Table of Contents
Advertisement
Quick Links
Advertisement
Table of Contents

Subscribe to Our Youtube Channel
Related Manuals for Kimray TREATER


Summary of Contents for Kimray TREATER
- Page 1 TREATER VALVE...
- Page 2 Kimray products or services described herein or their use or application. All sales are governed by our terms and conditions, which are available on request. Kimray reserves the right to modify or improve the designs or specifications of such products at any time without prior notice. ©2015 Kimray Inc.
-
Page 3: Table Of Contents
OIL & WATER VALVES Model: TREATER / DUMP Installation, Operation & Maintenance Guide Contents Before you start ..........4 18 Plugs & Stuffing Box ........26 A1 Scope ............4 19 Lever Hub ............26 A2 Introduction ...........4 A3 Description ............4 20 Drip Pot Assembly .........28 A4 Maintenance ..........4 A5 Changes and Updates ........4... -
Page 4: A Before You Start
• Trim Set A3 Description • Diaphragm • O-Ring The Kimray treater valve is designed as an oil or water valve for emulsion treaters, water knockouts and Occasional Replacement Parts gunbarrels. The treater valve is ideal for salt water • Body disposal syStems. -
Page 5: A6 Special Tools & Equipment
#1771SW #386SW Tip: Kimray recommends using the above special tools and equipment for disassembly, assembly and new part replacements. Kimray reserves the right to modify or improve the special tools and equipment designs or specifications at anytime without notice. www.kimray.com... -
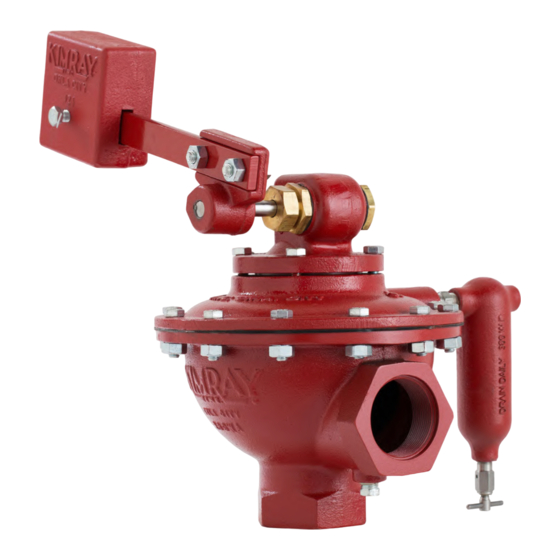
Page 6: A7 Orientation
Stuffing Box Set Screw Screw Packing Follower Screw Trunnion Shaft Screw Thrust Washer ✴ Gasket ✴ Plug ✴ Plug Gasket Kimray reserves the right to modify or improve the designs or specifications of such products at anytime without notice. www.kimray.com... -
Page 7: Installation
NOTE: DO NOT connnect gas equilizing line to gas vent line, burner manifold or downstream of mist extractor. DO NOT share equalizer lines. ǂConfiguration of Water Valve is a trademark of Kimray, Inc. www.kimray.com... - Page 8 All heights subject to liquid with a specific gravity of 1. For gravity correction, multiply the above Figures by Where “G” is the specific gravity of the flowing liquid. ǂConfiguration of Water Valve is a trademark of Kimray, Inc. www.kimray.com...
-
Page 9: Disassembly
Lever Remove both Bolts from the Lever Hub and remove Lever Lever. See Fig. 2-2 Bolt Fig. 2-2 Weight Bolt Lever Drip Pot Body Nipple Bleed Valve Fig. 2-1 ǂConfiguration of Water Valve is a trademark of Kimray, Inc. www.kimray.com... -
Page 10: Lever Hub
The Lever Hub may be difficult to remove from the Shaft if so remove the Shaft from the Bonnet place into a vice and heat the Lever Hub with a torch. Fig. 3-2 Loosen the Locking Screw Fig. 3-1 ǂConfiguration of Water Valve is a trademark of Kimray, Inc. www.kimray.com... -
Page 11: Shaft
OIL & WATER VALVES Model: TREATER / DUMP Installation, Operation & Maintenance Guide DISASSEMBLY 4 Shaft Use an adjustable wrench to remove the Nut. See Fig. 4-1 Remove Packing Follower behind Nut. See Fig. 4-2 Remove Stuffing Box Assembly. See Fig. 4-3 ✴... - Page 12 OIL & WATER VALVES Model: TREATER / DUMP Installation, Operation & Maintenance Guide DISASSEMBLY Use a wrench to remove the Plug. Remove Gasket from Plug. See Fig. 4-4 Use large punch and carefully tap Shaft out. See Fig. 4-5 NOTE:...
-
Page 13: Bonnet
See Fig. 5-1 NOTE: If Bonnet is stuck, pry gently with a flat blade screw driver. Remove Bonnet Fig. 5-1 Kimray reserves the right to modify or improve the designs or specifications of such products at any time without notice. www.kimray.com... -
Page 14: Trunnion Hub
Body. See Fig. 7-1 Pull Pin from Stem Assembly. Diaphragm Bolt Pull Stem through Diaphragm Bolt. Remove Diaphragm. ✴ Retainer Remove Retainer from Diaphragm Bolt. See Fig. 7-2 ✴ Diaphragm Fig. 7-2 ǂConfiguration of Water Valve is a trademark of Kimray, Inc. www.kimray.com... -
Page 15: Housing
OIL & WATER VALVES Model: TREATER / DUMP Installation, Operation & Maintenance Guide DISASSEMBLY 8 Housing 9 Diaphragm Assembly Remove Bolts connecting Upper Housing to Lower Body. Loosen Diaphragm Assembly with a wrench and See Fig. 8-1 remove Pivot. See Fig. 9-1... -
Page 16: Removable Seat
Remove Gasket from Removable Seat. See Fig. 10-2 Seat may be difficult to remove use, Seat Wrench. Fig. 10-1 Fig. 10-2 Kimray reserves the right to modify or improve the designs or specifications of such products at any time without notice. www.kimray.com... -
Page 17: Inspection
Item numbers 1- 9 should be sandblasted or cleaned Item Description Lever Hub Stuffing Box Bonnet Plug Stem Housing Removable Seat Body Kimray reserves the right to modify or improve the designs or specifications of such products at any time without notice. www.kimray.com... - Page 18 OIL & WATER VALVES Model: TREATER / DUMP Installation, Operation & Maintenance Guide INSPECTION Wire brush to clean the following: Plug See Fig. 11-1 Stuffing Box See Fig. 11-2 Nut See Fig. 11-3 Bonnet See Fig. 11-4 Stem See Fig. 11-5 Diaphragm Plate See Fig.
- Page 19 OIL & WATER VALVES Model: TREATER / DUMP Installation, Operation & Maintenance Guide INSPECTION Fig. 11-8 Fig. 11-10 Fig. 11-9 www.kimray.com...
-
Page 20: Assembly
OIL & WATER VALVES Model: TREATER / DUMP Installation, Operation & Maintenance Guide ASSEMBLY 12 Removable Seat Apply all purpose grease to the Seat area of the Body as shown. See Fig.12-1 Removable Seat Flip Removable Seat upside down and apply all purpose grease. -
Page 21: Diaphragm Assembly
OIL & WATER VALVES Model: TREATER / DUMP Installation, Operation & Maintenance Guide ASSEMBLY 13 Diaphragm Assembly Place pivot on ratio plug Be sure grooved side faces toward seat Flip Diaphragm Plate over and place Diaphragm on top. Take wrench and tighten Pivot Place Disc onto Diaphragm. -
Page 22: Housing
OIL & WATER VALVES Model: TREATER / DUMP Installation, Operation & Maintenance Guide ASSEMBLY 14 Housing Place Diaphragm Housing on Body. See Fig. 14-1 & 14-2 NOTE: Make sure you tighten the Bolts in a criss-cross pattern to avoid any miss alignment. For 2in., 3in., and 4in. -
Page 23: Stem / Hub Sub-Assembly
OIL & WATER VALVES Model: TREATER / DUMP Installation, Operation & Maintenance Guide ASSEMBLY 15 Stem / Hub Sub-Assembly CAUTION: NOTE: Hold the Stem Pin into place during installation. Tighten DO NOT DROP Stem Assembly into Housing. the Assembly using both a crows foot wrench and a torque wrench. -
Page 24: Bonnet
OIL & WATER VALVES Model: TREATER / DUMP Installation, Operation & Maintenance Guide ASSEMBLY 16 Bonnet Lift Link Hub slightly and place Bonnet over Stem Assembly and onto Stem Diaphragm Assembly. See Fig. 16-1 Fig. 16-2 shows correct orientation of Bonnet to Body. -
Page 25: Stem
OIL & WATER VALVES Model: TREATER / DUMP Installation, Operation & Maintenance Guide ASSEMBLY 17 Stem Insert Key onto Stem and insert Stem Assembly into Keyway on large diameter of Shaft. Line up Key with the Keyway inside the Link Hub and slide Shaft and Key into Hub. -
Page 26: Plugs & Stuffing Box
OIL & WATER VALVES Model: TREATER / DUMP Installation, Operation & Maintenance Guide ASSEMBLY 18 Plug and Stuffing Box 19 Lever Hub Install the Washer onto the Shaft. Install the Gasket on the Plug making sure the Gasket rests against the shoulder of the Plug. - Page 27 OIL & WATER VALVES Model: TREATER / DUMP Installation, Operation & Maintenance Guide ASSEMBLY Line up Keyway on Shaft and Lever Hub. Lightly tap Key into Keyway. NOTE: When completed, the Key, the end of the Shaft and the side of the Lever Hub should be flush.
-
Page 28: Drip Pot Assembly
OIL & WATER VALVES Model: TREATER / DUMP Installation, Operation & Maintenance Guide ASSEMBLY 20 Drip Pot 21 Serial Tag Lightly tap Drive Screws with small hammer. Leave Tag NOTE: slightly loose until remaining drive Screws are in place. Apply Blue Loctite™ to the threads in the places . -
Page 29: Flow Direction & Check Leaks
OIL & WATER VALVES Model: TREATER / DUMP Installation, Operation & Maintenance Guide TESTING 22 Flow Direction, Check For Leakage Flow Direction Make sure the air is flowing from upstream to downstream. Regulators have an arrow showing the direction of flow. - Page 30 OIL & WATER VALVES Model: TREATER / DUMP Installation, Operation & Maintenance Guide Page left blank www.kimray.com...
- Page 31 Kimray is an ISO 9001- certified manufacturer. Kimray quality assurance process maintains strict controls of materials and the certification of parts used in Kimray HPCV. Please visit our website for up to date product data www.Kimray.com...
- Page 32 Kimray.com © 2015 Kimray, Inc. 1/18 MKSLLS-RM0004...
Need help?
Do you have a question about the TREATER and is the answer not in the manual?
Questions and answers