Brother 1034D Handbook
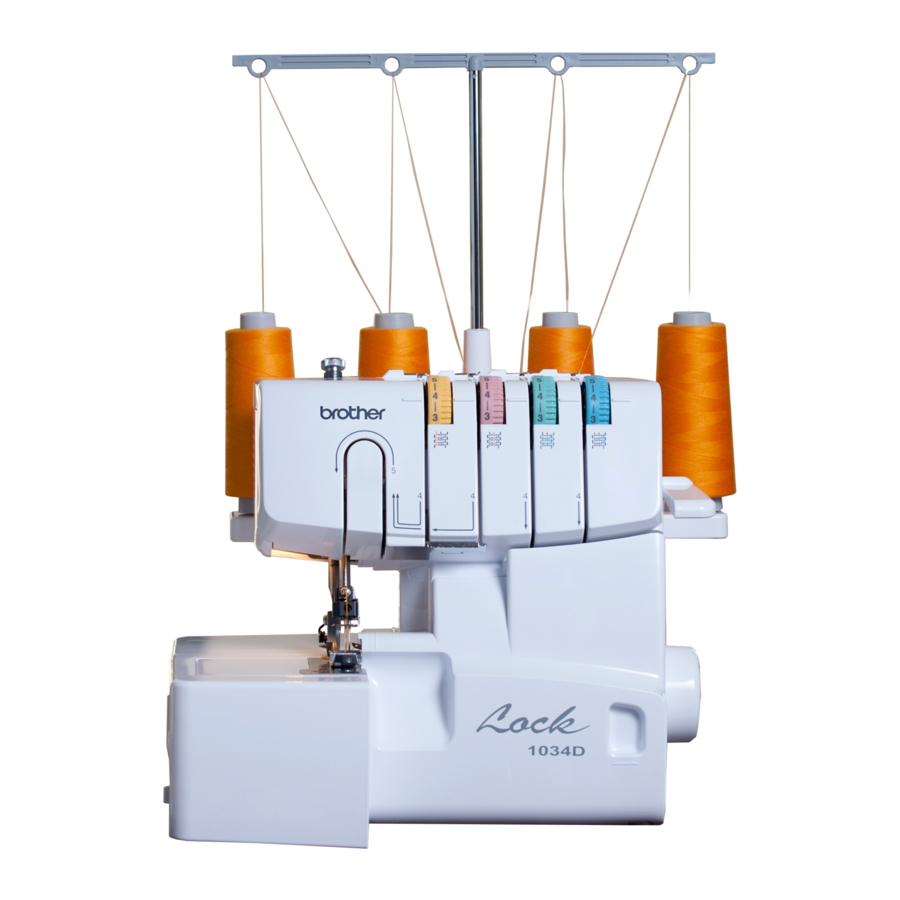
Compact overlock machine
Hide thumbs
Also See for 1034D:
- Handboek voor de compacte (68 pages) ,
- Handbook (68 pages) ,
- User manual (25 pages)

Related Manuals for Brother 1034D


Summary of Contents for Brother 1034D
- Page 1 HANDBOOK FOR COMPACT OVERLOCK MACHINE MANUAL DE INSTRUCCIONES DE LA MAQUINA COMPACTA OVERLOCK...
-
Page 2: Important Safety Instructions
"IMPORTANT SAFETY INSTRUCTIONS" When using the sewing machine, basic safety precautions should always be followed, DANGER – To reduce the risk of electric shock. 1. The sewing machine should never be left unattended when plugged in. Always unplug this sewing machine from the electrical outlet immediately after using and before cleaning. - Page 3 When leaving this sewing machine unattended, the main switch of the machine must be switched off or the plug must be removed from the socket- outlet. FOR USERS IN THE UK, EIRE, MALTA AND CYPRUS ONLY. If your sewing machine is fitted with a 3 pin non rewireable BS plug then please read the following. IMPORTANT If the available socket outlet is not suitable for the plug supplied with this equipment, it should be cut off...
- Page 4 CONGRATULATIONS ON CHOOSING THIS COMPACT OVERLOCK MACHINE Your machine is a high quality, easy-to-use product. To fully enjoy all the features, we suggest that you study this booklet. If you need more information regarding the use of your machine, your nearest authorized dealer is always happy to be of service.
-
Page 5: Notes On The Motor
Notes on the motor The normal operating speed of this sewing ma- chine is 1,300 stitches per minute, which is quite fast compared to the normal operating speed of 300 to 800 stitches per minute for the ordinary foot-operated sewing machine. The bearings in the motor are made of a special sintered, oil-impregnated alloy mounted in oil- soaked felt to withstand long hours of continuous... -
Page 6: Table Of Contents
TABLE OF CONTENTS Chapter 1 Names of parts and their functions Accessories included with your serger ... 3 Needle ... 5 Turning direction of motor ... 7 Opening and closing the front cover ... 7 Chapter 2 Operating ... 8 Powering the machine ... - Page 7 Capítulo 1 Nombres de las partes y sus funciones Accesorios incluidos con la máquina de coser ... 3 Aguja ... 5 Para cambiar la dirección del motor ... 7 Abre y cierre de la tapa delantera ... 7 Capítulo 2 Funcionamiento Encendido de la máquina ...
-
Page 8: Names Of Parts/Functions
Names of parts and Nombres de las partes their functions y sus funciones... - Page 9 1 Thread tree 2 Handle 3 Presser foot pressure adjustment screw 4 Spool pin 5 Spool support 6 Thread take-up cover 7 Needles 8 Upper knife 9 Presser foot 0 Material plate cover A Spool stand (thread tree support) B Left needle thread tension dial C Right needle thread tension dial D Presser foot lifting lever E Hand wheel...
-
Page 10: Accessories Included With Your Serger
Accessories included with your serger X77871-000 122991002 OPTION / OPTATIVO X76590002 9, 0, A OPTION Accesorios incluidos con la máquina de coser X75902001 X75904000 X77260000 XB0958001 X76663001 SA212 (U.S.A., CANADA) SA212 9, 0, A OPTATIVO X75906001 X77128001 X75917001 ( EE.UU, CANADÁ ) - Page 11 The number represents the parts code 1 Soft cover 2 Accessory bag 3 Tweezers 4 Thread net Two-needle models (4) One-needle models (3) 5 Thread spool cap Two-needle models (4) One-needle models (3) 6 Cleaning brush 7 Hexagonal (Allen) wrench (on Two-needle mod- els) 8 Needle set: SCHMETZ 130/705M 80/12: 2 pcs.
-
Page 12: Needle
Needle This machine uses a standard home sewing ma- chine needle. The recommended needle is SCHMETZ 130/705H. To remove the needle (1) Turn the main power switch to the OFF position. (2) Turn the hand wheel counter-clockwise by hand until the needle is at its highest position. (3) Loosen the needle set screw with hexagonal wrench and remove the needle. - Page 13 NOTE: Two-needle models On two-needle models, we suggest you hold the two needles with one hand and then insert them both at the same time. If the needles have been inserted correctly, the right needle should be set slightly lower than the left one.
-
Page 14: Turning Direction Of Motor
Turning direction of motor The motor and hand wheel of this machine turn in a counterclockwise direction (direction of arrow). This is the same direction as an ordinary home sewing machine. 1 Hand wheel Opening and closing the front cover It is necessary to open the front cover when thread- ing this machine. -
Page 15: Chapter 2 Operating
2 Foot Controller: Model N Note (For U.S.A. only): This foot controller can be used for sewing machine models 1034D, 1034, 1030D and 1030. Funcionamiento Encendido de la máquina Preparación de la máquina Introduzca el zócalo de tres puntas en el enchufe que se encuentra abajo, en el lado derecho de la máquina e inserte el zócalo de alimentación en... -
Page 16: Removing The Bed Extension For Free-Arm Sewing
Removing the Bed Extension for Free-Arm Sewing Removing the bed extension Free-arm sewing enables tubular pieces to be sewn more easily. For free-arm sewing, remove the bed extension and position the fabric as shown in the illustration. Extraiga el suplemento para la mesa para reali- zar la costura sin brazo Extraiga el suplemento... -
Page 17: Chapter 3 Stitch Length
Stitch Length To change the stitch length, (1) Locate the stitch length adjustment dial on the left side of the machine. (2) Turn the stitch length adjustment dial forward to lengthen the stitch to a maximum of 4 mm (5/32 inch). -
Page 18: Chapter 4 Instructions For The Differential Feed Mechanism (Models With Differential Feed)
Instructions for the Differential Feed Mechanism (Models with Differential Feed) This serger is equipped with two sets of feed dogs under the presser foot to move the fabric through the machine. The differential feed controls the move- ment of both the front and the rear feed dogs. When set at 1, the feed dogs are moving at the same speed (ratio of 1). - Page 19 Feed ratio Main feed (rear) Differential feed (front) 0.7 – 1.0 1.0 – 2.0 Velocidad de Alimentador alimentación principal (detrás). 0,7 – 1,0 1,0 – 2,0 Effect Material is pulled tight. Without differential feed. Material is gath- ered or pushed together.
- Page 20 An example where adjustment is required When stretch material is sewn without using the differential feed, the edge will be wavy. To make the edge more smooth, adjust the feed ratio from 1.0 toward 2.0. (The feed ratio required depends on the elasticity of the material.) The more elastic the material, the further toward 2.0 the differential feed ratio should be set.
-
Page 21: Chapter 5 Before Threading
Before Threading Preparation before threading Raise the telescoping thread tree to its highest position. Make sure that the thread holders are in alignment above the spool pins as illustrated below. 1 Thread holder on thread tree 2 Spool pin 3 On Two-needle models 4 Correct position CAUTION When threading, always thread in this order:... -
Page 22: How To Use The Thread Spool Cap
How to use the thread spool cap When using sewing thread spools, the thread spool cap should be used as illustrated below. Make sure that the spool notch is on the bottom. (See fig. A) 1 Thread spool cap How to use the thread net If you are sewing with loosely spun nylon thread, we recommend that you cover the spool with the net supplied to prevent the thread from slipping off the... -
Page 23: Before Threading
Before threading (1) Turn off the main power switch for safety. (2) Raise the presser foot using presser foot lever. CAUTION When threading the needle, always be sure to lift the presser foot lever, and also take care to thread in the proper order. (3) Set the needle bar in its highest position by turning the handwheel toward you. -
Page 24: Threading The Upperlooper
Threading the upperlooper Run the thread in the sequence illustrated, follow- ing the green color and the numbers next to each threading point. 1 Open the front cover by sliding to the right and guiding the top toward you. 2 Pull the thread off the spool and directly up through the thread guide on the thread tree from back to front. - Page 25 NOTE: If the upperlooper thread breaks during sewing This may be caused by the lowerlooper thread getting caught on the upperlooper. If this happens, lower the upperlooper by turning the hand wheel, remove the lowerlooper thread from the upperlooper, and re-thread the upperlooper from at least the tension disc.
-
Page 26: Threading The Lowerlooper
Threading the lowerlooper Run the thread in the sequence illustrated, follow- ing the blue color and the numbers next to each threading point. 1 Open the front cover by sliding to the right and guiding the top toward you. 2 Pull the thread off the spool and directly up through the thread guide on the thread tree from back to front. - Page 27 5 Slide and hold the thread tension release button to the right, then pass the thread through the tension disc which is in the channel next to the blue tension adjust- ment dial. Release the button. 6 Guide the thread down the channel and pass the thread through the threading points next to the blue color marks follow- ing the numerical order in the accompany-...
-
Page 28: Threading The Right Needle (On Two-Needle Models)
Threading the right needle (on Two-needle models) Run the thread in the sequence illustrated on page 22, following the pink color and the numbers next to each threading point. 1 Pull the thread off the spool and directly up through the thread guide on the thread tree from back to front. -
Page 30: Threading The Left Needle
Threading the left needle Run the thread in the sequence illustrated, follow- ing the yellow color and the numbers next to each threading point. 1 Pull the thread off the spool and directly up through the thread guide on the thread tree from back to front. -
Page 32: Comparison Chart Of Sewing Materials, Threads And Needles
Comparison Chart of Sewing Materials, Threads and Needles Material Crepe de chine Georgette Light Lawn Overlock stitch materials Organdy Tricot Crepe de chine Narrow/rolled Light Georgette Hem stitch materials Lawn Organdy Poplin Gingham Medium Seersucker Overlock stitch materials Gabardine Serge Knitted Cashmere Heavy... -
Page 33: Capítulo 6 Tabla De Relación Entre Los Distintos Tejidos, Hilos Y Agujas
Tabla de relación entre los distintos tejidos, hilos y agujas Tejido Crepe de China Georgette Tejidos Lino finos Organdí Tricot Crepe de China Tejidos Georgette finos Lino Organdí Popelina Guinga Tejidos Crespón de algodón medios Gabardina Sarga Prendas de punto Cachemir Tejidos Tweed gruesos Tejano... -
Page 34: Chapter 7 Thread Tension
Thread Tension Thread tension dial From the left to right: 1 Yellow marked tension disc is for left nee- dle. 2 Pink marked tension disc is for right nee- dle. 3 Green marked tension disc is for upperlooper. 4 Blue marked tension disc is for lowerlooper. 5 Tension selection mark. - Page 35 Tension control Sewing is possible at position “4” for most circum- stances. If improper stitching occurs, adjust the tension according to the drawing below. (Standard: SPAN 60/3Z) A for heavy tension (set from 4 to 7) B for light tension (set from 4 to 2) C for medium tension (set from 5 to 3)
-
Page 36: Chart Of Thread Tension Adjustment
Chart of Thread Tension Adjustment Two-needle (Four-thread) Left needle thread is loose. El hilo de la aguja izquierda está suelto. Reverse Revés Surface Derecho Left needle thread Hilo de la aguja izquierda Right needle thread Hilo de la aguja derecha Upperlooper thread Hilo del áncora superior Lowerlooper thread Hilo del áncora inferior Right needle thread is loose. - Page 37 Tabla de ajuste de tensión de los hilos Dos agujas (cuatro hilos) Tighten left needle thread. (yellow) Tienda el hilo de la aguja izquierda. (Amarillo) Tighten right needle thread. (pink) Tienda el hilo de la aguja derecha. (Rosado) Loosen left needle thread. (yellow) Afloje el hilo de la aguja izquierda.
- Page 38 One-needle (Three-thread) Reverse Revés Surface Derecho Needle thread Hilo de la aguja Upperlooper thread Hilo del áncora superior Lowerlooper thread Hilo del áncora inferior Needle thread is loose. El hilo de la aguja está suelto. Fabric puckers Frunces Upperlooper thread is tight. El hilo del áncora superior está...
- Page 39 Una aguja (tres hilos) Tighten needle thread. (yellow) Tienda el hilo de la aguja. (Amarillo) Loosen needle thread. (yellow) Afloje el hilo de la aguja. (Amarillo) Loosen upperlooper thread (green) Afloje el hilo del áncora superior. (Verde) Tighten lowerlooper thread (blue) Tienda el hilo del áncora inferior.
-
Page 40: Chapter 9 Test-Sewing
Test-sewing Test-sew after threading. (1) Place a piece of scrap material under the presser foot for test sewing. NOTE: Always lift the presser foot before placing the fabric under it. Just running the fabric under the foot without lifting the presser foot may cause an uneven seam. (2) Holding the needle threads with your left hand, turn the pulley slowly a few times in the counter clockwise direction with your right hand, and... -
Page 41: Chaining-Off
Chaining-off After test-sewing, continue to depress the foot controller slightly and chain off 4 inches. The threads will entwine themselves into a chain automatically. NOTE: If the thread tension is not correctly balanced, the chaining-off result will be uneven. If this happens, pull the threads slightly. Check the threading order and adjust the thread tension to create an even chain. -
Page 42: Chapter 10 Sewing
Sewing To start sewing Thread the machine and pull the threads out about 15 cm (6 inches) behind the presser foot. Lift the presser foot and place the material well underneath the presser foot before starting to sew. Slowly sew a few stitches by turning the pulley by hand. -
Page 43: To Remove Work
To remove work When the seam is finished, keep the machine running at a low speed to obtain chaining-off. Then cut the stitches 5 cm (2 inches) from the work. If feeding for chaining-off is not enough, pull the thread gently. If threads break during sewing Remove the material and re-thread in the correct... -
Page 44: To Sew Heavy Materials
To sew heavy materials Place the material underneath the presser foot until it touches the front of the upper knife. Start sewing. Do not lift the presser foot while sewing. To sew fine materials (1) Adjust the presser foot to prevent the material from puckering and to allow sewing of curves. -
Page 45: Presser Foot Pressure
Presser foot pressure The pressure of the presser foot can be adjusted by turning the pressure adjustment screw at the top left of this machine. Since this machine has already been adjusted to a pressure suitable for light to medium fabrics, no further adjustment is necessary except when sewing on very heavy or very light materials. -
Page 46: Chapter 11 Troubleshooting
Troubleshooting This sewing machine is designed for trouble-free operation. However, the following chart indicates trouble which may occur if basic adjustments are not made properly. Trouble 1. Does not feed Presser foot pressure too loose 1. Needles bent, or needle tip blunt 2. -
Page 47: Capítulo 11 Guía De Localización De Fallas
Guía de localización de fallas Esta máquina de coser ha sido concebida para un funcionamiento sin problemas. Sin embargo, la siguiente tabla le indica los problemas que podrían presentarse si los ajustes básicos no fueron realizados correctamente. Problema 1. No se alimenta el te- La presión del prensatelas es insu- jido. -
Page 48: Chapter 12 Stitch Selection
Stitch Selection Two-needle models This sewing machine can sew five different stitches by following the simple steps below: (1) Four-thread overlock stitch Use all four threads and two needles for produc- ing four-thread overlock stitches. Use: Ideal for sewing knits and wovens. (2) Three-thread overlock stitch (5 mm/3/16 inch) Use three threads and the left needle, producing 5 mm seams, which works with all kinds of mate-... -
Page 49: Narrow Overlock Stitch/Rolled Edge Stitch
Narrow overlock stitch/ rolled edge stitch The Narrow overlock/Rolled edge stitche is a deco- rative finish for lightweight to midweight fabrics. It is often used to complete the edge of a fabric. This stitch is sewn by removing the left needle and using the 3-thread overlock stitch. - Page 50 Press the stitch finger release lever to remove the stitch finger. Storage for the stitch finger is provided on the inside of the front cover illustrated. NOTE: Make sure to install stitch finger when sewing regular overlock stitches. 1 Upperlooper 2 Stitch finger 3 Stitch finger release lever 4 Front cover...
- Page 51 (6) Adjust the stitch length. Set the stitch length adjustment lever to “R” position as shown in the illustration. This adjust- ment is suitable for either Narrow Overlock stitch or Rolled Edge stitch. To Do Rolled Edge Stitch This application rolls the edge of the fabric inside of the hem stitch.
-
Page 52: Chapter 13 Chart Of Narrow Overlock/Rolled Edge Stitch
Chart of Narrow Overlock/Rolled Edge Stitch Stitch Style Underside of material Top of material Fabrics Light material Needle thread Nylon thread #80 Polyester thread #80 Upperlooper thread Wooly nylon thread Decorative thread Lowerlooper thread Nylon thread #80 Polyester thread #80 Stitch Length Stitch Width R.5 (Two-needle models) -
Page 53: Capítulo 13 Tabla Para Puntadas Overlock Estrechas/De Borde Enrollado
Tabla para puntadas overlock estrechas/de borde enrollado Estilo de puntada Tejidos Hilo de la aguja Hilo del áncora superior Hilo del áncora inferior Largo de puntada Ancho de puntada Uñeta de puntada Tensión de los hilos Hilo de la aguja Hilo del áncora superior Hilo del áncora inferior Puntada de borde enrollado... -
Page 54: Chapter 14 Examples Of Sewing Applications For This Serger
Examples of Sewing Applications for this Serger Features When using the blind stitch presser foot (multi purpose foot), you can sew blind stitches and overlock at the same time. This is ideal when sewing cuffs, trouser bottoms, pockets, and hem- ming skirts etc. -
Page 55: Blind Stitching With Blind Stitch Presser Foot
Blind stitching with blind stitch presser foot The Blind hem stitch is used for putting a near- invisible hem in garments or home decoration projects. Use it to hem pants, skirts, or draperies. a Replace the presser foot with a blind stitch presser foot (multi purpose presser foot). - Page 56 NOTE: The following are the recommended setting. Stitch Width :5 mm (Two-needle models) 3.5 mm (One-needle models) Stitch Length :3 ~ 4 mm Needle Thread Tension :Slightly Slackened (0-2) Upper Looper Thread Tension :Slightly Tightened (5-7) Lower Looper Thread Tension :Slightly Slackened (2-4) Test sew on a scrap of the fabric to adjust the fabric guide and the thread tension.
-
Page 57: Flatlock Stitching With Blind Stitch Presser Foot
Flatlock stitching with blind stitch presser foot The Flatlock stitch is primarily used as a decorative finish on a project. The finished stitch can look like a ladder or small parallel lines when the fabric is pulled flat. Either stitch finish can be used on the right side of the fabric. - Page 58 This method is not suitable for thin fabrics. The following are the recommended setting. Stitch Width :5 mm (Two-needle models) 3.5 mm (One-needle models) Stitch Length :2 ~ 4 mm Needle Thread Tension :0-3 Upper Looper Thread Tension :2-5 Lower Looper Thread Tension :6-9 Test sew on a scrap of the fabric to adjust the fabric guide and the thread tension.
-
Page 59: Pin Tuck Stitching With Blind Stitch Presser Foot
Pin tuck stitching with blind stitch presser foot The Pin tuck stitch uses a rolled edge to add shape and decoration to any sewing project. Fold the fabric on a line where the pin tuck is to be located and guide the fold through the serger. - Page 60 Test sew on a scrap of the fabric to adjust the fabric guide and the thread tension. 1 On Two-needle models 2 Upperlooper 3 Stitch finger 4 Stitch finger release lever 5 Stitch width lever 6 Regular needle plate 7 Stitch length adjustment lever 8 Making lines 9 Fold in two 0 Adjusting screw...
-
Page 61: Decorative Stitching
Decorative stitching Attractive decorative stitches can be made through different combinations of fabric and thread. Decora- tive thread with a high thread count or extremely fine thread can be used in the upperlooper to produce decorative stitches to make any project more excit- ing. -
Page 62: Chapter 15 Upper Knife And Lower Knife
Upper Knife and Lower Knife Worn or blunt knives will cause the material to pucker or stitches to be uneven. If one strand of thread can be cut off in front of or at the rear of the knife, the knife is sharp enough. When the knives are blunt, replace them as described on the next page. -
Page 63: Replacing The Knives
Replacing the knives Replacing the upper knife (1) To remove the knife, loosen the upper knife set screw and pull up the upper knife. (2) Insert the new knife into the upper knife holder. (3) Then turn the pulley by hand until the upper knife is in the down position. -
Page 64: Chapter 16 Oiling
Oiling For smooth and silent operation, the moving parts of the machine should be oiled periodically. (See dia- gram below.) REMARKS: Be sure to oil your sewing machine before use. Always clean the lint off your machine before you apply oil. OIL THE MACHINE ONCE OR TWICE A MONTH FOR NORMAL USE. -
Page 65: Chapter 17 Changing The Light Bulb
Changing the Light Bulb CAUTION Always be sure to turn off the power before carrying out the following operation. Changing the light bulb. • Remove the lamp cover as shown in the illustra- tion. • Loosen the lightbulb cover set screw pull up the light bulb cover and remove it. -
Page 66: Chapter 18 Machine Specifications
Machine Specifications Light- to heavy-weight materials Sewing speed 1,300 stitches per minute Stitch width 2.3 mm to 7 mm (5/64 to 9/32 inch) (Two-needle models) 3.0 mm to 3.5 mm (1/8 to 9/64 inch) (One-needle models) Stitch length (pitch) 2 mm to 4 mm (5/64 to 5/32 inch) Needle bar stroke 25 mm (1 inch) Presser foot... - Page 67 SETTING RECORD / NOTAS DE AJUSTES FABRIC THREAD TEJIDO HILO on Two-needle models en los modelos de dos agujas THREAD TENSION TENSION DE HILO left right upper- NEEDLE needle needle looper AGUJA aguja aguja áncora derecha izquier- superior NOTE NOTA lower- STITCH looper...
- Page 68 1034D 193345-011 Printed in Taiwan...
Need help?
Do you have a question about the 1034D and is the answer not in the manual?
Questions and answers
How do I order accessories for 1034d