Table of Contents
Advertisement
Advertisement
Table of Contents

Related Manuals for RTP Outdoors Genesis 3

Summary of Contents for RTP Outdoors Genesis 3
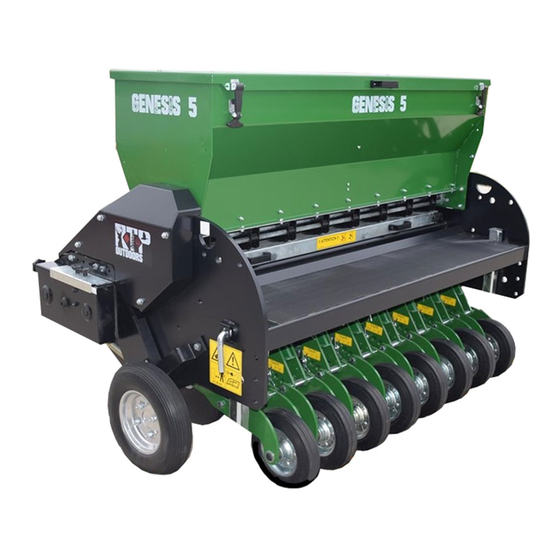
- Page 1 User manual and parts book Model: Genesis 3 427 West Outer Road Serial number: Valley Park, MO 63088 NOTE: IN THE INTERESTS OF SAFETY AND ACHIEVING THE BEST RESULT, IT IS VERY IMPORTANT THAT THIS MANUAL IS READ CAREFULLY BEFORE USING THE GENESIS.
-
Page 2: Foreword
FOREWORD Congratulations with the purchase of your Genesis. To ensure long and safe use of this Genesis, it is of major importance to all users to read and understand this user manual. Operation of this machine is not safe without full knowledge of the content of the manual. The Genesis is not an independently operating machine. -
Page 3: Safety Instructions
SAFETY INSTRUCTIONS The design of the Genesis allows for safe use. Safe use is only possible when the user fully understands the safety instructions given in this manual. Figure 1 Read and understand ( ) the manual before working with the Genesis. Figure 1 Not using the machine as described in the manual may lead to injury and/or damage to the Genesis. - Page 4 Inspect the Genesis for loose bolts/nuts/parts before each use. If present, inspect the hydraulic hoses regularly and replace them if they are damaged or show signs of wear. The replacement hoses must meet the manufacturer’s technical specifications. Always relieve the pressure from the hydraulic installation, if present, before carrying out any work on the hydraulic installation.
- Page 5 Before starting to work, all persons operating the Genesis must be familiar with all its functions and controls. Connect the Genesis to the vehicle that will pull it exactly according to the instructions (Danger of injury!) Before driving off, make sure you have a clear view both nearby and far away. Figure 3 Figure 4 On both sides of the Genesis, safety stickers (...
- Page 6 Figure 5 Location of safety stickers ( Figure 5...
-
Page 7: Eu-Declaration
EU-DECLARATION Redexim BV Utrechtseweg 127 3702 AC Zeist, the Netherlands declare entirely under our own responsibility that the product: THE GENESIS WITH SERIALNUMBER AS STATED ON THE MACHINE AND IN THIS MANUAL, to which this declaration refers, complies with stipulation of the 2006/42/EC machine directive and is in conformity with the following standards: NEN-EN-ISO 12100 : 2010 NEN-EN-ISO 13857 : 2008 Zeist, 24/03/2017... -
Page 8: Table Of Contents
CONTENTS FOREWORD GUARANTEE CONDITIONS REGISTRATION CARD SAFETY INSTRUCTIONS EU- DECLARATION TECHNICAL DATA REMOVING THE MACHINE FROM THE PALLET CONNECTING TO TRACTOR ADJUSTING THE WORKING DEPTH SETTING THE SEED QUANTITY. SPREADING TEST THE SEED ELEMENT VALVE OPENING TRANSPORTING THE GENESIS DRIVING SPEED GENERAL REMARKS ON THE USE OF THE GENESIS OPERATING THE GENESIS 10.0... -
Page 9: Technical Data
1.0 TECHNICAL DATA Model Genesis 3 Working width 0.952 m (37.5”) Working depth 13mm (1/2”) or 25.4mm (1”) or 51mm (2”) Seeding speed Up to 12 km/h (7.5 mph) Weight 540 kg ( 1188 lbs) Seeding row distance 190mm (7.5”) -
Page 10: Removing The Machine From The Pallet
REMOVING THE MACHINE FROM THE PALLET Perform the following actions to remove the machine from the pallet and place it horizontally on the Figure 6 floor ( !! NEVER CRAWL UNDER THE MACHINE !! 1. Attach a cable to the lifting points (1) on both sides of the machine. Make sure the cable/crane/lift has the capacity to lift at least 800 kg (1760 lbs). -
Page 11: Connecting To Tractor
CONNECTING TO THE TRACTOR Checks prior to connecting the Genesis: − Check the Genesis for any visual damage, and repair if safe operation of the machine cannot be guaranteed. − Check whether all nuts and bolts have been tightened properly. −... -
Page 12: Adjusting The Working Depth
ADJUSTING THE WORKING DEPTH The working depth can be adjusted by adjusting the pin on the rear wheel support. Remove the lower R-clip and pin (1) and place the pin in the hole for the right depth 0,5” - 1” - 2”. After that lock the pin with the R-clip. ( Figure 8 Figure 8 Figure 9... -
Page 13: Setting The Seed Quantity
SETTING THE SEED-QUANTITY The seed quantity can be set on the Genesis by using the gearbox and changing the gate opening of the seed element valve. These provide various combinations for a broad range of settings (see table 1). The gearbox have been marked with a decall which indicate numbers 1 to 11 given in table 1. -
Page 14: Spreading Test
5.1. SPREADING TEST If the seeding device needs recalibration for a certain seed type or if it must be checked for other seed a spreading test is to be carried out. Use table 1 below to record the values obtained. Fout! Verwijzingsbron niet gevonden. - Page 15 Figure 11...
-
Page 16: The Seed Element Valve Opening
5.2. THE SEEDING ELEMENT VALVE OPENING If the seed quantity does not correspond with the table in chapter 5, the seeding element valve may need adjustment. This is done as follows: (see Figure 12) 1. Loosen knob (1). 2. Adjust lever (2) with the knob by sliding it to open or closed. 3. -
Page 17: Transporting The Genesis
TRANSPORTING THE GENESIS The user is responsible for the transport of the Genesis behind the tractor when travelling on public roads. Check the national traffic rules. Due to the weight of the Genesis, a maximum speed of 20 km/h (12.4 mph) should be maintained while driving in open fields with the machine raised. Higher speeds may endanger the driver and/or other people and/or damage the machine. -
Page 18: Start/Stop Procedure
10.0 STARTING/STOPPING PROCEDURE Before starting the seeding, check the machine for the following points: While checking the machine/tractor combination must be fully locked to prevent it from driving/sliding/sinking away. The tractor engine must be switched off. • Check the seeding elements for damage and repair if necessary. •... -
Page 19: Disconnecting The Genesis
11.0 DISCONNECTING THE GENESIS The machine can be disconnected from the tractor as follows (see Figure 7 1. Drive the Genesis to a storage place with a stable/even floor. !! Make sure the tractor is secured in place and cannot start moving !! !! Turn the tractor off before dismounting !! !! Be sure that the Genesis is stable on the floor and can’t move unintentionally before dismounting the tractor!! -
Page 20: Troubleshooting
12.0 TROUBLESHOOTING Problem Possible cause Solution Seeding cuts are poorly Seeding discs are worn Replace the seeding discs. Poor ground. Reduce the working depth. shaped. Aerate/irrigate the ground if it is too dry and repeat the tilling later. Bearings of the seeding discs Replace the bearings. -
Page 21: Maintenance
13.0 MAINTENANCE Time schedule Check point/lubricating Method point Before each use Check for loose bolts/nuts. Tighten the loose bolts/nuts with the correct torque. Presence and legibility of safety Replace if damaged or Figure 5 missing. stickers ( After each use Clean the machine Clean the machine with compressed air. -
Page 22: Grease Points
13.1 GREASE POINTS Figure For grease points on the machine, see ( 3). There are grease points on the rear wheels of the machine and a chain behind the cover on the side of the machine. Check Tabel for maintenance intervals. Figure 13 14.0 ADJUSTING THE SPRING TENSION OF THE SIDE WHEEL When the seeding wheel (3) is slipping it is possible to adjust the wheel pressure on the ground by... -
Page 23: Optional Extras: Coulter Knife Kit
15.0 OPTIONAL EXTRAS: COULTER KNIVE KIT Figure 15 To help the Genesis cut into the ground more easily a Coulter knife kit (1) is recommended (Figure 15). This will help the standard knifes cut into hard soil and improve the seeding result. The following Coulter kit is available: •... -
Page 24: Optional Extras: Bogy Kit
16.0 OPTIONAL EXTRAS: BOGY KIT If the tractor is not able to lift the Genesis, the machine can be equipped with a Bogy kit. This makes it possible to lift and move the Genesis with a lighter tractor. The following Bogy Kit is available: •... -
Page 25: Optional Extras: Hydraulic Pump Kit
17.0 OPTIONAL EXTRAS: HYDRAULIC PUMP KIT Figure 17 The Genesis is also usable as self-supporting machine. For this there is a hydraulic pump kit available (see Figure 17): • 222.095.202 The kit contains a pre-assembled pump (1) with set of bolts and nuts, cover (2) and mounting bracket for battery pack (3), (battery pack excluded).
Need help?
Do you have a question about the Genesis 3 and is the answer not in the manual?
Questions and answers