Brother HL-760 Series User Manual
Brother hl-760: users manual
Hide thumbs
Also See for HL-760 Series:
- Operation manual (25 pages) ,
- Service manual (44 pages) ,
- Quick setup manual (17 pages)

Related Manuals for Brother HL-760 Series


Summary of Contents for Brother HL-760 Series
- Page 1 Please read this manual thoroughly before using the printer. Brother Laser Printer HL-760 Series User’s Guide Keep this manual in a convenient place for quick and easy reference at all times.
-
Page 2: Shipment Of The Printer
Shipment of the Printer If for any reason you must ship your Printer, carefully package the Printer to avoid any damage during transit. It is recommended that you save and use the original packaging. The Printer should also be adequately insured with the carrier. - Page 3 Brother products. This is available 24 hours a day, 7 days a week. You can use the system to send the information to any fax machine, not just the one you are calling from.
-
Page 4: Compilation And Publication Notice
Trademarks The Brother logo is a registered trademark of Brother Industries, Ltd. Apple, the Apple Logo, and Macintosh are trademarks, registered in the United States and other countries, and TrueType is a trademark of Apple Computer, Inc. Epson is a registered trademark and FX-80 and FX-850 are trademarks of Seiko Epson Corporation. -
Page 5: To Use The Printer Safely
Warning There are high voltage electrodes inside the printer. Before cleaning the printer, make sure to turn off the power switch and unplug the power cord from the power outlet. Turning off the Switch and Unplugging the Printer High Temperature... -
Page 6: Table Of Contents
CHAPTER 1 INTRODUCTION...1–1 ABOUT THE GUIDEBOOKS...1–1 Finding Out How to Use the Printer...1–1 ABOUT YOUR PRINTER...1–2 Printer Overview ...1–2 System Requirements in the Brother Printing Solution for Windows ...1–3 Features ...1–3 OPERATING AND STORAGE ENVIRONMENT...1–6 Power Supply ...1–6 Environment ...1–6 CHAPTER 2 PAPER HANDLING...2–1... - Page 7 Q & A ...6–8 Setting Up the Printer Hardware ...6–8 Setting Up the Printer for Windows...6–8 Setting Up the Printer for DOS ...6–9 Setting Up the Printer for Apple Macintosh Computers ...6–10 Paper Handling ...6–10 Printing ...6–11 Print Quality ...6–12 APPENDIX A ...A–1...
-
Page 8: Regulations
A shielded interface cable should be used in order to ensure compliance with the limits for a Class B digital device. Changes or modifications not expressly approved by Brother Industries, Ltd. could void the user’s authority to operate the equipment. - Page 9 1.8 metres in length. Laser Safety (For 110–120 V Model Only) This printer is certified as a Class I laser product under the U.S. Department of Health and Human Services (DHHS) Radiation Performance Standard according to the Radiation Control for Health and Safety Act of 1968.
- Page 10 USER’S GUIDE Declaration of Conformity (For Europe) We, Brother International Europe Ltd., Brother House 1 Tame Street, Guide Bridge, Audenshaw, Manchester M34 5JE, UK. declare that this product is in conformity with the following normative documents. Safety: EN 60950, EMC:...
- Page 11 Disconnect device This printer must be installed near a power outlet, which is easily accessible. In case of emergencies, you must disconnect the power cord from the power outlet in order to shut off power completely.
- Page 12 Green and yellow: Blue: Brown: The colours of the wiring in the power lead of this printer may not correspond with the markings which identify the terminals in your plug. If you need to fit a different plug, proceed as follows.
-
Page 13: Index
You have two guidebooks for this printer. Read each guidebook in the following order: 1. Read the Quick Setup Guide to set up your printer and to ensure proper connection with your computer. It also contains information for installing the printer driver, fonts and Remote Printer Console Program. -
Page 14: About Your Printer
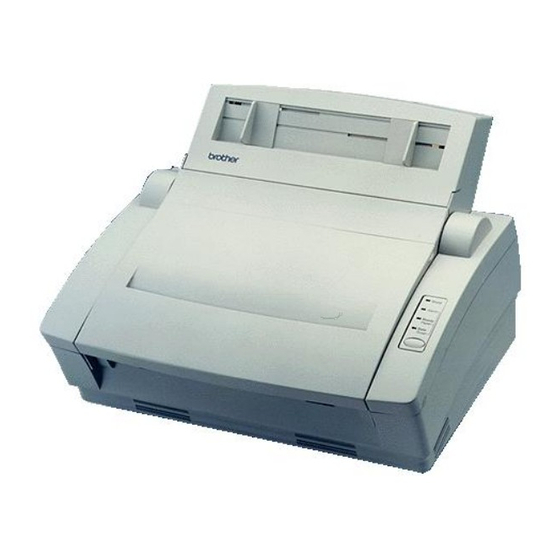
USER’S GUIDE ABOUT YOUR PRINTER Printer Overview Multi-Purpose Sheet Feeder Top Cover Extension Support Wire Output Tray Optional Interface Port (RS-422A/RS-232C) Parallel Interface Port CHAPTER 1 –2 Paper Support Fig. 1-1 Front View Power Cord Fig. 1-2 Rear View Paper Guide... -
Page 15: System Requirements In The Brother Printing Solution For Windows
IBM PC or compatible with 80486 SX or higher microprocessor Parallel interface (or printer port) 4 MB or more of memory (8 MB recommended) 10 MB of space available on your hard disk for the printer driver and all fonts Microsoft Windows 95 or Windows 3.1/3.11... - Page 16 300 dpi resolution mode. The printer also supports auto-emulation switching between HP and Epson or HP and IBM. If you want to select the printer emulation, you can do it using the Remote Printer Console Program.
- Page 17 Windows printer driver supplied with your printer. Sleep Mode (Power Save Mode) When the printer is not used for a certain amount of time, sleep mode automatically reduces power consumption. The printer consumes less than 9 W when in sleep mode.
-
Page 18: Operating And Storage Environment
Do not place the printer where the ventilation hole of the printer is blocked. Do not place the printer where it is exposed to direct sunlight. Use a blind or a heavy curtain to protect the printer from direct sunlight when the printer is unavoidably set up near a window. - Page 19 CHAPTER 1 INTRODUCTION Do not subject the printer to strong physical shocks or vibrations. Do not expose the printer to open flames or salty or corrosive gases. Do not place objects on top of the printer. Do not place the printer near an air conditioner.
-
Page 20: Chapter 2 Paper Handling
CHAPTER 2 PAPER HANDLING PAPER SPECIFICATIONS The printer can handle paper that has the following specifications. Paper Type Cut sheet A4, Letter, Legal, B5, A5, Executive, Custom size (70-216 x 127-356 mm, 2.75-8.5 x 5-14 inches) Envelopes DL, C5, COM-10, Monarch, 9” x 12”, C4 Post Card 70-216 x 127-356 mm, 2.75-8.5 x 5-11 inches... - Page 21 It is recommended that you test paper, especially special sizes and types of paper, on this printer before purchasing large quantities. Avoid feeding labels with carrier sheets exposed, or your printer will be damaged. Avoid using coated paper, such as vinyl coated paper.
- Page 22 Envelopes with self-adhesive closures Envelopes of baggy construction Envelopes not sharply creased Embossed envelopes Envelopes already printed by a laser printer Envelopes pre-printed on the inside Envelopes that cannot be arranged uniformly when placed in a pile Fig. 2-2 Envelopes Printable Area The figure below shows the physically printable area.
-
Page 23: Multi-Purpose Sheet Feeder
USER’S GUIDE MULTI-PURPOSE SHEET FEEDER The printer has a multi-purpose sheet feeder that can feed plain paper, envelopes, transparencies and organizer paper. To use the multi-purpose sheet feeder, follow these steps: 1. Make sure that you have selected the proper paper source, paper size and orientation. -
Page 24: Loading Paper Into The Feeder
Loading Paper into the Feeder To load paper into the feeder, follow these steps. 1. Open the multi-purpose sheet feeder by gently pulling the lid forward towards you. ( 2. Load paper into the multi-purpose sheet feeder with the printing surface face down. - Page 25 If paper jams in the printer, the Alarm and Paper lamps also blink. If the error is a paper jam, clear it referring to “PAPER JAMS”...
-
Page 26: Two Side Printing (Manual Duplexing)
For more information about settings, see the help text in the printer driver. The printer prints all the even numbered pages on one side of the paper first, and then prints all the odd pages on the reverse side of the paper. -
Page 27: Manual Feed Slot
Caution If bi-directional communication is not operational between the printer and the computer, such as when the printer is shared on a network, the dialog box will not appear to load the next page. Manual paper feeding is not recommended when your printer is attached to a network. - Page 28 CHAPTER 2 PAPER HANDLING Note Insert paper firmly into the manual feed slot. Be sure to load sheet by sheet when using the manual feed slot. CHAPTER 2 –9...
-
Page 29: Output Tray And Paper Support Wire
USER’S GUIDE OUTPUT TRAY AND PAPER SUPPORT WIRE The printer ejects paper with printed surfaces face down into the output tray at the front of the printer. When the output tray is closed, the ejected paper comes out sheet by sheet through the slit at the front. -
Page 30: Chapter 3 Control Panel
Fig. 3-1 Lamps and Switch on Control Panel Note When the power switch is off or the printer is in sleep mode, all lamps including the Ready lamp are off. Ready (Paper) Lamp The Ready lamp indicates the current status of the printer. -
Page 31: Data (Toner) Lamp
Lamp Alarm Lamp The Alarm lamp blinks to indicate a printer error status such as “Cover Open” and “Memory Full.” If any other error occurs, the printer indicates the error by blinking the Alarm lamp with another lamp or by printing an error report. -
Page 32: Switch
The default time-out is 5 minutes. While the printer is in sleep mode, all the lamps are off and it is as if it was turned off, but the printer can still receive data from the computer. Receiving a print file or document automatically wakes up the printer to start printing. -
Page 33: Test Print Mode
2. Hold down the switch and turn on the power switch. Keep the switch depressed until the Drum lamp comes on. The Drum lamp lights to indicate that the printer is in the test print mode. 3. Press the switch again to execute the test print or hold down the switch to select another option and release the switch to execute the selected option. -
Page 34: Control Features Set By The Brother Driver
Control Features Set by the Brother Printer Driver Page Protection If the printed images are too complex to print, the printer may print a partial image on the page. If this occurs, the printer has lost some print data and will indicate a “print overrun”... -
Page 35: Chapter 4 Options
OPTIONS SERIAL INTERFACE BOARD RS-100M To connect the printer to a DOS computer with a serial interface or to an Apple Macintosh computer, you need to install the optional serial interface board. When you have installed the serial interface board, you can share the... -
Page 36: Setting The Serial Interface Parameters
IBM(RS-232C) or to the left side for Apple (RS-422A). Setting the Serial Interface Parameters Note This section is only for printer models which have had the serial interface installed. Caution Be sure to set the parameters to match your computer as follows: Never change the RS-422A parameters for Apple Macintosh computers. - Page 37 If necessary, set the serial interface parameters as follows: 1. Make sure that the printer is in the off-line state. 2. Set the serial interface parameters by moving up (on) or down (off) the selectors of the dual in-line package (DIP) switch.
-
Page 38: Connecting The Serial Interface Cable
Note The factory settings are indicated in bold. If the robust Xon setting is turned on with selector 8, the printer sends Xon signals at one second intervals to the connected computer until it receives data. It is effective only if selector 7 is set to the On position for the Xon/Xoff plus DTR setting. - Page 39 CHAPTER 4 OPTIONS You can connect a parallel and a serial interface cable at the same time. The auto interface selection function allows you to share the printer with two computers. To do this, connect the parallel interface cable and then connect the serial interface cable as follows: 1.
-
Page 40: Additional Memory
Output32 bit or 36 bit Note This printer can also support DIB graphics with a resolution of 1200 x 600 dpi under Windows 95/Windows 3.1 with the supplied printer driver. We recommend to expand the printer memory to avoid any memory full error. - Page 41 Note The printer has only one slot for a SIMM upgrade. If you want to increase your printer memory again after you have installed a SIMM module into the slot, you will need to remove the previously installed SIMM first. For...
- Page 42 If static electricity collects, it may damage these electrical parts. 4. Install the SIMM into the slot and push gently until it clicks into place. 5. Install the main controller board into the printer by sliding it into the guide rails.
-
Page 43: Chapter 5 Maintenance
When the toner cartridge is running low, the Alarm and Data (Toner) lamps blink once every 5 seconds to indicate toner low. In USA, Canada and some other areas the printer is supplied with a starter toner cartridge which must be replaced after 1,000 pages. - Page 44 USER’S GUIDE Caution Keep the drum unit level after removing the toner cartridge, to avoid possible toner spill or scatter. Follow these steps to replace the toner cartridge: 1. Turn off the power switch. 2. Close the output tray and open the top cover. Remove the drum unit by holding each side of the drum and gently lifting the drum forwards towards you.
- Page 45 CHAPTER 5 MAINTENANCE Warning After you have just used the printer, some internal parts of the printer are extremely hot. When you open the top cover of the printer, never touch the shaded parts shown in the following illustration. High Temperature Fig.
- Page 46 If toner cartridges are left unpacked for a long period of time, the toner life is shortened. You can only use a Brother genuine toner cartridge (TN-200 series) which is specially formulated to ensure top print quality. Using another brand of toner cartridge could void your printer’s warranty.
- Page 47 7. Gently turn the lever on the toner cartridge backward until it stops. Fig. 5-8 Turning the Lever to Open the Shutter 8. Re-install the drum unit into the printer and close the top cover. Then, turn on the power switch.
-
Page 48: Replacing The Drum Unit
USER’S GUIDE REPLACING THE DRUM UNIT The printer uses a drum unit to create the print images on paper. If the Drum lamp is on, it indicates the drum unit is nearly at the end of its life. We recommend you prepare a new drum unit to replace the current one. Even if the Drum lamp is on, you may be able to continue to print without replacing the drum unit for a while. - Page 49 Fig. 5-10 Removing the Drum Unit Warning After you have just used the printer, some internal parts of the printer are extremely hot. When you open the top cover of the printer, never touch the shaded parts shown in the following illustration.
- Page 50 Do not remove the starter sheet. Only unpack a drum unit immediately before installing it into the printer. If an unpacked drum unit is subjected to excessive direct sunlight or room light, the unit may be damaged. Handle the toner cartridge and the drum unit carefully as it contains toner.
- Page 51 6. Install the new drum unit into the printer. Fig. 5-15 Installing the Drum Unit 7. Close the top cover. 8. Turn on the power switch. The printer automatically ejects the starter sheet. Ejecting this sheet resets the drum life alarm. Starter Sheet Fig.
-
Page 52: Adjusting The Print Density
USER’S GUIDE ADJUSTING THE PRINT DENSITY The print density dial is located inside the printer. You can use it to adjust the amount of toner applied to the paper. When the toner cartridge and drum unit are replaced, or if the operating temperature and humidity are high or low, print conditions may change causing darker or lighter printouts. -
Page 53: Cleaning The Printer
Use water or neutral detergents for cleaning. Cleaning with volatile liquids such as thinners or benzene will damage the surface of the printer. 4. Wipe dirt and dust away from the printer exterior and feeder with a cloth. 5. Load paper into the multi-purpose sheet feeder, and plug in the power cord. -
Page 54: Cleaning The Printer Interior And Drum Unit
1. Turn off the power switch and unplug the power cord. Warning There are high voltage electrodes inside the printer. Before cleaning the printer, make sure to turn off the power switch and unplug the power cord from the outlet 2. Open the top cover of the printer. - Page 55 4. Gently wipe the scanner window with a soft dry cloth. Fig. 5-22 Cleaning the Scanner Window Caution Do not touch the scanner window with your finger. Do not wipe the scanner window with cleaning alcohol (isophorol). 5. Turn the drum unit upside down carefully. Caution Handle the drum unit carefully as it contains toner.
- Page 56 Caution Be sure to position the tab at the home position, or printed pages may have vertical stripes. 8. Install the drum unit into the printer. See the section 9. Close the top cover. 10. Plug in the power cord and turn on the power switch.
-
Page 57: Re-Packing The Printer
1. Turn off the power switch and unplug the printer from the AC outlet. 2. Open the top cover. 3. Remove the drum unit assembly, referring to the previous section. - Page 58 Fig. 5-25 Placing the Drum Unit in the Plastic Bag 5. Close the top cover, the extension wire, and the output tray. 6. Wrap the printer in the plastic bag and place it in the original carton box with the original Styrofoam packing material.
-
Page 59: Chapter 6 Troubleshooting
If a recoverable error occurs, the printer indicates an ‘operator call’ by blinking the Alarm lamp and any of the following lamps. Find the error and take the proper action to correct it. The printer automatically recovers from most errors, but you may need to reset the printer with the panel switch as described below. - Page 60 USER’S GUIDE For errors shown below, the printer indicates an operator call by blinking the Alarm lamp. If you use the printer with the supplied Windows driver, the status monitor will appear to indicate the error on your computer screen. The printer may also print some error messages.
- Page 61 Consult your dealer. Note If the printer does not operate as you expect it to, it is recommended that you turn off the power switch, wait a few seconds and then turn it on again. If you still have problems, consult your dealer or our authorized service representative.
-
Page 62: Service Calls
USER’S GUIDE Service Calls If an unrecoverable error occurs, the printer indicates the need for a service call by lighting all the lamps and then the following combination of lamps alternately: Service Call Fuser mal- function Drum Alarm Ready Data... -
Page 63: Paper Jams
Warning After you have just used the printer, some internal parts of the printer are extremely hot. When you open the top cover of the printer, never touch the shaded parts shown in the following diagram. - Page 64 Also, open the top cover and check that a torn piece of paper does not remain inside the printer referring to the next section. If the paper cannot be pulled up, see the next section “Paper Jam near the Drum Unit.”...
- Page 65 If a paper jam has occurred near the drum unit, open the top cover and remove the drum unit. Then, pull the jammed paper upwards and out of the printer. Install the drum unit and close the top cover. Fig. 6-5 Paper Jam near the Drum Unit...
-
Page 66: Q & A
USER’S GUIDE Q & A This section contains questions and answers for using your printer. If you have encountered a problem, find the question relating to your problem and take the steps recommended to correct the problem. Setting Up the Printer Hardware Question The printer does not work. -
Page 67: Setting Up The Printer For Dos
HP LaserJet 5P/5L printer in your application software. Press the panel switch. The data has been sent to the printer but the printer did not receive the Page Eject command: print screens do not send this command. -
Page 68: Setting Up The Printer For Apple Macintosh Computers
USER’S GUIDE Setting Up the Printer for Apple Macintosh Computers when the Optional RS-100M Serial Interface is Installed into Your Printer Question I cannot print from my application software. Paper Handling Question The printer does not load paper. The printer does not load paper from the manual feed slot. -
Page 69: Printing
I print them. CHAPTER 6 TROUBLESHOOTING Recommendation Turn on and off the printer or reset the printer. Make sure your application software is correctly set up to use this printer by checking the printer settings in your application software. -
Page 70: Print Quality
If the same problem occurs and the Drum lamp is still on after cleaning, replace the drum unit with a new one. Clean the printer interior and the primary corona wire of the toner cartridge. See Printer Interior and Drum Unit”... - Page 71 The problem may disappear by itself. Try printing multiple pages to clear this problem especially if the printer has not been used for a long time. If the surface of the drum has been scratched, replace the drum unit with a new one.
- Page 72 Certain environmental conditions such as humidity, high temperatures, etc. may cause this situation to occur. Make sure that the printer is placed on a flat, horizontal surface. Remove the drum unit with the toner cartridge installed. Try shaking them from side to side.
-
Page 73: Appendix A
APPENDIX A PRINTER SPECIFICATIONS Printing Print Method Electrophotography by semiconductor laser beam scanning Laser Wavelength: 780 nm Output: 5 mW max Resolution 1200 (H) x 600 (V) dots/inch (for Windows DIB graphics) 600 x 600 dots/inch (for Windows and DOS) -
Page 74: Functions
LaserJet 5P (PCL Level 5e), EPSON FX-850, or IBM Proprinter Windows 3.1/3.11 and Windows 95 driver, supporting Brother Native Compression mode and bi-directional capability Optional Macintosh driver available for System 6.0.7 or higher... -
Page 75: Electrical And Mechanical
Electrical and Mechanical Power Source U.S.A. and Canada: Europe and Australia: Power Consumption Printing: Stand-by: Sleep: Noise Printing: Sleep: Temperature Operating: Storage: Humidity Operating: Storage: Dimensions (W x H x D) 366 x 250 x 383 mm (14.4 x 9.8 x 15.1 inches) (when the output tray is closed.) Weight Approx. -
Page 76: Parallel Interface Specifications
Note To ensure the highest quality performance, it is recommended that you use an IEEE 1284 compliant parallel cable between the printer and your computer. Only IEEE 1284 cables support all of the advanced printing capabilities, such as bi-directional communication. These cables will be clearly marked with “IEEE-1284”. - Page 77 Note To use bi-directional communication, an interface cable which has the pin connections above must be used. Shield Fig. A-1 Parallel Interface Cable APPENDIX Shield APPENDIX A –5...
-
Page 78: Resident Fonts
USER’S GUIDE RESIDENT FONTS Bitmapped Fonts This printer has the following bitmapped fonts. They can be used in the HP LaserJet 5P, EPSON FX-850, and IBM Proprinter XL modes. They have the following characteristics. Letter Gothic 16.66 Normal, Italic, Bold, BoldItalic (Portrait &... -
Page 79: Symbol Sets/Character Sets
PC-850 Note If you want to know what characters are in each symbol/character set, print CHARASET.PRN file from the “Print form” option in the Direct Access Menu of the Remote Printer Console Program. OCR-B Ventura US (14J) ISO11 Swedish ISO14 JIS ASCII... - Page 80 INDEX Alarm lamp ... 3–2, 6–1 auto-emulation switching ... baud rate... bitmapped font ... character set... control panel... 1–2, 3–1 cover open... cut sheet ... data compression technology ... Data lamp ... data length... DIP switch... 1–2, 4–3 DOS... dpi ... Drum lamp ...
- Page 81 ... method... overrun ... quality ... speed ... Print Config... Print Fonts I... printable area... printer driver ... printer status monitor ... protocol ... Ready lamp ... Remote Printer Console ... resident font ... resolution...1–3, A–1 robust... RPC ... RS-232C...
Need help?
Do you have a question about the HL-760 Series and is the answer not in the manual?
Questions and answers