
Related Manuals for BV BV-BF-03-PLUS


Summary of Contents for BV BV-BF-03-PLUS
- Page 1 VENTILAtion fan 140 CFM: BV-BF-03-PLUS INSTALLatiON MANUAL and USER GUIDE...
-
Page 2: Table Of Contents
CONTENTS General Safety Information and Warnings ................Included Parts ............................ Dimensions ............................Specifications ............................. Sizes ............................... Wiring Diagram ..........................Installation I (Joist Mounting) ...................... Installation II (In Existing Construction) ................... Maintenance ............................ -
Page 3: General Safety Information And Warnings
General safety information and warning WARNING Electrical service supply must be 120V 60Hz. Follow all local building,safety and electrical codes as well as NEC(National Electrical Code) and OSHA (Occupational Safety and Health Act). This unit must be properly grounded. Always disconnect the power supply prior to servicing the fan, motor or junction box. Do not bend or kink the power wires. -
Page 4: Included Parts
INCLUDED PARTS READ and SAVE THESE INSTRUCTIONS Please read these instructions carefully before installing, operating or servicing the fan. Failure to comply with the instructions contained herein could result in personal injury or property damage. We recommend that you keep this guide for future reference. -
Page 5: Specifications
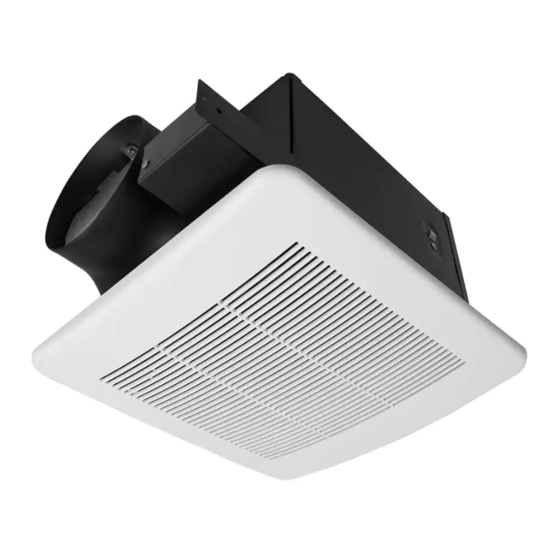
DUCT NOISE AIR DELIVER MODEL POWER DIAMETER (SONE) AT 0.1” WG DIRECTION 6” 42 W BV-BF-03-PLUS 140 CFM 140 CFM (15.24 cm) SIZES 10.31” 13.38” 10.31” 6” OUTLET 8.07” 8.86” (20.57cm) 8.07” (22.5cm) (20.57cm) 16” 16” (40.64cm) (40.64cm) WIring diagram... -
Page 6: Installation I (Joist Mounting)
INSTALLation I (joist mounting) 1. Insert the suspension bracket into the fan body. If spacing between joists is 21 1/4” to 23 1/2” (54 cm to 59.7 cm) connect suspension brackets I and II (Fig. 1). 2. Mount the fan body to joist using the suspension brackets and long wood screws (Fig. - Page 7 INSTALLation I (joist mounting) 3. Refer to wiring diagram on page 4. Remove the junction box cover. Using wire nuts, connect house wires to ventilating fan wires: black to black; white to white; green to green. Replace the junction box cover (Fig. 3). CAUTION If your house wires do not match these colors, you must determine what each house wire represents before connect-...
-
Page 8: Installation Ii (In Existing Construction)
installation II (IN EXISTING CONSTRUCTION) Installing the fan body in an existing building requires an accessible area (attic or crawl space) above the planned installation location and existing duct and wiring. A) To install the fan body, follow the procedures described in Installation I. 1. -
Page 9: Maintenance
BV offers a limited one-year warranty against any manufacturing defects as long as it is used according to its intended use. BV will exchange any product that would show any such manufacturing defects. However, this warranty does not include labor costs to... - Page 10 VENTILateur de salle de bain 140 PCM: BV-BF-03-PLUS INSTALLatiON MANUAL and USER GUIDE...
- Page 11 CONTENTS Consignes de sécurité et mises en garde ................Piéces Fournies ..........................Dimensions ............................Spécifications du produit ......................Formats..............................Schéma de câblage........................... Installation I (Sur Solive) ........................ Installation II (Construction Existante) ..................Entretien ...............................
-
Page 12: Consignes De Sécurité Et Mises En Garde
N’installez pas l’appareil dans une aire de préparation des repas ou au-dessus d’une surface de cuisson. N’utilisez cet appareil que de la façon prévue par le fabricant. Si vous avez des questions, veuillez communiquer avec BV votre détaillant. Les travaux d’installation doivent être effectués par une personne qualifée, conformément aux codes locaux de sécurité, y compris les règlements relatifs aux installations pare-feu. -
Page 13: Piéces Fournies
Pièces fournies VEUILEZ LIRE ET CONSERVER CES INSTRUCTIONS Veuillez lire attentivement les instructions avant d’installer ce ventilateur, de le faire fonctionner ou de l’entretenir. En ne vous conformant pas à ces instructions, vous pourriez causer des blessures ou des dommages matériels. Veuillez conserver ce guide pour le consulter ultérieurement. -
Page 14: Spécifications Du Produit
SPÉCIFICatIONS DU PRODUIT Diamètre du Consommation AIR DELIVER AT 0.1” Niveau sonore MODÈLE Sortie d’air conduit énergétique (sone) WG (CFM) 6” BV-BF-03-PLUS 140 PCM 42 W 140 PCM (15.24 cm) formats 10.31” 13.38” 10.31” 6” OUTLET 8.07” 8.86” (20.57cm) (22.5cm) 8.07”... -
Page 15: Installation I (Sur Solive)
INSTALLation I (sur solive) 1. Insérer le support dans le boîtier du ventilateur, Insérez si l’écart entre les solives est de 21 ¼ po à 23 ½ po (54 cm le support à 59,7 cm), insérez le support I dans le support II (ill. 1). 2. - Page 16 INSTALLation I (sur solive) Conduit 3. Consultez le schéma de cablage à la page 11. Retirez le couvercle de la boîte de jonction. à l’aide de marettes, raccordez les fls électriques de la maison à ceux du ventilateur : noir avec noir, blanc avec blanc et vert avec vert.
-
Page 17: Installation Ii (Construction Existante)
installation II (CONSTRUCTION Existante) Pour installer un ventilateur dans un bâtiment déjà construit, vous devez avoir accès, par le grenier ou le faux plafond, à l’emplacement se trouvant au-dessus de l’endroit prévu pour l’installation et aux conduits et au câblage déjà installés. A) Pour installer le ventilateur, suivez les étapes de l’installation I. -
Page 18: Entretien
GARANTIE LIMITÉE C’est un produit de qualité. Il a été fabriqué et sélectionné avec soin et BV offre une garantie limitée d’un an contre tout vice de fabrication, à condition qu’il soit utilisé con- formément à l’usage auquel il est destiné. BV échangera tout produit présentant de tels défauts de fabrication.
Need help?
Do you have a question about the BV-BF-03-PLUS and is the answer not in the manual?
Questions and answers