Advertisement
Quick Links
Video assembly guides
Guides d'assemblage en vidéo
Instrucciones de ensamblaje de vídeo
www.bestar.com/video-assembly-guides
MODEL
: MODÈLE : MODELO
L-Shaped
Configuration en L
Configuración en L
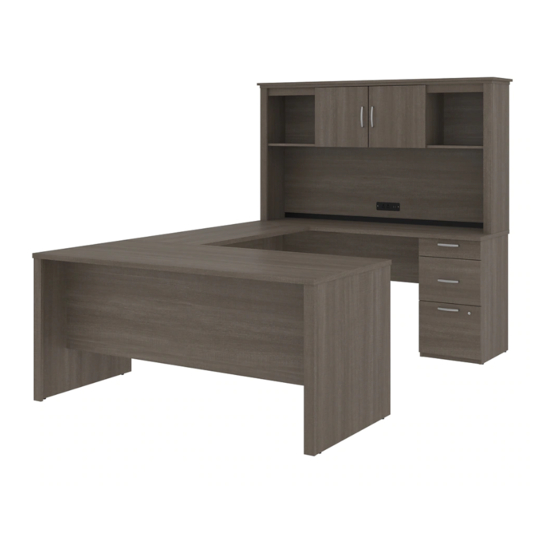
U-Shaped
Configuration en U
Configuración en U
TOLL FREE : 1-888-8BESTAR (1 888 823-7827)
46410-1131-1231
46410-1147-1247
46410-1152-1252
LEFT ASSEMBLY
INSTRUCTIONS
INSTRUCTIONS
D'ASSEMBLAGE GAUCHE
INSTRUCCIONES
IZQUIERDO DE
ENSAMBLAJE
http://bestar.ca
http://bestar.com
Advertisement

Related Manuals for Bestar 46410-1131-1231


Summary of Contents for Bestar 46410-1131-1231
- Page 1 MODEL : MODÈLE : MODELO TOLL FREE : 1-888-8BESTAR (1 888 823-7827) 46410-1131-1231 46410-1147-1247 46410-1152-1252 LEFT ASSEMBLY INSTRUCTIONS INSTRUCTIONS D’ASSEMBLAGE GAUCHE INSTRUCCIONES IZQUIERDO DE ENSAMBLAJE L-Shaped Configuration en L Configuración en L U-Shaped Configuration en U Configuración en U Video assembly guides Guides d’assemblage en vidéo...
-
Page 2: Warranty Information
Bestar reserves the right to request a proof of purchase to document a warranty claim. In no event shall BESTAR be liable for incidental or consequent damages resulting from the misuse of the product. This warranty is not transferable and is valid only in Canada and the United States excluding Alaska, Hawaii and Puerto Rico. -
Page 3: Customer Service
Customer Service Service client Atención al cliente www.bestar.com/support If there are parts missing from your order or if your product was damaged during shipping, PLEASE CONTACT US DIRECTLY. S’il vous manque des pièces ou si votre meuble a été endommagé pendant le transport, VEUILLEZ NOUS CONTACTER DIRECTEMENT. - Page 4 You must know the name of the product, the item number and the name of the store where the item was purchased. Repérez votre produit sur Bestar.com. Vous devez connaître le nom du produit, le numéro d'article et le nom du magasin où vous l'avez acheté.
-
Page 5: Maintenance Tips
Maintenance Tips Conseils d’entretien Consejos de mantenimiento www.bestar.com/maintenance Never leave damp clothes, liquids or damp cloths on the furniture. If a liquid has spilled on the furniture, clean the liquid up immediately. Ne laissez jamais de liquide ni de vêtements ou de linge humides sur le meuble. - Page 6 Voilà pourquoi votre entière satisfaction nous tient à cœur ! En Bestar nos enorgullecemos de crear muebles funcionales y con estilo para su hogar y oficina. Vamos más allá de la fabricación de muebles: ofrecemos soluciones para optimizar y personalizar su hogar u oficina.
- Page 7 Parts & Hardwares • Pièces et quincailleries • Piezas Y Quincallas Parts • Pièces • Piezas Code • Código Qty • Qté • Cant. Code • Código Qty • Qté • Cant. Code • Código Qty • Qté • Cant. Code •...
- Page 8 Parts & Hardwares • Pièces et quincailleries • Piezas Y Quincallas Hardwares • Quincailleries • Quincallas Code • Código Qty • Qté • Cant. Code • Código Qty • Qté • Cant. Code • Código Qty • Qté • Cant. Code •...
-
Page 9: Important Notice
• Assurez-vous de bien remplir l’autocollant. • Asegúrese de completar correctamente la etiqueta. To better serve you! MODEL : MODÈLE : MODELO TOLL FREE : 1-888-8BESTAR (1 888 823-7827) Pour mieux vous servir! 46410-1131-1231 46410-1147-1247 46410-1152-1252 Model / Modèle: Production Number LEFT ASSEMBLY INSTRUCTIONS Numéro de production:... - Page 10 Hardware installation • Installation des quincailleries • Instalación de las quincaillas Desk • Bureau • Escritorio H-36 PA-844 H-03 CO-249 Use these holes • Utilisez ces trous • Utilice estos orificios Push plastic lever and slide out piece to be used for parts CA09A & CA01A later Soulever pour dégager et séparer la section qui servira pour les pièces CA09A et CA01A plus tard Levantar para soltar y separar la sección que servirá...
- Page 11 Assembly • Assemblage • Ensamblaje Desk • Bureau • Escritorio Sequence • Séquence • Secuencia 18 72 45 44 17 Unfinished edge Bordure non-finie Borde sin acabado 46410_G SERVICE/SERVICIO: 1-888 8BESTAR (1-888 823-7827)
- Page 12 Hardware installation & assembly • Installation des quincailleries et assemblage • Instalación de las quincaillas y ensamblaje Desk • Bureau • Escritorio Sequence • Séquence • Secuencia 70 30 40 H-36 H-03 PA-844 H-03 H-36 PA-844 Code • Código x 10 Qty •...
- Page 13 Hardware installation & assembly • Installation des quincailleries et assemblage • Instalación de las quincaillas y ensamblaje Conference table • Table de conférence • Mesa de conferencía Sequence • Séquence • Secuencia 42 73 32 33 80 80 Important • Importante Ajust the mouldings and tight the screws VR-207...
- Page 14 Installation • Installation • Instalación Desk • Bureau • Escritorio 2 POSSIBILITIES FOR LEFT ASSEMBLY 2 POSSIBILITÉS POUR L’ASSEMBLAGE GAUCHE 2 POSIBILIDADES PARA EL ENSAMBLAJE IZQUIERDA For L-Shaped configuration, please refer to pages 15 to 16 and 19 to 27. L-Shaped Pour la configuration en L, Configuration en L...
- Page 15 Hardware installation & assembly • Installation des quincailleries et assemblage • Instalación de las quincaillas y ensamblaje Return table • Table retour • Mesa ángulo L-Shaped Configuration en L Configuración en L Sequence • Séquence • Secuencia 41 71 30 PA-844 insert TI-552...
- Page 16 Hardware installation & assembly • Installation des quincailleries et assemblage • Instalación de las quincaillas y ensamblaje Return table • Table retour • Mesa ángulo L-Shaped Configuration en L Configuración en L EQ-143 VR-212 without pre-drilled hole sans pré-perçage sin perforación previa VR-212 EQ-143 VR-212...
- Page 17 Hardware installation & assembly • Installation des quincailleries et assemblage • Instalación de las quincaillas y ensamblaje Bridge • Pont • Puente U-Shaped Configuration en U Configuración en U EQ-143 VR-212 EQ-143 VR-212 Code • Código x 16 Qty • Qté • Cant. 46410_G SERVICE/SERVICIO: 1-888 8BESTAR (1-888 823-7827)
- Page 18 Hardware installation & assembly • Installation des quincailleries et assemblage • Instalación de las quincaillas y ensamblaje Bridge • Pont • Puente U-Shaped Configuration en U Configuración en U Use the remaining screw Utilisez les vis restantes Utilizar los tornillos restante H-03 remove the screw enlever la vis...
- Page 19 Hardware installation & assembly • Installation des quincailleries et assemblage • Instalación de las quincaillas y ensamblaje Hutch • Étagère • Estantería Sequence • Séquence • Secuencia 75 47 35 36 81 81 EQ-314 VR-207 H-36 CL-140 H-03 EX-766 CL-140 EQ-314 EX-766 H-03...
- Page 20 Hardware installation & assembly • Installation des quincailleries et assemblage • Instalación de las quincaillas y ensamblaje Hutch • Étagère • Estantería Sequence • Séquence • Secuencia 21 21 74 49 VC-204 H-36 H-36 VC-204 Code • Código Qty • Qté • Cant. 46410_G SERVICE/SERVICIO: 1-888 8BESTAR (1-888 823-7827)
- Page 21 Hardware installation & assembly • Installation des quincailleries et assemblage • Instalación de las quincaillas y ensamblaje Hutch • Étagère • Estantería Sequence • Séquence • Secuencia 82 82 43 EQ-314 VR-207 VR-212 Important • Importante RU-420 Remove paper on one side only of RU-420.
- Page 22 Assembly • Assemblage • Ensamblaje Hutch • Étagère • Estantería Sequence • Séquence • Secuencia Important • Importante RU-420 Remove paper from RU-420. Retirez le papier du RU-420. Retire el papel del RU-420. Depth alignment: Align the back of the hutch with the back of the desk. Alignement en profondeur : Aligner l’arrière de l’étagère avec l’arrière du bureau.
- Page 23 Hardware installation & assembly • Installation des quincailleries et assemblage • Instalación de las quincaillas y ensamblaje Desk • Bureau • Escritorio VF-232 PO-902 CL-745 EC-744 VR-207 CH-838 Loosen Desserrer Aflojar SE-736A SE-736D not used non- utilisé no utilizado CH-838 CL-745 EC-744 PO-902...
- Page 24 Hardware installation & assembly • Installation des quincailleries et assemblage • Instalación de las quincaillas y ensamblaje Drawer • Tiroir • Cajón Sequence • Séquence • Secuencia CA05A CA01A CA01A CA15A CA05A Important Importante CO-249 VR-207 Use the remaining piece from step 1 for parts VM-601 number CA01A.
- Page 25 Hardware installation & assembly • Installation des quincailleries et assemblage • Instalación de las quincaillas y ensamblaje Drawer • Tiroir • Cajón Sequence • Séquence • Secuencia CA13A EX-681 CA09A EX-702 CA09A EX-702 CA15A CA13A EX-681 VM-601 EX-702 16 1/8 in/po 411 mm VR-212 EX-681...
- Page 26 Installation • Installation • Instalación Drawer • Tiroir • Cajón Important • Importante Ball bearings must be on front part of slider when installing drawers. Les roulements à billes doivent être sur la partie avant du coulisseau lors de l’installation des tiroirs. Los cojinetes de bolas deben ubicarse sobre la parte delantera de guía en...
- Page 27 Installation • Installation • Instalación Doors • Portes • Puertas Use screw A for horizontal adjustment, screw B for depth adjustment and screws C for vertical adjustment. Utilisez la vis A pour l’ajustement horizontal, les vis B pour l’ajustement en profondeur et les vis C pour l’ajustement vertical. Utilice el tornillo A para realizar el ajuste horizontal, los tornillos B para el ajuste de profundidad y los tornillos C para el ajuste vertical.
Need help?
Do you have a question about the 46410-1131-1231 and is the answer not in the manual?
Questions and answers