Table of Contents
Advertisement
Available languages
Available languages
Quick Links
Advertisement
Table of Contents

Related Manuals for DHP Baby Relax DA7319B5-BL


Summary of Contents for DHP Baby Relax DA7319B5-BL
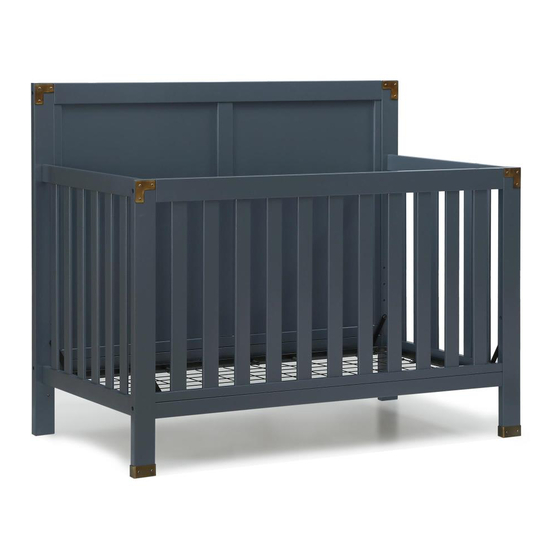
- Page 1 INSTRUCTION MANUAL 5-IN-1 CONVERTIBLE CRIB...
- Page 2 WARNING Failure to follow these warnings and assembly instructions could result in serious injury or death. Read all instructions before assembling crib. KEEP INSTRUCTIONS FOR FUTURE USE. Check this product for damaged hardware, loose joints, loose bolts or other fasteners, missing parts or sharp edges before assembly and frequently during use.
-
Page 3: Care And Cleaning
NOTES Ensure all parts and components are present before beginning assembly. Assemble on a soft, smooth surface to prevent damage to product finish. Phillips head screw driver is not included. DO NOT use power tools. CAUTIONS: Adult assembly required. Assembly will require two people. Estimated assembly time: 30 minutes. -
Page 4: Hardware List
5-IN-1 CONVERTIBLE CRIB HARDWARE LIST Ø1/4" * 13 * 70 mm Ø5/16" * 13 * 1.5 mm BOLT SPRING WASHER 2 PCS 24 PCS Ø1/4" * 13 * 45 mm Ø1/4" * 13 * 83 mm BOLT BOLT 8 PCS 8 PCS Ø10 * 35 mm Ø1/4"... -
Page 5: Parts Lista
5-IN-1 CONVERTIBLE CRIB PARTS LIST BACK PANEL BACK RAIL LEFT BACK POST 1 PC 1 PC 1 PC RIGHT BACK POST SIDE PANEL LEFT FRONT POST 1 PC 2 PCS 1 PC RIGHT FRONT POST FRONT PANEL FRONT RAIL 1 PC 1 PC 1 PC MATTRESS SUPPORT... - Page 6 5-IN-1 CONVERTIBLE CRIB STEP 1: Attach the back rail (B) to back panel (A) with bolts (1) and spring washers (2). Use Allen key (9) to tighten the bolts. 2 PCS 2 PCS...
- Page 7 5-IN-1 CONVERTIBLE CRIB STEP 2: Insert wood (5) into back panel (A) as shown. Attach left and right back post (C & D) to the back panel and rail (A & B) with bolts (4) and spring washers (2). Use Allen key (9) to tighten the bolts. 4 PCS 4 PCS 4 PCS...
- Page 8 5-IN-1 CONVERTIBLE CRIB STEP 3: Attach side panels (E) to the left and right back posts (C & D) with bolts (10) and spring washers (2). Use the Allen key (9) to tighten the bolts. Attach left and right front posts (F & G) to the side panels (E) with bolts (3) and spring washers (2).
- Page 9 5-IN-1 CONVERTIBLE CRIB STEP 4: Attach the mattress support (J) to the left and right back post (C & D) & the left and right front post (F & G) with mattress support bolts (7) and spring washers (8). Use Allen key (9) to tighten the bolts.
- Page 10 5-IN-1 CONVERTIBLE CRIB STEP 5: Attach front rail (I) to the front panel (H) with bolts (3) and spring washers (2). Use Allen key (9) to tighten the bolts. 4 PCS 4 PCS...
- Page 11 5-IN-1 CONVERTIBLE CRIB STEP 6: Insert wood (5) into front rail (I) as shown. Attach front panel (H) and front rail (I) to the left and right front post (F & G) with bolts (4) and spring washers (2). Use Allen key (9) to tighten the bolts (4). 4 PCS 4 PCS 4 PCS...
- Page 12 5-IN-1 CONVERTIBLE CRIB WARNINGS: * Any mattress used in this crib must be at least 27-1/4 inches by 51-5/8 inches (69cm by 131cm) with a thickness not exceeding 6 inches (15cm). * The day bed is not intended for children under 15 months of age or over 50 pounds (22.7 kgs).
- Page 13 5-IN-1 CONVERTIBLE CRIB FULL SIZE BED ASSEMBLY INSTRUCTION (HEADBOARD ONLY) FULL SIZE CONVERSION RAILS AND LEGS ARE NOT INCLUDED. DIAGRAMS ARE FOR REFERENCE ONLY. BED RAILS MAY DIFFER FROM ILLUSTRATION. STEP 1: Attach the full size conversion rails (not included) to the left and right back posts (C & D) of the headboard.
- Page 14 5-IN-1 CONVERTIBLE CRIB FULL SIZE BED ASSEMBLY INSTRUCTION (HEADBOARD AND FOOTBOARD ONLY) FULL SIZE CONVERSION RAILS AND SLATS ARE NOT INCLUDED. DIAGRAMS ARE FOR REFERENCE ONLY. BED RAILS MAY DIFFER FROM ILLUSTRATION. STEP 1: Attach the full size conversion rails (not included) to the back and front posts (C, D, F & G). Both Sides Both Sides STEP 2: Add the slats (not included).
- Page 15 5-IN-1 CONVERTIBLE CRIB Convert your 5-in-1 Convertible Crib into a toddler bed with the Toddler Bed Conversion Rail sold separately.
- Page 16 5-IN-1 CONVERTIBLE CRIB CAUTION: This unit is intended for use only with the products and/or maximum weights indicated. Use with other products and/or products heavier than the maximum weights indicated may result in instability or cause possible injury. ANY MATTRESS USED IN THIS CRIB MUST BE AT LEAST 27-1/4 INCHES BY 51-5/8 INCHES (69CM BY 131CM) WITH A THICKNESS...
- Page 17 MANUAL DE INSTRUCCIONES CUNA 5 EN 1 CONVERTIBLE...
- Page 18 ADVERTENCIA Si no se siguen estas advertencias e instrucciones al armar la cuna, el niño podría sufrir lesiones graves o morir. Lea todas las instrucciones antes de armar la cuna. CONSERVE LAS INSTRUCCIONES PARA USO FUTURO. Antes de cada uso o de armarla, inspeccione la cuna y asegúrese de que no hayan piezas dañadas, uniones flojas, piezas que falten o bordes filosos.
-
Page 19: Cuidado Y Limpieza
NOTAS Asegúrese de tener todas las piezas y componentes antes de comenzar a armarla. Ármela sobre superficies blandas y suaves para evitar dañar el pulido del producto. No use herramientas eléctricas. Precaución: Un adulto debe armarla. Se necesitan dos personas para armarla. Tiempo estimado para armarla: 45 minutos. -
Page 20: Lista De Accesorios
CUNA 5 EN 1 CONVERTIBLE LISTA DE ACCESORIOS Ø1/4" * 13 * 70 mm Ø5/16" * 13 * 1.5 mm PERNO ARANDELA RESORTE 2 PZAS 24 PZAS Ø1/4" * 13 * 45 mm Ø1/4" * 13 * 83 mm PERNO PERNO 8 PZAS 8 PZAS... - Page 21 CUNA 5 EN 1 CONVERTIBLE LISTA DE PIEZAS PANEL POSTERIOR RIEL POSTERIOR POSTE POSTERIOR IZQUIERDO 1 PZA 1 PZA 1 PZA PANEL LATERAL POSTE POSTERIOR DERECHO POSTE DELANTERO IZQUIERDO 1 PZA 2 PZAS 1 PZA PANEL FRONTAL RIEL DELANTERO POSTE DELANTERO DERECHO 1 PZA 1 PZA 1 PZA...
- Page 22 CUNA 5 EN 1 CONVERTIBLE ETAPA 1 Fije el riel posterior (B) al panel posterior (A) con los pernos (1) y las arandelas resorte (2). Utilice la llave Allen (9) para apretar los tornillos. 2 PCS 2 PCS...
- Page 23 CUNA 5 EN 1 CONVERTIBLE ETAPA 2 Inserte las tarugos de madera (5) en el panel posterior (A) como se muestra aquí abajo. Fije el poste posterior izquierdo y derecho (C & D) al panel y al riel posterior (A y B) con los pernos (4) y las arandelas resorte (2).
- Page 24 CUNA 5 EN 1 CONVERTIBLE ETAPA 3 Fije el panel lateral (E) a los postes posteriores izquierdo y derecho (C y D) con los pernos (10) y las arandelas resorte (2). Utilice la llave Allen (9) para apretar los tornillos. Fije los postes delanteros izquierdo y derecho (F &...
- Page 25 CUNA 5 EN 1 CONVERTIBLE ETAPA 4 Coloque el soporte del colchón (J) en el poste posterior izquierdo y derecho (C & D) y el poste delantero izquierdo y derecho (F & G) con los pernos (7) y las arandelas resorte (8). Utilice la llave Allen (9) para apretar los tornillos.
- Page 26 CUNA 5 EN 1 CONVERTIBLE ETAPA 5 Fije el riel delantero (I) al panel frontal (H) con los pernos (3) y las arandelas resorte (2). Utilice la llave Allen (9) para apretar los tornillos. 4 PCS 4 PCS...
- Page 27 CUNA 5 EN 1 CONVERTIBLE ETAPA 6 Introduzca los tarugos de madera (5) a el riel delantero (I) como se muestra aqui abajo. Fije el panel frontal (H) y el riel delantero (I) a los postes delantero izquierdo y derecho (F & G) con los pernos (4) y las arandelas resorte (2).
- Page 28 CUNA 5 EN 1 CONVERTIBLE ADVERTENCIAS: * TODO COLCHÓN UTIZADO EN ESTA CUNA DEBE SER DE POR LO MENOS 27-1/4 PULGADAS POR 51-5/8 PULGADAS (69cm POR 131cm) CON UN ESPESOR NO MAS DE 6 PULGADAS (15cm). * La cama de día no está prevista para niños de menos de 15 meses o más de 50 libras de peso (22.7 KGS).
- Page 29 CUNA 5 EN 1 CONVERTIBLE INSTRUCCIONES PARA ENSAMBLAJE DELA CAMA DOBLE (CABECERA SOLAMENTE) LAS BARANDILLAS DE CONVERSIÓN NO ESTÁN INCLUIDAS. LOS DIAGRAMAS SON RESENTADOS SOLO COMO REFERENCIA. LAS BARANDILLAS PUEDEN SER DIFERENTES A LAS ILUSTRADAS ETAPA 1: Fije las barandillas de conversión (no incluidas) a los postes posteriores (C &...
- Page 30 CUNA 5 EN 1 CONVERTIBLE INSTRUCCIONES PARA ENSAMBLAJE DELA CAMA DOBLE (CABECERA Y PIE DE CAMA SOLAMENTE) LAS BARANDILLAS DE CONVERSIÓN Y LISTONES NO ESTÁN INCLUIDOS. LOS DIAGRAMAS SON RESENTADOS SOLO COMO REFERENCIA. LAS BARANDILLAS PUEDEN SER DIFERENTES A LAS ILUSTRADAS. ETAPA 1: Fije las barandillas de conversión (no incluidas) a los postes delanteros y posteriores (C, D, F &...
- Page 31 CUNA 5 EN 1 CONVERTIBLE Convierta su cuna convertible 5 en 1 en una cama para niños con la barandilla de conversión de cama para niños vendido por separado.
- Page 32 CUNA 5 EN 1 CONVERTIBLE PRECAUCIÓN: Esta unidad está diseñada para ser utilizada únicamente con los productos y/o pesos máximos indicados. Su uso con otros productos y/o productos más pesados que los pesos máximos indicados puede provocar inestabilidad o causar lesiones. TODO COLCHÓN UTILIZADO EN ESTA CUNA DEBE SER DE POR LO MENOS 27-1/4 PULGADAS POR 51-...
- Page 33 INSTRUCTION MANUAL BERCEAU CONVERTIBLE 5 EN 1...
- Page 34 AVERTISSEMENT Le non respect de ces avertissements et des instructions d'assemblage peut entraîner des blessures graves ou la mort. Lire toutes les instructions avant d'assembler le lit de bébé. GARDEZ LES INSTRUCTIONS POUR UTILISATION. Vérifiez ce produit pour du matériel endommagé, des joints lâches, des boulons desserrés ou autres élé ments de fixation, des pièces manquantes ou des bords pointus avant d'assembler et fréquemment pendant l'utilisation.
-
Page 35: Entretien
NOTES S'assurer que toutes les pièces sont présentes avant de commencer l'assemblage. Assembler sur une surface douce et lisse pour empêcher d'endommager la finition du produit. NE PAS utiliser d'outils électriques. ATTENTION: Doit être assemblé par un adulte. Deux personnes sont nécessaires pour l'assemblage. Temps d'assemblage estimé: 45 minutes. - Page 36 BERCEAU CONVERTIBLE 5 EN 1 LISTE DE QUINCAILLERIE Ø1/4" * 13 * 70 mm Ø5/16" * 13 * 1.5 mm BOULON RONDELLE RESSORT 2 PCES 24 PCES Ø1/4" * 13 * 45 mm Ø1/4" * 13 * 83 mm BOULON BOULON 8 PCES 8 PCES...
- Page 37 BERCEAU CONVERTIBLE 5 EN 1 LISTE DE PIÈCES PANNEAU ARRIÈRE RAIL ARRIÈRE POTEAU GAUCHE ARRIÈRE 1 PCE 1 PCE 1 PCE PANNEAU LATÉRAL POTEAU AVANT GAUCHE POTEAU DROIT ARRIÈRE 1 PCE 2 PCES 1 PCE POTEAU AVANT DROIT PANNEAU AVANT RAIL AVANT 1 PCE 1 PCE...
- Page 38 BERCEAU CONVERTIBLE 5 EN 1 ÉTAPE 1 Fixez le rail arrière (B) au panneau arrière (A) avec les boulons (1) et les rondelles ressort (2). Utilisez la clé Allen (9) pour serrer les boulons. 2 PCS 2 PCS...
- Page 39 BERCEAU CONVERTIBLE 5 EN 1 ÉTAPE 2 Insérer des goujon de bois (5) dans le panneau arrière (A) tel qu'indiqué ci-dessous. Fixez les poteaux arrières gauche et droit (C & D) sur le panneau arrière et le rail (A & B) avec des boulons (4) et des rondelles ressorts (2).
- Page 40 BERCEAU CONVERTIBLE 5 EN 1 ÉTAPE 3 Fixez les panneaux latéraux (E) aux poteaux arrières gauche et droit (C & D) avec des boulons (10) et des rondelles ressorts (2). Utilisez la clé Allen (9) pour serrer les boulons. Fixez les poteaux avant gauche et droit (F & G) aux panneaux latéraux (E) avec des boulons (3) et des rondelles ressorts (2).
- Page 41 BERCEAU CONVERTIBLE 5 EN 1 ÉTAPE 4 Fixez le support de matelas (J) aux poteaux arrières gauche et droit (C & D) et eux poteaux avant gauche et droit (F & G) avec les boulons (7) et les rondelles ressorts (8). Utilisez la cl é...
- Page 42 BERCEAU CONVERTIBLE 5 EN 1 ÉTAPE 5 Fixez le rail avant (I) au panneau avant (H) avec les boulons (3) et les rondelles ressorts (2). Utilisez la clé Allen (9) pour serrer les boulons. 4 PCS 4 PCS...
- Page 43 BERCEAU CONVERTIBLE 5 EN 1 ÉTAPE 5 Insérez les goujon de bois (5) dans le rail avant (I) tel qu'indiqué ci-dessous. Attachez le panneau avant (H) et le rail avant (I) aux poteaux avant gauche et droit (F & G) avec des boulons (4) et des rondelles ressorts (2).
- Page 44 BERCEAU CONVERTIBLE 5 EN 1 MISE EN GARDE: * TOUT MATELAS UTILISÉ DANS CE LIT DE BÉBÉ DOIT MESURER AU MOINS 69 CM PAR 131 CM (27-1/4 po X 51-5/8 po) AVEC UNE ÉPAISSEUR NE DÉPASSANT PAS 15 CM (6 po). * Le lit de jour n'est pas destiné...
- Page 45 BERCEAU CONVERTIBLE 5 EN 1 INSTRUCTIONS D'ASSEMBLAGE DE GRAND LIT (TÊTE DE LIT SEULEMENT) LES RAILS DE CONVERSION ET LUMELLES NE SONT PAS COMPRISES. LES DIAGRAMMES SONT PRÉSENTÉS À TITRE INFORMATIF SEULEMENT. LES BARRIÈRES PEUVENT ÊTRE DIFFÉRENTES DE CELLES ILLUSTRÉES ÉTAPE 1: Attachez les rails de conversion (non inclus) aux poteaux gauche et droite (C &...
- Page 46 BERCEAU CONVERTIBLE 5 EN 1 INSTRUCTIONS D'ASSEMBLAGE DE GRAND LIT (TÊTE DE LIT ET PIED DE LIT SEULEMENT) LES BARRIÈRES DE CONVERSION ET LUMELLES NE SONT PAS COMPRISES. LES DIAGRAMMES SONT PRÉSENTÉS À TITRE INFORMATIF SEULEMENT. LES BARRIÈRES PEUVENT ÊTRE DIFFÉRENTES DE CELLES ILLUSTRÉES ÉTAPE 1: Fixez les barrières de conversion (non inclus)aux poteaux arrière et avant (C, D, F &...
- Page 47 BERCEAU CONVERTIBLE 5 EN 1 Transformez votre berceau convertible 5 en 1 en lit d'enfant avec la barrière de conversion de lit pour lit d'enfant...
- Page 48 BERCEAU CONVERTIBLE 5 EN 1 ATTENTION: Cette unité est destinée à être utilisé uniquement avec les produits et/ou les poids maximum indiqués. L'utilisation avec d'autres produits et/ou des produits plus lourds que les poids maximum indiqués peut entraîner une instabilité ou causer des blessures.