Advertisement
Available languages
Available languages
Quick Links
CARDIN ELETTRONICA S.p.A
Via del lavoro, 73 – Z.I. Cimavilla - 31013 Codognè (TV) Italy
Tel: +39/0438.404011 / Fax: +39/0438.401831
e-mail (Italy): sales.office.it@cardin.it
e-mail (Europe): sales.office@cardin.it
SERIAL Nr.
ZVL558.00
The CDRX12 series conforms to the essential requirements of the directive 99/05/CE and
the technical reference standards have been applied.
Class three appliance conforming to UNI EN ISO 13849-1
BARRIERA ALL'INFRAROSSO MODULATO AD OTTICHE ORIENTABILI
Messa in funzione ed uso
Disegni tecnici d'installazione e riferimento
INFRARED MODULATED BARRIERS WITH ADJUSTABLE LENSES
Set up and user instructions
Installation and reference drawings
BARRIÈRES À L'INFRAROUGE MODULÉ À TÊTES OPTIQUES ORIENTABLES
Mise en service et utilisation
Dessins techniques d'installation et référence
MODULIERTE INFRAROTLICHTSCHRANKEN MIT VERSTELLBAREN OPTIKEN
Inbetriebnahme und Benutzung
Technische Installations- und Referenzzeichnungen
BARRERAS DE RAYOS INFRARROJOS, MODULADOS CON ÓPTICAS ORIENTABLES
Puesta en función y uso
Dibujos técnicos de instalación y referencias
NAME
CDRX12
1
www.cardin.it
MODEL
-
DATE
27.08.2014
pagine
2-7
pagine
32-39
pages
8-13
pages
32-39
pages
14-19
pages
32-39
Seiten
20-25
Seiten
32-39
páginas
26-31
páginas
32-39
Advertisement

Related Manuals for Cardin ZVL558.00


Summary of Contents for Cardin ZVL558.00
- Page 1 CARDIN ELETTRONICA S.p.A Via del lavoro, 73 – Z.I. Cimavilla - 31013 Codognè (TV) Italy Tel: +39/0438.404011 / Fax: +39/0438.401831 e-mail (Italy): sales.office.it@cardin.it www.cardin.it e-mail (Europe): sales.office@cardin.it SERIAL Nr. MODEL DATE NAME ZVL558.00 CDRX12 27.08.2014 The CDRX12 series conforms to the essential requirements of the directive 99/05/CE and the technical reference standards have been applied.
-
Page 2: Possibilità D'impiego
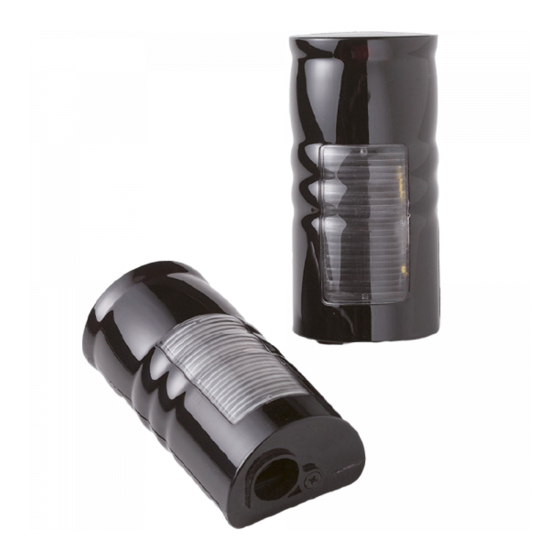
Avvertenze Il presente manuale si rivolge a persone abilitate all'installazione di "Apparecchi utilizzatori di energia elettrica" e richiede una buona conoscenza della tecnica, esercitata in forma professionale. L'uso ed installazione di questa apparecchiatura deve rispettare rigorosamente le indicazioni fornite dal costruttore e le normative di sicurezza vigenti. - Page 3 Il sistema è composto di: 1 proiettore + pacco batterie 1 ricevitore Portata fotocellule: 12 m in tutte le condizioni atmosferiche. Installazione fotocellule (fig. 1-5) In caso di installazioni comprendenti più coppie di fotocellule occorre tener presente, che due ricevitori installati sullo stesso lato possono essere interessati dall'identico proiettore, montato sul lato opposto, senza per questo compromettere il regolare funzionamento del sistema.
- Page 4 - fissare la base a muro utilizzando le viti e Fisher - eseguire le connessioni elettriche seguendo lo schema illustrato in figure 4; - applicare un strato di silicone attorno al cavo ed il tappo in gomma per garantire il grado di protezione IP55;...
- Page 5 Centratura CDRX12 (fig. 4, 5, 6) • Alimentate le fotocellule risulterà: sul proiettore led rosso spento e sul ricevitore led rosso acceso con fotocellula non centrata o spento con fotocellula centrata. • Impostare il dip switch S3 del trasmettitore: Dip 1 = ON - Dip 2 = ON POS 3 POS 1 POS 2...
- Page 6 Impostazione di funzionamento Selezione velocità di segnalazione della condizione d’allarme, dip-switch S1 (fig. 4) Questa impostazione viene effettuata tramite dip 1 del dip-switch S1 sulla scheda del ricevitore CDRX12: - con dip 1 in posizione OFF - segnalazione allarme immediata - bassa immunità ai disturbi; - con dip 1 in posizione ON - segnalazione allarme ritardata - alta immunità...
- Page 7 Tabella di risparmio energetico della batteria Trasmettitore Durata in mesi con Durata in mesi con Durata in mesi con dip-switch S3 jumper in posizione jumper in posizione jumper in posizione 'L' sensibilità bassa 'M' sensibilità media 'H' sensibilità alta Dip 1 - Dip 2 0 - 4 m 4 - 8 m 8 - 12 m...
- Page 8 REMARKS These instructions are aimed at professionally qualified "installers of electrical equipment" and must respect the local standards and regulations in force. The use and installation of these appliances must rigorously respect the indications supplied by the manufacturer and the safety standards and regulations in force. Attention! Only for EU customers - WEEE marking.
- Page 9 The system is made up of: - 1 projector + battery pack; - 1 receiver Photoelectric cells range: 12 m under all weather conditions. Installing the photoelectric cells (fig. 1-5) In cases where the installation consists of more than one device the following must be taken into account; two receivers installed on the same side can be operated by one single projector on the opposite side without compromising the correct functioning of the system.
- Page 10 - fasten the base to the wall using the supplied screws and rawlplugs - wire up the receiver following the electrical drawing shown in figure 4; - seal the wires and the rubber gasket with a layer of silicon in order to guarantee a protection grade of IP55;...
- Page 11 CDRX12 fine tuning alignment (fig. 4, 5, 6) • Once powered up the transmitter red led will be OFF, the receiver red led will be LIT if the lens are not aligned and OFF if the photoelectric cells are correctly aligned. •...
- Page 12 Dip-switch and jumper settings Selecting the alarm cut in speed, dip-switch S1 (fig. 4) This setting is carried out using dip 1 of dip-switch S1 on the CDRX12 receiver circuit board: - with dip 1 in position OFF - immediate alarm cut in - low ambient noise immunity; - with dip 1 in position ON - delayed alarm cut in - high ambient noise immunity.
- Page 13 Battery energy saving table Transmitter Lifetime in months Lifetime in months Lifetime in months dip-switch S3 with the jumper in position with the jumper in position with the jumper in position 'L' low sensitivity 'M' medium sensitivity 'H' long sensitivity Dip 1 - Dip 2 0 - 4 m 4 - 8 m...
- Page 14 Remarque La présente notice étant destinée à des personnes habilitées à l’installation d’APPAREILS ÉLECTRIQUES, elle requiert une bonne connaissance de la technique appliquée professionnellement. L’installation et l’utilisation de cet appareil doivent respecter strictement les instructions fournies par le fabricant et les normes de sécurité...
- Page 15 Ce système est composé de: 1 projecteur + paquet batterie 1 récepteur Portée cellule photoélectrique: 12 m en toutes conditions atmosphériques. Installation des cellules photoélectriques (fig. 1-5) En cas d’installations comprenant plusieurs paires de cellules photoélectriques, te nir comp te que deux ré cep- teurs in stal lés du mê...
- Page 16 - fixer l’embase au mur avec les vis et chevilles (Fisher) - faire les branchements électriques suivant le schéma de la figure 4; - appliquer une couche de silicone autour du câble et du passe-fils en caoutchouc afin de garantir un indice de protection IP55;...
- Page 17 Centrage du CDRX12 (fig. 4, 5, 6) • Une fois que les cellules photoélectriques sont sous tension, la led rouge sur le projecteur est éteinte et la led rouge sur le récepteur s’avère allumée quand la cellule photoélectrique n’est pas centrée, et éteinte quand elle est centrée. POS 3 POS 1 POS 2...
- Page 18 Réglage du fonctionnement Sélection de la vitesse de signalisation de la condition d’alarme, dip-switch S1 (fig. 4) Ce réglage s’effectue au moyen du dip 1 du dip-switch S1 sur la carte du récepteur CDRX12: - avec dip 1 en position OFF - signalisation immédiate de l’alarme – faible immunité aux perturbations; - avec dip 1 en position ON - signalisation retardée de l’alarme –...
- Page 19 Tableau de l’économie d’énergie de la batterie Projecteur Durée en mois avec Durée en mois avec Durée en mois avec dip-switch S3 cavalier en position cavalier en position cavalier en position 'L' sensibilité basse 'M' sensibilité moyenne 'H' sensibilité haute Dip 1 - Dip 2 0 - 4 m 4 - 8 m...
- Page 20 Hinweise Diese Bedienungsanleitung wendet sich an Personen, die zur Installation von “Elektrogeräten” berechtigt sind und setzt gute technische Kenntnisse voraus, die in fachmännischer Weise anzuwenden sind. Die Benutzung und Installation dieses Geräts muss unter der strengen Befolgung der Herstelleranweisungen und geltenden Sicherheitsvorschriften erfolgen. Achtung! Nur für EG-Kunden - WEEE-Kennzeichnung.
- Page 21 Das System besteht aus: 1 Sender + Batterienpaket; 1 Empfänger. Lichtschrank-Reichweite: 12 m unter allen Witterungsbedingungen. Installation der Lichtschrankpaaren (Abb. 1-5) Bei Installationen mit mehreren Lichtschrankenpaaren, sollte man wissen, dass wenn zwei Empfänger auf der gleichen Seite montiert werden, sie von dem gleichen Sender, der auf der gegenüberliegenden Seite montiert wird, getroffen werden können, ohne dass dadurch das ordentliche Funktionieren des Systems beeinträchtigt wird.
- Page 22 - die Basis mit Dübeln und Schrauben an der Wand befestigen - die elektrischen Anschlüsse nach dem in Abb. 4 gezeigten Schema ausführen; - eine Schicht aus Silikon um das Kabel und den Gummipuffer auftragen, um deren Schutz entspre- chend IP55 zu gewährleisten; - die Abdeckung , einhängen, nach unten drehen und mit der Basis verbinden;...
- Page 23 Zentrierung CDRX12 (Abb. 4, 5, 6) • Nach Anschluss an die Stromversorgung: ist die rote LED des Senders AUS, während die rote LED des Empfängers bei nicht ausgerichteter Lichtschranke AN und bei korrekt POS 3 ausgerichteter Lichtschranke AUS ist. POS 1 POS 2 •...
- Page 24 Einstellung des Betriebs Auswahl der Meldegeschwindigkeit des Alarmzustandes, DIP-Schalter S1 (Abb. 4) Diese Einstellung erfolgt durch den DIP 1 des DIP-Schalters S1 auf der Platine des Empfängers CDRX12: - mit DIP 1 Position OFF - Sofortiges Alarmsignal - geringe Störfestigkeit; - mit DIP 1 Position ON - Verzögertes Alarmsignal - hohe Störfestigkeit.
- Page 25 Tabelle zur Energieeinsparung der Batterie Projektor Lebensdauer in Monaten Lebensdauer in Monaten mit Lebensdauer in Monaten mit DIP-Schalter S3 mit Jumper in Position 'L', Jumper in Position 'M', mittlere Jumper in Position 'H', hohe geringe Empfindlichkeit Empfindlichkeit Empfindlichkeit Dip 1 - Dip 2 0 - 4 m 4 - 8 m 8 - 12 m...
- Page 26 Advertencias El presente manual se dirige a personas habilitadas a instalar los "Aparatos que utilizan energía eléctrica" y requiere un buen conocimiento de la técnica, ejercida de forma profesional. El uso y la instalación de este equipo deben cumplir estrictamente las indicaciones comunicadas por el fabricante y las normas de seguridad vigentes.
- Page 27 El sistema está compuesto por: 1 emisor + paquete de baterías; 1 receptor. Alcance fotocélula: 12 m para cualquier condición atmosférica. Instalación fotocélula (fig. 1-5) En caso de instalaciones que incluyen varios pares de fotocélulas es necesario tener en cuenta que dos receptores instalados por el mismo lado pueden depender del mismo emisor, montado por el lado opuesto, sin que esto afecte al funcionamiento corriente del sistema.
- Page 28 - fijar la base en la pared usando los tornillos y tacos Fisher - realizar las conexiones eléctricas siguiendo el esquema ilustrado en la figura 4; - aplicar una capa de silicona alrededor del cable y de la tapa de goma para garantizar el grado de protección IP55;...
- Page 29 Centraje CDRX12 (fig. 4, 5, 6) • Alimentadas las fotocélulas, resultará lo siguiente: en el proyector led rojo apagado y en el receptor led rojo encendido con la fotocélula no centrada, o apagado con la fotocélula centrada. POS 3 POS 1 POS 2 •...
- Page 30 Configuración de funcionamiento Selección de la velocidad de señalización de la condición de alarma, dip-switch S1 (fig. 4) Esta configuración se efectúa mediante dip 1 del dip-switch S1 en la tarjeta del receptor CDRX12: - con dip 1 en posición OFF - señalización alarma inmediata – baja inmunidad a las perturbaciones; - con dip 1 en posición ON - señalización alarma retrasada –...
- Page 31 Tabla de ahorro energético de la batería Transmisor Duración en meses con Duración en meses con Duración en meses con dip-switch S3 jumper en posición jumper en posición jumper en posición 'L' caudal bajo 'M' caudal medio 'H' caudal alto Dip 1 - Dip 2 0 - 4 m 4 - 8 m...
- Page 32 ESEMPI DI INSTALLAZIONE - INSTALLATION EXAMPLES - EXEMPLES D'IN- STALLATION - INSTALLATIONSBEISPIELE - EJEMPLOS DE INSTALACIÓN All rights reserved. Unauthorised copying or use of the information contained in this document is punishable by law Funzionamento con posizionamento in asse Operation with aligned positioning Fonctionnement avec positionnement aligné...
- Page 33 Drawing number : DM0949 Chiusura box CDRX12 RX Product Code : CDRX12 Date : 06-10-2014 Draft : P.J.Heath CARDIN ELETTRONICA S.p.A - 31020 San Vendemiano (TV) Italy - via Raffaello, 36 Tel: 0438/401818 Fax: 0438/401 Description: Installazione RADIOSHIELD Drawing number : DM0922...
- Page 34 CDRX12 CARDIN ELETTRONICA S.p.A - 31020 San Vendemiano (TV) Italy - via Raffaello, 36 Tel: 0438/401818 Fax: Draft : P.J.Heath Date : 07-10-2014 CARDIN ELETTRONICA S.p.A - 31020 San Vendemiano (TV) Italy - via Raffaello, 36 Tel: 0438/401818 Fax: 0438/401831...
- Page 35 IMPOSTAZIONE FOTOCELLULE - PHOTOCELL SETTINGS - RÉGLAGE CELLULES PHOTOÉLECTRIQUES - EINSTELLUNG DER INFRAROTLICHTSCHRANKEN - CONFIGURACIÓN DE LAS FOTOCÉLULAS Proiettore - Transmitter - Ricevitore - Receiver - Récepteur Projecteur Sender - Emisor Empfänger - Receptor DC0548 CS1459 Test Point RELAY NA NC...
- Page 36 Récepteur - Empfänger Receptor TESTER Description : Centratura Drawing number : DM0917 RADIOSHIELD - CDR4-8 Product Code : RADIOSHIELDCDR Draft : P.J.Heath Date : 03-03-2014 CARDIN ELETTRONICA S.p.A - 31020 San Vendemiano (TV) Italy - via Raffaello, 36 Tel: 0438/401818 Fax: 0438/401831...
- Page 37 CARATTERISTICHE TECNICHE - TECHICAL SPECIFICATIONS Italiano - grado di protezione IP55 - portata: 12 m in tutte le condizioni atmosferiche. - alimentazione ricevitore (dal programmatore) ................12/24V ac-dc - assorbimenti ricevitore: 12 Vac/dc, 50 mA 24 Vac/dc, 53 mA - alimentazione trasmettitore (batteria litio modello ZRA3.0-3.8-W).............. 3V - assorbimento medio trasmettitore......................
- Page 38 Français - indice de protection IP55 - portée: 12 m en toutes conditions atmosphérique. - alimentation récepteur (du programmateur) ................12/24V ac-dc - Intensité absorbée récepteur: 12 Vac/dc, 50 mA 24 Vac/dc, 53 mA - alimentation projecteur (batterie au lithium modèle ZRA3.0-3.8-W) ............3V - consommation moyenne projecteur .....................
- Page 39 Español - grado de protección IP55 - alcance: 12 m para cualquier condición atmosférica. - alimentación emisor (desde el programador) ................12/24V ac-dc - absorción emisor: 12 Vac/dc, 50 mA 24 Vac/dc, 53 mA - alimentación transmisor (batería litio modelo ZRA3.0-3.8-W) ..............3V - absorción media emisor.........................
- Page 40 GROUP CARDIN HOTLINE ITALY 04 38 40 41 50 CARDIN ELETTRONICA S.P.A VIA DEL LAVORO, 73 – Z.I. CIMAVILLA - 31013 CODOGNÈ (TV) ITALY GPS 45.864, 12.375 TÉL: (+39) 04 38 40 40 11 FAX: (+39) 04 38 40 18 31 E-MAIL (ITALY): SALES.OFFICE.IT@CARDIN.IT...
Need help?
Do you have a question about the ZVL558.00 and is the answer not in the manual?
Questions and answers