Table of Contents
Advertisement
Quick Links
Advertisement
Table of Contents

Subscribe to Our Youtube Channel
Summary of Contents for Xylem Bell & Gossett CRS
- Page 1 Instruction Manual 0121-01_1.0 Coalescing-Style Air and Sediment Separator...
-
Page 3: Table Of Contents
Table of Contents Table of Contents 1 Introduction and Safety......................2 1.1 Introduction........................2 1.2 Safety terminology and symbols..................2 1.3 User safety........................3 1.4 Protecting the environment....................3 1.5 Spare parts........................3 1.6 End of life product disposal................... 3 2 Transportation and Storage....................4 2.1 Examine the delivery..................... -
Page 4: Introduction And Safety
This includes any modification to the equipment or use of parts not provided by Xylem. If there is a question regarding the intended use of the equipment, please contact a Xylem representative before proceeding. -
Page 5: User Safety
• Clean-up of spills Exceptional sites CAUTION: Radiation Hazard Do NOT send the product to Xylem if it has been exposed to nuclear radiation, unless Xylem has been informed and appropriate actions have been agreed upon. 1.5 Spare parts CAUTION: Only use the manufacturer’s original spare parts to replace any worn or faulty components. -
Page 6: Transportation And Storage
2 Transportation and Storage 2 Transportation and Storage 2.1 Examine the delivery 2.1.1 Examine the package 1. Examine the package for damaged or missing items upon delivery. 2. Record any damaged or missing items on the receipt and freight bill. 3. -
Page 7: Product Description
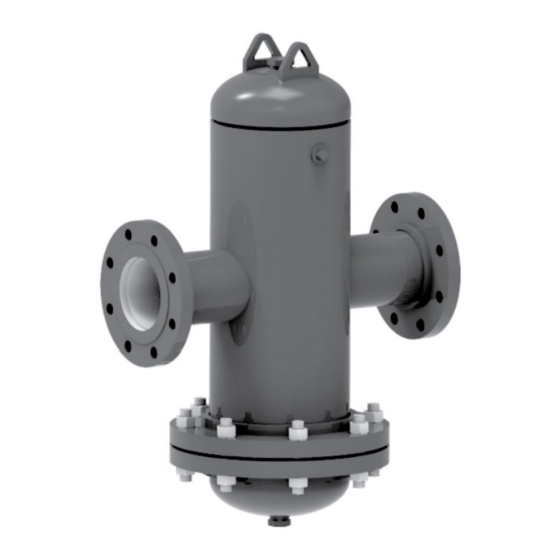
3 Product Description 3 Product Description 3.1 Product overview The CRS removes free and entrained air and separates dirt, sediment, and unwanted material from the hydronic system. The CRS has the following optional accessories: • Air vent • Blowdown valve •... -
Page 8: Parts
3 Product Description • The entrained air is pulled out of solution and forms microbubbles, which coalesce around the media and form larger bubbles. • The sediment and dirt particles are strained or filtered from the water and collected in the bottom of the container. -
Page 9: Installation
4 Installation 4 Installation 4.1 Precautions Introduction and Before starting work, make sure that the safety instructions in the chapter Safety on page 2 have been read and understood. WARNING: STRONG MAGNETIC FIELD This product may contain strong magnets which can be harmful to pacemaker wearers and others with medical implants. -
Page 10: Prerequisites
4 Installation 4.2 Prerequisites • The CRS separator must be installed before the pump inlet to increase the pump performance and seal life. • The CRS separator must not be installed on a dead pipe or in an overhead joist space. 4.3 Install the CRS 1. -
Page 11: Install The Insulation
4 Installation WARNING: RUPTURE OR EXPLOSION HAZARD Like most pressurized tanks, this tank can over time corrode, weaken, and burst or explode. Failure to follow this instruction may result in serious personal injury or death and property damage. WARNING: Chlorine & aggressive water hazard The water quality can significantly influence the life of your product. -
Page 12: Operation
5 Operation 5 Operation 5.1 Precautions Introduction and Before starting work, make sure that the safety instructions in the chapter Safety on page 2 have been read and understood. 5.2 Start up of the system 1. Flush the CRS to remove the dirt, sediment, magnetite, and other contaminants that are collected in the first 24 to 48 hours. -
Page 13: Maintenance
6 Maintenance 6 Maintenance 6.1 Precautions Introduction and Before starting work, make sure that the safety instructions in the chapter Safety on page 2 have been read and understood. 6.2 Examine the CRS WARNING: Corrosion or leakage are indications that the Series CRS coalescing removal separator must be replaced. -
Page 14: Clean The Magnetic Insert
6 Maintenance 4. Dispose of the old gasket. 5. Replace the cover head gasket with a new one. 6. Install the housing cover. 7. Tighten the flange bolts. The bolts must be tightened in increments of 30%, 60%, and 100%: Connection size, in Body size, in (mm) Bolt size, in (mm) Number of bolts... -
Page 15: Drain The Fluid
6 Maintenance 1. Remove the (4) #10-32 screws with a 5/32 inch hex Allen key. 2. Carefully slide the magnetic insert out from the bottom port of the series CRS separator. 6.4.3 Drain the fluid 1. Wait for 10 minutes before flushing the separator. 1. - Page 16 6 Maintenance The PTFE tape typically does not require curing to achieve the maximum pressure resistance. CRS Instruction Manual...
- Page 20 The original instruction is in English. All non-English instructions are translations of the original instruction. Tel: (847) 966–3700 Fax: (847) 965–8379 © 2021 Xylem Inc www.xylem.com/bellgossett Bell & Gossett is a trademark of Xylem Inc or one of its subsidiaries. 0121-01_1.0_en-US_2021-01_IOM_CRS...

Need help?
Do you have a question about the Bell & Gossett CRS and is the answer not in the manual?
Questions and answers