Advertisement
Quick Links
Introduction.
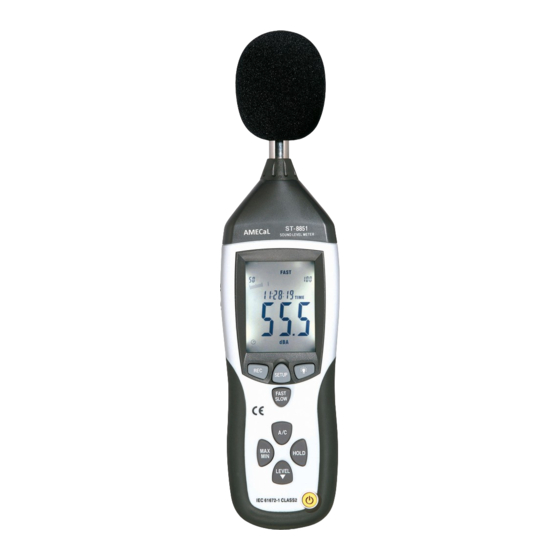
This digital logging Sound Level meter is a precision instrument used to meet IEC61672-1 Class 2 Regulations. It
measures sound levels and gives the facility of being able to record and store measured values. When not in use the
instrument should be kept in the carry case to protect it from damage.
Features.
3 Measuring Ranges with Auto Ranging or Manual Range Selection
Over Range and Under Range Indication.
Precision ½" electret condenser microphone.
High accuracy and rapid response.
"A" & "C" Frequency Weighting.
Fast and Slow Response Filters
Data Hold, Min/Max Memory.
56mm High Contrast LCD with 41 Segment Bargraph, Function Indicators and Backlight.
Auto-power Off after 15 minutes with User Disable.
USB output.
Accessories Included: Carry Case, Software, USB Connection Cable, Acoustic Wind Muffler, Mini Tripod and
AC/DC Power Adaptor.
Specifications.
3 Measuring Ranges 30 to 80dB, 50 to 100db, 80 to 130dB or Auto Range 30 to 130dB.
Accuracy: 1.4dB
Sampling rate of 2.5 times per second (selectable rate for logging).
Operating temperature and humidity: 0C ~ 40C and 0%rh ~ 80%rh.
Storage conditions: -10C ~ 50C and 0%rh ~ 70%rh.
Power Source: 1 x 9V battery or AC/DC Adaptor (Supplied).
Meter Dimensions: 290L x 80W x 50H (mm).
Weight of Unit: 350g.
Function Buttons.
11.
Power On/Off button.
3.
Record Button.
4.
Set Up Button.
5.
Fast/Slow Response Filters Button.
6.
Min/Max Memory Button.
7.
Level Button.
8.
Backlight Button.
9.
A/C Frequency Button.
10.
Data Hold Button
SL-8851
USB Logging Sound Level Meter Manual
1
2
3
REC
FAST
4
5
A/ C
6
7
8
9
10
11
Advertisement

Related Manuals for ATP Instrumentation SL-8851


Summary of Contents for ATP Instrumentation SL-8851
- Page 1 SL-8851 USB Logging Sound Level Meter Manual Introduction. This digital logging Sound Level meter is a precision instrument used to meet IEC61672-1 Class 2 Regulations. It measures sound levels and gives the facility of being able to record and store measured values. When not in use the instrument should be kept in the carry case to protect it from damage.
- Page 2 12. AC/DC Adaptor Socket. 13. USB Connection Port. 14. AC/DC Signal Output Port. 15. Calibration Port. 16. 4mm Camera Bush. 17 Battery Cover (Slide). 18 Microphone. Operating Instructions. Power On/Off, Auto Power Off and Display Back Light. To turn the meter on press the yellow power button (No 11) on the bottom of the unit.
- Page 3 It will also show 00:00. To change the sampling rate press Level (No 7) and press Hold (No 10) to save the new sampling rate. 00:22 means the meter will take a reading every 22seconds and 00:02 is every 2 seconds. Data Hold.
- Page 4 This allows the user to make external standard level calibration adjustments. (Only adjust using a traceable calibrator). This should not be used for traceable calibration adjustments which should be carried out by a qualified technician in a certified laboratory. Maintenance and Calibration. The instrument should be cleaned using a damp cloth to remove any dust or dirt.
- Page 5 Press the ‘SETUP’ button once to remove this symbol from the bottom left hand corner of the display. If you do not disable auto power off by removing the clock symbol you will not be able to connect your meter to the software to download data.
- Page 6 When the connection is made, the software will show an image of the instrument and display measured values the same as the instrument. General Recording using the Software Open the software and connect the instrument. On the top menu icons, click on RealTime(R). On the drop down menu click Setup(U).
- Page 7 Trouble Shooting Meter will not connect First make sure when you are using the meter with the software that a clock symbol is not showing in the bottom left hand corner, because this is the symbol that indicates that auto power off is enabled. If this is not disabled by pressing SETUP on the meter before connecting, you will not be able to connect it at all.
- Page 8 If the com port assigned to your hardware is showing as higher than 10 in Device Manager, please follow the procedure below. While you are still in the Device Manager window, right hand click on your hardware to bring up a menu (as seen below) Select Properties at the bottom of this menu, to bring up the Properties window for the Silicon Labs hardware.
- Page 9 Uninstall the software and see if you can find the hardware listed in the add/remove programs If you can see it, remove it, so you can re-install everything again. If you cannot see it, remove just the software and try re-installing everything from scratch. UK Distributor ATP Instrumentation Ltd Tournament Way Ivanhoe Industrial Estate Ashby-De-La-Zouch...
Need help?
Do you have a question about the SL-8851 and is the answer not in the manual?
Questions and answers