
Related Manuals for The Singing Machine SML2350


Summary of Contents for The Singing Machine SML2350
- Page 1 SML2350 INSTRUCTION MANUAL www.singingmachine.com The Singing Machine® is a registered trademark of The Singing Machine Co., Inc.
-
Page 2: Important Safety Information
Warnings CAUTION: TO PREVENT ELECTRIC SHOCK, MATCH WIDE BLADE OF CAUTION PLUG TO WIDE SLOT AND FULLY INSERT. RISK OF ELECTRIC SHOCK DO NOT OPEN WARNING: TO PREVENT FIRE OR SHOCK HAZARD, DO NOT EXPOSE THIS UNIT TO RAIN OR MOISTURE. CAUTION: TO REDUCE THE RISK OF ELECTRIC SHOCK, DO NOT REMOVE COVER (OR BACK). - Page 3 Included What’s in the box. Main Unit Wired Microphone AC Adapter Audio/Video Cables Manual — E2 —...
-
Page 4: Master Volume
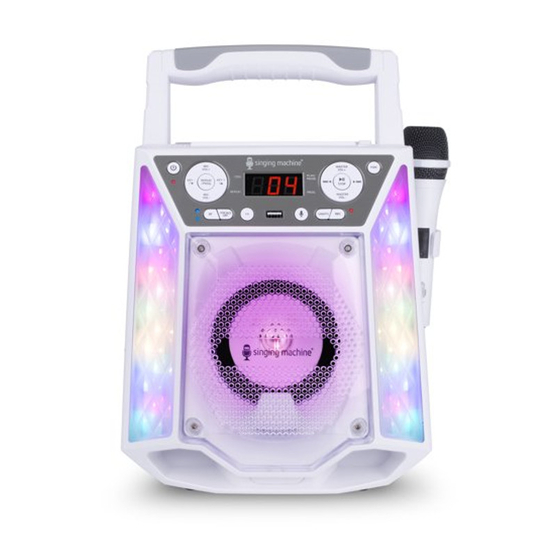
Location of Controls (Top/Front) Virtual Assistant wake up 10. MIC VOLUME + Button 21. USB slot microphone 11. Handle 22. Speaker 2. Handle release Button ON/STANDBY Button Virtual Assistant wake 3. FUNCTION Button up Button 13. Power indicator 4. MASTER VOLUME + 24. -
Page 5: Location Of Controls (Rear)
Location of Controls (Rear) 1. Line In Jack 6. AUDIO OUT (R) Jack 2. Mic 2 Jack 7. AUDIO OUT (L) Jack 3. Mic 1 Jack 8. DC In Jack 4. Mic Holders 9. Battery Compartment 5. VIDEO OUT Jack Location of Controls (Display) PLAY/PAUSE PROGRAM... - Page 6 (White and Red) to the AUDIO OUT jacks located on the back AUDIO OUT VIDEO OUT (white - L (yellow) of the Singing Machine. red - R) REAR VIEW OF TV VIDEO AUDIO INPUT INPUT...
-
Page 7: Making The Connections
SML283-eng and fra.V4_Layout 1 11/7/16 8:37 AM Page 3 Connection MAKING THE CONNECTIONS Connecting to AC Power Insert the AC power cord into a INSTALLATION OF BATTERIES conveniently located AC outlet having 120V AC, 60Hz. “C” size “C” size UM2 1.5V UM2 1.5V Note: Make all connections before connecting to... - Page 8 Operation Connecting to Line In Jack Connect an external device by using an appropriate cable (3.5mm audio cable not included) as shown. To External Unit AUDIO OUTPUT / HEADPHONE JACK Note: LINE IN See page E20 to select and use the Line In function.
- Page 9 Operation Playing a CDG This unit is designed to play CDs and CDGs bearing the identification logo respectively. If the disc does not conform to the standard, it may not play properly. Notes: • What is a CD+G? A CD+G (CD+Graphics) is the standard format for most karaoke discs that will display the words on the screen.
- Page 10 Operation Playing a CD (Continued) Press the /STOP button to start playback; if listening to a CD+G file, the image and lyrics will appear on the TV screen (if connected). When a CDG disc is inserted, the CDG indicator will light.
- Page 11 Operation Playing a CD (Continued) SKIP: Advance or go back one track by pressing the (Navigation) button or (Navigation) button respectively. REPEAT: During playback, press the REPEAT/PROG button once to repeatedly play the selected song; the Repeat indicator will blink. Press the REPEAT/ PROG button a second time to repeatedly play the whole CD;...
- Page 12 Operation Playing a CD (Continued) PAUSE: During playback, if you wish to pause the disc momentarily, press the STOP button; the PLAY/PAUSE indicator will blink. Press again to resume normal playback. Press and hold the /STOP button to stop playback. RECORD YOUR VOCAL PERFORMANCE: Insert a USB drive first, then...
- Page 13 Operation Playing Songs from the USB Connect the unit as described previously; it should be connected to a TV. Press the button to turn the unit on. Insert a USB flash drive into the USB slot on the unit. Repeatedly press the FUNCTION button to select the USB mode;...
- Page 14 Operation Playing Songs from the USB (Continued) Connect microphone(s) and slide the ON/OFF switch on the microphone to the ON position. Press the MIC VOLUME + or – button as desired, which will affect both microphones. SING-ALONG WITH BUILT-IN VOICE CHANGERS There are 6 built-in voice changers in this unit.
- Page 15 Operation Playing Songs from the USB (Continued) SKIP: Advance or go back one track by pressing the / or / buttons. When playing any audio from the USB, press and hold / or / buttons. The USB will search at high speed in the forward or backward direction.
-
Page 16: Operation
Operation Playing Songs from the USB (Continued) PROGRAM: You can program up to 20 tracks for playback in any desired order. While in the Stop mode, press the REPEAT/PROG button; the Program indicator will blink and ”P01” will appear on the display indicating the first program is ready to program. - Page 17 Operation Using a Bluetooth Device Connect the unit as described previously. Press the button to turn the unit on. Repeatedly press the FUNCTION button to select the Bluetooth; “bt” will appear in the display. The unit automatically searches for and pairs a previously paired Bluetooth device (if previously paired).
- Page 18 Operation Using a Bluetooth Device (Continued) The Bluetooth indicator will light solid blue and a chime will sound. Notes: • If your Bluetooth prompts you for a passcode during the pairing process, please enter “0000” to connect. • On some Bluetooth devices, once pairing is complete, select your Bluetooth device as “Use as Audio Device”...
- Page 19 Operation Using a Bluetooth Device (Continued) To sing without the lead singer on the recording, press the VOCALS OFF button, the bluetooth indicator will light solid red. To resume the lead singer, press the VOCALS OFF button again. Note: Lead vocal removal may work better on some songs than others.
- Page 20 Operation Using a Bluetooth Device (Continued) RECORD YOUR VOCAL PERFORMANCE: To record your singing as well as the music, press the REC button. Recording will begin and the record indicator will light solid. When done recording, press the REC button again; the record indicator will turn off.
- Page 21 Operation Using the LINE IN Jack Connect the unit as described previously. Press the button to turn the unit on. Connect the external unit to the LINE IN Jack on the back of this unit. Connecting an external unit will allow the audio to be played through your Singing Machine.
- Page 22 Operation Using the LINE IN Jack (Continued) SING-ALONG WITH BUILT-IN VOICE CHANGERS There are 6 built-in voice changers in this unit. Repeatly press the FX button to select different vocal effects. Display will show: EF0 - NONE EF1 - ECHO EF2 - FEMALE EF3 - MALE EF4 - CHIPMUNK...
- Page 23 • Remove (eject) the USB flash drive from your Select and purchase your favorite computer. karaoke music from the Singing Turn on the Singing Machine and connect the USB Machine Download Store. flash drive. Download your selected purchase(s) from the Singing Machine Digital •...
-
Page 24: Troubleshooting Guide
Troubleshooting Guide Should this unit exhibit a problem, check the following before seeking service: No Power • Power is not on; press the button to turn power on. • Confirm the AC adapter is connected securely to the back of the unit. •... -
Page 25: Specifications
Specifications AUDIO Output Power ....................8 Watts (RMS) 10% THD Output Impedance ........................8 Ohms CD SECTION Frequency Response..................... 100Hz - 20kHz Signal-to-Noise Ratio ....................50dB (A-WTD) Number of Programs ............20 Step Random Access Programming BLUETOOTH Bluetooth Version ..........................V5.0 Working Distance ..........Up to 30 feet/10 meters measured in open space Format .............................. - Page 26 Copyright © 2021 - All Rights Reserved. The Singing Machine Company, Inc. 4060 E Jurupa Street, Unit B Ontario, CA 91761-1413 USA U.S. Representative Company Name : The Singing Machine Company, Inc. Address : 6301 NW 5th Way, Suite 2900, Fort Lauderdale, FL33309, USA Telephone...
Need help?
Do you have a question about the SML2350 and is the answer not in the manual?
Questions and answers