Table of Contents
Advertisement
BEFORE YOU BEGIN
·
Please read these instructions carefully to
familiarize yourself with the required tools, materials,
and installation sequences. Follow the sections that
pertain to your particular installation. This will help
you avoid costly mistakes. In addition to proper
installation, read all operating and safety instructions.
·
All information is based on the latest product
information available at the time of publication.
Kohler China Ltd. reserves the right to make
changes in product characteristics, packaging, or
availability at any time without notice.
·
These instructions contain important care, cleaning,
and warranty information-
instructions for the consumer.
·
Please provide adequate available space for the
bath unit in accordance with roughing-in. Arrange
the location of drain in advance.
IMPORTANT:
All installations must comply with council and local
authority by-laws. It is the responsibility of the installer
to ensure that the waste is made watertight by means
of silicone sealant or caulking compound.
CAUTION: Risk of personal injury.
extremely heavy. Obtain sufficient help to
carefully lift or move the bath.
CAUTION: Risk of personal injury.
the risk of injury, children or people with
infirmities should not be allowed to use this
product without close, continuous supervision.
CAUTION: Risk of personal injury.
remove, adjust, or alter any factory-installed
components of this product unless explicitly
directed to within this installation guide.
CAUTION: Risk of product damage.
support the bath by the rim.
NOTICE:
This bath is designed for either a new
three-wall alcove or an existing alcove for a
standard 60" (1524 mm) bath. For installation in
an existing alcove, gap panels are provided and
will likely require cutting to fit.
Note:
K-156T-LCP/RCP is designed for below-
the-floor drain installation. K-23769T-LCP/RCP is
designed for above-the-floor drain installation.
1397340-T01-A
please leave these
This bath is
To reduce
Do not
Do not
SHANGHAI KOHLER LTD.,
FENG XIAN DISTRICT, SHANGHAI, CHINA
·
·
·
·
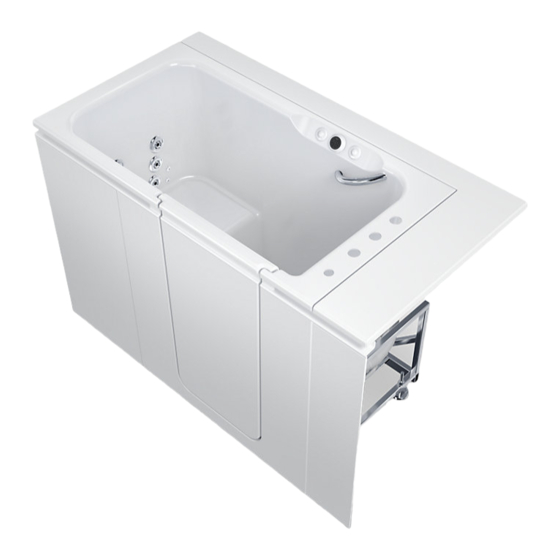
K-156T-LCP/RCP
K-23769T-LCP/RCP
NO.368, MIN LE ROAD,
POST CODE: 201419
368
©
Copyright Kohler China Investment Co., Ltd. 2019
-1-
©
BELAY
INSTALLATION INSTRUCTIONS
WALK IN WP
1.3m
K-156T-LCP/K-156T-RCP
K-23769T-LCP/K-23769T-RCP
60
(1524
201419
)
L
2019
Advertisement
Table of Contents

Subscribe to Our Youtube Channel
Related Manuals for Kohler BELAY K-156T-LCP


Summary of Contents for Kohler BELAY K-156T-LCP
- Page 1 · · All information is based on the latest product information available at the time of publication. Kohler China Ltd. reserves the right to make changes in product characteristics, packaging, or availability at any time without notice. · ·...
-
Page 2: Installation Instructions
INSTALLATION INSTRUCTIONS WARNING: When using electrical products, basic precautions should always be followed, including the following: WARNING: Risk of electric shock. Connect 30mA only to a circuit protected by a Residual Current Device (RCD) with residual current less than 30mA. ·... -
Page 3: Product Information
Kohler Co. shall not be liable under its warranty or otherwise for personal injury or damage caused by any such unauthorized modification. -
Page 4: Product Requirements
PRODUCT REQUIREMENTS A. Summary Of Key Requirements · · Observe all local plumbing codes. · · Install the bath to an adequately supported, level subfloor. · · The bath is designed for alcove installation. · · K-156T-LCP/RCP K-156T-LCP/RCP is designed for below-the-floor K-23769T-LCP/RCP drain installation. -
Page 5: Installation Requirements
INSTALLATION REQUIREMENTS A. Tools Required B. Materials Required · · Plumbers putty · · Adjustable pipe · · wrench Wall coverings(as necessary) · · · · Rule Silicone sealant · · · · Level Gypsum cement(optional) · · · · Safety shoes Construction adhesive ·... - Page 6 INSTALL THE BATH 1. Prepare the Bath IMPORTANT! Do not lift the bath by the fittings, drain and pipe. Lift only by the metal frame. IMPORTANT! Do not damage the adjustable feet by dragging or sliding the bath across the floor. IMPORTANT! To prevent product damage while moving the bath, make sure the adjustable feet are fully...
- Page 7 2. Install the Gap Panel Clips NOTICE: Complete these steps only if you will use the provided gap panel to fill a gap between the bath rim and the walls. · · Use the hardware provided to secure the four gap panel clips to the bath rim.
- Page 8 · · Raise the bath by positioning 2 pieces of wood blocks under the metal frame and ensure there is K-156T-LCP/RCP) enough space for the drain. (For K-156T-LCP/RCP) · · Install the drain to the bath according to the installation instructions included in the box containing the product.
-
Page 9: Complete The Installation
5. Make the Final Connections · · Make the final drain line connections. · · Make sure the door seal is free of dirt and debris. · · Close and latch the door. · · Close the bath drain. · ·... -
Page 10: Make Electrical Connections
MAKE ELECTRICAL CONNECTIONS WARNING: Risk of electric shock. Disconnect the power before performing the following procedures. WARNING: Risk of electric shock. Connect bathtub to properly grounded, grounding-type (RCD) power line protected by Residual Current Device (RCD). Power Input 220-240V Heated Back Heater Air Pump Water Pump... - Page 11 · · Install the access panels. · · Install the bracket on the corresponding frame and adjust the position. Bracket · · Install the side panel on the bath, make the side panel and bath closely. · · Fix the gap panel and side panel on the bath with silicone sealant.
-
Page 12: Test Operation
TEST OPERATION Test Run the Bath 5-10 NOTICE: When testing the heated surface functions, allow 5 to 10 minutes to begin feeling heat on the end wall. · · Operate the heated surface user keypad to test the temperature settings. ·... -
Page 13: Important Safety Instructions
Important Safety Instructions READ AND FOLLOW ALL INSTRUCTIONS SAVE THESE INSTRUCTIONS INSTRUCTIONS PERTAINING TO A RISK OF FIRE, ELECTRIC SHOCK, OR INJURY TO PERSONS WARNING: When using electrical products, basic precautions should always be followed, including the following: DANGER: Risk of accidental injury or drowning. - Page 14 · · Use this bath only for its intended purpose as described in this guide. Do not use attachments not recommended by Kohler Co. · · (RCD) The bath must be connected only to a supply circuit that is protected by a Residual Current Device (RCD).
-
Page 15: Keypad Operation
· · Press the air system button a third time to operate at low speed. · · Press the air system button a fourth time to shut off the air system. · · When you are done bathing, open the drain and remain seated while the water drains from the bath. -
Page 16: Error Codes
Error Codes · · Heat indicator blinking red - The heater is not functioning. · · Heat indicator blinking yellow - The temperature sensor is not functioning or is loose. · · Refer to the "Troubleshooting" section to troubleshoot any problems. Confirm Heated Surface Operation 5-10 NOTICE: When testing the heated surface functions,... - Page 17 · · Fill the bath at least 2" (51 mm) above the highest 2" 51 mm whirlpool jets. · · Press the air switch actuator to turn the whirlpool on. The in-line heater will turn on automatically. · · Press the air switch actuator a second time to turn the whirlpool and in-line heater off.
-
Page 18: Care And Cleaning
CARE AND CLEANING For best results, keep the following in mind when caring for your KOHLER bath: · · Always test your cleaning solution on an inconspicuous area before applying to the entire surface. · · Wipe surfaces clean and rinse completely with water immediately after applying cleaner. -
Page 19: Troubleshooting
TROUBLESHOOTING Note: The section is for general aid only. A Kohler Co. Authorized Representative should correct any electrical problems. Air System Symptoms Probable Causes Recommended Action 1. Blower motor does not A. No power to the blower A. Set or reset the . - Page 20 Heated Surface Symptoms Probable Causes Recommended Action 1. Heated surface does A. No power to power supply. A. Make sure nothing except the pump and not turn on. blower/heated surface are plugged into their shared duplex outlet. Set or reset the RCD.
- Page 21 Whirlpool System and in-line Heater Symptoms Probable Causes Recommended Action 1. Whirlpool does not A. No power to the pump A. Set or reset the . Check and repair the start or stop. motor. wiring. B. Air actuator tubing is loose B.
- Page 22 3. 1 °F °C 1397340-T01-A -22-...
Need help?
Do you have a question about the BELAY K-156T-LCP and is the answer not in the manual?
Questions and answers