Table of Contents
Advertisement
Available languages
Available languages
Quick Links
Download this manual
See also:
Instruction Manual
FOR USE WITH RANGEMASTER 60000 OR RM60000 SERIES OR 64000 SERIES RANGE HOODS
READ AND SAVE THESE INSTRUCTIONS
WARNING
TO REDUCE THE RISK OF FIRE, ELECTRIC SHOCK, OR
INJURY TO PERSONS, OBSERVE THE FOLLOWING:
1. Use this unit only in the manner intended by the manufac-
turer. If you have questions, contact the manufacturer at the
address or phone number listed in the warranty.
2. Before servicing or cleaning unit, switch power off at service
panel and lock the service disconnecting means to prevent
power from being switched on accidentally. When the service
disconnecting means cannot be locked, securely fasten a
prominent warning device, such as a tag, to the service panel.
3. Installation work and electrical wiring must be done by a
qualified person(s) in accordance with all applicable codes
and standards, including fire-rated construction codes and
standards.
4. Sufficient air is needed for proper combustion and exhaust-
ing of gases through the flue (chimney) of fuel burning
equipment to prevent backdrafting. Follow the heating equip-
ment manufacturer's guideline and safety standards such as
those published by the National Fire Protection Association
(NFPA), and the American Society for Heating, Refrigeration
and Air Conditioning Engineers (ASHRAE), and the local
code authorities.
PLAN THE INSTALLATION
ALL INSTALLATIONS
1. Locate the blower so the length of the duct run and number
of elbows needed are kept to a minimum.
2. Where possible, blower should be centered between wall
studs or roof rafters.
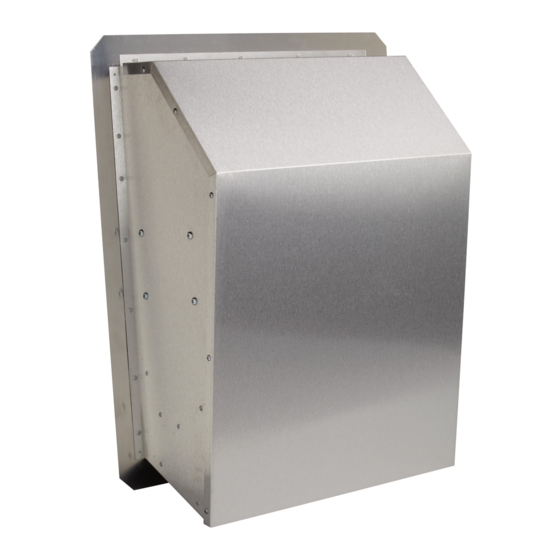
MODEL 335
EXTERIOR BLOWER
SOFFIT
WALL HOOD
CANOPY
(island canopy
available)
DUCT
OPENING
COVER PLATE
24" or 27"
TYPICAL ROOF MOUNTED INSTALLATION
(Vertical discharge)
INSTALLER: Leave This Manual With The Homeowner
HOMEOWNER: Use And Care Information On Page 4
EXTERIOR MOUNTED BLOWER
10" ROUND
DUCT
WALL HOOD
CANOPY
(island canopy
available)
ROUGH-IN
18"
PLATE
DUCT OPENING
TYPICAL WALL MOUNTED INSTALLATION
(Vertical discharge - elbow to horizontal)
MODEL 335
WARNING
5. When cutting or drilling into wall, or ceiling, do not damage
electrical wiring or other hidden utilities.
6. Ducted fans must always be vented to the outdoors.
7. To reduce risk of fire, use only metal ductwork.
8. This unit must be grounded.
CAUTION
1. For general ventilating use only. Do not use to exhaust
hazardous or explosive material and vapors.
2. To avoid motor bearing damage and noisy and/or unbal-
anced impellers, keep drywall spray, construction dust, etc.
off power unit.
3. Please read specification label on product for further informa-
tion and requirements.
4. Electrical circuit, including speed control, (if used), must be
rated 6 AMPS minimum.
SPECIFICATIONS
MODEL VOLTS
335
3. Avoid pipes, wires, or other ductwork that may be running
through the wall.
4. Wall mounted installation only: Make sure blower discharge
is at least 12" above any outside obstructions.
NOTE: Horizontal discharge requires relocation of the duct
opening cover plate. See hood manual for instructions.
10" ROUND ELBOW
10" ROUND DUCT
SOFFIT
MODEL
335
EXTERIOR
BLOWER
ROUGH-IN
PLATE
18"
12" MIN.
24" or 27"
ABOVE ANY
OBSTRUCTION
COVER PLATE
AMPS
CFM
120
3.0
1200
10" ROUND DUCT
SOFFIT
WALL HOOD
CANOPY
(island canopy
available)
18"
24" or 27"
ROUGH-IN
PLATE
TYPICAL WALL MOUNTED INSTALLATION
(Horizontal discharge)
DUCT SIZE
10" DIA.
DUCT
OPENING
COVER
PLATE
MODEL 335
EXTERIOR
BLOWER
12" MIN.
ABOVE ANY
OBSTRUCTION
Advertisement
Table of Contents

Related Manuals for NuTone 335


Summary of Contents for NuTone 335
-
Page 1: Specifications
1. Locate the blower so the length of the duct run and number of elbows needed are kept to a minimum. 2. Where possible, blower should be centered between wall studs or roof rafters. MODEL 335 EXTERIOR BLOWER 10" ROUND DUCT... -
Page 2: Prepare The Installation Location
PREPARE THE INSTALLATION LOCATION ROOF INSTALLATIONS 1. Locate the blower on the rear slope of the roof. Place it in a location to minimize duct run. The location should be free of obstacles (T.V. leads, electrical lines, etc.). If the blower top is level with the roof peak, it will not be seen from the street. - Page 3 INSTALL THE BLOWER ROOF INSTALLATIONS 1. Remove the cover and screws. 2. Attach an appropriate U.L. approved cable connector in the hole at the rear of the wiring box. 3. Remove roofing nails from shingles around the TOP and SIDES of the cutout area only.Carefully lift the shingles to allow the back flashing sheet on the blower housing to fit under them.
-
Page 4: Service Parts
Order replacement parts by Part No. - NOT by Key No. Broan-NuTone warrants to the original consumer purchaser of its products that such products will be free from defects in materials or workmanship for a period of one year from the date of original purchase. -
Page 5: Spécifications
1. L’emplacement de pose du ventilateur doit être choisi de manière à réduire le plus possible l’utilisation de conduits et de coudes. 2. Lorsque cela est envisageable, le ventilateur doit être centré entre les poteaux muraux ou les chevrons du toit. MODÈLE 335 MODEL 335 VENTILATEUR EXTÉRIEUR EXTERIOR BLOWER... -
Page 6: Préparation De L'installation
PRÉPARATION DE L’INSTALLATION INSTALLATIONS SUR LE TOIT 1. Positionez le ventilateur sur la pente arrière du toit. Placez-le de manière à minimiser la longueur des conduits. L’emplacement doit être dépourvu d’obstacles (câble de télévision, fils électriques, etc.). si le dessus du ventilateur est à... -
Page 7: Installation Du Ventilateur
INSTALLATION DU VENTILATEUR INSTALLATIONS SUR LE TOIT 1. Enlevez le couvercle et les vis. 2. Fixez un connecteur de câble adéquat portant l’homologation U.L. dans le trou arrière de las boîte de câblage. 3. Enlevez les clous à toiture des bardiaux entourant uniquement le HAUT et les CÔTÉS de l’ouverture. -
Page 8: Pièces De Rechange
REPÈRE. Broan-NuTone garantit à l’acheteur consommateur original de ses produits qu’ils sont exempts de vice de matériaux ou de fabrication pour une période d’un an à compter de la date d’achat original. IL N’Y A PAS D’AUTRES GARANTIES, EXPRIMÉES OU IMPLICITES, INCLUANT MAIS NON LIMITÉES AUX GARANTIES IMPLICITES DE QUALITÉ MARCHANDE ET DE CONVENANCE DANS UN BUT PARTICULIER. - Page 9 1. Ubique el ventilador de manera que la longitud del ducto y el número de codos se reduzcan al mínimo. 2. Cuando sea posible el ventilador deberá centrarse entre los montantes de la pared o las vigas del techo. MODEL 335 MODELO 335 EXTERIOR BLOWER VENTILADOR EXTERIOR...
- Page 10 PREPARE EL ÁREA DE LA INSTALACION INSTALACIONES DE TECHO 1. Ubique el ventilador en la pendiente posterior del techo. Colóquelo en un área en la cual minimice la longitud del tramo de conductos. Esta área debe estar libre de obstáculos (cables de T.V., cables eléctricos, etc.).
- Page 11 INSTALE DEL VENTILADOR INSTALACIONES DE TECHO 1. Quite la cubierta y los tornillos. 2. Coloque un conectador de cables apropiado, aprobado por U.L., en el orificio que se encuentra en la parte posterior de la caja de conexiones. 3. Quite los clavos solamente de las tejas que se encuentran en las partes SUPERIOR y LATERALES del área de corte.
-
Page 12: Uso Y Cuidado
Siempre pida repuestos dando el No. de Parte, No la Clave. Broan-NuTone garantiza al consumidor comprador original de sus productos que dichos productos carecerán de defectos en materiales o en mano de obra por un período de un año a partir de la fecha original de compra. NO EXISTEN OTRAS GARANTIAS, EXPLICITAS O IMPLICITAS, INCLUYENDO, PERO NO LIMITADAS A, GARANTIAS IMPLICITAS DE COMERCIALIZACION O APTITUD PARA UN PROPOSITO PARTICULAR.
Need help?
Do you have a question about the 335 and is the answer not in the manual?
Questions and answers