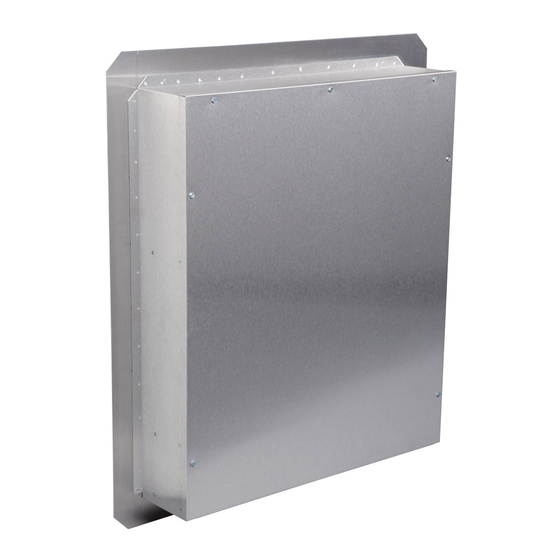
NuTone 331H User Manual
Broan-nutone 331h exterior blowers: user guide
Hide thumbs
Also See for 331H:
- Specification sheet (2 pages) ,
- Specification sheet (1 page) ,
- Instruction manual (4 pages)
Table of Contents
Advertisement
Available languages
Available languages
Quick Links
Download this manual
See also:
Instruction Manual
FOR USE WITH RANGEMASTER HOODS AND ECLIPSE DOWNDRAFT VENTILATORS
READ AND SAVE THESE INSTRUCTIONS
WARNING
TO REDUCE THE RISK OF FIRE, ELECTRIC SHOCK, OR
INJURY TO PERSONS, OBSERVE THE FOLLOWING:
1. Use this unit only in the manner intended by the manufac-
turer. If you have questions, contact the manufacturer at the
address or telephone number listed in the warranty.
2. Before servicing or cleaning unit, switch power off at service
panel and lock the service disconnecting means to prevent
power from being switched on accidentally. When the service
disconnecting means cannot be locked, securely fasten a
prominent warning device, such as a tag, to the service panel.
3. Installation work and electrical wiring must be done by a
qualified person(s) in accordance with all applicable codes
and standards, including fire-rated construction codes and
standards.
4. Sufficient air is needed for proper combustion and exhaust-
ing of gases through the flue (chimney) of fuel burning
equipment to prevent backdrafting. Follow the heating equip-
ment manufacturer's guideline and safety standards such as
those published by the National Fire Protection Association
(NFPA), and the American Society for Heating, Refrigeration
and Air Conditioning Engineers (ASHRAE), and the local
code authorities.
5. When cutting or drilling into wall, or ceiling, do not damage
electrical wiring or other hidden utilities.
6. Ducted fans must always be vented to the outdoors.
7. To reduce risk of fire, use only metal ductwork.
8. This unit must be grounded.
PLAN THE INSTALLATION
ALL INSTALLATIONS
1. Locate the blower so the length of the duct run and number of
elbows and transitions needed are kept to a minimum.
Please note - when using blower with the Broan Eclipse
Downdraft: The downdraft has a 3¼" x 10" discharge.
Transitions are available to connect it to the 10" round
inlet on this exterior-mounted blower.
MODEL 331H or 332H
EXTERIOR BLOWER
SOFFIT
WALL HOOD
CANOPY
(island canopy
available)
DUCT
OPENING
COVER PLATE
24" or 27"
TYPICAL ROOF MOUNTED INSTALLATION
(Vertical discharge)
INSTALLER: Leave This Manual With The Homeowner
HOMEOWNER: Use And Care Information On Page 3
10" ROUND
DUCT
SOFFIT
WALL HOOD
CANOPY
(island canopy
available)
ROUGH-IN
18"
PLATE
TYPICAL WALL MOUNTED INSTALLATION
(Vertical discharge - elbow to horizontal)
MODELS 331H & 332H
EXTERIOR MOUNTED BLOWER
CAUTION
1. For general ventilating use only. Do not use to exhaust
hazardous or explosive material and vapors.
2. To avoid motor bearing damage and noisy and/or unbalanced
impellers, keep drywall spray, construction dust, etc. off power
unit.
3. Please read specification label on product for further informa-
tion and requirements.
4. Electrical circuit, including speed control, (if used), must be
rated 6 AMPS minimum for Model 332H or 3 AMPS minimum
for Model 331H.
SPECIFICATIONS
MODEL VOLTS
331H
332H
2. Where possible, blower should be centered between wall
studs or roof rafters.
3. Avoid pipes, wires, or other ductwork that may be running
through the wall.
4. Be sure that there is enough space for any transitions that may
be needed between the blower and the connecting ductwork.
5. For best performance, locate transitions nearest to ventilator
(i.e. downdraft).
NOTE: Horizontal discharge requires relocation of the duct open-
ing cover plate. See hood manual for instructions.
10" ROUND ELBOW
10" ROUND DUCT
MODEL
or 332H
EXTERIOR
BLOWER
DUCT
ROUGH-IN
18"
OPENING
COVER PLATE
24" or 27"
AMPS
120
2.4
120
5.7
SOFFIT
WALL HOOD
CANOPY
(island canopy
331H
available)
18"
PLATE
24" or 27"
TYPICAL WALL MOUNTED INSTALLATION
(Horizontal discharge)
Page Lm
1
CFM
DUCT SIZE
600
10 " DIA.
900
10" DIA.
10" ROUND DUCT
DUCT
OPENING
COVER
PLATE
MODEL
331H
or 332H
EXTERIOR
BLOWER
ROUGH-IN
PLATE
Advertisement
Table of Contents

Related Manuals for NuTone 331H


Summary of Contents for NuTone 331H
-
Page 1: Specifications
Please note - when using blower with the Broan Eclipse Downdraft: The downdraft has a 3¼" x 10" discharge. Transitions are available to connect it to the 10" round inlet on this exterior-mounted blower. MODEL 331H or 332H EXTERIOR BLOWER 10" ROUND DUCT... -
Page 2: Prepare The Installation Location
PREPARE THE INSTALLATION LOCATION ROOF INSTALLATIONS 1. Locate the blower on the rear slope of the roof. Place it in a location to minimize duct run. The location should be free of obstacles (T.V. leads, electrical lines, etc.). Bear in mind, if the blower top is level with the roof peak, it will not be seen from the street. -
Page 3: Motor Lubrication
INSTALL THE BLOWER ROOF INSTALLATIONS 1. Remove roofing nails from the upper 2/3 of the shingles around the cutout area and carefully lift the shingles to allow the back flashing sheet on the blower housing to fit under them. 2. Center the blower ring in the 11" diameter hole, making sure that the 1-1/4"... -
Page 4: Service Parts
IMPLIED, INCLUDING, BUT NOT LIMITED TO, IMPLIED WAR- RANTIES OF MERCHANTABILITY OR FITNESS FOR A PAR- TICULAR PURPOSE. During this one-year period, Broan-NuTone will, at its option, repair or replace, without charge, any product or part which is found to be defective under normal use and service. -
Page 5: Spécifications
REMARQUE : sortie repositionnement de la plaque d’ouverture du conduit. Voir les instructions du manuel de la hotte. MODÈLE 331H ou 332H MODEL 331H or 332H VENTILATEUR EXTÉRIEUR EXTERIOR BLOWER CONDUIT ROND DE 10"... - Page 6 PRÉPAREZ L'ENDROIT POUR L'INSTALLATION INSTALLATIONS SUR LE TOIT 1. Positionnez le ventilateur sur la pente arrière du toit. Placez- le dans un endroit qui minimisera la longueur du conduit de ventilation. Cet endroit doit être exempt d'obstacles (câble de téléviseur, lignes électriques, etc.) Souvenez-vous que si le dessus du ventilateur est à...
-
Page 7: Installation Du Ventilateur
POSE DU VENTILATEUR POSE DU VENTILATEUR 1. Retirez les premiers deux tiers des clous à toiture des bardeaux se trouvant autour de la surface de découpe puis soulevez délicatement les bardeaux afin de glisser le solin en dessous. 2. Centrez l’anneau de ventilateur dans le trou de 11" (27,9 cm) de diamètre, en vous assurant que le trou de 1-1/4"... -
Page 8: Pièces De Rechange
Écrou à rondelle, 1/4" - 20 (3)* 98008511 Grille 99100379 Butée de clapet (2) 99080396 Moteur à condensateur (modèle 332H) 99080397 Moteur à condensateur (modèle 331H) 98008509 Couvercle du boîtier de câblage 98008588 Bride de condensateur 98008510 Capot de boîte à air 99020263 Roue du ventilateur (modèle 332H) -
Page 9: Especificaciones
Por favor lea la etiqueta de especificaciones que tiene el producto para ver información y requisitos adicionales. El circuito eléctrico, incluido el control de velocidad (si se usa) debe tener una capacidad nominal mínima de 6 amperios para el Modelo 332H o 3 amperios para el Modelo 331H. AMPERIOS 331H 332H Cuando sea posible, el ventilador se debe centrar entre los montantes de la pared o entre las vigas del techo. -
Page 10: Instalación
PREPARE EL LUGAR DE LA INSTALACIÓN INSTALACIONES EN EL TECHO 1. Ubique el ventilador en la pendiente posterior del techo. Colóquelo en un área en la cual minimice la longitud del tramo de conductos. Esta área debe estar libre de obstáculos (cables de T.V., cables eléctricos, etc.). -
Page 11: Uso Y Cuidado
INSTALE EL VENTILADOR INSTALACIONES EN EL TECHO 1. Quite los clavos del techo de las 2/3 partes de las tejas superiores que se encuentran alrededor del área de corte y levante las tejas con cuidado para permitir que la hoja cubrejuntas posterior de la cubierta del ventilador se ajuste debajo de ellas. -
Page 12: Piezas De Repuesto
98008511 Rejilla 99100379 Regulador de tiro Heyco (2 req.) 99080396 Motor con capacitor (Modelo 332H) 99080397 Motor con capacitor (Modelo 331H) 98008509 Cubierta de la caja de conexiones 98008588 Pinza del capacitor 98008510 Cubierta de la caja de ventilación 99020263...
Need help?
Do you have a question about the 331H and is the answer not in the manual?
Questions and answers