Advertisement
Quick Links
Important Precautions
1.
This model applies to swimming pool with flat floor.
2.
Do not power on the unit when it is outside of the water.
3.
Do not operate the cleaner when there is people in pool.
4.
The filter tray should be cleaned after use. This will prevent the dirty filter tray affecting the normal
operation of the cleaner.
5.
The cleaner should be stored in a cool and ventilated place, away from direct sunlight.
6.
Please close the main pool filtration system before use this cleaner.
7.
Only authorized personnel should open the cleaner's motor assembly and battery pack, fail to do
which will cause a invalid warranty.
8.
Slightly water pollution may occur in case grease in motor seal oil leaks.
9.
Use original and authorized adapter only, warranty dose not cover the risk of using unauthorized
adapter to charge the battery.
10.
Never charge the battery when cleaner in water, charge the battery indoor and make sure at least
3.5m away from pool edge.
11.
Never power on the battery when in charge.
12.
Make sure close and tighten the charging cover on the battery charging socket before use.
13.
Do not use the cleaner when environment temperature is over 60 , do not charge the battery when
temperature is bellow 0 .
14.
Avoid touching the battery pack by sharp items, do not throw out or impact the battery pack.
15.
If the battery pack and cleaner need to be stored over 3 months, please put it in an environment with
temperature of 23±5 , humidity of 65±20%RH, and make sure the remaining b
over 80%, suggest charge the battery every 3 months.
16.
Do not use the cleaner beyond the working environment/conditions stated in this manual. Read this
manual carefully before use.
℃
℃
℃
1
attery capacity is
Advertisement

Subscribe to Our Youtube Channel
Related Manuals for Bestway Falcon Plus


Summary of Contents for Bestway Falcon Plus
- Page 1 Important Precautions This model applies to swimming pool with flat floor. Do not power on the unit when it is outside of the water. Do not operate the cleaner when there is people in pool. The filter tray should be cleaned after use. This will prevent the dirty filter tray affecting the normal operation of the cleaner.
- Page 2 Note 1. Putting into or lifting out from pool with the cleaner bottom toward the wall to avoid any possible scratch to the pool surface. 2.Install the brush before use to avoid possible dirt leaks.
- Page 3 Contents Ⅰ. Introduction································································································P. 4 Ⅱ. Safety········································································································P. 4 Ⅲ. Specifications·····························································································P. 4 Ⅳ. Cleaner Structure························································································P. 5 Ⅴ. Operation Instructions·················································································P. 5 Ⅵ. Trouble Shooting·························································································P. 17 Ⅶ. Packing List································································································P. 17...
- Page 4 Ⅰ. Introduction: The automatic swimming pool floor cleaner HJ1107 is a new type of highly efficient swimming pool cleaning equipment. Through its advanced computer controlled program, it can clean the pool floor automatically without draining pool water. At the same time, it filters the pool water and gets rid of suspended particles and sediments.
-
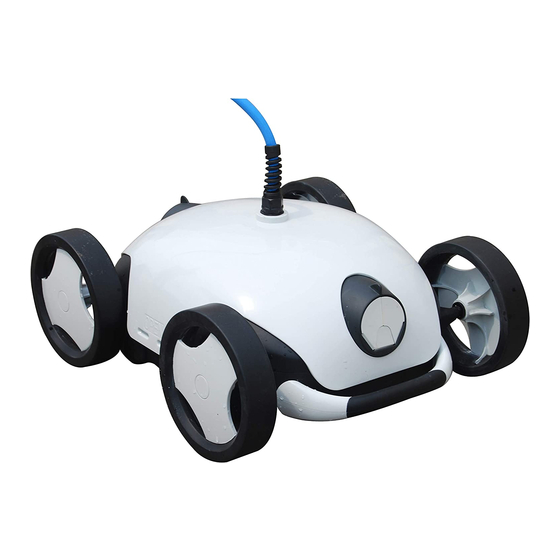
Page 5: Top Cover
Ⅳ. Cleaner Structure Top cover Filter tray Chassis Assemble the cleaner according to above structure Ⅴ. Operation Instruction 5.1 Panel... - Page 6 Chart 5-1Buttons & indicator lights instructions Item Name Function Instruction Power on Power off Pool size selection Chose the proper program based on pool size S Moving direction reverses every 18 seconds, ideal for pool size: Program M Moving direction reverses every 23 seconds, ideal for pool size:...
- Page 7 L Moving direction reverses every 28 seconds, ideal for pool size: Press this button and the cleaner starts working in START Start working selected program, corresponding indicator light will flash Corresponding light flashes when the cleaner works in selected program (pool size) When battery is deleting, cleaner moves in single direction ...
- Page 8 5.2 Remote control Instruction Item Function Automatic program Cleaner works automatically Manual forward Cleaner moves forward Manual backward Cleaner moves backward Stop Cleaner stops working Indicator light 5.3 Battery charging 5.3.1 Lift out the cleaner out of pool before charge the battery 5.3.2 Connect to adapter 5.3.3 Connect to home power 5.3.4 Indicator of adapter...
- Page 9 5.4 Function and adjustment of nozzle There are two nozzles on the cleaner, one of them opens once the other closes. Water flows out through the opening nozzle to thrust the cleaner move forward. Adjust the nozzle by rotating it to control the moving path.
- Page 10 Moving path Setting 2; 0°/ 45° When the cleaner move in too much curved line to cover the pool. Nozzle Moving path...
- Page 11 Setting 3; 0°/ 30° , When the cleaner still moves in too much curved line to cover the pool by above settings. Nozzle Moving path Setting 4: 15°/ 60°when the cleaner need to move in more curved line to cover the pool Nozzle...
- Page 12 Moving path Setting 5: 30°/ 60°Cleaner moves in more curved line than setting 4. Nozzle Moving path...
- Page 13 Setting 6: 30°/ 30°For round pool. Nozzle Moving path Setting 7: 45°/ 45°When the cleaner does not have full coverage of pool by setting 6, and need to move in more curved line. Nozzle...
- Page 14 Moving path Note: Above are recommended settings, different setting may applies to specific pools. Or, chose bellow settings may lead to a larger coverage. 5.5Method of putting the cleaner into pool Hold the battery pack by one hand, and hold Hold the cable till the cleaner immerse into the handle of the cleaner by the other hand to pool floor...
- Page 15 5.5 Clean the filter tray Open the cleaner from both side of themachine Take off the filter trayClean the filter tray Wash the filter tray and chassis then Push both side of the clips on: reassemble the cleaner...
-
Page 16: Sweeping Mode
5.6 Filter net replacement Press buckle to Replace and press to disassemble assemble 5.7 Sweeping mode Under normal circumstances, nozzle towards obliquely upward so as to avoid blowing away sewage on the pool floor. For some specific pools, sweeping mode could be used (Adjust the nozzle obliquely downward) for blowing up debris located in dead corner or fine particles so as to collect or filter them by main filter system of the pool. -
Page 17: Troubleshooting
,Trouble Shooting Symptom Possible reason Solution Adjust nozzle into proper direction so as to Nozzle in improper direction move in more curved path Cleaner always move along Adjust nozzle or use sweeping mode pool edge Cleaner does not have a full Adjust the nozzle for a more curved moving Customized pool shape coverage of pool...
Need help?
Do you have a question about the Falcon Plus and is the answer not in the manual?
Questions and answers