
Related Manuals for Rekluse RadiusX BMW S1000


Summary of Contents for Rekluse RadiusX BMW S1000
- Page 1 INSTALLATION & USER’S GUIDE RadiusX BMW S1000/S1000RR/S1000XR/HP4 Doc ID:191-6309001A ©2019 Rekluse Motor Sports Revision: 101619 Rekluse Motor Sports, Inc. customerservice@rekluse.com...
-
Page 2: Table Of Contents
TABLE OF CONTENTS OVERVIEW ................3 INSTALLATION TIPS ............3 TOOLS NEEDED ..............4 INCLUDED PARTS .............. 5 DISASSEMBLE THE CLUTCH ..........7 CLUTCH PACK INSTALLATION .......... 9 Notes for installation ............9 Clutch pack ..............9 PRESSURE PLATE INSTALLATION ......... 13 SET THE INSTALLED GAP .......... -
Page 3: Overview
Rekluse-designed high quality clutch pack designed specifically for your bike model. The following is a summary of what is replaced: · All OE steel drive plates will be replaced with Rekluse drive plates · All OE friction disks will be replaced with Rekluse ®... -
Page 4: Tools Needed
TOOLS NEEDED · Torx 30 · Torx 25 · 5mm Allen · Torque wrench · Pick set · 10mm Wrench · Standard Screw Driver Doc ID: 191-6309001A Pg. 4 Doc Rev: 101619... -
Page 5: Included Parts
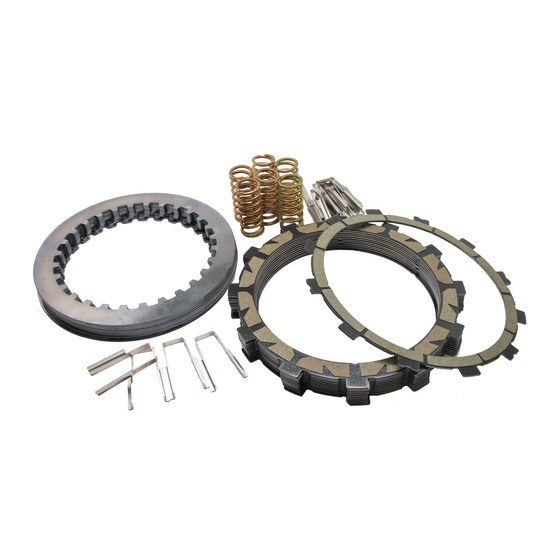
INCLUDED PARTS Item Description Qty. Basket sleeves Steel drive plates - .060” (1.5 mm) 65.1 Steel drive plates - .048” (1.2 mm) Steel drive plates - .040” (1.0 mm) Steel drive plates - .048” (1.2 mm) 69.1 TorqDrive® friction disks TorqDrive®... - Page 6 EXP adjustment spring – steel Not Shown Velcro straps Not Shown Orange Free Play Gain rubber band Not Shown Clutch lever warning label Visit www.rekluse.com/support for a full parts fiche illustration and part numbers. Doc ID: 191-6309001A Pg. 6 Doc Rev: 101619...
-
Page 7: Disassemble The Clutch
DISASSEMBLE THE CLUTCH 1. Remove the 3 bolts securing the right side cowling to the frame using a T25 torx. Remove cowling bolts 2. With the bike on its side stand, use a T30 Torx to remove the clutch cover bolts. There are 2 bolts behind the right- side cowling. - Page 8 Pressure plate springs Pressure plate & throwout rod Clutch pack Judder seat and spring NOTE: Items 2, 3, & 5 are not reused with the Rekluse clutch pack and can be set aside. Doc ID: 191-6309001A Pg. 8 Doc Rev: 101619...
-
Page 9: Clutch Pack Installation
This mark is used for processing and can be ignored. · Some OE basket have “half slots” at the top of the basket tangs. Rekluse products require the entire clutch pack be installed into the MAIN (deeper) basket slots. Installing the clutch pack into the “half slots”... - Page 10 Representative image. Basket may appear different than the stock basket. 3. Install ALL the Rekluse basket sleeves into the basket slots. Make sure the sleeve tabs sit against the inside of the basket, then push the sleeves down until they contact the bottom of the tang slot.
- Page 11 4. Install the EXP as the first friction into the basket. 5. Install a .048” (1.2 mm) steel drive plate followed by a thin friction. 6. Continue to alternate four .048” (1.2 mm) steel drive plates with four thin friction disks EXP disk EXP disk Section total:...
- Page 12 7. Install a .060” (1.5 mm) steel drive plate followed by a thin friction. 8. Continue to alternate three .060” (1.5 mm) steel drive plates with three thin friction disks 9. Install a .060” (1.5 mm) steel drive plate followed by the judder friction disk.
-
Page 13: Pressure Plate Installation
Install the Rekluse pressure plate springs. Note: Be sure to alternate springs if you are using two different color springs to keep even pressure on the clutch. Reinstall the OE pressure plate bolts using Rekluse provided screw sleeves. Rekluse screw... - Page 14 5. Lightly tighten the bolts until the bolt is tight against the standoff. You will torque the bolts and install the cover after setting the install gap in the next section. Doc ID: 191-6309001A Pg. 14 Doc Rev: 101619...
-
Page 15: Set The Installed Gap
SET THE INSTALLED GAP The “installed gap” is the separation in the clutch pack created by tension adjusted into the clutch cable. This gap is what allows the clutch to spin freely until the desired RPM is reached for engagement. The installed gap must be set correctly for optimal performance. - Page 16 REUSE ORIGINAL BOLTS. Use rekluse provided bolts or order new bmw bolts part # 1114724485 Qty: 9 · Rekluse provided bolts 80 in-lb (9 nm) · New OEM bolts 26 in-lb (3nm) + 90°. 7. Reinstall the 3 side cowling bolts.
-
Page 17: Check Free Play Gain
If Free Play Gain is new to you, follow the instructions below to help you learn this important step. You can also view the video entitled “How to Check Free Play Gain” on our website at https://rekluse.com/support/videos. Pg. 17 Doc ID: 191-6309001A... - Page 18 Checking Free Play Gain allows you to externally monitor the installed gap, so you can know when to make an adjustment if the installed gap is too large or too small. The correct installed gap is verified by observing and feeling the increased free play movement in the clutch lever.
-
Page 19: Two Ways To Check For Free Play Gain
Two Ways to Check for Free Play Gain The following steps explain 2 ways to check Free Play Gain. One way uses the rubber band Rekluse includes in the clutch kit, and one uses your hand. You can use either method to check Free Play Gain. - Page 20 A Rekluse auto-clutch can make your motorcycle appear to be in neutral when in gear, even when the engine is running and clutch lever released.
- Page 21 d) Pull the band through the loop, and then attach it to the outside end of the clutch lever. e) While still in NEUTRAL, quickly rev the engine between 3,000-5,000 RPM (1/4 to 1/2 throttle), then let it return to idle. Notice the movement in the clutch lever when the engine is revved.
-
Page 22: The Hand Method
The Hand Method Use the hand method to check Free Play Gain before the start of every ride and adjust as needed for optimum performance and longevity of your new clutch. a) Before you begin, place the bike in NEUTRAL, start the engine and let it warm up for 2-3 minutes to warm up the engine oil. - Page 23 d) When the bike returns to idle, rev the engine between 3,000-5,000 RPM a second time to verify the Free Play Gain again. Free Play Gain Pg. 23 Doc ID: 191-6309001A Doc Rev: 101619...
-
Page 24: Adjust The Installed Gap
ADJUST THE INSTALLED GAP After checking for Free Play Gain, you may need to adjust the installed gap. If Free Play Gain is optimal, continue to “Break In The New Clutch”. If Free Play Gain is not optimal, the installed gap needs to be adjusted. The installed gap should be fine-tuned in small increments and then recheck Free Play Gain. - Page 25 Adjust the Installed Gap Symptom Reason Solution Tighten the cable; · Too much Free increase the length Play Gain: Clutch of the in-line cable lever moves in too adjuster housing and/or the lever perch adjuster · Clutch has Installed gap (extend the excessive drag or is too small...
-
Page 26: Break In The New Clutch
BREAK IN THE NEW CLUTCH Once you install your new clutch, it is important to break it in. A series of roll-on starts are used to break in the clutch. Follow these procedures for breaking in your clutch and any time new friction disks, EXP bases, Teflon pads, or wedges are installed. - Page 27 DO NOT DYNO TEST YOUR MOTORCYCLE BEFORE BREAK IN! Always break in the product before performing dyno testing. Adjustments are necessary for dyno testing. Contact Rekluse for dyno testing procedure. Pg. 27 Doc ID: 191-6309001A Doc Rev: 101619...
-
Page 28: Exp Tuning Options
You can tune the engagement RPM of the EXP disk by changing the spring configuration. The EXP disk comes set with the recommended “Medium” setting from Rekluse. For other EXP tuning options, see the Setup sheet at the back of the Installation Manual. - Page 29 2. With the pin still pushed past the base, turn 90° to remove the pin and spring. 3. Remove the remaining 2 pins and springs from the same side of the EXP base. 4. Drop a new spring into the spring slot on the base, then add the ¼...
- Page 30 7. If you need to disassemble the EXP disk, you can watch the video on our website under Tech Tips at www.rekluse.com/support/videos/atv-mc-support-videos. If you disassemble the EXP, the Teflon pads may fall out or be stuck to the ramp surfaces of the EXP bases.
-
Page 31: Shifting And Operation
· Measuring the friction disks for wear. This can help determine if the components need replacing. o Rekluse thin friction disk minimum allowable thickness = 0.068” (1.7 mm) · Replace friction disks if they measure below specifications or if the disks are glazed and/or burnt. -
Page 32: Disk Inspection Examples
These are best viewed in color by viewing this install document on www.rekluse.com/support. Drive Plates – If the clutch pack is getting high amounts of heat, purple, blue, or black color can be seen on the drive plate teeth. -
Page 33: Troubleshooting
Normal Friction Glazed Friction TROUBLESHOOTING Clutch Drag · Cold Drag Only – Cold drag is normal. The clutch will usually have some amount of drag before the oil warms to operating temperature. Be sure to warm up the vehicle before riding. ·... -
Page 34: Need Additional Help
Contact Technical Support for questions related to product installation, tuning, and performance. Technical Support hours: Monday thru Friday: 8:00 a.m. - 5:00 p.m. Mountain Time zone Email: tech@rekluse.com Customer Service Contact Customer Service for additional product information, orders, and returns. Customer Service hours: Monday thru Friday: 8:00 a.m.
Need help?
Do you have a question about the RadiusX BMW S1000 and is the answer not in the manual?
Questions and answers