Table of Contents
Advertisement
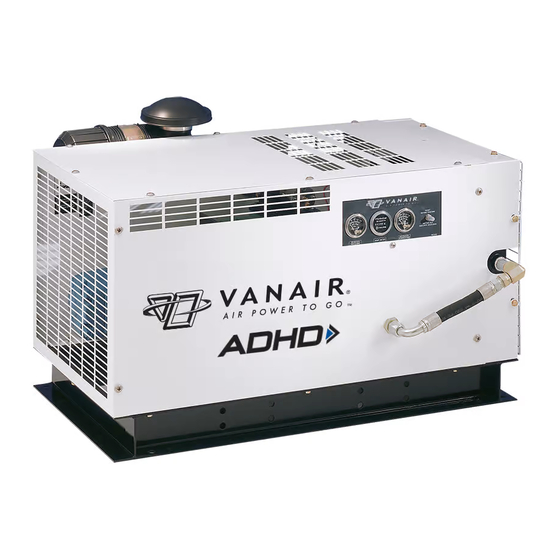
Rotary Screw Air Compressor
Installation, Operation, Maintenance and Parts List Manual
NOTE
Read this manual before installing,
operating or servicing this equipment.
Failure to comply with the operation
and maintenance instructions in this
manual WILL VOID THE
EQUIPMENT WARRANTY.
KEEP THE MANUAL
WITH THE VEHICLE
Vanair ADHD Powertech
125 to 185 CFM
Making unauthorized modifications to
the compressor or system components
WILL VOID THE WARRANTY!
Always inform Vanair Manufacturing,
Inc., before beginning any changes to
the ADHD system.
Vanair Manufacturing, Inc.
10896 West 300 North
Michigan City, IN 46360
Phone: (219) 879-5100
(800) 526-8817
Service Fax: (219) 879-5335
Parts Fax: (219) 879-5340
Sales Fax: (219) 879-5800
www.vanair.com
NOTE
NOTE
Use only Genuine Vanair Parts.
Inspect and replace damaged
components before operation.
Substituting non-Vanair components
will VOID THE COMPRESSOR
WARRANTY!
POO280-6
04/13
Advertisement
Table of Contents

Related Manuals for Vanair ADHD Powertech

Summary of Contents for Vanair ADHD Powertech
- Page 1 Rotary Screw Air Compressor Installation, Operation, Maintenance and Parts List Manual NOTE NOTE NOTE Making unauthorized modifications to Use only Genuine Vanair Parts. the compressor or system components Inspect and replace damaged WILL VOID THE WARRANTY! components before operation. Substituting non-Vanair components...
- Page 2 The warranty does not include incidental or consequential damages. This warranty shall be void and VANAIR shall have no responsibility to repair, replace or repay the purchase price of defective or damaged parts resulting from the use of or repair of replacement parts or fluids not of VANAIR’S manufacture or from buyer’s failure to store, install, maintain and operate...
-
Page 3: Table Of Contents
TABLE OF CONTENTS Pg i TABLE OF CONTENTS DESCRIPTION SECTION SECTION-PAGE NO. Warranty ................- ......Behind Cover Table of Contents ............... - ........i Definition of Terms ............- ........v Section 1 – Safety ..........1.0 ......1-1 General ................ - Page 4 TABLE OF CONTENTS Pg ii DESCRIPTION SECTION SECTION-PAGE NO. Section 2 – Description (continued) Control System, Functional Description ......2.5 ........2-5 Air Inlet System, Functional Description ......2.6 ........2-6 Instrument Panel, Functional Description......2.7 ........2-7 Hydraulic Motor, Functional Description ......2.8 ........2-8 Electrical System, Functional Description ......
- Page 5 TABLE OF CONTENTS Pg iii DESCRIPTION SECTION SECTION-PAGE NO. Section 5 - Maintenance (continued) Dimensions Diagram ............5.4 ........5-4 Section 6 - Maintenance ........6.0 ......6-1 General ................6.1 ........6-1 Daily Operation ..............6.2 ........6-1 Maintenance after Initial 50 Hours of Operation ....6.3 ........6-1 Every 500 Hours or Yearly, Whichever Comes First ..
- Page 6 TABLE OF CONTENTS Pg iv DESCRIPTION SECTION SECTION-PAGE NO. Section 8 – Illustrations and Parts List ....8.0 ......8-1 Procedure for Ordering Parts ..........8.1 ........8-1 Discharge System ............... 8.2 ........8-2 Enclosure ................8.3 ........8-4 Instrument Panel ..............8.4 ........8-6 Inlet Valve Assembly ............
-
Page 7: Definition Of Terms
DEFINITION OF TERMS Pg v DEFINITION OF TERMS Abovedeck ADBD Abovedeck Belt Drive ADHD Abovedeck Hydraulic Drive ASME American Society of Mechanical Engineers Belt Drive Cab to axle Length Cubic Feet per Minute Electric Cooled Front Cooled GAWR Gross Axle Weight Rating Gallons per Minute GVWR Gross Vehicle Weight Rating... - Page 8 BLANK PAGE...
-
Page 9: Section 1 - Safety
SAFETY General ® Vanair Manufacturing designs and manufactures all of its products so they can be operated safely. However, the responsibility for safe operation rests with those who use and maintain these products. The following safety precautions are offered as a guide which, if conscientiously followed, will minimize the possibility of accidents through the useful life of this equipment. -
Page 10: Parking Or Locating Compressor
SAFETY Section 1 - Pg 02 Parking or Locating Compressor 1. Park or locate compressor on a level surface, if possible. If not, park or locate compressor across grade so the compressor does not tend to roll downhill. DO NOT park or locate compressor on grades exceeding 15°... -
Page 11: Fire And Explosion
SAFETY Section 1 - Pg 03 Pressure Release - Continued G. Secure all hose connections by wire, chain or other suitable retaining device to prevent tools or hose ends from being accidentally disconnected and expelled. H. Open fluid filler cap only when compressor is not running and is not pressurized. Shut down the compressor and bleed the sump (receiver) to zero internal pressure before removing the cap. - Page 12 SAFETY Section 1 - Pg 04 Fire and Explosion - Continued C. Shut off air compressor and allow it to cool. Keep sparks, flames and other sources of ignition away. DO NOT permit smoking in the vicinity when adding fuel, checking or adding electrolyte to batteries, checking or adding fluid, checking diesel engine ether starting aid systems, replacing cylinders, or when refilling air line anti- icer systems antifreeze compound.
-
Page 13: Moving Parts
SAFETY Section 1 - Pg 05 Fire and Explosion – Continued N. Store flammable fluids and materials away from your work area. Know where fire extinguishers are and how to use them, and for what type of fire they are intended. Check readiness of fire suppression systems and detectors if so equipped. -
Page 14: Toxic And Irritating Substances
SAFETY Section 1 - Pg 06 Hot Surfaces, Sharp Edges and Sharp Corners – Continued D. Keep a first aid kit handy. Seek medical assistance promptly in case of injury. DO NOT ignore small cuts and burns as they may lead to infection. Toxic and Irritating Substances A. -
Page 15: Electrical Shock
SAFETY Section 1 - Pg 07 Electrical Shock A. Keep the vehicle or equipment carrier, compressor hoses, tools and all personnel at least 10 feet (3 meters) from power lines and buried cables. B. Keep all parts of the body and any hand-held tools or other conductive objects away from exposed live parts of electrical system. - Page 16 BLANK PAGE...
-
Page 17: Section 2 - Description
The compressor never needs any inspection of the internal parts. As you continue reading this manual and learn how the compressor operates and is maintained, you will see how surprisingly easy it is to keep a Vanair air compressor in top operating condition. -
Page 18: Description
DESCRIPTION Section 2 - Pg 02 Compressor Cooling and Lubrication System, Functional Description Refer to Figure 2-1. The compressor cooling and lubrication system is designed to provide adequate lubrication as well as maintain the proper operating temperature of the compressor. In addition to the cooler and fan, the system consists of an oil filter, electric fan switch. - Page 19 DESCRIPTION Section 2 - Pg 03 Figure 2-1: Compressor Discharge and Cooling and Lubrication System...
- Page 20 DESCRIPTION Section 2 - Pg 04 Compressor Discharge System, Functional Description - Continued The sump is ASME code rated at 175 psig working pressure. A minimum pressure/orifice valve, located downstream from the separator, helps assure a minimum receiver pressure of 65 psig during all conditions. This pressure is necessary for proper air/fluid separation and proper fluid circulation.
-
Page 21: Control System, Functional Description
DESCRIPTION Section 2 - Pg 05 Control System, Functional Description Refer to Figure 2-1. The purpose of the control system is to regulate the amount of air intake in accordance with the amount of compressed air demand. The Control System consists of an air inlet valve, a control regulator, blowdown valve, and tubing connecting the various components together. -
Page 22: Air Inlet System, Functional Description
DESCRIPTION Section 2 - Pg 06 Air Inlet System, Functional Description Refer to Figure 2-3. The compressor inlet system consists of one air filter, a compressor air inlet valve and interconnecting piping. The air filter is a two-stage, dry element-type filter. This filter is capable of cleaning extremely dirty air. -
Page 23: Instrument Panel, Functional Description
DESCRIPTION Section 2 - Pg 07 Instrument Panel, Functional Description Refer to Figure 2-4. The instrument panel group consists of a receiver pressure gauge, an hour meter, a compressor discharge temperature gauge and reset button. The air pressure gauge continually monitors the sump pressure at various load and\or unload conditions. -
Page 24: Hydraulic Motor, Functional Description
Vanair does not supply or recommend any other hydraulic system component information. It is recommended that the person installing a Vanair hydraulic driven compressor seek in their area a reputable hydraulic supplier for the hydraulic components (i.e: pump, relief valve, oil cooler, flow control, hosing, reservoir). -
Page 25: Section 3 - Specifications
CAUTION – DO NOT MIX OILS OF DIFFERENT TYPES— Substituting non- Vanguard Oil or non-genuine Vanair filter components WILL VOID THE COMPRESSOR WARRANTY! The result of poorly maintained lubricant and/or filters may produce hazardous conditions resulting in ignition, which could cause a fire in the sump. -
Page 26: Application Guide
SPECIFICATIONS Section 3 - Pg 02 Application Guide Water must be drained from the receiver periodically. In high ambient temperature and high humidity conditions, condensed moisture may emulsify with the oil forming a “milky” color. The fluid should be changed if this condition develops. IMPORTANT —... -
Page 27: Section 4 - Operation
Before starting your Vanair compressor, read this section thoroughly and familiarize yourself with the controls and indicators - their purpose, location and use. -
Page 28: Initial And Routine Start-Up Procedures
OPERATION Section 4 - Pg 02 4.2 Purpose of Controls (Continued) PURPOSE CONTROL OR INDICATOR Maintains the minimum of 65 psig in the MINIMUM PRESSURE ORIFICE compressor sump. This valve restricts receiver air discharge from receiver/sump when pressure falls to 65 psig, however, full flow is allowed at normal operating pressures. -
Page 29: Section 5 - Installation
The duty cycle and ambient operating temperatures. Other hydraulic equipment which may share that same hydraulic supply system (Vanair recommends a dedicated pump and hydraulic circuit). NOTE – The temperature of the hydraulic oil should not exceed 140ºF due to the rating of the Vanair supplied hydraulic motor. -
Page 30: Receiver Tank Installation
INSTALLATION Section 5 - Pg 02 5.2.1 RECEIVER TANK INSTALLATION 1. Always install tank with drain plug at bottom. 2. Do not install tank above height of compressor. - Page 31 INSTALLATION Section 5 - Pg 03 Wire Diagram 266551_r1_(TP)
-
Page 32: Dimensions Diagram
INSTALLATION Section 5 - Pg 04 Dimensions Diagram 263620_r1_(TP) -
Page 33: Section 6 - Maintenance
MAINTENANCE Section 6 - Pg 01 SECTION 6: MAINTENANCE General A sound maintenance program is the key to long compressor life. Below is a program that when adhered to, should keep the compressor in top operating condition. See Section 6.5, Parts Replacement and Adjustment Procedures for a detailed description of specific compressor system components. -
Page 34: Every 500 Hours Or Yearly, Whichever Comes First
6. Run the compressor for a few moments to circulate new system oil. 7. Check the receiver tank oil level in the sight glass (level should be at the sight glass mark, with the compressor off). Add Vanair Vanguard Premium Synthetic Oil as needed (DO NOT overfill the tank). -
Page 35: Compressor Oil Filter Element Replacement
6. Restart the compressor and check for leaks. IMPORTANT: To minimize the possibility of filter element rupture, it is important that only replacement elements identified with the Vanair name, logo and appropriate part number be used. DO NOT use substitute elements. -
Page 36: Air Filter Maintenance
MAINTENANCE Section 6 - Pg 04 FILTER HEAD ELEMEN T Figure 6-2: Compressor Oil Filter (Replacement Element P/N 261991) 6.5.2 Air Filter Maintenance Refer to Figure 6-3. The air filter supplied with your compressor is a two-stage system which offers more than adequate filtration. The air filter should be inspected periodically to maintain maximum compressor protection and filter service life. -
Page 37: Air Filter Element Replacement
MAINTENANCE Section 6 - Pg 05 DUST CAP RAIN CAP CLAMP ELEMENT BODY Figure 6-3: Compressor Air Filter (Replacement Element P/N 263931) 6.5.2.1 Air Filter Element Replacement 1. Loosen the clamp which secures the rain cap to the body and remove the cap. 2. -
Page 38: Cleaning The Air Filter Element With Compressed Air
MAINTENANCE Section 6 - Pg 06 6.5.2.2 Air Filter Element Cleaning - Continued When cleaning an element, never exceed the maximum allowable pressures for compressed air (30 psi). Do not strike the element against any hard surface to dislodge dust. This will damage the sealing surfaces and possibly rupture the element. - Page 39 MAINTENANCE Section 6 - Pg 07 SEPARATOR ELEM ENT Figure 6-4: Separator Element (Replacement Element P/N 260017-001) 4. Remove the separator element. 5. Scrape the old gasket material from the cover and the flange on the sump. Be sure to keep all scrapings from falling inside tank.
- Page 40 BLANK PAGE...
-
Page 41: Section 7 - Troubleshooting
3. Check for parts damaged by heat or an electrical short circuit, usually noticeable by discoloration or a burnt odor. Should your problem persist after making the recommended check, consult your nearest ® Vanair representative or Vanair Manufacturing, Inc. 7.2 Troubleshooting Guide SYMPTOM PROBABLE CAUSE REMEDY... - Page 42 TROUBLESHOOTING Section 7 - Pg 02 7.2 Troubleshooting Guide (Continued) SYMPTOM PROBABLE CAUSE REMEDY COMPRESSOR WILL NOT Dirty Air Filter Check the filter and change element if required. BUILD UP FULL Pressure Regulator Out of Adjust regulator according to control adjustment DISCHARGE Adjustment instructions in the Maintenance section.
-
Page 43: Section 8 - Illustrations And Parts List
ILLUSTRATIONS AND PARTS LIST Procedure for Ordering Parts Parts should be ordered from the nearest Vanair Representative or the Representative from whom the compressor was purchased. If, for any reason, parts cannot be obtained in this manner, contact the factory directly at the address or phone numbers below. -
Page 44: Discharge System
PARTS LIST & ILLUSTRATION Section 8 - Pg 02 Discharge System 267928_r4(TP2) - Page 45 PARTS LIST & ILLUSTRATION Section 8 - Pg 03 Discharge System PART DESCRIPTION NUMBER Receiver, Air/Oil Horizontal 047331-001 Elbow, Swivel 90 Deg. 3/4 Pipe x 3/4 Pipe 048429 Element, Air/Oil Separator 260017-001 Valve, Relief, 200 PSI, 1/2" npt 270853 Tee, Pipe Female Street 1/4 260848-102 Elbow, 90 Deg.
-
Page 46: Enclosure
PARTS LIST & ILLUSTRATION Section 8 - Pg 04 Enclosure 263612... - Page 47 PARTS LIST & ILLUSTRATION Section 8 - Pg 05 Enclosure PART DESCRIPTION NUMBER Washer, Flat Nylon ¼ 262704 Washer, Flat Nylon 5/16 262943 Screw, Truss HD 5/16 - 18 x ¾ 262945 Screw, Truss HD 1/4 x 3/4 262953 Frame, Assembly ADHD-EC 263464 Panel, End 263469...
-
Page 48: Instrument Panel
PARTS LIST & ILLUSTRATION Section 8 - Pg 06 Instrument Panel 14 AMP FUSE VANAIR P/N: 260066 266579_r0... - Page 49 PARTS LIST & ILLUSTRATION Section 8 - Pg 07 Instrument Panel PART DESCRIPTION NUMBER Panel, Gauge 261251 Decal, Panel Overlay 261349 Switch, High Temp. Shutdown 260625 Gauge, Temperature 266331 Gauge, Pressure 261974 Gauge, Hour Meter 040035 Elbow, 1/4T x 1/8P Push-on 261309 Coupling, Pipe Galv 806230-005...
- Page 50 PARTS LIST & ILLUSTRATION Section 8 - Pg 08 Inlet Valve Assembly 265400_r0...
-
Page 51: Inlet Valve Assembly
PARTS LIST & ILLUSTRATION Section 8 - Pg 09 Inlet Valve Assembly PART DESCRIPTION NUMBER Seal, Inlet Valve 265400-001 Piston, Inlet Valve 265400-002 Spring, Piston Inlet Valve 265400-003 Housing, Piston Inlet Valve 265400-004 Screw, Socket Head M6 x 50 265400-005 Spring, Inlet Check 265400-006 Stem, Inlet Valve... -
Page 52: Oil Cooling System (Electric) 125-185 Cfm
PARTS LIST & ILLUSTRATION Section 8 - Pg 10 Oil Cooling System (Electric) 125 - 185 CFM 267870_r0... - Page 53 PARTS LIST & ILLUSTRATION Section 8 - Pg 11 Oil Cooling System (Electric) 125 - 185 CFM PART DESCRIPTION NUMBER Shroud, Cooler 262109 Cooler, Oil 125-185 CFM 261992 Guard, Cooler 125/185 EC 261968 Fan and Motor Assy • 12V 264856 •...
-
Page 54: Above Deck - Compressor, Air Inlet And Parts
PARTS LIST & ILLUSTRATION Section 8 - Pg 12 Above Deck – Compressor, Air Inlet and Parts 6010092ID_r0... - Page 55 PARTS LIST & ILLUSTRATION Section 8 - Pg 13 Above Deck – Compressor, Air Inlet and Parts PART DESCRIPTION NUMBER Adapter, Swivel 1-1/2" 040292 Compressor, 2.56 Ratio Standard Short Shaft 250187-301 Compressor, 3.95 Ratio Standard Short Shaft 250187-303 Compressor, 3.04 Ratio Standard Short Shaft 250187-312 Compressor, 3.95 Ratio...
- Page 56 PARTS LIST & ILLUSTRATION Section 8 - Pg 14 Above Deck – Hydraulic Drive 6100047ID_r0...
-
Page 57: Above Deck - Hydraulic Drive
Section 8 – Pg15 PARTS LIST & ILLUSTRATION Above Deck – Hydraulic Drive PART DESCRIPTION NUMBER Frame, Compressor Mounting 012745 Bushing,Taper Bore 1610 1"Bore 049853 Support,Comp/Hyd Motor 263052 Decal, Caution O-Ring Fitting 263252 Motor,Hyd 3.2 Cid 263365 Motor,Hyd 4.5 Cid 263366 Kit, Bolt Package 264911-100... -
Page 58: Decal Locations - 1 Of 2
PARTS LIST & ILLUSTRATION Section 8 - Pg 16 8.9A Decal Locations – 1 of 2 DO NOT REMOVE OR COVER ANY SAFETY DECAL. Replace any safety decal that becomes damaged or illegible. -
Page 59: Decal Locations - 2 Of 2
PARTS LIST & ILLUSTRATION Section 8 - Pg 17 8.9B Decal Locations – 2 of 2 DO NOT REMOVE OR COVER ANY SAFETY DECAL. Replace any safety decal that becomes damaged or illegible. - Page 60 BLANK PAGE...
-
Page 61: Installation/Test Record
Vanair Manufacturing, Inc. 10896 West 300 North Michigan City, IN 46360 219-879-5100 INSTALLATION/TEST RECORD Distributor_____________________ End User__________________ _____________________ _____________________ Receiver S/N___________________ Serial Number______________ Air End S/N___________________ Vin Number________________ Split Shaft S/N_________________ Locations: Split Shaft Location (inches from cab) _______________________________________ Air End/PTO: Left/Right/Extension Bracket... - Page 62 BLANK PAGE...
- Page 63 BLANK PAGE...
- Page 64 Vanair Manufacturing, Inc. 10896 West 300 North Michigan City, IN 46360 Phone: (219) 879-5100 (800) 526-8817 Service Fax: (219) 879-5335 Parts Fax: (219) 879-5340 Sales Fax: (219) 879-5800 www.vanair.com Printed in the U.S.A. Specifications Subject to Change Without Prior Notice...
Need help?
Do you have a question about the ADHD Powertech and is the answer not in the manual?
Questions and answers