Table of Contents
Advertisement
Available languages
Available languages
Quick Links
Advertisement
Chapters
Table of Contents

Subscribe to Our Youtube Channel
Related Manuals for Helios AIR1-JVK

Summary of Contents for Helios AIR1-JVK
- Page 1 Helios Ventilatoren MONTAGE- UND BETRIEBSVORSCHRIFT INSTALLATION AND OPERATING INSTRUCTIONS NOTICE DE MONTAGE ET D’UTILISATION Jalousie-Verschlussklappe Multi-leaf damper Registre de fermeture AIR1-JVK für AIR1 Lüftungsgeräte for AIR1 ventilation units pour les centrales AIR1...
-
Page 2: Table Of Contents
2.1.1 Jalousie-Verschlussklappe AIR1-JVK XC ........... Seite 4 2.1.2 Jalousie-Verschlussklappe AIR1-JVK XH 1000-3500 und RH 1500-3000 ......Seite 4 2.1.3 Jalousie-Verschlussklappe AIR1-JVK XH 3500-8500 und RH 5000-1500 . -
Page 3: Wichtige Informationen
Wenn die nachfolgenden Ausführungen nicht beachtet werden, entfällt die Gewährleistung. Gleiches gilt für Haftungs- ansprüche an den Hersteller. Der Gebrauch von Ersatzteilen, die nicht von Helios empfohlen oder angeboten werden, ist nicht statthaft. Even tuell auftretende Schäden unterliegen nicht der Gewährleistung. -
Page 4: Allgemeine Montagehinweise
Laufzeit (auf/zu) Umgebungs- Leistung Betriebs- Schutzart Antriebsart (kg) temp . (°C) max . (W) spannung (IP) AIR1-JVK XH 7000/RH 8000 40...75 -30 - 50 24 DC – Federrückstellend AIR1-JVK XH 8500/RH 9500 40...75 -30 - 50 24 DC – Federrückstellend AIR1-JVK RH 12000 40...75... -
Page 5: Mechanische Montage
– Die elektrischen Anschlüsse der Stellmotoren am Klemmenkasten herstellen (s. Schaltplan der Montage- und Betriebsvorschrift des AIR1 Lüftungsgeräts). 2 .1 .2 Jalousie-Verschlussklappe AIR1-JVK XH 1000-2500 und RH 1500-3000 Vor allen Wartungs- und Installationsarbeiten oder vor Öffnen des Klemmenkastens ist das Gerät allpolig vom... - Page 6 Montage- und Betriebsvorschrift Jalousie-Verschlussklappe AIR1-JVK Abb .4 2. Schrauben lösen (s. Abb. 5). Abb .5 3. Dichtung auf die Flanschoberfläche aufkleben (s. Abb. 6). Abb .6 4. Die Jalousie-Verschlussklappe mit den Ösen und den Schrauben in Linie bringen und die Schrauben am oberen und am unteren Teil der Klappe fest anziehen (s.
-
Page 7: Jalousie-Verschlussklappe Air1-Jvk Xh 3500-8500 Und Rh 5000-1500
Montage- und Betriebsvorschrift Jalousie-Verschlussklappe AIR1-JVK Abb .8 2 .1 .3 Jalousie-Verschlussklappe AIR1-JVK XH 3500-8500 und RH 5000-15000 Vor allen Wartungs- und Installationsarbeiten oder vor Öffnen des Klemmenkastens ist das Gerät allpolig vom GEFAHR Netz zu trennen! Der elektrische Anschluss darf nur von einer autorisierten Elektrofachkraft entsprechend den nachstehenden Anschlussplänen ausgeführt werden . - Page 8 Montage- und Betriebsvorschrift Jalousie-Verschlussklappe AIR1-JVK Abb .11 4. Die Verriegelung zuschieben, um die Jalousie-Verschlussklappe festzuklemmen (s. Abb. 12). Abb .12 5. Die Blechbefestigung, wie im Folgenden dargestellt, einsetzen und mit den Schrauben befestigen (s. Abb. 13). Abb .13 6. Jalousie-Verschlussklappe über Stecker anschließen (s. Abb. 14).
- Page 9 Montage- und Betriebsvorschrift Jalousie-Verschlussklappe AIR1-JVK KAPITEL 3 3 .0 Service und Wartung Reinigungs- und Wartungsarbeiten dürfen nur von einer Elektrofachkraft durchgeführt werden. SERVICE UND WARTUNG Lebensgefahr! Vor allen Wartungs- und Installationsarbeiten sowie vor Öffnen des Klemmenkastens ist das Gerät allpolig vom...
- Page 10 2.1.3 Multi-leaf damper AIR1-JVK XH 3500-8500 and RH 5000-15000 ....... .
-
Page 11: Important Information
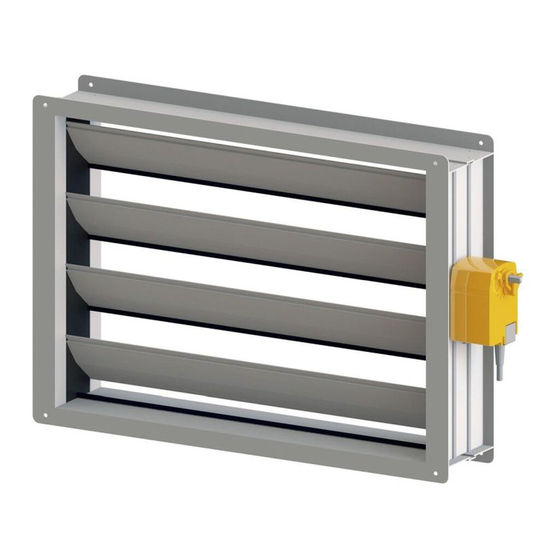
The multi-leaf damper prevents the flow of air into the unit when the unit is not in operation. The multi-leaf dampers AIR1-JVK XC are externally mounted to the respective AIR1 XC unit. The AIR1-JVK XH/RH are internally installed in the respective AIR1 XH/RH unit. -
Page 12: Chapter 2 Installation And Commissioning
Ambient Power max . Operating Protection Actuator type (kg) closed) temp . (°C) voltage (W) class (IP) AIR1-JVK XH 8500/RH 9500 40...75 -30 - 50 24 DC – Spring return AIR1-JVK RH 12000 40...75 -30 - 50 24 DC –... -
Page 13: Mechanical Assembly
– Establish the electrical connections from the actuators to the terminal box (see wiring diagram in the installation and operating instructions for the AIR1 ventilation unit). 2 .1 .2 Multi-leaf damper AIR1-JVK XH 1000-2500 and RH 1500-3000 The unit must be fully isolated from the mains power supply before all maintenance and installation work and... - Page 14 Installation and Operating Instructions Multi-leaf damper AIR1-JVK 1. Open the latch and turn the handles counter clockwise to open the doors (Fig. 4). Fig .4 2. Loosen the screws (see Fig. 5). Fig .5 3. Apply seal to the flange surface (see Fig. 6).
-
Page 15: Multi-Leaf Damper Air1-Jvk Xh 3500-8500 And Rh 5000-15000
5. Connect the multi-leaf damper actuator via plug (see Fig. 8). Fig .8 2 .1 .3 Multi-leaf damper AIR1-JVK XH 3500-8500 and RH 5000-15000 The unit must be fully isolated from the mains power supply before all maintenance and installation work and... - Page 16 Installation and Operating Instructions Multi-leaf damper AIR1-JVK 3. Pull the latch and loosen the plate fastening to insert the multi-leaf damper (see Fig. 11). Fig .11 4. Close the latch to secure the multi-leaf damper (see Fig. 12). Fig .12 5.
-
Page 17: Chapter 3 Service And Maintenance
Installation and Operating Instructions Multi-leaf damper AIR1-JVK CHAPTER 3 3 .0 Service and maintenance Cleaning and maintenance work may only be carried out by an electrician. SERVICE AND Danger to life! MAINTENANCE The unit must be fully isolated from the mains power supply before all maintenance and installation work and... - Page 18 2.1.2 Registre de fermeture AIR1-JVK XH 1000-3500 et RH 1500-3000 .......
-
Page 19: Informations Importantes
Si les consignes figurant dans cette notice ne sont pas correctement respectées, la garantie s’annule. Il en est de même pour toute implication de responsabilité du fabricant. L’utilisation de pièces de rechange non conseillées ou proposées par Helios n’est pas permise. Les dégâts causés par cette mauvaise utilisation ne sont pas inclus dans la garantie. -
Page 20: Consignes De Montage Générales
Notice de montage et d’utilisation Registre de fermeture AIR1-JVK Désignation du produit Poids Durée de fonc- Température Puissance Tension de Indice de Type de moteur (kg) tionnement ambiante max . (kW) fonctionne- protection (ouvert / fermé) (°C) ment (W) (IP) AIR1-JVK XH 5500/RH 5000-6000 40...75... -
Page 21: Mise Au Rebut
– Procéder au raccordement électrique des servomoteurs dans le coffret électrique (se référer au schéma de raccorde- ment de la notice de montage et d’utilisation de la centrale AIR1). 2 .1 .2 Registre de fermeture AIR1-JVK XH 1000-2500 et RH 1500-3000 Mettre impérativement l’appareil hors tension avant tous travaux d’entretien, d’installation ou avant l’ouverture DANGER du boîtier électrique ! Le raccordement électrique doit être effectué... - Page 22 Notice de montage et d’utilisation Registre de fermeture AIR1-JVK 1. Ouvrir le verrou et tourner les poignées dans le sens inverse des aiguilles d’une montre afin d’ouvrir les portes (voir fig. 4). Fig . 4 2. Desserrer les vis (voir fig. 5).
-
Page 23: Registre De Fermeture Air1-Jvk Xh 3500-8500 Et Rh 5000-1500
5. Raccorder le servomoteur du registre de fermeture à l’aide du connecteur (voir fig. 8). Fig . 8 2 .1 .3 Registre de fermeture AIR1-JVK XH 3500-8500 et RH 5000-15000 Mettre impérativement l’appareil hors tension avant tous travaux d’entretien, d’installation ou avant l’ouverture DANGER du boîtier électrique ! Le raccordement électrique doit être effectué... - Page 24 Notice de montage et d’utilisation Registre de fermeture AIR1-JVK 3. Tirer sur le verrou et retirer la fixation en tôle pour installer le registre de fermeture (voir fig. 11). Fig . 11 4. Refermer le verrou en le faisant glisser afin de bloquer le registre de fermeture (voir fig. 12).
- Page 25 Notice de montage et d’utilisation Registre de fermeture AIR1-JVK CHAPITRE 3 3 .0 Entretien et maintenance Les travaux de nettoyage et de maintenance doivent être effectués exclusivement par un électricien qualifié. ENTRETIEN ET Danger de mort ! MAINTENANCE Mettre impérativement l’appareil hors tension avant tous travaux d’entretien, d’installation et avant l’ouverture du boîtier électrique !
- Page 26 Notice de montage et d’utilisation Registre de fermeture AIR1-JVK...
- Page 27 Notice de montage et d’utilisation Registre de fermeture AIR1-JVK...
- Page 28 HELIOS Ventilatoren GmbH + Co KG · Lupfenstraße 8 · 78056 VS-Schwenningen HELIOS Ventilateurs · Le Carré des Aviateurs · 157 avenue Charles Floquet · 93155 Le Blanc Mesnil Cedex CH HELIOS Ventilatoren AG · Tannstrasse 4 · 8112 Otelfingen GB HELIOS Ventilation Systems Ltd.
Need help?
Do you have a question about the AIR1-JVK and is the answer not in the manual?
Questions and answers