Advertisement
Available languages
Available languages
Quick Links
Advertisement

Related Manuals for Funkey SP-561


Summary of Contents for Funkey SP-561
- Page 1 SP-561 / SP-588 KP-88 AK-61 Bedienungsanleitung / User Manual Version: 01/2021...
- Page 2 Vielen Dank, dass Sie sich für dieses Produkt entschieden haben. Um sicherzustellen, dass Sie mit diesem Produkt vollständig zufrieden sind, lesen und verstehen Sie dieses Handbuch sorgfältig. BITTE SORGFÄLTIG DURCHLESEN Bitte bewahren Sie dieses Handbuch zum späteren Nachschlagen an einem sicheren Ort auf. Händigen Sie alle Unterlagen bei Weitergabe des Produkts an Dritte ebenfalls mit aus.
- Page 3 Alle Informationen in dieser Bedienungsanleitung wurden nach bestem Wissen und Gewissen kontrolliert. Weder Autor noch Herausgeber können jedoch für Schäden haftbar gemacht werden, die in Zusammenhang mit der Verwendung dieser Bedienungsanleitung stehen. Sonstige, in diesem Dokument aufgeführte Produkt-, Marken- und Unternehmensbezeichnungen können die Warenzeichen ihrer jeweiligen Eigentümer sein.
- Page 4 Netzspannung Sollte für die Nutzung ein externes Netzteil notwendig sein, schließen Sie dieses an eine Steckdose mit der richtigen Spannung an. Schließen Sie das Gerät nicht an eine andere Netzspannung an, als die, für die Ihr Produkt vorgesehen ist. Ziehen Sie den Netzadapter aus der Steckdose, wenn Sie den Artikel nicht benutzen oder wenn es zu einem Gewitter kommt.
- Page 5 Reproduktion oder das Kopieren von Bildern, auch in veränderter Form. Inhalt 1. Hinweise zur richtigen Nutzung, Reinigung und Aufbewahrung ..........5 2. Einfache Fehlerbehebung ......................5 3. SP-561 / SP-588........................... 6 4. KP-88 ............................11 5. AK-61 ............................15 1. Hinweise zur richtigen Nutzung, Reinigung und Aufbewahrung Das Instrument kann mit einem weichen und sauberen Tuch abgewischt werden.
- Page 6 3. SP-561 / SP-588 1. Bedieneinheit LED Display FullFingered Taste Power ON/OFF Start / Stopp Taste Steuertaste + FILL-In Taste Steuertaste - Synchro Taste Volume Taste Demo Taste Tempo Taste Sustain Taste Tone Taste Drum Kit Taste Transpose Taste Reset Taste...
- Page 7 Aufnahme Taste Kopfhöreranschluss Dual Taste LINE-In USB DC 5V Anschlussbuchse Play / MIDI Output Interface 2. Allgemeine Bedienung 1) Einschalten Drücken Sie die Power On / Off Taste für ca. 1 Sekunde um das Instrument einzuschalten. Um das Instrument auszuschalten drücken Sie die Taste erneut. Der Power On/Off Schalter funktioniert nicht im Standby-Modus.
- Page 8 7) Demo Durch Drücken der Demo Taste gelangen Sie in das Menü für die Widergabe der Demo Songs. Wählen Sie den gewünschten Song mittels der Steuertasten. Stoppen Sie die Demo Widergabe durch Drücken der Start/Stop Taste. 8) Akkordbegleitung Durch Drücken der FullFingered Taste um die Akkorderkennung zu aktivieren. Nun können Sie bei gestarteter Rhythmusbegleitung mittels zwei Eingabemöglichkeiten einfache Dur und Moll Akkorde bestimmen.
- Page 9 widerzugeben. Stoppen Sie die Widergabe durch Drücken der Play Taste. Für eine erneute Widergabe drücken Sie erneut Play. Durch erneutes Drücken von REC wird der Speicher gelöscht und Sie gelangen wieder zum Aufnahmemodus. 14) Drum Kit Drücken Sie die Taste DrumKit um die Klaviatur als Percussion Instrument zu nutzen. Sie verlassen diese Einstellung durch erneutes Drücken der DrumKit Taste.
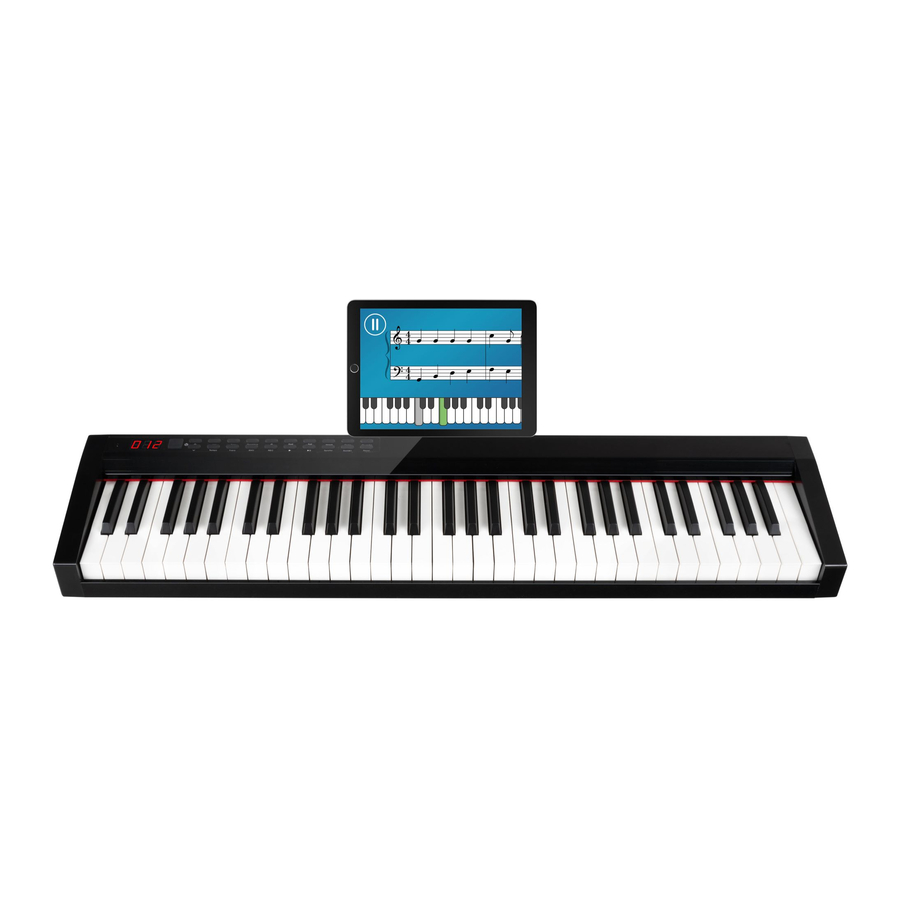
- Page 10 Bluetooth-Audio Verbinden Sie Ihr Instrument mit einem bluetoothfähigen Mobiltelefon oder Tablet um Musik von Ihrem Smart Device über das Piano widerzugeben. Der Bluetooth Name zur Audio Übertragung lautet „Music Piano“ 5. Noten / Tablethalter Stecken Sie die mitgelieferten Kunststoffwinkel rückseitig in die schmale Sicke an der Oberkante des Instruments um diese als Noten bzw.
- Page 11 4. KP-88 LED Display Synchro Start Taste Steuertaste + FullFingered Taste Tone Taste FILL-In Taste Steuertaste - Aufnahme Taste RHY Taste Stopp / Pause Taste Dual Voice Taste Play Taste Dual Voice USB DC 5V Demo Taste Anschlussbuchse / MIDI Output Interface Sustain Taste Pedal Anschluss...
- Page 12 Metronom Kopfhöreranschluss Volume Taste On / Off Schalter Tempo Taste LED Betriebsanzeige Transpose Taste LINE-Ladeanzeige 2. Allgemeine Bedienung 1) Einschalten Schalten Sie das Instrument mit dem On / Off Schalter ein bzw. aus. 2) Auto Standby Wenn Sie das Instrument für einige Minuten nicht benutzen schaltet es automatisch in den Standby Modus.
- Page 13 8) Akkordbegleitung Durch Drücken der FullFingered Taste um die Akkorderkennung zu aktivieren. Nun können Sie bei gestarteter Rhythmusbegleitung mittels zwei Eingabemöglichkeiten einfache Dur und Moll Akkorde bestimmen. Die Rhythmusbegleitung wird nun durch eine vollständige Akkordbegleitung ergänzt. Die folgenden beiden Eingabemöglichkeiten werden vom Instrument automatisch erkannt.
- Page 14 14) Dual Voice Drücken Sie die Taste Dual Voice um zwei Klangfarben zu überlagern. Wählen Sie erst eine Klangfarbe mit den Steuertasten, drücken dann Dual Voice und wählen Sie nun die zweite Klangfarbe mit den Steuertasten. Verlassen Sie diesen Modus durch erneutes Drücken der Taste Dual Keyboard.
- Page 15 5. AK-61 1. Bedieneinheit Trans Toneauswahl Tasten Vibrato Vibrato Taste Rhythmusauswahl Sustain Sustain Taste Play Program Rhythmus-Aufnahme Aufnahme Taste Metronom Stopp / Pause Taste LED Ladekontrolle...
- Page 16 Demo Demo Taste LED Betriebsanzeige USB DC 5V Insert Fill-In Taste Anschlussbuchse / MIDI Output Interface DrumKit Drum Kit Taste Pedalanschluss Tutorial Lernfunktion Kopfhöreranschluss Grand Piano Grand Piano Taste Line-In Buchse Tempo Steuertasten On / Off Schalter Lautstärketasten Trans Transpose Taste Dynamics Anschlagsdynamik 2.
- Page 17 8) Anschlagsdynamik Drücken Sie die Taste Dynamics um die Anschlagsdynamik aktiv oder inaktiv zu schalten. 9) Transponierfunktion Durch Drücken der Trans Taste gelangen Sie in das Menü für die Transponierfunktion. Steigern, bzw. verringern Sie die Tonhöhe in Halbtonschritten durch mehrmaliges Drücken der Trans Taste.
- Page 18 3. Seitliche Anschlüsse 1) Midi-Verbindung über Kabel Das Piano kann mittels der USB Midi-Schnittstelle mit jedem midifähigen Programm auf Ihrem Rechner verbunden werden. Sollten Sie noch keine midifähige Software auf Ihrem Rechner installiert haben, finden Sie eine kostenfreie Software für Windows zum Funktionstestest Ihres Pianos unter https://www.kirstein.de/produkte/00046/00046319/en-piano.zip zum Download.
-
Page 19: Vereinfachte Eu-Konformitätserklärung
Handeln, rechtlich zu binden. VEREINFACHTE EU-KONFORMITÄTSERKLÄRUNG Hiermit erklärt Musikhaus Kirstein GmbH, dass der Funkanlagentyp [ Funkey SP-561 / SP-588 / KP-88] der Richtlinie 2014/53/EU entspricht. Der vollständige Text der EU- Konformitätserklärung ist unter der folgenden Internetadresse verfügbar: http://www.kirstein.de/docs/Konformitaetserklaerung/CE_Konformitaetserklaerung_00074008.p... - Page 20 SP-561 / SP-588 KP-88 AK-61 User Manual Version: 01/2021...
-
Page 21: Please Read Carefully
Thank you for choosing this product. To ensure that you are completely satisfied with this product, please read and understand this manual carefully. PLEASE READ CAREFULLY Please keep this manual in a safe place for future reference. Please also hand over all documents when passing on the product to third parties. - Page 22 All information in this operating manual has been checked to the best of our knowledge and belief. However, neither the author nor the publisher can be held liable for any damages in connection with the use of this manual. Other product, brand and company names mentioned in this document may be the trademarks of their respective owners.
- Page 23 Mains voltage If an external power supply unit is required for use, connect it to an outlet with the correct voltage. Do not connect the device to a power supply voltage other than that for which your product is intended. Unplug the AC adapter from the wall outlet when you are not using the product or when a thunderstorm is brewing.
-
Page 24: Simple Troubleshooting
Content 1. Instructions for proper use, cleaning and storage............... 5 2. Simple troubleshooting......................... 5 3. SP-561 / SP-588........................... 6 4. KP-88 ............................11 5. AK-61 ............................15 1. Instructions for proper use, cleaning and storage. - Page 25 3. SP-561 / SP-588 1. Operating unit LED display FullFingered button Power ON/OFF Start / stop button Control button + FILL-In button Control button - Synchro button Volume button Demo button Tempo button Sustain button Tone button Drum Kit Button...
- Page 26 Record button Headphone jack Dual button LINE-In USB DC 5V connector / MIDI Play output interface 2. General operation 1) Power On Press the Power On / Off button for approx. 1 second to switch the instrument on. To turn the instrument off, press the button again. The Power On/Off switch does not work in standby mode.
- Page 27 7) Demo Press the Demo button to enter the demo song playback menu. Select the desired song using the control buttons. Stop the demo playback by pressing the Start/Stop button. 8) Chord accompaniment Press the FullFingered button to activate the chord recognition. Now you can determine simple major and minor chords by means of two input possibilities while the rhythm accompaniment is started.
- Page 28 14) Drum Kit Press the DrumKit button to use the keyboard as a percussion instrument. You leave this setting by pressing the DrumKit button again. 15) Dual Keyboard Press the Dual Keyboard button to split the keyboard in two. A bass tone is now set in the left keyboard area.
- Page 29 6. Reset Press the Reset key to reset the instrument to the factory settings.
- Page 30 4. KP-88 LED display Synchro Start button Control button + FullFingered button Tone button FILL-In button Control button - Record button RHY button Stop / Pause button Dual Voice button Play button Dual Voice USB DC 5V connector / Demo button MIDI output interface Sustain button Pedal connection...
- Page 31 Volume button On / Off switch Tempo Tempo button LED operation indicator Trans Transpose button LINE charge indicator 2. General operation 1) Switch on Switch the instrument on or off with the On / Off switch. 2) Auto Standby If you do not use the instrument for a few minutes, it automatically switches to standby mode. Wake up the instrument by pressing any key on the keyboard.
- Page 32 chord accompaniment. The following two input possibilities are automatically recognized by the instrument. Single Finger In this mode, by means of a single arbitrary key in the range C3 ~ F4 #, you can specify the chord for the corresponding chord accompaniment. Here, the pressed key sets the root of the accompaniment chord in major.
- Page 33 3. Connections 1) Midi connection via cable The piano can be connected to any midi-enabled program on your computer via the USB midi interface. If you don't have a midi capable software installed on your computer yet, you can find a free software for Windows to test the function of your piano at https://www.kirstein.de/produkte/00046/00046319/en-piano.zip for download.
- Page 34 5. AK-61 1. Operating unit Trans Tone selection Vibrato Vibrato button Rhythm selection Sustain Sustain button Play Program Rhythm recording Record button Metronome Stop / Pause button LED charge control...
- Page 35 Demo Demo button LED operation indicator USB DC 5V connector / Insert Fill-In button MIDI output interface DrumKit Drum Kit button Pedal connection Tutorial Learning function Headphone jack Grand piano Grand piano button Line-In jack Tempo control buttons On / Off switch Trans Volume buttons Transpose button...
- Page 36 8) Touch dynamics Press the Dynamics button to toggle touch dynamics active or inactive. 9) Transpose function By pressing the Trans button you enter the menu for the transpose function. Raise or lower the pitch in semitone steps by pressing the Trans button several times. 10) Metronome Press the metronome button to activate the metronome.
- Page 37 3. Connections 1) Midi connection via cable The piano can be connected to any midi-enabled program on your computer via the USB midi interface. If you don't have a midi capable software installed on your computer yet, you can find a free software for Windows to test the function of your piano at https://www.kirstein.de/produkte/00046/00046319/en-piano.zip for download.
-
Page 38: Weee Declaration
SIMPLIFIED EU DECLARATION OF CONFORMITY Musikhaus Kirstein GmbH hereby declares that the radio equipment type [Funkey SP-561 / SP- 588 / KP-88] is in compliance with Directive 2014/53/EU. The full text of the EU Declaration of Conformity is available at the following internet address: http://www.kirstein.de/docs/Konformitaetserklaerung/CE_Konformitaetserklaerung_00074008.p...
Need help?
Do you have a question about the SP-561 and is the answer not in the manual?
Questions and answers