Chopin Rheo F4 User Manual
Hide thumbs
Also See for Rheo F4:
- Maintenance manual (84 pages) ,
- Quick installation and first test (16 pages)

Related Manuals for Chopin Rheo F4


Summary of Contents for Chopin Rheo F4
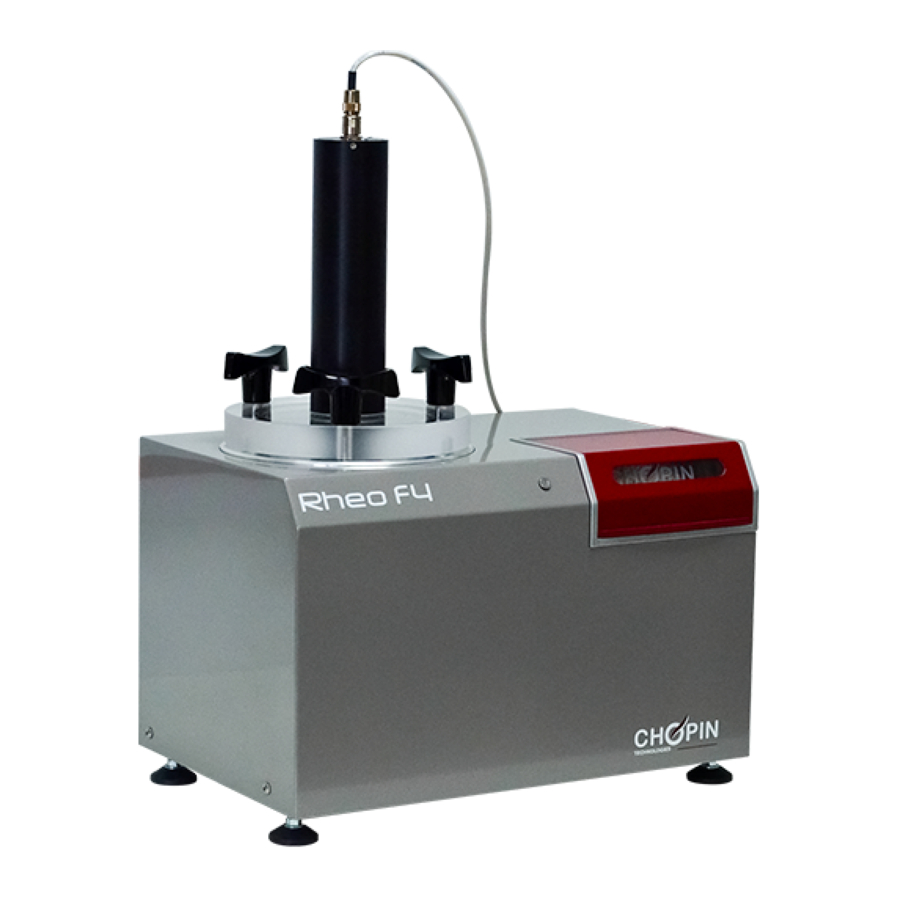
- Page 1 Rheo F4 User’s manual 07/2015 20, avenue Marcellin Berthelot - Z.I. du Val de Seine www.chopin.fr 92396 Villeneuve La Garenne cedex - France...
-
Page 2: Table Of Contents
Table of contents Introduction ..............................7 Installation and start-up ..........................10 Use ................................18 Maintenance .............................. 32 Appendix 1: Standard curves ..........................36 Appendix 2: Improving flour quality ........................39 Appendix 3: CHOPIN protocol ........................... 41... - Page 3 The technical elements that constitute this manual (text and illustrations) are not contractual, their only target being to bring assistance for using the Rheo F4. Use, duplication or disclosure of subject data, for any purpose other than relating to the use or servicing of the equipment, is strictly prohibited without the written authorisation of CHOPIN Technologies.
- Page 4 Rheo F4 User’s manual 07/2015...
- Page 5 Rheo F4 User’s manual 07/2015...
- Page 6 Rheo F4 User’s manual 07/2015...
-
Page 7: Introduction
1.2 Operating principle The Rheo F4 analyses the development of a dough sample placed in a test bowl and that will ferment under the conditions imposed by the protocol used (temperature, weights placed on it, etc.). - Page 8 Rheo F4 The cycle principle consists in measuring total gas release and gas release less its carbon dioxide trapped in the soda lime cartridge. The difference between the two gas release curves gives the quantity of carbon dioxide given off by the dough during the test.
- Page 9 Rheo F4 1.3 Device characteristics General characteristics Power supply: 220/240 Vac - 50 /60 Hz - 150 W Noise level: < 70 dB Dimensions: Width x Depth x Height: 415 x 265 x 545 mm Net weight: 12 kg Gross weight: 20 kg Fuse Fuse 5x20 T 1.6A 250 V...
-
Page 10: Installation And Start-Up
The device is protected by a specific packaging. We strongly recommend that you keep this packaging for transfers from workstation to workstation or for return for service (re-dispatching to CHOPIN Technologies or your distributor). This packaging contains the Rheo F4 with its accessories. User’s manual 07/2015... - Page 11 Rheo F4 2.2 Part lists The Rheo F4 package contains the following parts in addition to the device: 500 gr weights and standard support Proofing basket Soda lime cartridge piston assembly Power cable Dough development sensor cable Cable to computer...
- Page 12 5 Power supply port Connect the power cable to the supply port (5) Connect the dough development sensor cable to the Rheo F4 using port RJ (1), then connect the other side of the cable to the dough development sensor. User’s manual...
- Page 13 The device must also be connected (2) to a computer. Once all the connections have been made, press the I/O switch. Please wait for the Rheo F4 peripheral to be fully installed, this can take a few minutes. If the installation is incomplete, double click the executable on the CDROM of the instrument.
- Page 14 Before installing the software, please refer to the file "Read me first" available on the USB stick provided. Plug the USB stick supplied with the Rheo F4 on your computer. Click on the software icon and then on setup.exe. Click on [Exécuter].
- Page 15 Rheo F4 Choose the installation folder and click on [Next]. Choose the folder where the icon will appear in the start menu and click on [Next]. You can choose to create an icon on the desktop by ticking the box. Click on [Next] to validate installation.
- Page 16 Rheo F4 2.5 Conditions of use The Rheo F4 must be installed on a flat, clean and tidy bench. The device must not be installed close to a water source (taps). The device must not be exposed to sunlight or heat sources.
- Page 17 Rheo F4 To access the connection configuration menu, click on the icon: [Connection] The following window is displayed: Select the COM port corresponding to the connection of your device. If you do not know your connection port, you can try them one by one until the device is connected.
-
Page 18: Use
Rheo F4 3 Use 3.1 Preliminary parameter settings for running a test When using the software for the first time, we recommend you check the following parameters: customers, protocols and configuration. Customer parameters To access customer parameters, click on the tab [Files] followed by [Customers]. - Page 19 Rheo F4 Protocol parameters To access protocol parameters, click on the tab [Files] followed by [Protocols]. The following window is displayed: You can thus define your own protocols by clicking on [New]. Enter the protocol name and click on [OK]. You can now enter the protocol values.
- Page 20 To access the configuration parameters, click on the tab [Tools] followed by [Configuration]. The following window is displayed: The Rheo F4 section (1) gives the device serial number and the version of the embedded software. The User section (2) lets you enter your personal information such as your address, phone and fax numbers, and lets you choose a picture for the logo.
- Page 21 Rheo F4 You can also change the curve colors by clicking the button [Colors]. The window (opposite) summarises the list of curves and their color. Click on the curve colors box to bring up the color selection window. You can choose the color you want for each curve.
- Page 22 . (See Replacing the soda lime cartridge). Prepare the dough as per the relevant protocol (e.g. CHOPIN, see Appendix 3) then place it at the bottom of the basket and manually pack it down at regular intervals. Height in the basket must be even, just below the first lower holes.
- Page 23 Rheo F4 3.3 Starting the test To access the test window, go to the tab [Test] then click on [Start]. You can also access it directly by clicking on: [Start] The following window lets you choose the test protocol, and gives its main parameters, as well as name the test and enter a comment.
- Page 24 Rheo F4 The test starts, the [START] button becomes the [STOP] button and changes from green to red. The first LED in the bottom right- hand corner of the software screen moves to red and indicates that the device is in the test process.
- Page 25 Rheo F4 To display the test process diagram, click on the button: [Display] This window displays the operation of the Rheo F4. You can display the current cycle, temperature stability, electrovalve status, etc. You can stop the test at any time by clicking the button: [Stop] Confirm the stop and let the pneumatic system bleed.
- Page 26 Rheo F4 3.5 End of test and cleaning of the Rheo F4 The Rheo F4 will bring up a warning screen to inform you that the test is finished. You can save the test by clicking the button: [Save] After the test and before conducting a new test, you must clean the Rheo F4.
- Page 27 Rheo F4 3.6 Test analysis Based on the test conducted or on recorded tests, you can display the results and compare several tests. 1 Curve characteristics [Customer] button (see page [Comparison] button [Raw curves] tick [Information] tick 7 Time pointer...
- Page 28 Rheo F4 By clicking the [Information] button (3), you will bring up the information for the open tests, such as the protocol used, the customer, and the embedded software version. By clicking the [raw curves] button, you will bring up the points that were used to plot the curve.
- Page 29 Rheo F4 3.7 Other functions Update The update function is to update the program embedded in the Rheo F4. Click on the tab [Update] followed by [Embedded program]. This function is reserved for accredited persons Maintenance The maintenance function is for access to the calibration functions.
- Page 30 Moreover, as measures are taken at temperatures between 27°C and 30°C, action of the fungal enzymes is highly visible with the Rheo F4. To see reference curves, refer to the Appendix 1 page 36 User’s manual...
- Page 31 = dough tolerance h: dough development height at the end of the test (T:3 hours for a complete test with CHOPIN protocol, or T: x for a manually interrupted test with another protocol). (Hm-h)/Hm: % of drop in development after 3h (case of the...
-
Page 32: Maintenance
CHOPIN Technologies can propose updates for the software embedded in the device. The installation procedure is described page 34 The malfunctions: If the Rheo F4 no longer communicates with the computer or refuses to attain the setpoint temperature, check the fuse. The procedure is described on page User’s manual... - Page 33 Check that if you are opposite the Rheo F4, the cartridge metal tube is positioned as shown opposite. Close the cartridge lid. Once the cartridge has been filled, you must check the tightness of the pneumatic circuit by following the instructions in the "Leak test"...
- Page 34 Rheo F4 4.2 Updating The update function is to update the program embedded in the Rheo F4. Click on the tab [Update] followed by [Embedded program]. This function is reserved for accredited persons. 4.3 Replacing the fuse Before starting, check you have disconnected the machine mains lead.
- Page 35 4.4 Leak test The leak test principle is simple. The pneumatic circuit is pressurised using the pump. Then the Rheo F4 will monitor this pressure for at least 15 minutes. The procedure consists in monitoring the entire circuit first. Then if there is a leak, the two sub circuits will be used to locate the leak.
-
Page 36: Appendix 1: Standard Curves
Rheo F4 APPENDIX 1: STANDARD CURVES A. Dough development (using the CHOPIN protocol) >50 Good dough development. Excellent tolerance. Good bakery flour. Good bakery quality flour. Must give excellent results in a very wide Can be used in many conditions. - Page 37 Rheo F4 Good dough development. No problems before 2 hours. Followed Good dough development. Average quality flour that should be used by problems of use if longer proofing. in bakeries with care, if not , it will be disappointing. Good dough development. Flour that needs to be improved with...
- Page 38 Rheo F4 B. Gas Release (using the CHOPIN protocol) Relatively low proofing capacity. Should be slightly increased. Relatively low proofing capacity. It needs to be slightly increased. However, prolonged production of CO and late appearance of Tx However, production of CO is prolonged.
-
Page 39: Appendix 2: Improving Flour Quality
(with or without associated actions) is very common. Their use is justified by the baking industry needs and by the development of technology in this field. The Rheo F4 can assess the action of the various additives that are often used excessively. - Page 40 Rheo F4 Effect of the various additives on gas release. Sample Sample + 0.5% malted wheat flour Sample Sample + 150 ppm alpha amylase User’s manual 07/2015...
-
Page 41: Appendix 3: Chopin Protocol
Rheo F4. It is essential to follow this protocol when Dough consistency has a great effect on tests using the Rheo F4. preparing the samples for analysis. This is linked to the amount of water added to the dough. It is understood that consistency varies according to the target aims, the products manufactured, and local customs. - Page 42 Rheo F4 Amount of water to be removed or added (Table 2). Qty H20(ml) Qty H20(ml) Qty H20(ml) Qty H20(ml) -15.61 0.03 13.73 20.93 -15.1683 0.3677 13.9377 21.0077 -14.7292 0.7028 14.1428 21.0828 -14.2927 1.0353 14.3453 21.1553 -13.8588 1.3652 14.5452 21.2252 -13.4275...
- Page 43 Rheo F4 Example: Flour H O=14.6%; Alveographic Pmax=55 at 14.6% water content corresponds to 126.8ml of water. As the correction to be made according to P is -1.69ml, flour hydration should be: 126.8ml-1.69ml=125.11ml. User’s manual 07/2015...
- Page 44 Rheo F4 CHOPIN protocol The CHOPIN protocol characteristics are: test temperature of 28.5°C dough composition: 250g of flour, 3g (1.2%) of quick-rising dry yeast (or 7g of baker's fresh yeast), 5g of salt, hydration as per tables 1 and 2;...
Need help?
Do you have a question about the Rheo F4 and is the answer not in the manual?
Questions and answers