Chopin Infraneo User Manual
Nit (near infrared transmittance) analyzer
Hide thumbs
Also See for Infraneo:
- Maintenance manual (134 pages) ,
- Quick installation and first test (16 pages)

Related Manuals for Chopin Infraneo


Summary of Contents for Chopin Infraneo
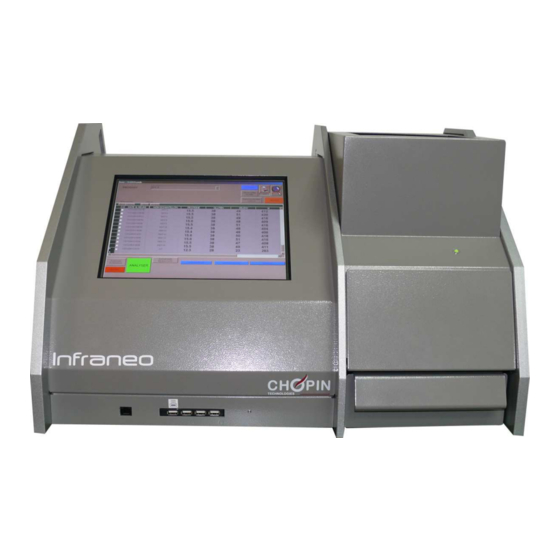
- Page 1 Infraneo NIT (NEAR INFRARED TRANSMITTANCE) ANALYZER User’s manual 10/2015 20, avenue Marcellin Berthelot - Z.I. du Val de Seine www.chopin.fr 92396 Villeneuve La Garenne cedex - France www.chopinservice.com...
-
Page 2: Table Of Contents
Table of contents INTRODUCTION .............. 5 INSTALLATION AND STARTUP ........8 THE INFRANEO APPLICATION ........17 USER MENU ..............30 MAINTENANCE MENU ..........34 EXPERT MENU .............. 38 “BACKUP” FUNCTIONALITY ......... 60 MAINTENANCE OF THE INFRANEO ......73 User’s manual 10/2015... - Page 3 In order to ensure the proper operation of the software, please do not change the config- uration settings of Windows™. Do not install software that does not come with the Infraneo. This will ensure the device will not be infected by any virus.
- Page 4 INFRANEO User’s manual 10/2015...
-
Page 5: Introduction
The Infraneo is intended for the analysis of solid products by near infrared transmittance. The device establishes the spectrum of a sample in the near infrared domain. In this spectral domain, the product absorbance is lower than in higher spectral bands. - Page 6 INFRANEO General characteristics Power supply: 110/240 Vac 50 /60 Hz 225 W Noise level: < 70 dB Dimensions: W x D x H: 600 x 500 x 385 mm Net weight: 33 kg Windows XP Pro 12’’ LCD Screen with touch pad Intel Atom N270 at 1,6 GHz, 160 GB Hard Drive, 1 RJ 45 LAN and 4 USB2 ports.
- Page 7 INFRANEO SW Module Power supply: 12 Vdc - 10 W Dimensions - W x D x H: 220 x 270 x 320 mm Net weight: 10 kg Aqua-TR Option Power supply: 12 Vdc - 35 W Dimensions - W x D x H:...
-
Page 8: Installation And Startup
(dispatch back to CHOPIN Technologies or your dealer) This container contains the Infraneo with its supply cord, its accessories and a user’s manual. User’s manual... - Page 9 1 set of 4 fuses (not represented), 1 USB card with a copy of the software and user’s manual (2), 1 50 W Infraneo lamp (not represented), 1 green USB stick "Database back up (not represented), 1 universal sliding cell (3),...
- Page 10 INFRANEO For users having a “Grain” sliding cell : The “universal” sliding cell is not available for wheat testing – the measurement window is hidden. This sliding cell is aimed primarily at : Flour testing Cleaning Maintenance For users not having the “Grain” sliding cell, the “universal” sliding cell enables wheat and flour testing.
- Page 11 Place the Infraneo on a horizontal, stable surface. Do not place the Infraneo behind a glass window, particularly if it is exposed to sunlight. The Infraneo must not be placed right up against a wall. Leave sufficient space to ensure proper ventilation. User’s manual...
- Page 12 INFRANEO 2.2. Connection Connecting through USB ports The 4 USB ports are available on the front panel for USB external connection: keyboard, mouse, modem or mass storage discs (key, hard drive). Connecting other devices The RJ45 connector on the front is available for LAN connection.
- Page 13 Connection for SW module or moisture tester Connecting an USB printer A ticket printer can be connected to the Infraneo via the USB port located on the far left. Location of the USB ports is described on page 12 User’s manual...
- Page 14 INFRANEO Electrical connection The Infraneo is an electrical device which must be connected to an electrical network with using a grounded plug. The electrical network must also comprise upstream a residual current device (RCD) with a sensitivity of ≤ 30 mA, class AC.
- Page 15 Glass hider Cleaning kit Switching On the Infraneo Press the ON / OFF button at back of the device. The Infraneo runs a functional test sequence which lasts approximately 15 seconds (pre-heating excluded). If inconsistencies are detected during this sequence, the device displays an error number (see Error messages page 76).
- Page 16 INFRANEO Restarting the Infraneo Press button “EXIT” to close the application then press “Start/Stop” in the operating system to switch off the screen. Closing the program User’s manual 10/2015...
-
Page 17: The Infraneo Application
INFRANEO THE INFRANEO APPLICATION The Infraneo application is a graphic program with a user interface allowing access to all Infraneo functions. The main functions are: Management of databases with unlimited number of products and parameters. Simultaneous analysis and display of multiple parameters. - Page 18 INFRANEO In case of reinstallation or update, please note that the program can be installed from the supplied Infraneo USB memory stick. If the anti-virus software detects the Worm file: W32/Downaduprun.A on the USB memory stick, do not take this warning into account.
- Page 19 INFRANEO 3.1. The main window of the Infraneo application After the pre-heating phase, the application main window appears. Name of the database Selected product Quit program Start an analysis Access to service menus The name of the database in use is mentioned in the window’s title bar.
- Page 20 INFRANEO 3.2. Making a basic test From the main window of the application, select in the scrolling menu the product to be analyzed. Fill the hopper of the Infraneo (1 liter approx.). Click on User’s manual 10/2015...
- Page 21 Click on to start the analysis. If the sample’s volume is not sufficient, the Infraneo stops the analysis and displays following window: Add grain in the hopper and click on “OK” to continue or on “Cancel” to stop.
- Page 22 INFRANEO For a detailed summary of the analysis (no. of out of range measurements, calibration, etc.), double click on the results. User’s manual 10/2015...
- Page 23 INFRANEO Printing the results If a printer is connected and activated, the results are automatically printed at end of analysis. Click on for switching on the printing and on for switching off. The printed ticket is represented as follow: Ticket header...
- Page 24 INFRANEO Using the zoom mode On Infraneo, two display modes of the results are available: - the standard mode with display of all results in a spreadsheet, - the zoom mode that allows to see in detail the last result.
- Page 25 INFRANEO Exporting the results It is possible to export the results manually at the end of analysis: Choose the application language, see Language page 54. Choose the file format in which the results will be exported : .csv or .txt.
- Page 26 Automatic recording of results To facilitate the recovery of analysis results when operating the Infraneo on a network, they are automatically exported in the same folder. The "Save" folder is located in "C:\Analyzer. It then organizes by year/ month/ day.
- Page 27 INFRANEO Flour test with Neocup The flour kit is composed of the following elements: 2 “flour” Neocups and 1 “bran” Neocup, one Neocup support, one Neofix support, one brush, one spoon, one spatula, one simplified user’s manual. Neocup Brush Neocup support...
- Page 28 INFRANEO Sample preparation Place the lower cup on the Neofix support (1). Fill one spoon of flour into the lower cup (2). Level off the flour with the spatula at 45° in relation to the lower cup (3). Assemble both cups: rotate the upper cup by 90° to complete assembly and remove the Neocup (4).
- Page 29 INFRANEO Analysis From the application main window, select “FLOUR” in the pull- down menu. If necessary, remove the grain sliding cell and place the universal sliding cell with the Neocup support (see Remove the sliding cell” page 31). Place the Neocup in the sliding cell.
-
Page 30: User Menu
INFRANEO USER MENU This menu allows access to some basic functions of the device (sliding cell removal or replacement, cleaning, etc.). For accessing the user menu, click on . Enter the password “1” in the window ACCESS RIGHTS and confirm. - Page 31 To activate a feature, select the corresponding box. The following dialog box asks you to restart the application to apply changes. It also allows choosing the connection mode between Infraneo and printer: USB or LPT (parallel). Remove the sliding cell This function allows the sliding cell to be removed for cleaning, to add or change accessories or to change the sliding cell type.
- Page 32 INFRANEO Unlock the sliding cell Click on “Unlock sliding cell” to release the sliding cell and remove it. This button has the same function as the button "Unlock sliding cell" in the main screen. Emptying Click on to empty the hopper. This button has the same function as the "Emptying"...
- Page 33 INFRANEO Backup The “backup” function is described on page 60 Zoom and printer From the user menu, you can configure the printer and the zoom to ensure the availability at start-up. Validation of these changes requires the application to be restarted.
-
Page 34: Maintenance Menu
“2” in the window ACCESS RIGHTS and confirm. This menu allows you to access the functions of the user menu defined on page as well as functions used for maintenance of the Infraneo. These maintenance operations should be performed by trained personnel only. User’s manual... - Page 35 Click on and follow displayed instructions. Remove the work sliding cell from the Infraneo and insert in place the universal sliding cell and the accessory for liquids. Press “OK”. Liquid accessory If the window below doesn't appear, click ALT+TAB at the same time, then click on “Control”.
- Page 36 Once the dibromomethane test is completed, remove the universal sliding cell, reinsert the "regular" sliding cell and press “OK”. If the test has not been successfully completed, retry. If the problem remains, please contact your CHOPIN representative RACT This function allows checking and adjustment of different positions of the sliding cell and trap.
- Page 37 After adjustments are made, click on "EEPROM" or "SAVE" to save the modifications. Click on "Quit". Press “OK” for closing the application. Switch off Windows and reboot the Infraneo so that the updates take place. The OZ function allows checking the optical bench reference position.
-
Page 38: Expert Menu
For accessing the Expert menu, click on . Enter the password in the ACCESS RIGHTS window and confirm. Note: Please contact CHOPIN for obtaining the Expert menu password. The Expert menu gives access to following functions: - exporting the spectra, - recalculating and exporting the spectra, - advanced functions, - enabling functions for the user. - Page 39 INFRANEO 6.1. Database management From the Expert menu (see page 38), click on then for accessing the management of databases. The different possible actions on the databases are described below. Any action in this section leads to the opening of a database.
- Page 40 INFRANEO Opening a database To open a database, click on , select the database in the list and click on OK. Creating a database Click on , enter the name of the new database and confirm by clicking on OK.
- Page 41 INFRANEO Click on the first cell of column “Product” and select a product in the pull-down menu. Click on the first cell of column “Parameter” and select a parameter to analyze in the pull-down menu. Click on cell “Calibration” and select a calibration.
- Page 42 Once all products in the database are defined, click on A new window comes up from which bias and slope modifications are possible. Click on to confirm and return to the main menu of the Infraneo application. User’s manual 10/2015...
- Page 43 INFRANEO Duplicating a database Click on . Select from the list the database to duplicate and confirm. Enter the name of a new database. If needed complete the new database by adding new products or parameters and click on then on to confirm and return to the main menu.
- Page 44 INFRANEO Opening an archived database After 1000 analyses have been performed, the database is automatically archived. To re-open this database, click on Select the database from the list and click on “OK”. Note: On an archived database, it is not possible to carry out any re- calculation.
- Page 45 INFRANEO 6.2. Recalculate a database Select the analyses to be recalculated by selecting the corresponding boxes in the first column (or all the tests by clicking on “All"). From the Expert menu (see page 38), click on then click on...
- Page 46 INFRANEO Click on If some analyses are out of range, the program generates a report. Click on “Close” to confirm and return to the main menu. User’s manual 10/2015...
- Page 47 INFRANEO 6.3. Export the spectra Select the analyses to be exported by selecting the corresponding boxes in the first column (or all tests by clicking on “All"). From the Expert menu (see page 38), click on enter the directory name where the files will be exported.
- Page 48 INFRANEO Three files are exported on the key. They can be opened with the software GRAMS for development of new calibrations. User’s manual 10/2015...
- Page 49 INFRANEO 6.4. Advanced functions Maintenance level User level Configuration This function allows you to: create new constituents and to associate a compartment of sliding cell to new product, create new products and to associate a compartment to each new constituent, configure the number of decimals displayed per constituent, configure the data transfer on RS port.
- Page 50 INFRANEO To create a new product: Click on “Configuration” then on “New product”, Enter in capital letters the name of the new product in box “Reference name” and select in pull-down menu “Similar product” the associated compartment. Click on “OK” to confirm, then on X to close the window.
- Page 51 INFRANEO To create a new constituent: Click on "Configuration" then on "New constituent". Enter in capital letters the name of the new constituent. It can first be checked in the scrolling list "Existing components" if the component already exist. Select the number of decimals to be applied for this constituent.
- Page 52 USB-RS adapter supplied with a CD driver a RS 232 wire To transfer data by RS from the Infraneo to an external computer, follow the different steps as follows : transfer the USB-RS adapter drivers (CD supplied with the adapter) on a USB key.
- Page 53 INFRANEO In Startup/Control Panel/System Configuration, select the “Device” tab. Click on “Device Manager”. Click on the “+” to open the location “COM and LPT ports”. Double-click on the COM2 port, select the “Port parameters” tab. User’s manual 10/2015...
- Page 54 Double-click on the USB-RS adapter port and select the “Port parameters” tab. Click on “advanced” and change the port number to COM2. Confirm and close all windows. Reboot the Infraneo and connect it to the external computer which is able to receive data directly. Language Click on and select the language to be used in the pull-down menu.
- Page 55 INFRANEO Visualize spectra This function allows to visualize the spectra during an analysis. This requires the use of a keyboard. Click on to activate the function and on “Close” to exit from the menu. To visualize the spectra during an analysis, press keys “ALT” and “TAB”...
- Page 56 INFRANEO 6.5. User functions enabled / disabled from expert menu The following functions must be enabled by the expert: Number of wheat subsamples Ticket header Lamp replacement Number of tests before archiving Database opening Standardization For enabling the access to these functions, the expert should go in the EXPERT menu and select the different authorizations.
- Page 57 INFRANEO Number of wheat subsamples The analysis of wheat can be performed in 10 or 16 subsamples. The selection is done at the User's level. Ticket header This function allows you to enter text in the 4-line header of the printout ticket.
- Page 58 Install the new lamp while positioning the arrow downward. Tighten the screws and connect the supply cable. Arrow downward Click on OK to switch on the lamp. After 10 minutes of pre-heating, the Infraneo checks the lamp function by running a self-test sequence. User’s manual 10/2015...
- Page 59 INFRANEO Number of analyses before archive To reduce the work databases and increase speed for loading and closing the databases, an automatic archiving has been implemented. So when a certain number of analyses have been carried out in a database, the database is automatically archived (at unit power-on).
-
Page 60: Backup" Functionality
INFRANEO “BACKUP” FUNCTIONALITY To access to the “Backup” function, from the main window: Click on . Enter the password “1” in the window ACCESS RIGHTS and confirm. Click on “Backup”, the message below appears. The main window will close. To access the backup functions, you will need to insert the provided green USB stick (MIC 104). - Page 61 INFRANEO The existing functionalities in the Backup functions are divided in three categories which are detailed below: Update System restore Database archiving function User’s manual 10/2015...
- Page 62 INFRANEO 7.1. UPDATE To carry out an update, different files are supplied by CHOPIN Technologies. These files should be unzipped and copied directly to the root of your USB stick. In case the setup must be updated, the window below appears.
- Page 63 INFRANEO Click on “Yes” to remove the Setup1 and close the window (X at the top right of screen). Click on “LAUNCH UPDATE”. In case the setup must be updated, the window below appears. Otherwise go to step “end setup installation”.
- Page 64 INFRANEO Select “Tout le monde” (every one), then click on “Suivant” (next). Click on “Suivant” (next), to start the Setup1 installation. If the message above appears, click on “Continuer” (continue). User’s manual 10/2015...
- Page 65 INFRANEO To end the Setup1 installation, click on “Fermer” (close). In addition to Setup1 update, the configuration files can be updated. For each file, a message similar to the previous appears and for which you only need to click on “OK”.
- Page 66 INFRANEO 7.2. SYSTEM RESTORE Among the “System tools” available, there is the “SYSTEM RESTORE”. When clicking on it, the following window appears that gives you access to some functionalities. CREATE A RESTORE POINT Before you create a restore point, you should save all configuration files.
- Page 67 INFRANEO COMPLETE RESTORE At the end of the manufacturing process, a restore point has been created by CHOPIN Technologies (with factory configuration and settings). It has been stored on the supplied green USB stick. To restore it, connect the USB key and follow procedure below.
- Page 68 This function allows you to copy the databases present on your Infraneo to your USB stick and vice-versa. Select “From USB stick to Infraneo” or “From Infraneo to USB stick” and click on “COPY DATABASE”. Choose one or more databases you want to copy and click on “Open”.
- Page 69 INFRANEO Click on “OK”, the database copy has successfully completed. User’s manual 10/2015...
- Page 70 INFRANEO 7.3. DATABASE ARCHIVING FUNCTION The menu "Database Archive Function" allows you to: Delete one or all the archived databases. Restore archived databases that were saved previously. The different databases are grouped in an archive folder. You can delete all or some of the archived databases. For this: Choose “All”...
- Page 71 INFRANEO In the open folder, select the archived database(s) to be deleted. Then click on “Open”. Click on “OK” to delete the selected database(s). If you want to save the databases before deleting them, click on “OUI” (yes) and continue. Otherwise click on “NON” (no), the selected databases won’t be saved.
- Page 72 INFRANEO Then select the folder where the data will be saved. It is also possible to restore a database to a folder where there are other databases. For this, click on “Restore database in archived repertory” then select the databases to be restored.
-
Page 73: Maintenance Of The Infraneo
Replace all fuses. If the device doesn't start after checking of the electrical supply, check the fuses of the Infraneo. The fuses are located at the back of the device behind a cover. Unplug the device, use a small screwdriver to open the fuse holder, and replace the defective fuse(s). - Page 74 To configure this connection, follow these steps : Connect the Infraneo to the LAN connection or to the internet using a RJ45 connector. To do this, one RJ45 cable end needs connection to the RJ45 connector plug at the right side of the Infraneo.
- Page 75 INFRANEO 8.2. Troubleshooting Infraneo LED STATUS The LED located on the front panel of the Infraneo provides indications on the operating status. LED colour / status Status Infraneo switched off Green Infraneo ready Flashing green Waiting for initialization Orange Standby...
- Page 76 Measurement impossible (bad sliding cell position) ERR 113 Check that the sliding cell is at its place Contact your agent if the problem persists Measurement impossible (initialization fault) ERR 114 Restart the Infraneo Contact your agent if the problem persists User’s manual 10/2015...
- Page 77 Contact your agent if the problem persists Communication port problem ERR 201 Restart the Infraneo Contact your agent if the problem persists The application does not communicate with the Infraneo ERR 301 Restart the Infraneo Contact your agent if the problem persists User’s manual...
- Page 78 Description Periodicity User Agent NEOBS50/ES Lamp 1000 hours NEO C6 Vaned rotor 4 years The replacement of parts requiring the dismantling of the equipment shall be carried out by a CHOPIN approved technician. Please contact your agent. User’s manual 10/2015...
Need help?
Do you have a question about the Infraneo and is the answer not in the manual?
Questions and answers