
Related Manuals for Sharp KH-6V08FT00-EU


Summary of Contents for Sharp KH-6V08FT00-EU
- Page 1 Home Appliances KH-6V08FT00-EU Cooking User manual Guide D’utilisatin Bedienungsanleitung Istruzioni per l’uso...
- Page 2 GB-Declaration of conformity We declare that our products meet the applicable European Directives, Decisions and Regulations and the requirements listed in the standards referenced. FR-Déclaration de conformité Nous déclarons que nos produits sont conformes aux Directives, Décisions et Règlementations européennes en vigueur et aux exigences visées dans les normes citées en référence. DE-Konformitätserklärung Wir erklären, dass unsere Produkte die geltenden europäischen Richtlinien, Entscheidungen und Regularien sowie die...
- Page 3 GB: The symbol on the product or on its packaging indicates that this product may not be treated as household waste. Instead it shall be handed over the applicable collection point for recycling of electrical and electronic equip-ment. By ensuring this product is disposed of correctly, you will help prevent potential nega-tive consequences for the environment and hu-man health, which could otherwise be caused by inappropriate waste handling of this product.
-
Page 4: Table Of Contents
CONTENTS: DESCRIPTION OF THE HOB SAFETY WARNINGS INSTALLATON Locating Your Built-in Hob Electrical Connection of Your Hob USAGE Turn the Control Off and On Selecting the Heater Turning on the Dual and Triple Zones Setting the Cooking Level With and Without Heat Boost Turning Off Individual Heaters Timer Function Key Lock... -
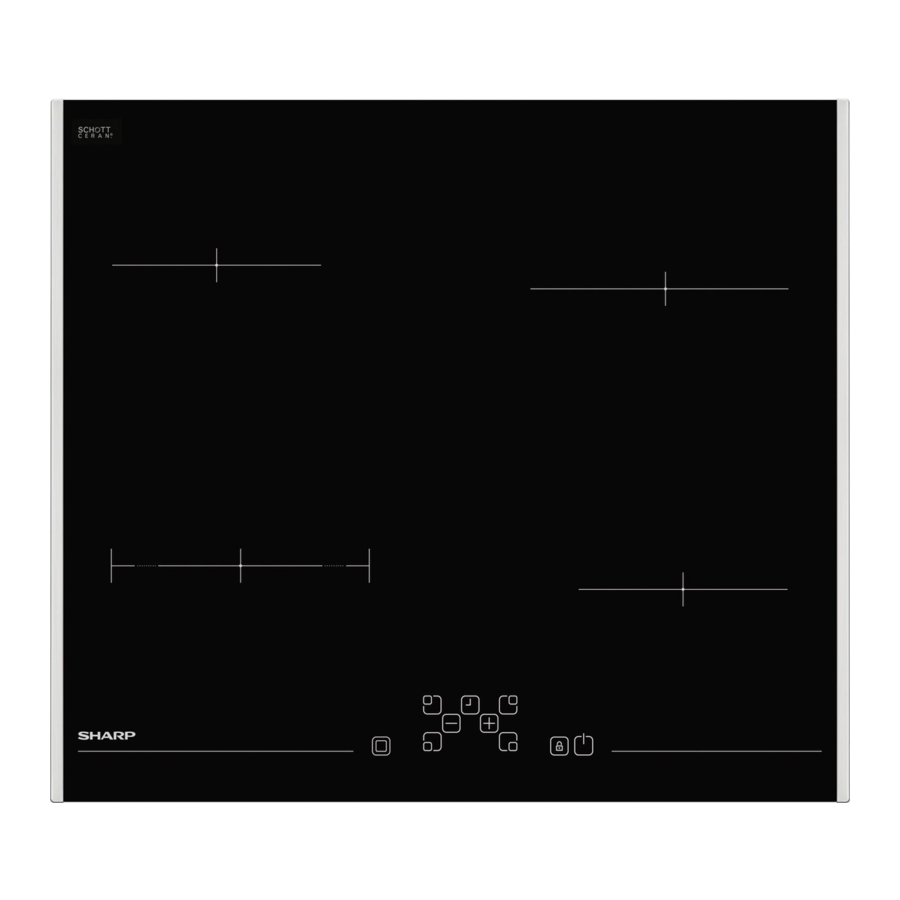
Page 5: Description Of The Hob
DESCRIPTION OF THE HOB Dear Customer It is important that you read this manual for best performance and to extend the life of your appliance. We recommended you keep this manual for future reference. Your new hob is guaranteed and will give lasting service. This guarantee is only ap- plicable if the appliance has been installed and is operated in accordance with the operating and installation instructions detailed in this manual. -
Page 6: Safety Warnings
SAFETY WARNINGS Cleaning user maintenance must not READ THESE INSTRUCTIONS CARE- FULLY AND COMPLETELY BEFORE be done by children USING YOUR APPLIANCE, without supervision. KEEP IT IN A CONVENIENT PLACE FOR REFERENCE. • WARNING: The ap- pliance and its acces- THIS MANUAL HAS BEEN PREPARED sible parts become FOR MORE THAN ONE MODEL. - Page 7 rooms.
- Page 8 qualified persons in order to pre- with its cover in order to extinguish vent any hazards. the resulting flame and turn the cooker off. Installation Warnings • Always position pans over the • Do not operate the appliance be- centre of the cooking zone, and fore it is fully installed.
-
Page 9: Locating Your Built-In Hob
INSTALLATION The electrical connection of this hob should be carried out by an authorised service personal or a qualified electri- cian according to the instructions in this guide and in compliance with the cur- rent regulations. • Before connecting your appliance to the mains at home, make sure to check the conformity of voltage set- tings, which are specified on the infor-... -
Page 10: Electrical Connection Of Your Hob
Electrical connection of your hob • All repairs must be carried out by au- thorised service personnel or a quali- • Before proceeding with the electrical fied electrician. connection, verify that the current car- rying capacity of the system and the •... -
Page 11: Usage
USAGE The appliance is operated by touching buttons and the functions are confirmed by displays and acoustic signals. Cooking zone Heater Dual-Zone Triple-Zone Timer Decimal indicators Active/deacti- Indicator Display Indicator Display Point Timer Function vated Heater Heat setting/ Key Lock Dual-Zone On/Off Active/deacti- Heat Setting/ Timer Decrease Indicator Lock Selection vated Timer Timer Increase Stand-By-Mode S-Mode... -
Page 12: Selecting The Heater
Turn the Appliance off and on The heat setting can always be changed by pressing between If the appliance is in standby mode, level 1-9. it is put in operating mode by holding the On/Off button down for at least 1 second. -
Page 13: Turning Off Individual Heaters
Turning Off Individual Heaters The heater can also be turned off by A selective heater can be turned off 3 reducing the operated heat setting to different ways: ´0`. • Simultaneous operation of When the heater display indicates ´0`, buttons the associated decimal point for the heater will also turn off. -
Page 14: Timer Function
Timer Function The minute minder is selected when all cooking zone indicators are statically The timer provides following features: on or off (no cooking zone indicator is The control can run max. 4 heater as- flashing). signed timers and the 1minute minder (which is assigned to no heater) simul- taneously. -
Page 15: Key Lock
Touching sets the timer val- · Decrement by touching until ´00` ue for the heater. appears on the Timer Display. · Touch simultaneously for 0.5 sec until ´00` is shows on the timer The timer running for the first set heater display. timer is indicated by the lit cooking zone indicator. -
Page 16: Touch Control Safety Functions
dication that the key lock functionality has been activated. Only the switch off by operation of is possible. But if you switched off the appliance, you can not restart it again without first unlocking it. The key lock indicator will go out after pressing for 2 sec. . Now the hob control is unlocked and can be operated The safety turn-off causes the hob con- in normal order. -
Page 17: Operating Time Limitations
Residual Heat Functions is indicated in the heater 4 heater dis- play with the letter ´t` for all the time un- After all cooking processes there is til the temperature decreases. some heat stored in the vitroceramic glass called residual heat. The con- trol can calculate roughly how hot the glass is in the worst case. -
Page 18: Cleaning And Care
CLEANING AND CARE window scraper. Then wipe the hob with a suitable cleaning detergent liquid and a clean damp cloth. Wipe the appliance Cookware with rough finishes should down using a clean dry cloth. not be used since these can scratch the glass ceramic surface. - Page 19 CONTENU : DESCRIPTION DES PLAQUES DE CUISSON AVERTISSEMENTS DE SÉCURITÉ INSTALLATION Mise en place de vos plaques de cuisson intégrées Raccordement électrique de vos plaques de cuisson UTILISATION Activation et désactivation les commandes Sélection de foyer Activation des fonctions double et triple zones Réglage du niveau de chauffage avec et sans boost de chaleur Mise à...
-
Page 20: Description Des Plaques De Cuisson
DESCRIPTION DES PLAQUES DE CUISSON Cher client, Il est important que vous lisiez ce manuel pour obtenir des performances optimales de votre appareil et allonger sa durée de vie. Nous vous recommandons de garder ce manuel pour une consultation ultérieure. Vos nouvelles plaques de cuisson sont garanties et vous offrirons une longue du- rée de service. -
Page 21: Avertissements De Sécurité
AVERTISSEMENTS doivent pas jouer avec DE SÉCURITÉ l'appareil. Le nettoyage et LISEZ CES INSTRUCTIONS ENTIÈRE- l’entretien ne doivent pas MENT AVEC ATTENTION AVANT D’UTI- être effectués par des en- LISER VOTRE APPAREIL, ET GAR- fants non supervisés. DEZ-LES DANS UN EMPLACEMENT PRATIQUE POUR UNE CONSULTA- •... - Page 22 une couverture antifeu. ci pouvant rayer les surfaces et provoquer • AVERTISSEMENT l’éclatement du verre ou Danger de feu : ne stoc- endommager la surface. kez pas d’objets sur les surfaces de cuisson. • N’utilisez pas de net- toyeur à vapeur pour •...
- Page 23 le verre peut casser, vous devez • Ne laissez pas les plaques de faire attention à ne pas le rayer. cuisson sans surveillance lorsque Évitez de frapper ou de heurter le vous cuisinez avec des huiles so- verre avec des accessoires. lides ou liquides.
-
Page 24: Installation
TÉ ET LA SÉCURITÉ DE VOTRE APPAREIL, NOUS VOUS RECOM- MANDONS DE TOUJOURS UTI- LISER DES PIÈCES DÉTACHÉES ORIGINALES ET DE N’APPELER QUE NOS AGENTS DE SERVICES AUTORISÉS EN CAS DE BESOIN. INSTALLATION Le raccordement électrique de ces plaques doit être effectué par du per- Murs mi- A (mm) B (mm) - Page 25 Raccordement électrique de assurer que des câbles isolés sont votre plaque de cuisson utilisés. Un raccordement incorrect peut endommager votre appareil. La • Avant d’effectuer le raccordement garantie ne couvrira pas de telles électrique, vérifiez que les capacités dommages. électriques du système et de la prise sont adaptés à...
-
Page 26: Utilisation
UTILISATION L’appareil fonctionne via des touches tactiles, dont les fonctions sont confirmées par des affichages et signaux acoustiques. Indicateurs de Affichage zone de cuisson Indicateur Indicateur Activation/ de minu- de la fonction de double Point Affichage de triple désactiva- terie minuterie zone décimal... -
Page 27: Sélection De Foyer
Activer et désactiver l’appareil taire n’est détectée sous 10 secs, le foyer repasse en mode S. Si l’appareil est en mode de veille, il est placé en mode de fonctionnement Le réglage de chaleur peut toujours en pressant la touche Marche/Arrêt être modifié... -
Page 28: Mise À L'arrêt Des Foyers Individuels
il peut toujours être activé en pressant Le foyer peut aussi être éteint en rédui- à nouveau si le réglage de chaleur sant le réglage de température associé est réglé sur le niveau 9. Dans l’affi- sur ‘0’. chage de chaleur, ‘A/9’ clignote. Lorsque l’affichage de foyer indique ‘0’, le point décimal associé... -
Page 29: Fonction Minuterie
Fonction minuterie dans l’affichage de minuterie de droite indique que sont maintenant La minuterie apporte les fonctions liés pour régler la valeur de minuterie. suivantes : Les commandes peuvent contrôler au max. 4 minuteries associés aux foyers La minuterie de rappel est sélectionnée et une minuterie de rappel (associée à... -
Page 30: Verrouillage Des Touches
foyer recommandé est indiqué par l’in- Pour effacer une minuterie en mode de dicateur de zone de cuisson. fonctionnement, vous devez dans un premier temps sélectionner la minuterie en pressant la touche Activation/désac- La valeur de minuterie pour le foyer tivation de minuterie jusqu’à... -
Page 31: Fonctions De Sécurité Des Commandes Tactiles
touche pendant plus de 2 secs, l’indi- cateur de verrouillage des touches cli- gnote et le foyer est verrouillé. Le foyer ne peut être verrouillé qu’en mode de fonctionnement (Mode B). Si le foyer est verrouillé, uniquement peut être utilisé, toutes les autres L’arrêt de sécurité... -
Page 32: Limitations De La Durée De Fonctionnement
commandes de la plaque de cuisson, le chaleur est appliquée. système de contrôle suit constamment Fonctions de chaleur la température et éteint les foyers en cas résiduelle d’urgence de surchauffe. Ceci est indiqué Après tous les processus de cuisson, par la lettre ‘t’ dans l’affichage de foyer, de la chaleur stockée dans le matériau jusqu’à... -
Page 33: Nettoyage Et Entretien
NETTOYAGE ET ENTRETIEN Retirez tous les aliments renversés ou la graisse avec un racleur pour vitre. Puis nettoyez les plaques avec un li- N’utilisez pas de casseroles ou de quide de nettoyage approprié et un chif- poêles au fond rugueux, celles-ci pou- fon humide propre. - Page 34 INHALT BESCHREIBUNG DER KOCHFLÄCHE SICHERHEITSHINWEISE INSTALLATON Positionierung Ihrer Einbaukochfläche Elektroanschluss Ihrer Kochfläche VERWENDUNG Die Steuerung ein- und ausschalten Kochzone auswählen Doppel- und Dreifachzonen einschalten Einstellung der Hitze ohne und mit Heat-Boost Einzelne Kochzonen ausschalten Zeitschaltuhr Schloss TOUCH-BEDIENUNG SICHERHEITSFUNKTIONEN Sensor Sicherheitsabschaltung Überhitzungsabschaltung Betriebszeitbeschränkungen Resthitzefunktionen...
-
Page 35: Beschreibung Der Kochfläche
BESCHREIBUNG DER KOCHFLÄCHE Sehr verehrte/r Kunde/in, Es ist wichtig, dass Sie sich dieses Handbuch sorgfältig durchlesen, um die beste Leistungen und eine lange Lebensdauer Ihres Gerätes zu erreichen. Wir empfeh- len Ihnen, dieses Handbuch für zukünftige Probleme aufzubewahren. Ihre neue Kochfläche ist mit einer Garantie ausgestattet und wird lange funktio- nieren. -
Page 36: Sicherheitshinweise
SICHERHEITSHINWEISE Reinigung und An- wenderwartung soll- LESEN SIE SICH DIESE ANLEITUN- GEN VOLLSTÄNDIG UND SORGFÄL- te von Kindern nicht TIG VOR DER VERWENDUNG IHRES ohne Aufsicht ausge- GERÄTS DURCH UND BEWAHREN führt werden. SIE SIE FÜR SPÄTER AN EINEM LEICHT ERREICHBAREN ORT AUF. •... - Page 37 Kochflächen ab. zen, was zum Split- tern des Glases oder • ACHTUNG! Wenn die Schäden an der Ober- Oberfläche gerissen ist, fläche führen kann. schalten Sie das Gerät aus, um einen Strom- • Verwenden Sie zur schlag zu vermeiden. Reinigung des Geräts keinen Dampfreiniger.
- Page 38 Kratzer zu vermeiden. Vermeiden wenn Sie mit festen oder flüssigen Sie, das Zubehör gegen das Glas Ölen kochen. Diese können bei schlägt oder anstößt. extremer Erhitzung Feuer fangen. Schütten Sie niemals Wasser in • Achten Sie beim Einbau darauf, brennendes Öl. Decken Sie die dass die Stromzuleitung nicht ein- Kochtopf oder die Pfanne mit dem gequetscht wird.
- Page 39 INSTALLATION Der elektrische Anschluss dieser Koch- fläche darf nur von einem autorisierten Servicetechniker oder einem Elektriker gemäß den Anweisungen in dieser An- leitung und unter Einhaltung der gelten- den Vorschriften vorgenommen werden. • Bevor Sie Ihr Gerät an die Stromver- sorgung anschließen, müssen Sie überprüfen, ob die Anschlusswerte mit den Werten übereinstimmen, die...
-
Page 40: Elektroanschluss Ihrer Kochfläche
Elektroanschluss Ihrer Kochfläche • Verwenden Sie für die Installation nur isolierte Kabel. Ein fehlerhafter An- • Bevor Sie mit dem elektrischen An- schluss kann Ihr Gerät beschädigen. schluss beginnen, müssen Sie über- Derartige Schäden sind nicht in der prüfen, ob die Strombelastbarkeit der Garantie enthalten. -
Page 41: Verwendung
VERWENDUNG Dieses Haushaltsgerät wird über Berührungsflächen bedient und die Ausführung der Funktionen wird durch Anzeigen und akustische Signale bestätigt. Kochzonenanzei- Zeitschalt- Dreifachzo- Doppelzo- Heizanzeige Heizer einschal- ger Zeitschaltuhr- uhranzeige Komma nenanzeige nenanzeige funktion ten/ausschalten Heizungseinstel- Zeitschaltuhr Heizungseinstel- Tastatursper- lung/Zeitschaltuhr einschalten/aus- lung/Zeitschalt- Doppelzonen- Ein/... -
Page 42: Einstellung Der Hitze Ohne Und Mit Heat-Boost
Das Gerät ein- und ausschalten S-Modus zurück. Wenn sich das Gerät im Standby- Sie können die Hitzeeinstellung jeder- Modus befindet, können Sie es durch zeit zwischen Stufe 1 bis 9 ändern, in drücken des Ein/Aus Knopfs für dem Sie auf oder drücken. -
Page 43: Zeitschaltuhr
Einzelne Heizzonen ausschal- Die Heizzone kann auch durch die Ver- ringerung der eingestellten Hitzestufe Eine ausgewählte Heizzone kann auf auf '0' ausgeschaltet werden. drei Arten ausgeschaltet werden: Wenn die Heizzonenanzeige '0' an- zeigt, dann erlischt auch das dazuge- • Gleichzeitige Betätigung der hörige Komma. - Page 44 Die Uhr kann max. 4 den Heizzonen jetzt zur Einstellung des Zeit- zugeordneten Zeitschaltuhren und die werts verknüpft sind. Minutenerinnerung (die keiner Heizzo- ne zugeordnet ist) gleichzeitig steuern. Man kann die Minutenerinnerung aus- wählen, wenn alle Kochzonenanzeigen Alle Zeitschaltuhren können nur im B- statisch an oder aus sind (keine Koch- Modus verwendet werden.
- Page 45 tete Heizzone vor, die zugeordnet wer- Zeit abgelaufen ist. den kann. Der Zuordnungsvorschlag wird durch die zugehörige blinkende Um eine Zeitschaltuhr im Betriebsmo- Kochzonenanzeige angezeigt. dus zu löschen, müssen Sie zunächst die Zeitschaltuhr durch Umschalten des kann man die Zeit für die Zeitschaltuhr aktivieren/deaktivieren aus- Heizzone einstellen.
-
Page 46: Touch-Bedienung Sicherheitsfunktionen
Nach den 2 Sekunden beginnt die Tas- tatursperrenanzeige zu blinken und die Kochplatte ist gesperrt. Die Heizzone kann nur im Betriebsmo- dus (B-Modus) gesperrt werden. Wenn die Bedienung blockiert ist, kann nur noch betätigt werden, alle an- Die Sicherheitsabschaltung führt dazu, dere Knöpfe sind gesperrt. - Page 47 Resthitzefunktion Steuerung ständig die Temperatur und schaltet das Gerät im Fall einer Überhit- Nach jedem Kochvorgang ist immer zung aus. Dann erscheint in den 4 Heiz- noch Hitze in der Glaskeramikoberflä- zonenanzeigen solange der Buchstabe che vorhanden, die als Resthitze be- 't', bis die Temperatur wieder gefallen ist.
-
Page 48: Reinigung Und Pflege
REINIGUNG UND PFLEGE Entfernen Sie übergelaufene Speisen und Fett mit einem Fensterschaber. Dann wischen Sie die Kochfläche mit Da Kochgeschirr mit rauen Böden die einem geeigneten Spülmittel ab und Glaskeramikoberfläche zerkratzen reinigen mit einem feuchten Tuch nach. können, sollten diese nicht verwendet Dann reiben Sie die Oberfläche mit ei- werden. - Page 49 CONTENUTI: DESCRIZIONE DELLA PIASTRA AVVERTENZE SULLA SICUREZZA INSTALLAZIONE Individuazione della piastra incorporata Connessione elettrica della piastra Accensione e spegnimento dei comandi Selezionare il riscaldatore Accendere le zone doppie e triple Impostare il livello di cottura con e senza potenziamento di calore Spegnimento dei singoli riscaldatori Funzione timer Blocco tasto...
- Page 50 DESCRIZIONE DELLA PIASTRA Gentile cliente, è importante che tu legga questo manuale per ottenere le migliori prestazioni ed estendere la vita della tua apparecchiatura. Ti raccomandiamo di conservare que- sto manuale per riferimenti futuri. La tua nuova piastra è garantita e noi offriamo un servizio a lungo periodo. Questa garanzia si applica solo se l'apparecchiatura è...
- Page 51 AVVERTENZE SULLA SICUREZZA recchiatura non è un giocattolo. La pulizia LEGGERE LE PRESENTI ISTRUZIO- NI CON ATTENZIONE E NELLA LORO e la manutenzione non INTERESSA PRIMA DI UTILIZZARE devono essere esegui- LA PROPRIA APPARECCHIATURA, E ti a bambini in assenza CONSERVARLE IN UN LUOGO ADAT- TO PER EVENTUALI RIFERIMENTI.
- Page 52 • AVVERTENZE: Peri- superficie, provocan- colo di incendio: non do la rottura del vetro conservare oggetti sul- o danni alla superficie. le superfici di cottura. • Non usare pulitori • AVVERTENZE: Se la a vapore per la pulizia superficie è spaccata, di- dell'apparecchiatura.
- Page 53 per evitare di graffiarlo. Evitare di bili o combustibili, all'interno o nel- colpire o battere sul vetro con de- le vicinanze dell'apparecchiatura gli accessori. quando è in funzione. • Assicurarsi che il cavo di alimenta- • Non allontanarsi del fornello du- zione non si pieghi durante l'instal- rante la cottura con olii liquidi lazione.
- Page 54 • PER MANTENERE L'EFFICIENZA distanza tra il bordo posteriore della E LA SICUREZZA DELLA PROPRIA piastra e le pareti adiacenti dipende APPARECCHIATURA, RACCOMAN- dalla superficie della parete. Non usare DIAMO DI USARE SEMPRE PARTI materiali facilmente combustibili come ORIGINALI O CHIAMARE I NOSTRI tende o carte vicino alla piastra.
- Page 55 Connessione elettrica della piastra re l'apparecchiatura. La garanzia non copre tali danni. • Prima di procedere alla connessione elettrica, verificare che la capacità di • Tutte le riparazioni devono essere ef- trasporto corrente del sistema e lo fettuate da personale di servizio auto- zoccolo siano adeguati alla potenza rizzate o da un elettricista qualificato.
- Page 56 L'apparecchiatura viene operata usando i pulsanti tattili e le funzioni sono confer- mate dagli schermi e dai segnali acustici. Indicatore Indicatore Funzione timer a zona a zona indicatori zona Schermo Riscaldatore Schermo Punto tripla doppia cottura riscaldatore attivo/disattivo timer decimale Indicatore di Impostazioni Impostazioni calore/...
- Page 57 Accensione e spegnimento del- entro 10 sec., il riscaldatore passa alla la piastra modalità S. Se l'apparecchiatura è in modalità stand- Le impostazioni di calore possono by, passa in modalità operativa premen- essere modificare premendo do il pulsante On/Off per almeno 1 tra il livello 1-9.
- Page 58 Se il potenziamento di calore deve es- Il riscaldatore può essere disattivato ridu- sere usato, può essere attivato azionan- cendo l'impostazione del calore su '0'. do nuovamente se l'impostazione Quando lo schermo del riscaldatore del calore è impostata a livello 9. Nello india '0', un punto decimale associato schermo del calore ´A/9` lampeggia.
- Page 59 Funzione timer l'impostazione del valore del timer. Il timer offre le seguenti funzionalità: Il comando può eseguire max. 4 timer Il riduttore minuti viene selezionato assegnati a riscaldatori riduttore di un quando tutti gli indicatori zona cottura minuto (non assegnato ad alcun riscal- sono accesi o spenti staticamente (nes- datore) simultaneamente.
- Page 60 attivo successivo assegnato al timer in procede in funzione fino al termine. direzione oraria. La raccomandazione dell'assegnazione viene indicata dall'in- Per cancellare un timer in modalità ope- dicatore di zona cottura lampeggiante. razione, è necessario prima seleziona- re il timer usando il pulsante Attivare/ Toccando è...
- Page 61 2 sec., l'indicatore di blocco lampeggia e il riscaldatore è bloccato. Il riscaldatore può essere bloccato solo in modalità operativa (modalità B). Se il riscaldatore è bloccato, solo può essere operato, e tutti gli altri pul- santi sono bloccati. Se c'è qualche altro tasto funzionante nel modo bloccato, La disattivazione di sicurezza fa sì...
- Page 62 Funzioni calore residue mente la temperatura e si spegne in caso di emergenza da surriscaldamen- Dopo tutti i processi di cottura il vetro in to. È indicato nel display Riscaldatore vetroceramica contiene del calore det- 4 con la lettera "t" per tutto il tempo fin- to calore residuo.
- Page 63 PULIZIA E MANUTENZIONE Rimuovere gli alimenti e il cibo con un raschietto. Quindi spazzolare la piastra usando un liquido detergente adatto Le stoviglie con fondo ruvido non devo- e un panno umido pulito. Strofinare l'ap- no essere usate perché possono grat- parecchiatura usando un panno asciut- tare la superficie in ceramica e vetro.
- Page 64 Service & Support Visit Our Website sharphomeappliances.com...