Table of Contents
Advertisement
Quick Links
NOTICE
It is the Purchaser's/Owner's obligation:
1. To disclose and post all Rules & Regulations, Danger, Warning and Caution
labels affi xed on the machine to their customers/users.
2. Equipment to be installed by TFI Authorized Dealer or a service
company approved by TFI.
3. Provide trained personnel, supervision and correct usage of the equipment.
4. Provide scheduled inspection, maintenance & repairs and must be performed
by TFI Authorized Dealer or a service company approved by TFI.
5. Must use only genuine TFI replacement parts.
6.
Machine must be anchored to a solid and level surface.
TUFFSTUFF FITNESS INTERNATIONAL
OWNER'S MANUAL
OWNER'S MANUAL
Maintenance & Assembly Instructions
IMPORTANT: KEEP THIS MANUAL FOR FUTURE REFERENCE
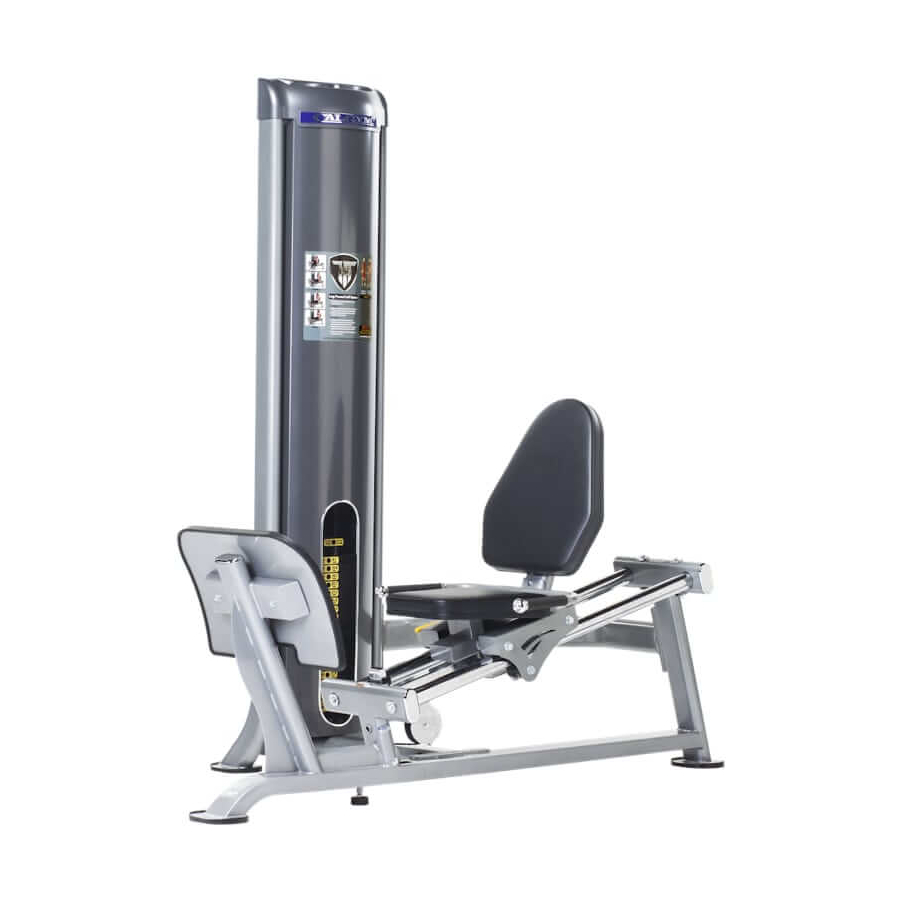
CG-9516
Leg Press
CG-9516 Rev1
Revision Date 1-5-16
Advertisement
Table of Contents

Related Manuals for TuffStuff CG-9516


Summary of Contents for TuffStuff CG-9516
- Page 1 TUFFSTUFF FITNESS INTERNATIONAL OWNER’S MANUAL OWNER’S MANUAL Maintenance & Assembly Instructions IMPORTANT: KEEP THIS MANUAL FOR FUTURE REFERENCE NOTICE CG-9516 It is the Purchaser’s/Owner’s obligation: 1. To disclose and post all Rules & Regulations, Danger, Warning and Caution Leg Press labels affi xed on the machine to their customers/users.
-
Page 2: Table Of Contents
Should additional information be required, or should situations arise that are not covered by this owner’s manual, the matter should be directed to Customer Service at Tuff Stuff Fitness International Inc. in Chino, California. www.tuff stuffi tness.com CG-9516 Leg Press... -
Page 3: Overhead Specifi Cations
Overhead Specifi cations L 77” X W 52” X H 88” MAX-LOAD WEIGHT LIMIT -200 lbs CG-9516 Leg Press www.tuff stuffi tness.com... -
Page 4: Danger, Warning, & Caution Labels Information
Carefully read ALL Danger, Warning & Caution labels posted on the machine www.tuff stuffi tness.com CG-9516 Leg Press... - Page 5 Carefully read ALL Danger, Warning & Caution labels posted on the machine CG-9516 Leg Press www.tuff stuffi tness.com...
- Page 6 Carefully read ALL Danger, Warning & Caution labels posted on the machine www.tuff stuffi tness.com CG-9516 Leg Press...
- Page 7 Facility Sign with your order, you can obtain one at no cost to you from Tuff Stuff Fitness by contacting our service department at: 1 (888) 884-8275 service@tuff stuff .net service1@tuff stuff .net CG-9516 Leg Press www.tuff stuffi tness.com...
-
Page 8: Anchoring Unit
Anchoring Unit Holes on frame are provided for anchoring the unit to the fl oor. See anchoring hole location below. www.tuff stuffi tness.com CG-9516 Leg Press... -
Page 9: Important Safety Instructions
CAUTION: indicates a hazardous situation which, if not avoided, could result in minor or moderate injury. CG-9516 Leg Press www.tuff stuffi tness.com... -
Page 10: Registration, Service & Assembly
Fully Tighten Fully Tighten Set up the CG-9516 on a clean, solid, fl at surface. A smooth, fl at surface Wrench tighten all hardware in this step. under the machine helps keep it level. 100% www.tuff stuffi tness.com... -
Page 11: Inspection/Maintenance
Professional Service Company approved by TFI. Keep a service log of all maintenance and repair activities. Extra copies can be downloaded from our website www.tuff stuffi tness.com INSPECTION / MAINTENANCE RECORDS DATE REPLACEMENT REPAIRS INSPECTED BY WARRANTY REPAIRS DATE REPLACEMENT REPAIRS INSPECTED BY CG-9516 Leg Press www.tuff stuffi tness.com... -
Page 12: Cable Inspection
A BREAK ON THE CABLE CABLE END SLIPPING OUT IMPORTANT NOTE: DAMAGED OR WORN CABLE (AS SHOWN ABOVE) MAY DAMAGE THE PULLEY(S). YOU MUST INSPECT THE PULLEYS AT THIS TIME FOR WEAR AND TEAR. REPLACE IF NEEDED. www.tuff stuffi tness.com CG-9516 Leg Press... -
Page 13: Step 1
2. Be sure to hold the weight stack frame perpendicular to fl oor before tightening the screws. Fully Tighten 100% Fully Tighten Wrench tighten all hardware in this step. CG-9516 Leg Press www.tuff stuffi tness.com... -
Page 14: Step
Step 2 Step 2 Assembly List Item # Description Qty. CARRIAGE LINEAR SHAFT www.tuff stuffi tness.com CG-9516 Leg Press... -
Page 15: Step 3
FLAT WASHER Z/P 3/8 ID X 1 1/2 OD X 3/16 HEX HEAD CAP SCREW GR-5 Z/P 3/8-16 X 1 1/4 SPLIT LOCK WASHER Z/P 3/8” Loosely Tighten Loosely Tighten Loosely tighten all hardware in this step. CG-9516 Leg Press www.tuff stuffi tness.com... -
Page 16: Step
HEX HEAD CAP SCREW GR-5 Z/P 3/8-16 X 1 1/4 NYLON INSERT THIN PATTERN LOCK NUT Z/P 3/8-16 OVAL WASHER Z/P 3/8” SPLIT LOCK WASHER Z/P 3/8” Fully Tighten 100% Fully Tighten Wrench tighten all hardware in this and previous loosely tighten steps. www.tuff stuffi tness.com CG-9516 Leg Press... -
Page 17: Step
FLAT WASHER Z/P 3/8 ID X 1 1/2 OD X 3/16 HEX HEAD CAP SCREW GR-5 Z/P 3/8-16 X 3 NYLON INSERT THIN PATTERN LOCK NUT Z/P 3/8-16 RUBBER FOOT PLATE COVER Fully Tighten 100% Fully Tighten Wrench tighten all hardware in this step. CG-9516 Leg Press www.tuff stuffi tness.com... -
Page 18: Step
Step 6 Fully Tighten 100% Fully Tighten Wrench tighten all hardware in this step. www.tuff stuffi tness.com CG-9516 Leg Press... - Page 19 8. Open the lube package provided and apply a thin fi lm of lubricant around the fi rst 3 inches of the guide rods above the top plate. 9. After the cables are installed, do a set of reps to spread the lubricant thoroughly. CG-9516 Leg Press www.tuff stuffi tness.com...
-
Page 20: Step 7 Cable Routing
Step 7 Cable Routing www.tuff stuffi tness.com CG-9516 Leg Press... - Page 21 BLACK NYLON BUMPER SHOULDER BOLT Z/P 3/8 X 3/4 NYLON PULLEY 3/8 X 1 X 6 BLACK NYLON INSERT LOCK NUT Z/P 5/16-18 Fully Tighten 100% Fully Tighten Wrench tighten all hardware in this step. CG-9516 Leg Press www.tuff stuffi tness.com...
-
Page 22: Step 8
WEIGHT SHIELD FRONT 75 3/8” WEIGHT SHIELD REAR 75 3/8” FLAT HEAD SOCKET CAP SCREW Z/P M6-1.0 X 50 PLASTIC SHROUD LID Fully Tighten 100% Fully Tighten Wrench tighten all hardware in this step. www.tuff stuffi tness.com CG-9516 Leg Press... -
Page 23: Step 9
FLAT WASHER SAE Z/P 3/8” HEX HEAD CAP SCREW GR-5 Z/P 3/8-16 X 1 1/4 HEX HEAD CAP SCREW GR-5 Z/P 3/8-16 X 3 Fully Tighten 100% Fully Tighten Wrench tighten all hardware in this step. CG-9516 Leg Press www.tuff stuffi tness.com... -
Page 24: Parts List
REV. PART NO. QTY.ITEM NO. DESCRIPTION REV. PART NO. QTY. WEIGHT SHIELD FRONT 75 3/8 CARRIAGE UP8860X1 UP8518X1 HANDLES WEIGHT STACK FRAME UP8863X1 UP8874X1 PLASTIC SHROUD LID LINEAR SHAFT HOUSING BNH3393X1 UP8866X2 MAIN FRAME UP8867X1 www.tuff stuffi tness.com CG-9516 Leg Press... -
Page 25: Pre-Assembled Components
Pre-Assembled Components *23 UP8874X1 27 40 *21 UP8518X1 *8 UP8863X1 *11 UP8866X2 CG-9516 Leg Press www.tuff stuffi tness.com... - Page 26 Pre-Assembled Components www.tuff stuffi tness.com CG-9516 Leg Press...
- Page 27 Pre-Assembled Components *12 UP8867X1 *58 BNH3393X1 CG-9516 Leg Press www.tuff stuffi tness.com...
-
Page 28: Rail Wheel Replacement
Rail Wheel Replacement Step 1 DISCONNECT CABLE HERE AND SET ASIDE. Step 2 NOTE: 1. HAVE ONE PERSON HOLD THE LINEAR SHAFTS WHILE YOU REMOVE THE LINEAR SHAFT HOUSING AND THEN SLIDE THE CARRIAGE OUT. www.tuff stuffi tness.com CG-9516 Leg Press... - Page 29 Rail Wheel Replacement Step 3 Step 4 INSTALLATION IS THE REVERSE OF REMOVAL. (DO NOT INSTALL THE SEAT PAD UNTIL COMPLETING RAIL WHEEL ADJUSTMENT ON NEXT PAGE) CG-9516 Leg Press www.tuff stuffi tness.com...
-
Page 30: Rail Wheel Adjustment
Rail Wheel Adjustment Step 1 www.tuff stuffi tness.com CG-9516 Leg Press... - Page 31 Rail Wheel Adjustment Step 2 CG-9516 Leg Press www.tuff stuffi tness.com...
Need help?
Do you have a question about the CG-9516 and is the answer not in the manual?
Questions and answers