
Related Manuals for EM Acoustics ST-218


Summary of Contents for EM Acoustics ST-218
- Page 1 ST-218 Subwoofer Product User Manual v2 November 2019 L O U D S P E A K E R S D E F I N E D...
-
Page 2: Table Of Contents
FG-218 Instruction Labels – Spine, Right Side ................. 15 6.0 – System Setup ............................16 6.1 – Preparing ST-218 subwoofers for flying or stacking ............16 6.1.1 – Extending the rigging links ....................16 6.1.2 – Cardioid Use ..........................17 6.1.3 –... - Page 3 8.1 – ST-218: Removing the grille ..................... 40 8.2 – ST-218: Removing the drive units ..................41 8.3 – ST-218: Replacing a Rigging flying pin ................42 Appendix A – Technical Specifications ....................43 ST-218 large format flyable subwoofer ..................43 Appendix B –...
- Page 4 Page 4 of 49 Appendix D – Warranty Information ....................... 49 Limited Warranty ..........................49 Warranty Coverage ..........................49 Returning your EM Acoustics loudspeaker................. 49 ST-218 User Manual v2 Novenber 2019...
-
Page 5: Declaration Of Conformity
The packaging supplied with this product is recyclable. Please retain all packaging, however if disposing of this packaging please ensure that you comply with local recycling regulations. These products also all comply to the RoHS Directive 2002/95/EC. ST-218 User Manual v2 Novenber 2019... -
Page 6: Introduction
Page 6 of 49 1.0 - Introduction Thank you for purchasing the ST-218 subwoofer from EM Acoustics. This product has been designed and rigorously tested to give you the utmost in sonic performance and many years of reliable, trouble-free operation. Please take the time to read this user manual thoroughly to ensure you get the best performance from your system and to ensure you set it up correctly and safely. -
Page 7: St-218 & Accessories
Page 7 of 49 2.0 – ST-218 & Accessories The ST-218 subwoofer has a range of accessories available for flying, stacking and transport in different configurations. ST-218 FEATURES & BENEFITS Large format touring subwoofer • Signature EM Acoustics “maximum headroom” design approach ensures consistency of performance regardless of SPL level. -
Page 8: Wc-T218
WC-T218 wheelcart. Castor Set For single subwoofer transport, tour-grade castors can be fitted to the rear of the enclosure to allow the ST-218 to be easily moved around. CHAIN-HALO-A Extension Lift Chain The CHAIN-HALO-A assembly is intended to go between a motor and the FG-218 pickup link. -
Page 9: Safety Considerations
Do not modify or alter the ST-218 hardware or accessories, nor use them in any way other than that described in this manual. Rigging components supplied as part of the ST-218 system are in no way interchangeable and should not be used as such. -
Page 10: Secondary Safeties
In most cases, annual independent tests & inspections carried out by a suitably approved and qualified inspector will be required. EM Acoustics recommends detailed logbooks be kept of all inspections and load tests to ensure an accurate record is kept of the testing for each EM Acoustics rigging accessory. -
Page 11: Simulation
For safety and acoustic reasons, it is advised that users familiarize themselves with Ease Focus 3. Along with providing the user with accurate simulations for setting up ST-218 subwoofers, it also provides importing safety information with regards to load limits. -
Page 12: Rigging System Overview
Page 12 of 49 5.0 – Rigging System Overview 5.1 – ST-218 Cabinet Hardware Overview Lifting & Carrying Handle Rigging Link (retracted) Rigging Link Lock Pin Enclosure Link Pin Floor Runner Stacking Recess Castor Attachment Point ST-218 User Manual v2 Novenber 2019... -
Page 13: Fg-218
Page 13 of 49 5.2 - FG-218 ST-218 User Manual v2 Novenber 2019... - Page 14 Page 14 of 49 [1] – Front Link Attachment Point This clevis forms the area where ST-218 enclosure links should be engaged. A 0.375” ball-lock pin secures each link in place. [2] – Rear Link Attachment Point This clevis forms the area where ST-218 enclosure links should be engaged.
-
Page 15: Fg-218 Instruction Labels - Spine, Right Side
Page 15 of 49 FG-218 Instruction Labels – Spine, Right Side ST-218 User Manual v2 Novenber 2019... -
Page 16: System Setup
Page 16 of 49 6.0 – System Setup 6.1 – Preparing ST-218 subwoofers for flying or stacking 6.1.1 – Extending the rigging links Remove the Link Lock pin from Extend all four rigging links Step 1. Step 2. the top of each rigging assembly Safety label visible when link is retracted Step 3. -
Page 17: Cardioid Use
See sections 6.2.1 and 6.2.2 for information on the correct procedure when flying normal or cardioid arrays from a single point. For all sections of this manual describing flying or stacking ST-218 subwoofers, the procedure is identical when assembling cardioid subwoofer arrays. -
Page 18: Using The Wc-T215 Transit Wheelcart
The subwoofer will rest on the supports in the cart structure. Step 3. Reinstate the enclosure link pins into all four corners of the cart to lock the subwoofer to the wheelcart. ST-218 User Manual v2 Novenber 2019... - Page 19 There should not be any of the rigging safety indicators visible where the two subwoofers meet. Step 6. This process can be repeated to add a third subwoofer if required. ST-218 User Manual v2 Novenber 2019...
-
Page 20: Flying St-218 Subwoofers
Page 20 of 49 6.2 – Flying ST-218 subwoofers 6.2.1 – ST-218 subwoofers – single pickup, normal orientation Step 1. Prepare the FG-218 by locating a single pickup link into the “normal” position as indicated by the main label and the label on the link. Ensure the location arrows are lined up as shown. - Page 21 SUBWOOFER OR REMOVE ANY PINS YET. Lower the upper subwoofer down so it sits on top of the second sub, with the runners from the upper sub engaging in the recesses in the lower sub. ST-218 User Manual v2 Novenber 2019...
- Page 22 Once in place, replace both the Enclosure Link and Link Lock pins to secure both subwoofers together. Step 9. Repeat steps 6-8 to add additional subwoofers as required. ST-218 User Manual v2 Novenber 2019...
-
Page 23: St-218 Subwoofers - Single Pickup, Cardioid Orientation
Page 23 of 49 6.2.2 – ST-218 subwoofers – single pickup, cardioid orientation Step 1. Prepare the FG-218 by locating a single pickup link into the “cardioid” position as indicated by the main label and the label on the link. Ensure the location arrows are lined up as shown. -
Page 24: Ground Stacking St-218 Subwoofers
6.3.1 – Using ST-218 subwoofers alone Step 1. If ground stacking more than one ST-218, lift the second subwoofer on top of the first so that the floor runners engage in the recesses in the lower subwoofer – this helps to ensure the subwoofer is in the correct location to engage the rigging hardware. -
Page 25: Ground Stacking With Halo-A And The Gs-Halo-A Frame
ST-218 links engage into the slots in the outer edges of the GS-HALO-A. Step 2. Engage the four ST-218 link pins to securely lock the GS- HALO-A to the subwoofer stack. Remove the HALO-A Front Link and Splay Link Attachment point pins ready to receive the first HALO-A enclosure. - Page 26 Insert the Angle Set pin on the HALO-A to select the desired angle and lock it in place. Pay close attention to the label on the GS-HALO-A which illustrates the difference between indicated angle and achieved angle on the GS- HALO-A. ST-218 User Manual v2 Novenber 2019...
- Page 27 Select the desired angle from your EASE Focus simulation, and insert the Angle Set pin into the corresponding location hole. Step 11. Repeat steps 8-10 until your ground stack is complete, up to a maximum of 6 HALO-A elements. ST-218 User Manual v2 Novenber 2019...
-
Page 28: Using The Chain-Halo-A Lifting Chain
The CHAIN-HALO-A has a chain hook included so that the chain length can be adjusted as necessary. Using the CHAIN-HALO-A allows you to create sufficient space below the motor for the chain bag to sit safely. ST-218 User Manual v2 Novenber 2019... -
Page 29: Fitting Castors
Page 29 of 49 6.5 – Fitting castors The ST-218 can be fitted with a set of four tour-grade castors for ease of movement as single subwoofers. The carton should contain: 4pcs 32 x 100mm heavy duty castor 17pcs M8 x 30 hex head set screw... -
Page 30: Powering The System
Page 30 of 49 7.0 – Powering the System The ST-218 subwoofer can be powered from any amplifier with the relevant high & low pass filter, and limiter settings. However, due to the self-contained nature of the package, the use of DQ Series advanced system amplifiers is highly recommended. The use of DQ... -
Page 31: Amplifier Requirements
Page 31 of 49 7.1.3 – Amplifier Requirements The ST-218 is a very powerful subwoofer, making use of some of the most advanced drive units available in the industry today. It is good practice to ensure that your amplifier can... -
Page 32: Presets And Settings
DQ Series amplifier. 7.2.2 – Cardioid Array Preset The ST-218 can be used to create cardioid arrays as detailed in chapter 6 by ensuring that one in three ST-218 subwoofers are physically reversed, and the appropriate ST-218 Cardioid preset is loaded into the amplifier. -
Page 33: Fir Latency
The presets are intended to be a starting point for your system and will almost certainly require tuning on-site dependent on room characteristics, the rest of your system design and the system voicing you are aiming for. The ST-218 is designed with a significant amount of system headroom, so applying EQ is perfectly acceptable. -
Page 34: Use With The Dq Series Advanced System Amplifiers
Page 34 of 49 7.3 - Use with the DQ Series Advanced System Amplifiers The ST-218 will perform best when using DQ Series advanced system amplifiers, as not only are they state-of-the-art amplifiers, but the onboard DSP provides appropriate high/low pass filter settings and limiters to get the best from your subwoofers. -
Page 35: System Connectivity
120m 7.4.2 - Available Cable Accessories There are a number of bespoke cable assemblies which can be supplied by EM Acoustics to ensure correct wiring for your system, both using DQ Series amplifiers alone and also using the DQRack touring solution. - Page 36 Intended to split NL8 connections into four 2-core feeds, SPLIT-NL8-NL4M gives four 2- core cable sends, on male NL4 sockets. This assembly is intended for use at the amplifier end of the cable run. ST-218 User Manual v2 Novenber 2019...
-
Page 37: Use With The Dqrack
Detailed below are some examples of how you can use the DQRack to power a system appropriately in a touring environment, and the various accessories and other parts that would be required. ST-218 User Manual v2 Novenber 2019... -
Page 38: System Examples With The Dqrack
Page 38 of 49 7.5.2 - System Examples with the DQRack Given below are two examples of possible ways ST-218 subwoofers can be used with a DQRack. There are of course many possible combinations, depending on the application and the equipment available – so these two examples are by no means comprehensive. - Page 39 Page 39 of 49 The system example below illustrates a smaller stereo HALO-B/ST-218 system being driven off one DQRack. Using the NL8 amplifier outputs, one output is used to feed each of the left/right HALO-B hangs, and the last output is used for subwoofers.
-
Page 40: Servicing Information
Allen key, and then lift the grille clear of the cabinet. To replace the grille, position the grille on the front of the ST-218 (logo badge should be on the left of the enclosure when in a flown configuration) and ensure the threaded fittings on the grille are lined up with the mounting holes. -
Page 41: St-218: Removing The Drive Units
Page 41 of 49 8.2 – ST-218: Removing the drive units TOOLS REQUIRED: 5mm Allen key Complete step 8.1 above to remove the grille. Using a 5mm Allen key, remove the eight M6x40 socket cap screws that secure each drive unit. -
Page 42: St-218: Replacing A Rigging Flying Pin
Page 42 of 49 8.3 – ST-218: Replacing a Rigging flying pin TOOLS REQUIRED: 2.5mm Allen key All the rigging flying pins are held in place by M3 socket cap machine screws, with captive Nyloc nuts within the assembly. As such, they can be easily removed and replaced in the field. Using a 2.5mm Allen key, undo the machine screw to remove it. -
Page 43: Appendix A - Technical Specifications
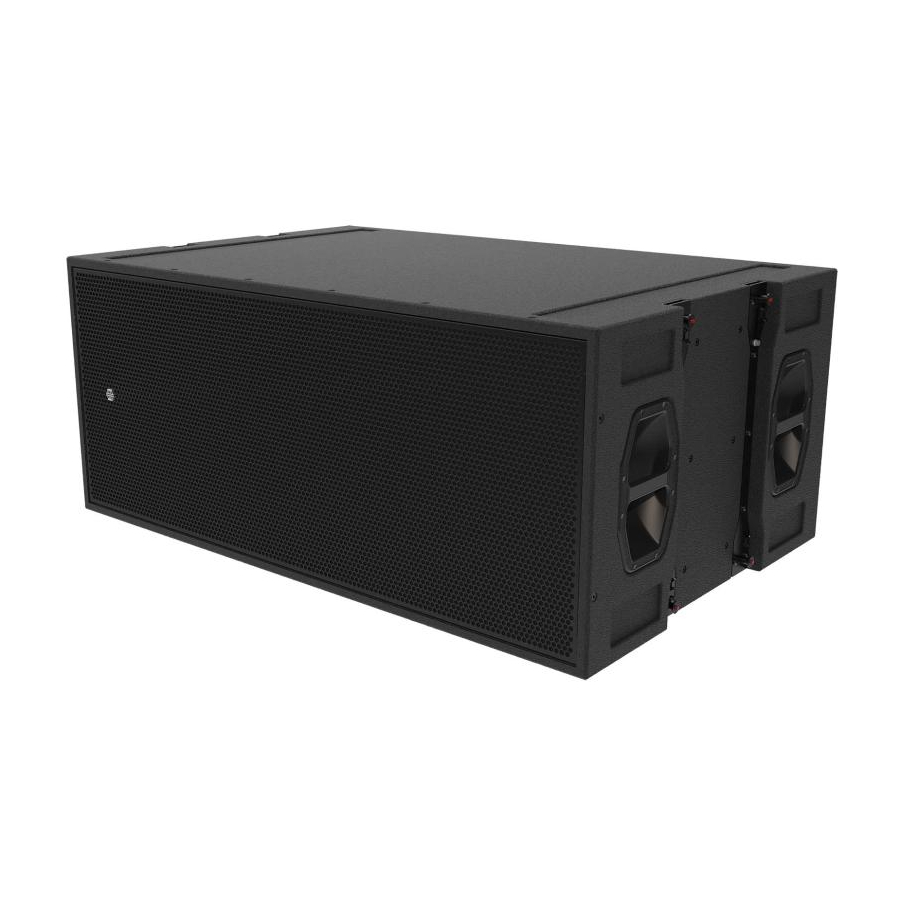
Page 43 of 49 Appendix A – Technical Specifications ST-218 large format flyable subwoofer Dimensions (HxWxD) : 550 x 1300 x 850mm (21.7” x 51.2” x 33.5”) Net/Shipping Weight: 111kg/114kg (244.2/250.8lbs) Frequency Response (+/- 3dB) 28Hz – 150Hz Dispersion Omnidirectional Drive Units: 2 x 4.5”... -
Page 44: Appendix B - Technical Drawings
Page 44 of 49 Appendix B – Technical Drawings ST-218 User Manual v2 Novenber 2019... - Page 45 Page 45 of 49 ST-218 User Manual v2 Novenber 2019...
- Page 46 Page 46 of 49 ST-218 User Manual v2 Novenber 2019...
- Page 47 Page 47 of 49 ST-218 User Manual v2 Novenber 2019...
-
Page 48: Appendix C - Spare Parts List
Page 48 of 49 Appendix C – Spare Parts List Order Code Description 01A022 DU-1802 replacement 4 ohm 18” LF drive unit 04A024 RFG-S218 replacement grille/fabric for S-218/ST-218 05A087 PIN-0.375/0.813 ball-lock flying pin – all rigging ST-218 User Manual v2 Novenber 2019... - Page 49 Serial numbers must be quoted in all correspondence relating to the claim. EM Acoustics or its representatives are in no way liable for any loss or damage in transit, and hence it is recommended that the sender insure the shipment. EM Acoustics will pay for return freight should the repair be covered under warranty.
Need help?
Do you have a question about the ST-218 and is the answer not in the manual?
Questions and answers