Table of Contents
Advertisement
Quick Links
Advertisement
Table of Contents

Related Manuals for Templari KITA AIR


Summary of Contents for Templari KITA AIR
- Page 1 INSTALLATION INSTRUCTION A I R T O A I R...
-
Page 2: Table Of Contents
3.3 Operation mode ..................... 6 Equipment supplied ....................6 Main unit ........................ 6 Name and serial number ..................6 KITA AIR Templari® internal unit dimension ............7 Transport ........................ 8 Mounting and installation..................8 Equipment check ....................8 External unit measurements ................... 8 Free spaces for the assembly .................. - Page 3 12.1 Digital outputs ...................... 18 12.2 Digital inputs ......................18 12.3 Analogical outputs ....................18 12.4 Analogical inputs ....................18 12.5 Electric diagram KITA AIR ..................19 12.6 Internal wiring connection diagram ..............20 Commissioning ..................... 21 13.1 Preliminary controls ..................... 21 13.2 Commissioning ..................... 21 Control unit ......................
-
Page 4: Introduction
Set of screwdrivers; This manual aims to give all the necessary information installation • Cutter; and proper operation of KITA - AIR Templari® heat pump, from • Scissors; its start-up and for all its life cycle. The document is divided •... -
Page 5: Read Carefully Before Use
• It Is not allowed the installation of the external unit or of • KITA AIR Templari® heat pump has to be used with external the monoblock in niches or in interior courtyards, because air temperature between -30°C and 46°C. -
Page 6: Operation Mode
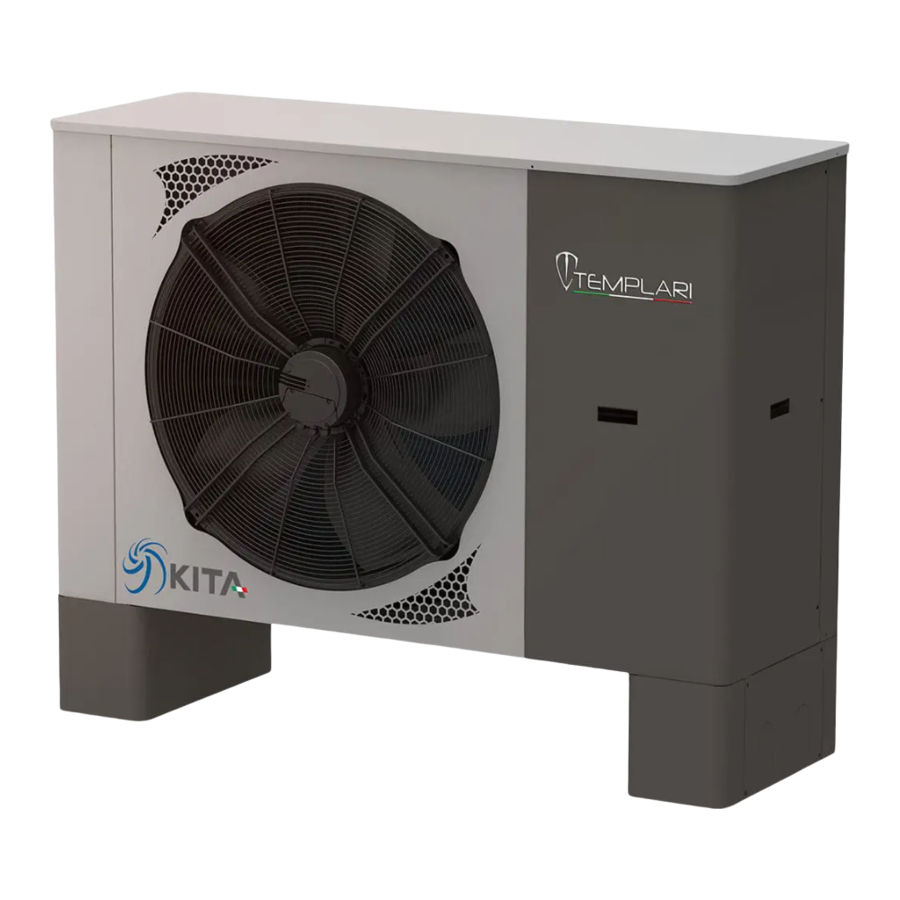
Main unit The heat pump can operate in two modes, actionable trough the The KITA AIR Templari® heat pump is provided in 2 units and it’s switching of the 4 way valve: as shown below, this modes are consists of components which are indicated at page 4. -
Page 7: Kita Air Templari® Internal Unit Dimension
KITA AIR Templari® internal unit dimension Deflector Case Battery exchanger Electric box Side cover (remove to access to electric box) Probe cable B2 prewired to unroll The image is intended only to indicate the main internal components. The actual product may looks different. -
Page 8: Transport
In severe cases this may have as a consequence a failure inside. 1791 The transport to the final place of installation should be done on a pallelt. The heat pump KITA AIR Templari® can be transported using a forklift. 231 170 233 1133... -
Page 9: Choice Of Installation Place
6.4 Choice of installation place • Observe all the rules in force. • Install the product outside the building. • Don’t install the product: near a heat source, near flammable substances, near ventilation opening of contiguous buildings, Below deciduous trees. • For the installation of the product observe:... -
Page 10: Correct Alignment
Correct alignment Put horizontally the heat pump KITA AIR Templari® so that the condensate can flow. The product must be installed with amortized feet, purchased separately. The amortized feet increase the height of the product, facilitating the flow of condensate and reducing vibrations. -
Page 11: Generalities And Choice Of The Installation Place
The connection pipes must be insulated and have diameters specified in the following table. Gas (mm) Liquid (mm) KITA AIR Ø 28 Ø 16 For the preparation of the pipes for installation, proceed as Probe cable B2 follows: •... -
Page 12: Vacuum Procedure
Vacuum procedure • We recommend to run a leak test with nitrogen to 40 bar pressure to check the quality of the welding connections • For the vacuum perform, connect the pump charging vacuum connection procedure (1/4) inside the external unit. -
Page 13: Maintenance And Cleaning
Maintenance and cleaning Condensate discharge cleaning Please make sure that the condensate discharge pipe is in the A regularly maintenance is necessary in particular for correct correct position e without any obstruction to ensure a proper and efficient heat pump operations, so as to reduce damages condensate flow from the finned coil fins. -
Page 14: Electric Connection
10 Electric connection 10.5 Probes and remote controller Temperature probe B2 of internal ambient temperature must 10.1 General information be connected with a multipolar cable (2x1,5 shielded) along the shortest route and away from the power cables. Particular • Before starting any operation please adopt any safety... - Page 15 Power supply cables indication • KITA AIR External unit Supply 400 Vac - 50 Hz Cable 5x6 mmq Secondary line protection 230 3 fuses - 5x20-4A µPC protection 24 Vdc 1 fuse - 5x20-4A Internal unit Supply 230 Vac - 50 Hz Cable 3x1,5 mmq...
-
Page 16: Terminal Box Wiring
11 Terminal box wiring 11.1 Internal terminal box wiring RX+ / TX+ RX- / TX- 11.2 External unit internal terminal box wiring KITA - AIR 1 3 5 7 9 11 2 4 6 8 10 12 +VDC F1 F2 F3... - Page 17 +Vdc +5 Vref RX-/TX- RX+/TX+ µPC Connector description: Subcooling internal ambient probe +Vdc Head compressor probe outside t. probe drain probe suction probe transducer high DIC1 transducer low summer-winter thermal sensor press. switch high solar boost SGR bit0 remote on-off...
-
Page 18: Plan Web Wiring - "Multi-Kita
Block outputs C2 NO4 - NO6 Block outputs C3 No7 - Nc7 Block outputs C4 NO8 - NO12 Bar hooks Din 35 18 18 12.1 Digital outputs 12.3 Analogical outputs KITA AIR KITA AIR Y1 (0-10V) Y2 (0-10V) Y3 (0-10V/PWM)) Y4 (0-10V) Condensate discharge heater 12.4 Analogical inputs... -
Page 19: Electric Diagram Kita Air
12.5 Electric diagram KITA AIR... -
Page 20: Internal Wiring Connection Diagram
12.6 Wiring connection diagram internal unit Yellow/Green Blue Brown N-Lok 3 Brown Brown Yellow/Green Blue Brown N-Lok 6 Blue Blue Brown NO11 Yellow/Green Brown No10 N-Lok 9 White White White White White White White White White Black Black Black Black Black Black Black... -
Page 21: Commissioning
13 Commissioning management --˃ SERVICE PASSWORD --˃ Screen Gg02: set up “Speed Fan” in manual MAN and “Power required” at The plant commissioning should be realized by technical • Screen D08: verify that the value SH (overheating) is personnel that has received a complete training. -
Page 22: Control Unit
14 Control unit 1 - Control panel display 2 - Main parameters and active request The terminal of the unit is connected serially through line P-LAN No active request and can be installed in remote to control the unit. In the control... -
Page 23: Main Menu
14.4 Main menu unit we suggest to use the climatic curve instead of setting the Setpoint, because it permits a continuous flow. To enter the menu press the button MasK B05: it permits the choice of fan operation mode. Press the buttons to navigate manus. -
Page 24: Clock/Timetable Menu
14.7 Clock/timetable menu time set in F3. • F4: it means the timetable from the time set in F3 until the time set in F4. After entering the time in the first time period, confirm with Clock to set the wanted operation mode in the time period concerned (choose between ON - OFF- ENERGY SAVE). -
Page 25: Input/Output Menu
14.8 Input/Output menu 14.9 Alarms history menu Alarm history Input/Output ALL02 16:02 28/10/13 Analog inputs Power plus off-line Inlet Outlet B11 = Condensation: Plant : 18.2°C 17.8°C 14.Obarg e 21.5°C Ext. T: 18.0°C B12 = Evaporation: ACS : 20.5°C 14.Obarg e 21.5°C... - Page 26 Setpoint set on the heat pump. pump. E . CONFIGURATION BMS Mask Gfc03: integration activation in case of need This menu allows to set the communication protocol of the port (heat pump in “crisis”).
- Page 27 Mask Gfc22: temperature. • Enable protection: it allow to enable or not • Res.drain cond.: it enables the activation of the function winter antifreeze protection that the resistance for the condensate drain. activates the compressors when the plate heat exchanger reaches a temperature too low.
- Page 28 DEFAULT USER / CHANGE PASSWORD activation of the function. Mask Gfd01: it allows to change the password of the • Start temperature: the starting temperature of the acces to assistance menu. function. • Cancel history alarms: cancels • Target temperature: the traghet temperature of the cmpletely the history of the alarms.
-
Page 29: Menu Overview
14.12 Menu overview... -
Page 30: Alarms
15 Alarms Alarm Visualized message Reset Delay Relay Action code ALA01 Probe B1 broken or disconnected Automatic 60 sec Stop the machine ALA02 Probe B2 broken or disconnected Automatic 60 sec If there is a geothermal modulating pump it... - Page 31 Alarm Visualized message Reset Delay Relay Action code ALP01 Position: ID1 Flow switch geothermal circ. After 5 times per At the start: 15s (par. Stop the machine at maximum time reached water hour it becomes Hc15) at regime: 5s manual (par.
-
Page 32: Alarms Resolution
The letter preceding the number has the following meaning “AIN” Physic probes broken uPC “Pumps” Pumps flow switches, pumps thermic “Boh”Alarms blocking the Circuit, High-Low pressure.. “Quality”HACCP, Consumptions “Compressor” Thermic, envelope “Remote” Various alarms from digital inputs “Driver” Electronic valve “Serial probe”... -
Page 33: Performances
16 Performances TECHNICAL DATA U. M. Nom. Air-Air Heat pump with internal giht efficiency unit Heating capacity 26,5 39,0 Heating mode (Air7°C-Ambient 20°C) 4,34 Cooling capacity 27,0 39,0 Cooling mode (Air35°C-Ambient 27°C) 4,02 Power supply V/np/Hz 400/3/50 Power supply Maximum input power 13,3 Maximum current Heating Min ~ Max °C -33°C ~ 35°C... -
Page 34: Declaration Of Conformity
17.1 Declaration of conformity KITA AIR Dichiarazione di conformità CE Certificato n………….. EC Declaration of Conformity EG Konforrnitàtserklarunq La sottoscritta Templari S.r.l. The undersigned Via Pitagora, 20/A - 35030 Rubano (PD) - ltaly Die Firma P. IVA 04128520287 conferma che gli apparecchi qui di seguito erklàrt in alleiniger Verantwortung,... - Page 35 Note...
- Page 36 Pitagora, 20A - 35030 Rubano (PD) - Italia Tel. +39 049 8597400 | +39 049 5225929 www.templari.com | info@templari.com vers. 26/07/2019 - C...
Need help?
Do you have a question about the KITA AIR and is the answer not in the manual?
Questions and answers