Advertisement
Available languages
Available languages
Quick Links
Montagehandleiding en gebruiksaanwijzing
Berlijn
Elektrische hanghaard
met afstandsbediening
Belangrijk:
Lees deze montagehandleiding en gebruiksaanwijzing zorgvuldig door, voordat u de
haard plaatst en in gebruik neemt.
De handleiding moet bij de elektrische haard worden bewaard. In geval van verkoop aan
derden moet deze handleiding worden meegeleverd.
In geval van onjuist gebruik of het niet volgen van de veiligheidsvoorschriften wordt
iedere aansprakelijkheid afgewezen en zal de garantie niet van toepassing zijn.
Voor hulp of aanvullende informatie neem contact op met een erkende monteur,
helpdesk of uw aankoopadres.
Advertisement

Related Manuals for livin flame Berlijn


Summary of Contents for livin flame Berlijn
- Page 1 Montagehandleiding en gebruiksaanwijzing Berlijn Elektrische hanghaard met afstandsbediening Belangrijk: Lees deze montagehandleiding en gebruiksaanwijzing zorgvuldig door, voordat u de haard plaatst en in gebruik neemt. De handleiding moet bij de elektrische haard worden bewaard. In geval van verkoop aan derden moet deze handleiding worden meegeleverd.
- Page 2 DEEL 1: WAARSCHUWINGEN & ELEKTRISCHE GEGEVENS 1.1 Belangrijke veiligheidsinstructies WAARSCHUWING! Alleen voor binnengebruik. Dit apparaat is niet geschikt voor buiten. Het apparaat is geschikt voor gebruik in geïsoleerde ruimtes en voor incidenteel gebruik NOOIT DOEN: • beschadigde kachel Installeren of gebruiken •...
- Page 3 1.2 Technische specifications Model identifier(s): EF451SL-E Item Symbol Value Unit Item Unit Heat output Type of heat input, for electric storage local space heaters only (select one) Nominal heat output manual heat charge control, with integrated thermostat applicable Minimum heat output manual heat charge control with room (indicative) and/or outdoor temperature feedback...
- Page 4 with working time limitation [no] with black bulb sensor [no]...
- Page 5 DEEL 2: INSTALLATIE Benodigd gereedschap Magnetische schroevendraaier Boormachine 2.1 Uitpakken van de haard Waarschuwing! Gebruik het apparaat nooit als een van de onderdelen nat is geweest. Neem dan eerst contact op met een gekwalificeerd onderhoudstechnicus voor controle en/of vervanging van elektrische onderdelen indien nodig. Houd de plastic verpakking uit de buurt van kinderen.
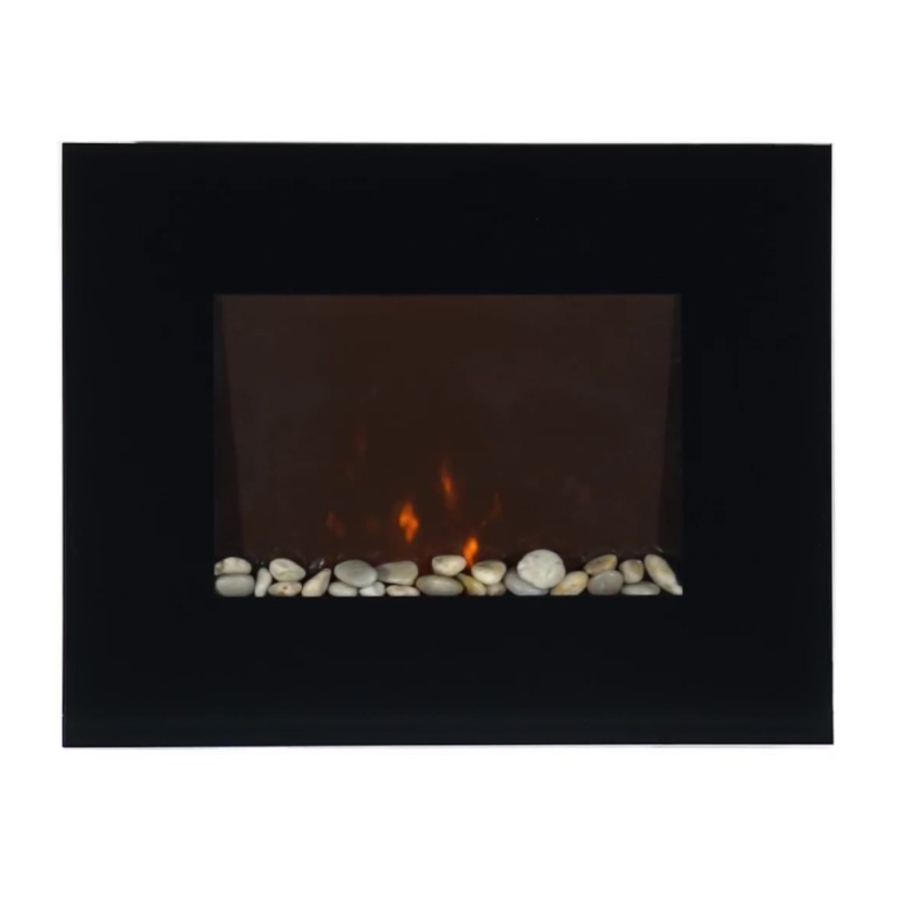
- Page 6 STAP 2. Plaats de kachel tegen de muur en bevestig de onderste bevestigingsbeugel aan de muur met behulp van de meegeleverde schroeven om de kachel permanent op zijn plaats vast te zetten. Pak de kiezels uit de zak en plaats ze langs de lichtunit in de gewenste positie. Plaats de glasrand over de voorkant van de haard en lijn de sleuven in de beugels aan beide zijden van het voorpaneel DEEL 3: BEDIENINGSVOORSCHRIFTEN...
- Page 7 3.2 Gebruiksaanwijzing afstandsbediening Belangrijk! Dit is een afstandsbediening met thermostaat. De afstandsbediening dient ten alle tijden in dezelfde ruimte te zijn als waar de haard zich bevindt en geplaatst worden op een vlakke ondergrond. De communicatie frequentie tussen de afstandsbediening en haard is automatisch vooringesteld. De standby-schakelaar rechtsboven aan de haard moet eerst worden ingeschakeld;...
- Page 8 stellen 4) Druk opnieuw op de knop "DATE TIME" en druk vervolgens op "+" of "-" om de minuten in te stellen 5) Druk op de knop "OK" om te voltooien 4. Temperatuurinstelling De standaard ingestelde temperatuur is 20 ℃, druk op "+" of "-" op de afstandsbediening om de temperatuur in te stellen, die varieert van 15 tot 30 ℃.
- Page 9 (VI) Druk op de knop "TIMER SET" om verder te gaan met instellen en druk op "OK" om de instelling te voltooien 6. Tijdschakelaar "TIMER AAN / UIT" is om de tijdige opening en sluiting te regelen Start de haard opnieuw op nadat de stroom is uitgeschakeld, de instelling van de weektimer is bewaard, maar de huidige datum en tijd moeten worden gereset Opmerking 1: Wanneer de weektimer is ingeschakeld, moet u de verwarmingsfunctie inschakelen, of anders werkt de machine alleen als het...
- Page 10 DEEL 4: ONDERHOUD Waarschuwing: Voordat onderhoud en/of het schoonmaken aan de buitenzijde van de elektrische haard, moet de stekker uit het stopcontact worden gehaald. De elektrische haard even laten afkoelen. 4.1 Reiniging van de elektrische haard U kunt de buitenkant van de open haard met een zachte, vochtige, niet-pluizende doek. Gebruik geen schoonmaakmiddelen of gepolijste producten.
- Page 11 Installation instructions & operating manual Berlijn Electric wall mounted fireplace Important: Please read the instructions and manual carefully before installation or use of the electric fire and retained for future reference. This manual is part of the device and should be stored with it. In case of sale to a third party, these instructions for use should be supplied with the product.
-
Page 12: Section 1: Warnings & Electric Specifications
SECTION 1: WARNINGS & ELECTRIC SPECIFICATIONS Important Safety Instructions For indoor use only. This appliance is not suitable for use outside the house and only suitable for well insulated spaces or occasional use. DO NOT: • install or operate damaged heater •... - Page 13 ⚫ Do not use this fire in rooms that have explosive gas in them (for example petrol), or if you are using solvents, glue, aerosol spray or in flammable paints, as these may catch fire. ⚫ Cleaning and user maintenance shall not be made by children without supervision. Technische specifications Model identifier(s): EF451SL-E Item...
-
Page 14: Section 2: Installation
room temperature control, with open [no] window detection with distance control option [no] with adaptive start control [yes] with working time limitation [no] with black bulb sensor [no] SECTION 2: INSTALLATION Getting Started Remove appliance from the box. Remove any packaging from the product. In the box Fire body. - Page 15 Helpful Advice Before Fitting Please retain all packaging until you have checked and counted all the parts and the contents of the fixing pack against the parts list. The fixing pack contains small items, which should be kept away from young children. We suggest that you open the fixing pack and place all the contents into a container, therefore reducing the risk of losing any small pieces.
- Page 16 Refit the heater to the wall and fasten the bottom fixing bracket to the wall using the screws provided to permanently fix the heater in place. Unpack the pebbles from the bag and place them along the light unit in the desired position. Place the front surround over the front of the fire aligning the slots in the brackets at each side of the front panel with the lugs on the sides of the fire-see Fig.4.
- Page 17 2) Turn on the power switch 3)Press the "ON/OFF" key of the remote controller to start up 4) Press the 900W button for the 900W heat settings; press twice to switch off the heat setting. 5) Press the 1800W button for the 1800W heat settings; press twice to switch off the heat setting. 6) Press the DIMMER button to operate the dimmer mode, repeat pressing will raise and lower the brightness.
-
Page 18: Troubleshooting
Then press the "TIMER SET" button, the display is off, and the hour starts blinking Press the "+" or "-" to adjust the hour. Continue to press the " TIMER SET" button, the minute starts blinking Press the "+" or "-" to adjust minute (V) Set temperature Then press the "... -
Page 19: Section 4: Maintenance
SECTION 4: MAINTENANCE Warning: Before any maintenance and/or cleaning the exterior of the fireplace, disconnect the unit from the power supply and leave until cooled off. 4.1 Cleaning the Fireplace You can clean the exterior of the fireplace with a soft, damp, lint-free cloth. Do not use cleaning or polishing products.
Need help?
Do you have a question about the Berlijn and is the answer not in the manual?
Questions and answers