
Related Manuals for Euromaid ETL1000RCW


Summary of Contents for Euromaid ETL1000RCW
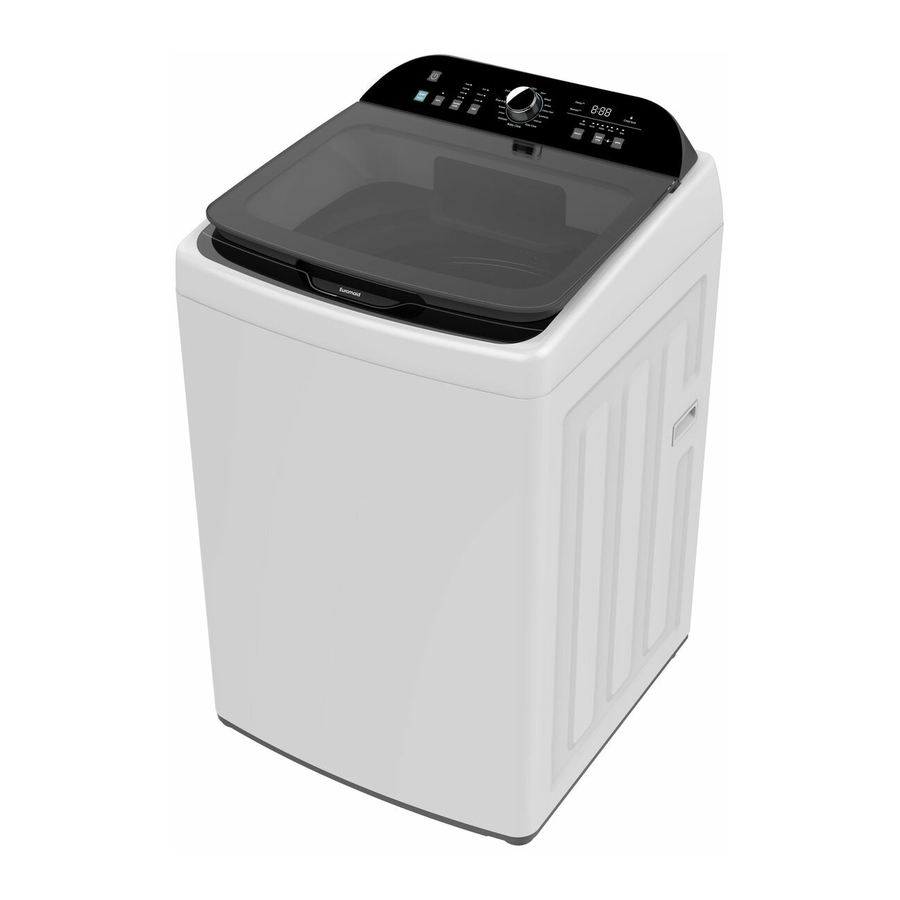
- Page 1 User Manual Description: Top Loader Washing Machine MODEL NO. ETL1000RCW / ETL1200RCW euromaid.com.au PG 1 USER MANUAL...
-
Page 3: Table Of Contents
CONTENTS SAFETY INSTRUCTIONS Explanation of the symbols ............Pg 05 INSTALLATION Product description ................ Pg 10 Accessories included ..............Pg 10 Installation area ................Pg 11 Unpacking the washing machine ..........Pg 11 Levelling the washing machine ............ Pg 12 Connection of inlet hose, tap and washing machine.... -
Page 4: Safety Instructions
SAFETY INSTRUCTIONS For your safety, the information in this manual must be followed to minimize the risk of fire or explosion, electric shock, or to prevent property damage, personal injury or loss of life. • This appliance is not intended for use by persons (including children) with reduced physical, sensory or mental capabilities or lack of experience and knowledge unless they have been given supervision or instruction concerning use of the appliance by a person responsible for their safety •... -
Page 5: Explanation Of The Symbols
SAFETY INSTRUCTIONS Explanation of the symbols Warning! This combination of symbol and signal word indicates a potentially dangerous situation which may result in death or serious injuries unless it’s avoided. Caution! This combination of symbol and signal word indicates a potentially dangerous situation which may result in slight or minor injuries or damage to property and the environment. - Page 6 SAFETY INSTRUCTIONS Warning! POTENTIAL ELECTRIC SHOCK • This appliance is for indoor use only. • Do not put washing machine in a humid place • Hands shall not be inserted into running spin-dry tub . • If the spin-dry tub does not stop within 15 seconds after opening the cover, please stop using the machine and have it repaired.
- Page 7 SAFETY INSTRUCTIONS RISK TO CHILDREN! • Machine may be very hot during the operation. Keep kids and pets far away from the machine during the operation. RISK OF EXPLOSION! • Do not wash or dry articles that have been cleaned in, washed in, soaked in, or dabbed with combustible or explosive substances (such as wax, oil, paint, gasoline, degreasers, drycleaning solvents, kerosene, etc.) This may result in fire or explosion.
- Page 8 SAFETY INSTRUCTIONS INSTALLATION WARNING! • This washing machine is for indoor use only. • It isn’t intended to be built-in. • The openings must not be obstructed by a carpet. • Washing machine shall not be installed in bath room or very wet rooms as well as in the rooms with explosive or caustic gases.
- Page 9 SAFETY INSTRUCTIONS OPERATING THE APPLIANCES! • Before washing with clothes for the first time, run a wash program with the machine empty to ensure any residue from manufacturing processes is removed. • Flammable and explosive or toxic solvents are forbidden. •...
-
Page 10: Installation
INSTALLATION Product description Control Panel Detergent Dispenser Water inlet valve Drum Power Cord Agitator Filter holder Cabinet handle Cabinet Adjustable feet Drain Hose Note: The product diagram is for reference only and may differ to the final product. Accessories included Note: if the drain hose is already installed on the machine, then there is no spring clamp and drain hose in the accessories. -
Page 11: Installation Area
INSTALLATION Installation area Warning! • Ensure the machine is level to minimise vibration when in operation. • Ensure the power lead is not by caught under the machine where it can be come damaged. Before installing the machine, ensure placement as follows: 1. -
Page 12: Levelling The Washing Machine
INSTALLATION Warning! • Position drain hose properly ,otherwise damage might result in water leakage. • Do not kink or protract the drain hose. • If drain hose is too long, do not force it into washing machine as it will cause abnormal noises. -
Page 13: Connection Of Inlet Hose, Tap And Washing Machine
INSTALLATION Connection of inlet hose, tap and washing machine Tap with threads and inlet Special tap for washing machine hose Warning! • To prevent leakage or water damage, follow the instructions in this chapter • Do not kink, crush, modify or sever the water inlet or drainage hoses PG 13 USER MANUAL... -
Page 14: Prior To Commencing Use
OPERATION Prior to commencing use Caution • Before washing, please make sure the washing machine is installed properly. • Before washing with clothes for the first time, run a wash program with the machine empty to ensure any residue from manufacturing process is removed. -
Page 15: Articles Of Washing That Require Attention
OPERATION Articles of washing that require attention. • The ambient temperature in the room where the washing machine is placed should be between 0 - 40°C. If used under 0°C,the inlet valve and draining system may be damaged. If the machine is stored in conditions of 0°C or less, then it should be transferred to normal ambient temperature to ensure the water supply hose and drain hose are not frozen before use. -
Page 16: Control Panel
OPERATION Control Panel POWER Press this button to turn the washing machine On or Off. START/PAUSE WATER LEVEL After selecting the desired wash settings, press this button to start Select water level according to the wash cycle. amount of clothes loaded into the You can also use this button to machine. - Page 17 DISPLAY The display shows the settings, estimated time remaining, options, and status messages for the washing machine. The display will remain on through the cycle. If using the delay function, the LED will be flashing with the remaining time before the machine starts washing. During a washing cycle, the LED is will be solid and show the remaining time of the program.
-
Page 18: Program Variables
OPERATION Program Variables The below buttons can be used to change variables on all wash programs. Water Level Select water level according to amount of clothes loaded into the machine. Low, Mid, High and Max are available to be selected. Temp Select Hot, Warm or Cold water. -
Page 19: Personalised Settings Of Washing Programs
OPERATION One Touch Auto Wash The One Touch Auto Wash feature detects the amount of clothing placed in the machine and automatically sets the water level. Daily START PAUSE Select the DAILY, SPORT, MIXED, Turn On Press Start WHITES or COLOUR FAST program. Rinse and Spin Only Daily START... -
Page 20: Washing Program Table
If garment is considered fragile then it is advised to hand wash only or skip the spin program when washing in the machine. **Program used for AS/NZS 2040 and AS/NZS 6400 Energy and Water ratings. ETL1000RCW / ETL1200RCW Test program is Daily, temperature ‘Warm’, water level ‘Max’... - Page 21 OPERATION 10kg Program Variables Soak Wash Program Delay (H) Water level Rinse Type Spin Duration Duration 0~24 auto/1~4 — Daily 0~3(2) 0/5/7/9/11 auto/1~4 Sport 0~24 0~3(2) 0/5/7/9/11 — auto/1~4 Mixed 0~24 — 0~3(2) 0/5/7/9/11 auto/1~4 Whites 0~24 0~3(2) 0/5/7/9/11 — auto/1~4 Colour 0~3(2)
- Page 22 OPERATION 12kg Program Table Soak Wash Program Delay (H) Water level Rinse Type Spin Duration Duration 0~24 auto/1~4 — Daily 0~3(2) 0/5/7/9/11 0~24 auto/1~4 Sport — 0~3(2) 0/5/7/9/11 0~24 auto/1~4 — Mixed 0~3(2) 0/5/7/9/11 0~24 auto/1~4 Whites — 0~3(2) 0/5/7/9/11 Colour 0~24 auto/1~4...
-
Page 23: Maintenance
MAINTENANCE Cleaning and care Warning! • Before performing maintenance , please unplug the machine and close the tap. Cleaning and care Proper maintenance on the washing machine can extend its working life. The surface can be cleaned with diluted non-abrasive neutral detergents when necessary. -
Page 24: Cleaning Drain Pump Filter
MAINTENANCE Cleaning the drain pump filter Only applicable to certain models. Warning! • Be careful of the hot water! • Allow detergent solution to cool down. • Unplug the machine to avoid electrical shock before cleaning. • Drain pump filter can filter lint and small foreign objects from the washing. •... -
Page 25: Troubleshooting
MAINTENANCE Troubeshooting If the machine will not turn on or stops during operation, refer to the table below to diagnose the problem. If a solution cannot be achieved, please contact the service provider. Fault Possibe Cause No washing The power is off or the fuse is burned out. The power supply voltage is too low. -
Page 26: Technical Information
MAINTENANCE Technical Information Rated Model No. Washing Capacity Unit Dimensions Unit Weight Power Supply Power 601 (W) x 611 (D) x ETL1000RCW 10kg 46kg 600W 220-240V~50Hz 1060 (H) 640 (W) x 684 (D) ETL1200RCW 12kg 53kg 600W 220-240V~50Hz x1085 (H) Standard Water Pressures: 0.03-0.8MPa... -
Page 27: Manufacturer's Guarantee
In the case of Euromaid products used for personal, domestic or household purposes, a period of 2 years from the date the product is purchased as a brandnew product from a retailer located in Australia / New Zealand. - Page 28 MANUFACTURER GUARANTEE 4. How to make a claim. You may make a claim under this warranty through our website, contacting our customer care line or via email. Contact details for Glen Dimplex Australia and New Zealand can be found at the end of this document To make a valid claim under this warranty, you must: a) Lodge the claim with us as soon as possible and no later than 14 days after you first become aware of...
- Page 29 NOTES PG 29 USER MANUAL...
- Page 30 NOTES PG 30 USER MANUAL...
- Page 31 NOTES PG 31 USER MANUAL...
- Page 32 READ THE INSTRUCTION BOOKLET BEFORE INSTALLING AND USING THE APPLIANCE. The manufacturer will not be responsible for any damage to property or to persons caused by incorrect installation or improper use of the appliance. The manufacturer is not responsible for any inaccuracies, due to printing or transcription errors, contained in this manual.
Need help?
Do you have a question about the ETL1000RCW and is the answer not in the manual?
Questions and answers