Stockmaster Step-Thru Assembly Instructions Manual
Hide thumbs
Also See for Step-Thru:
- Assembly instructions manual (15 pages) ,
- User instructions (20 pages)
Advertisement
Advertisement
Table of Contents

Related Manuals for Stockmaster Step-Thru


Summary of Contents for Stockmaster Step-Thru
- Page 1 Assembly Instructions...
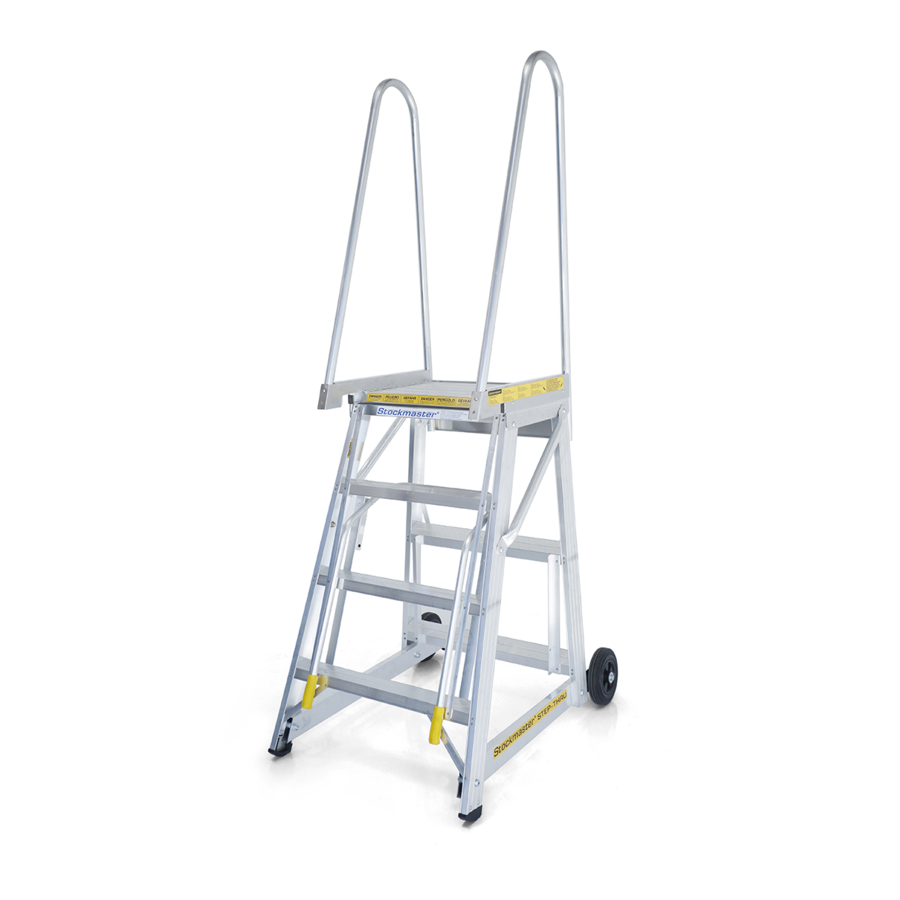
- Page 2 Platform - Safety Rail Assembly Platform - Safety Rail Assembly IMPORTANT To avoid assembly problems follow these instructions exactly. Step 1 M6 x 40 Fasten the two piece Side Safety Rail Set together at A using an M6 x 40mm Bolt and Nyloc Nut. Repeat for the second rail.
- Page 3 Ladder Frame Assembly Ladder Frame Assembly IMPORTANT To avoid assembly problems follow these instructions exactly. Work Safely - Do not stand the frames upright when assembling. Place the frames in the positions as shown in the illustrations. Step 1 Lay the Rear Frame (without steps) on the floor and place the Platform over the frame as shown. Check that M10x 20 the side with the Angled Brace “E”...
- Page 4 Tube Brace Assembly Tube Brace Assembly IMPORTANT To avoid assembly problems follow these instructions exactly. M10 x 20 Work Safely - Do not stand the frames upright when assembling. Place the frames in the positions as shown in the illustrations. Instructions for sizes with 3 to 7 steps including the platform There are no Tube Braces to be fitted to these sizes.
- Page 5 IMPORTANT To avoid assembly problems follow these instructions exactly. Work Safely - This assembly is done with the Stockmaster standing upright. Step 1 Position the Control Handle in the Step Frame between the 2nd and 3rd steps. (See illustration No. 1) “E”...
- Page 6 IMPORTANT To avoid assembly problems follow these instructions exactly. Work Safely - This assembly is done with the Stockmaster standing upright. M6 x 40 Step 1 Fix the Handrail to the Platform Kickrail. Slide the Handrail into the Kickrail and rotate the handrail so that the lower end is over the Step.
- Page 7 Mobilisation Assembly Mobilisation Assembly IMPORTANT To avoid assembly problems follow these instructions exactly. Work Safely - Do not stand the frames upright when assembling. Place frames in the positions shown in the illustrations Step 1 Fix the Mobilisation Rails (Rectangular Hollow Section - RHS) to the Frames at A & B. The fixing detail is shown in steps 2 to 3 (See illustration No.
- Page 8 This completes the product assembly. Before use - See the product Risk Assesment at www.stockmaster.co Sleeve Sleeve Illustration 5 Illustration 6 WARRANTY Thank you for choosing Stockmaster your safety is in good hands Register your 2 year warranty online at www.stockmaster.co...
Need help?
Do you have a question about the Step-Thru and is the answer not in the manual?
Questions and answers