
Summary of Contents for G&G Hopscotch
- Page 1 Hopscotch Imported in North America by : Peter John M. Distributions inc. #114 - 6951 - 72nd street Delta, BC, Canada V4G 0A2 info@guzzieandguss.com 1-888-597-0992...
- Page 2 Thank you for purchasing the guzzie+Guss Hopscotch stroller. Given all products out there, choosing the right stroller to fit your needs can be a challenge and we are honored that you have decided to go with guzzie+Guss. We are committed to producing...
-
Page 3: Table Of Contents
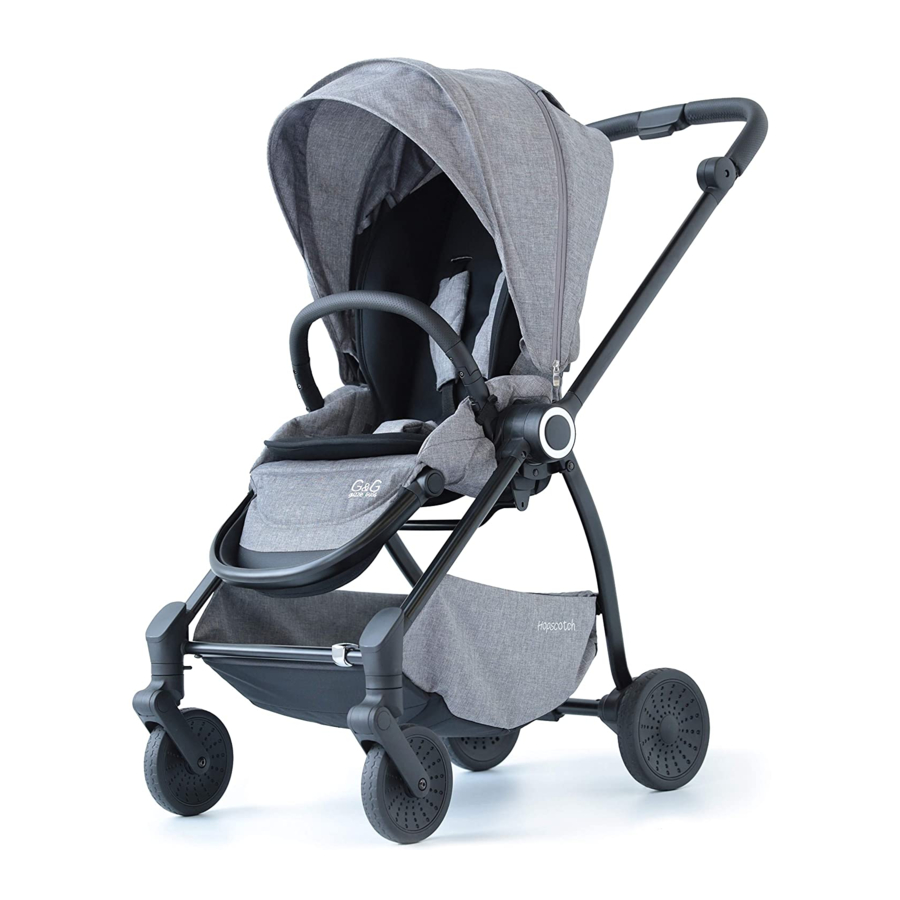
Please note the following to TABLE OF CONTENTS ensure safe use of your stroller • Read these instructions before using this product. • Failure to follow all warnings and instructions could result in serious injury or death. • Do not use this stroller if there are any broken or missing parts. Assembling your stroller Using your stroller •... - Page 4 CONTROL BUTTONS WHAT IS IN THE BOX Canopy extension zipper Footrest adjustment button Swivel lock Canopy Stroller chassis + Seat unit Handle button Recline lever Bumper bar Car seat adapters* Parking brake Front wheels (2) Rear wheels (2) *Please contact us for an up to date list of compatible car seats.
- Page 5 ASSEMBLY ASSEMBLY Opening Chassis Front wheels Squeeze the handle button and rotate the handle away from the chassis, until it clicks in place. (pic 1) Attaching the front wheels Lift the handle up.(pic 2) (pic 3) Insert the swivel pin into the front wheel housing on the stroller Keep lifting the handle up as the chassis unfolds, until the handle clicks into chassis.
-
Page 6: Attaching The Bumper Bar 14 Footrest
ASSEMBLY ASSEMBLY Bumper bar Rear wheels Attaching the rear wheels Attaching the bumper bar Insert the axle into the rear wheel housing on the chassis. The wheel will click Line the bumper bar up with the receptacles on either side of the stroller when properly inserted. -
Page 7: Attaching The Canopy
ASSEMBLY USING YOUR STROLLER Canopy Seat Attaching the Canopy: Removing the set On both sides of the seat you will find a rectangular, grooved mount. Slide To remove the seat from the stroller chassis, lift the release lever at the top of the canopy ratchet onto one of these side mounts (from the top to the the seat, then push the seat forward until the backrest is past 90 degrees. - Page 8 USING YOUR STROLLER USING YOUR STROLLER Seat Ventilation On the back of the seat there is a zippered panel that can be unzipped Reclining the seat to allow for more airflow. You can store the flap in the pouch at the At the top of the seat back, you will find the release lever;...
-
Page 9: Harness
USING YOUR STROLLER USING YOUR STROLLER Harness Adjusting the Handle position The Stroller is equipped with a magnetic 5-point harness. To use the harness, The handle angle can be adjusted to several positions by squeezing the slide the waist strap buckle into the shoulder harness buckle, repeat on the handle button, and rotating the handle up or down. -
Page 10: Swivel Wheels
USING YOUR STROLLER USING YOUR STROLLER Harness Swivel wheels The waist belts are adjustable on either the right or left by using the To set your front wheels to not swivel (locked position), slide the swivel adjustment buckles on the waist strap. (pic1) lock to the middle of the frame. -
Page 11: Folding The Stroller
USING YOUR STROLLER HOW TO USE FOR A NEWBORN Folding the Stroller Footrest Enclosure To use the stroller for children who are newborn to 4 months old you WARNING: Make sure to remove your child before folding the stroller. Fold the seat forward by lifting the lever and bringing the seat forward. will need to use the footrest enclosure. -
Page 12: Car Seat Adapters
HOW TO USE FOR A NEWBORN CARE & MAINTENANCE Car seat adapters - Check the rivets, brakes and accessories very carefully before using this stroller. Slide the adapter with “L” onto the chassis side with the “L”; slide the adapter - Stop using this product if there is any damage or broken parts or pieces. -
Page 13: Warranty
WARRANTY Your guzzie+Guss item is warranted to be free from any manufacturing defects for 1 year from the date of purchase under normal use and in compliance with the operating instructions. This warranty cannot be extended and an extended warranty cannot be purchased. This warranty is not transferable and extends only to the original retail purchaser and is only valid when supplied with proof of purchase.
Need help?
Do you have a question about the Hopscotch and is the answer not in the manual?
Questions and answers