Schrack Technik AVARA Multi Power Series Advanced Configuration Manual
Hide thumbs
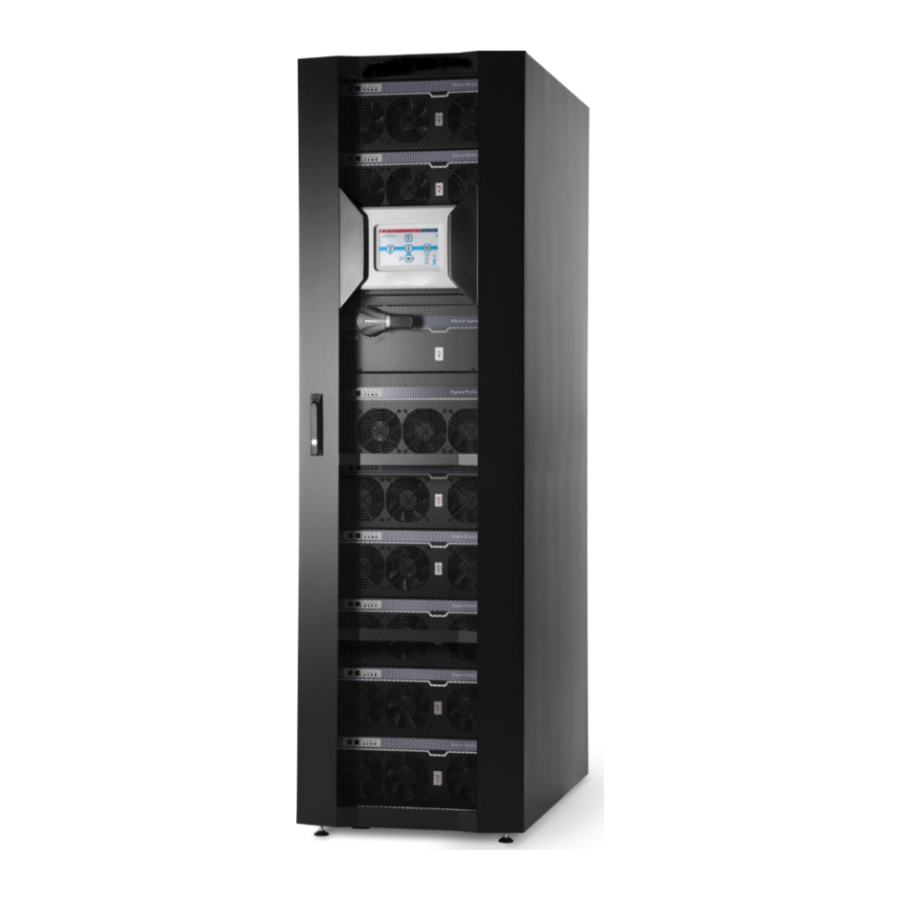
Also See for AVARA Multi Power Series:
- User manual (92 pages) ,
- User manual (60 pages) ,
- User manual (90 pages)

Subscribe to Our Youtube Channel
Related Manuals for Schrack Technik AVARA Multi Power Series


Summary of Contents for Schrack Technik AVARA Multi Power Series
- Page 1 ADVANCED CONFIGURATION MANUAL UNINTERRUPTIBLE POWER SUPPLY Series AVARA Multi Power USMPX 15/25 kW – 500kW USMPW 25/42 kW – 1 MW 3 phase input / 3 phase output On Line / Double Conversion (VFI) Technology...
-
Page 2: Table Of Contents
ONTENTS PART 1 HARDWARE CONFIGURATION USMPW ( USMPX CBC 100X ABINET ADDRESS SETTING ON SYSTEM CABINET ADDRESS SETTING ON USMPX PWC 130X SYSTEM “C ” ABINET IDENTIFICATION LABEL APPLICATION ADVANCED SYSTEM CONFIGURATION XPERT ACCESS LEVEL SELECTION AIN SETUP PAGE “S ”... - Page 3 PART 2: USMPW CONFIGURATOR INTRODUCTION USMPW C ONFIGURATOR MENU ONNECTION ASSWORD BOUT SETTINGS ONFIGURATION ASIC PERATING MODE UTPUT ENERAL DVANCED ENERAL ILTER XTERNAL OPTION YPASS ENERAL NLINE ATTERY OMINAL ENERAL HARGING ALGORITHM ATTERY CHEDULING TIME TEST XTERNAL CARD MODEL NPUT CONTACT UTPUT CONTACT COM 382 ( ULTI...
-
Page 5: Hardware Configuration
HARDWARE CONFIGURATION THE OPERATIONS DESCRIBED WITHIN THIS CHAPTER MUST ONLY BE PERFORMED BY SKILLED AND SPECIFICALLY TRAINED PERSONNEL USMPW ( USMPX CBC 100X ABINET ADDRESS SETTING ON SYSTEM In a modular system, each Cabinet must be assigned a unique identification address. To perform this configuration, the MU (Monitoring Unit) must be extracted and the SW3 switch rotated to the required address. - Page 6 Example In a system consisting of 4 PWC 300 and 8 BTC 170, the Monitoring Unit of each single cabinet must be configured as follows. Cabinet (MU) SW3 Position SW1 Position SW4 Position PWC 300 n° 1 PWC 300 n° 2 PWC 300 n°...
-
Page 7: Cabinet Address Setting On Usmpx Pwc 130X System
CABINET ADDRESS SETTING ON USMPX PWC 130X SYSTEM In addition, within the USMPX modular system, a unique identification address must be assigned to each cabinet. This setting is made via the CONNECTIVITY PANEL. Open the cover by undoing the 4 x M4 (three-lobed) Phillips screws and rotate the SW2 switch. - Page 8 When assigning an address, certain rules must be followed according to the cabinet type. Refer to the table below. SW3 rotating switch position Addresses reserved for A D PWC 130X Reserved Reserved Example In a system consisting of 4 PWC 130X and 8 BTC 170, the CONNECTIVITY PANEL and the MU of each single cabinet must be configured as follows: Cabinet (CP) SW3 Position...
-
Page 9: Cabinet Identification " Label Application
“C ” ABINET IDENTIFICATION LABEL APPLICATION Supplied within the accessory box there are 2 labels to be applied onto the door of the Cabinet for identification purposes. 1 – “Address” label 2 – “Selector” label Apply the "address" label as shown above Apply the "selector"... -
Page 10: Advanced System Configuration
ADVANCED SYSTEM CONFIGURATION XPERT ACCESS LEVEL SELECTION The “Expert” level allows you to configure the system; you can set the number and positions of the PM and battery type and capacity. In addition, the "Expert" allows you to configure the system operating mode (ECO-MODE, ON LINE, ...) and electrical output parameters. -
Page 11: Main Setup Page
AIN SETUP PAGE Within the “Expert” access level the “Main setup page” displays a new icon to access the advanced system configuration System configuration (Power/Combo Cabinet, Battery Cabinet, battery connection, redundancy) -
Page 12: System Configuration Page
“S ” YSTEM CONFIGURATION PAGE The field to be configured (Power/Combo Cabinet, Battery Cabinet, battery connection, redundancy level) can be selected using the Tab menu on the left. The system is comprised of 1 up to a maximum of 4 UPS Cabinets, identified with the letters A, B, C, D. Each UPS Cabinet can house one or more Power Modules (max. -
Page 13: Preliminary Configurations (Pm Size And Battery Type )
RELIMINARY CONFIGURATIONS SIZE AND BATTERY TYPE Upon first configuration, the setting of the PM size which is compatible with the type of Cabinet will be required Choose the size of the PMs and confirm by pressing the SAVE icon. PM size compatible with the USMPW Cabinets PM size compatible with the USMPX Cabinets During the first configuration, you will also be asked to set the type of battery you wish to use: - Conventional Battery (blocks of conventional batteries housed within an independently installed cabinet or stand) -
Page 14: Power Cabinet Configuration
Change battery type • Enter the Configuration procedure. Remove all of the batteries configured within the system (zero the Ah or remove all the BUA). • • Exit the procedure, saving the configuration just created without any batteries. Once you enter the configuration procedure again, you will be asked to select the battery type. •... -
Page 15: Combo Cabinet Configuration
Power Cabinet A, selected for display and/or changes to the configuration if required. The check mark highlights the presence in the cabinet of at least one configured Power Module. Power Cabinet A, configured as not present in the system and not selected. Power Module configured as present in the system. - Page 16 Combo Cabinet A, currently selected for display and/or changes to the configuration if required. The check mark highlights the presence in the cabinet of at least one configured Power Module or Battery Unit Array. Combo Cabinet A, configured as not present in the system and not selected. Power Module configured as present in the system.
-
Page 17: Battery Cabinet Configuration
ATTERY ABINET CONFIGURATION If one of the Battery Cabinets is selected, the current configuration of the cabinet is displayed in the righthand side. If at least one battery drawer is selected a check mark on the symbol of the Battery Cabinet will be present, confirming that the Battery Cabinet is configured in the system with at least one battery drawer inserted. -
Page 18: Modular Battery Connection Configuration
ODULAR ATTERY CONNECTION CONFIGURATION There are 3 possible connection types: Shared: with a single battery connection shared by all the UPS Cabinets within the system. • Separate: each UPS Cabinet is connected exclusively to one or more Battery Cabinets electrically separated from the •... - Page 19 EPARATE BATTERIES In the event of Modular Batteries connected in a “separate connection” the Battery Cabinet – UPS Cabinet association must be created. Key: Battery Cabinet associated with above UPS Cabinet Battery Cabinet associated with another UPS Cabinet Battery Cabinet present, but not yet associated Battery Cabinet not present (and therefore cannot be associated) Clicking on the respective Battery Cabinet array will show the following screen for the creation of logic connections.
- Page 20 After associating Battery Cabinets “1” and “2” with UPS Cabinet “A” the main page will change as follows. After having concluded the configuration, there should be no non-associated Battery Cabinets.
- Page 21 ATTERIES IN GROUPS PAIRS In the event of 4 UPS Cabinets connected in a pair configuration, proceed in exactly the same way.
-
Page 22: Conventional Battery Connection And Configuration
ONVENTIONAL BATTERY CONNECTION AND CONFIGURATION There are 3 possible connection types: Shared: with a single battery connection shared by all the UPS Cabinets within the system. • Separate: each UPS Cabinet is connected exclusively to one or more Battery Cabinets electrically separated from the •... - Page 23 EPARATE BATTERIES By touching each of the text boxes, it is possible to configure the battery capacity (Ah) for each UPS Cabinet. Representation of a configuration to separate batteries with only 2 UPS Cabinets.
- Page 24 ATTERIES IN GROUPS By touching each of the text boxes, it is possible to configure the battery capacity (Ah) for each group of UPS Cabinets. The simultaneous use of two battery types is prohibited. If you try to configure modular batteries at this time, you will be shown a warning reminding you of the selection made at the start of the configuration procedure.
-
Page 25: Redundancy And Alarm Threshold Configuration
EDUNDANCY AND ALARM THRESHOLD CONFIGURATION Within this section it is possible to configure: the number of redundant Power Modules within the system; • the load level threshold, which when exceeded will produce an alarm. • NOTE: The redundancy should be set from 0 to N. For each complete PWC 300 (with 7 modules), at least one redundant module must be set. -
Page 26: Settings
SETTINGS ENERAL SYSTEM SETTINGS XPERT EVEL The “Expert” access level is required for accessing these menus. The preset access password is: expert General system settings (Expert Level) ENERAL SYSTEM DATA On this page, with both Power User and Expert access levels, you can enter the system name, place of installation and a reference ID for the system. -
Page 27: System Operating Settings
YSTEM OPERATING SETTINGS This page allows the configuration of the rated output voltage, the frequency and the mode of operation. NOTE: it is not possible to modify the system output frequency if one or more PM are on or starting up. OWER DERATING In the case where the output voltage is set to a value less than 225 V PHASE-NEUTRAL, the maximum power of the UPS is derated from the rated power, as shown in the following graph. -
Page 28: Advanced System Settings
OMINAL FREQUENCY CHANGE Once the output frequency is selected, to activate the change, perform the following operations: - Open the locking switch on all PM. - Wait for a few seconds to allow all PM to completely shut down. - Restart the system following the start-up procedure (for details refer to the “USMPW user manual” or “USMPX user manual”). DVANCED SYSTEM SETTINGS This page allows the configuration of the autostart, the automatic shut down and the low battery warning time. -
Page 29: Troubleshooting
TROUBLESHOOTING TART UP PROBLEMS Moving an already-configured MCU from one cabinet to another one of a different type, could lead to the following screen. Also, by selecting the correct type of new cabinet, it will not be possible to start the application correctly and the screen will be shown again. -
Page 30: Communication
OMMUNICATION If during operation you think there might be wiring errors, or more generally, communications errors between different elements within the system, you can potentially find help on the communications errors troubleshooting page, which can be reached via Command Panel → View communication status. This page shows an element with good communication status with a light blue ring and a non-communicating element with a grey ring. - Page 31 PART 2 USMPW CONFIGURATOR...
-
Page 32: Introduction
INTRODUCTION Symbols used in this manual: Indicates information that must not be ignored. Danger Failure to follow these indications may cause serious damage to the UPS, the batteries or the load. Indicates important information. Warning Failure to follow these indications may result in the UPS malfunctioning. Information Provides notes and useful suggestions for the User. -
Page 33: Menu
MENU New configuration file: Connect to USMPW: Creates a new USMPW-USMPX configuration using Activates the PC↔USMPW-USMPX connection. default values. Open configuration file: Disconnect from USMPW: Opens a configuration file (.mcf) previously saved on Deactivates the PC↔USMPW-USMPX connection. a disk. Save configuration file: Insert password for service level: Saves a configuration file (.mcf) to disk, containing all Allows a password to be entered to access the... -
Page 34: File
Creates a new USMPW-USMPX configuration using default values. Open Opens a configuration file (.mcf) previously saved on a disk. Save Saves a configuration file (.mcf) to disk, containing all the settings selected in the various program tabs. Save as… Saves and renames a configuration file (.mcf), containing all the settings selected in the various program cards. Download Downloads the configuration from the USMPW-USMPX that is currently connected, which is then displayed in the various program cards. -
Page 35: Connection
ONNECTION Connect Activates the PC↔USMPW-USMPX connection using the set serial communication port (see Menu → Connection → Com Port). Once the operation is finished, the status of the USMPW-USMPX is indicated in the status bar on the bottom left. For the PC↔USMPW-USMPX connection, use: •... -
Page 36: View
Serial Number Activates the window in which you can see the serial number of all devices in the USMPW-USMPX system. It is also possible to see the event history of serial numbers (History window) in case of replacement of equipment. To access this information, make sure that the .msn and .mcf files downloaded from the MCU or CONNECTIVITY PANEL are present in the same folder (for further information refer to the “USMPW user manual”... -
Page 37: Password
ASSWORD Service password Allows a password to be entered to access the Service level. Advanced service password Allows a password to be entered to access the Advanced level. BOUT Help Opens this manual. -
Page 38: Settings
SETTINGS ONFIGURATION Displays the USMPW-USMPX system configuration; the cabinets and modules present within the system are represented. The settings displayed can only be modified from the MCU or CONNECTIVITY PANEL. Example system with Modular Batteries configured as Shared Batteries. Example system with Modular Batteries configured as Grouped Batteries; with the same colour corresponding to the shared battery connection. - Page 39 Example system with Modular Batteries configured as Separate Batteries; with the same colour corresponding to the shared battery connection. Example system with Conventional Batteries configured as Separate Batteries; with the same colour corresponding to the shared battery connection.
-
Page 40: Basic
ASIC View the main operating parameters of the system. The settings displayed can only be modified from the MCU or CONNECTIVITY PANEL. PERATING MODE Mode Select the desired operating mode [Default → Online]. Online This mode ensures maximum load protection and the best waveform output quality. In this mode, the USMPW-USMPX can work with an input frequency of 50Hz and an output frequency Frequency converter of 60Hz or vice versa. -
Page 41: Output
UTPUT Nominal voltage Set the desired output voltage of the USMPW-USMPX [Default → 230V]. Nominal frequency Select the desired output frequency (50 or 60 Hz) of the USMPW-USMPX [Default → 50Hz]. The output nominal frequency must always be properly selected. The configuration of the frequency set only occurs when the USMPW-USMPX is powered. -
Page 42: Advanced
DVANCED Setting the advanced operating parameters of the USMPW-USMPX. The service level password is required to configure these parameters. -
Page 43: General
ENERAL Autonomy limitation If the function is enabled, it is possible to set a maximum battery operation time (“Limit” - expressed in seconds and between 1 and 65534); when this time has expired the USMPW-USMPX automatically switches off even if the autonomy of the batteries has not been exhausted. -
Page 44: Filter
ILTER Synchronization speed Allows the setting of the synchronization speed of the inverter to the bypass line. The possible speeds are 0.5, 1.0, 1.5 and 2.0 [Default → 1.0 Hz/sec]. Input filter (Input frequency) Enable a digital filter of voltage and frequency reading of the input supply. The function can be enabled in the case of disturbances on the incoming mains supply [Default →... -
Page 45: Bypass
YPASS Setting the bypass operating parameters. The service level password is required to configure these parameters. ENERAL Separated bypass line Default → Function ENABLED. Auto bypass on In the absence of the mains, at the end of battery discharge the load is transfer on the bypass. If the bypass is not available or fails, the load is no longer supplied and the USMPW-USMPX turns off. -
Page 46: Online
NLINE Setting the bypass parameters with the USMPW-USMPX in Online mode (see Setting → Basic → Operating mode). Mode Select the bypass line mode for transitional events and in emergency conditions [DefaultEnabled high sensibility]. Switching to bypass enabled with high sensitivity intervention (inverter voltage waveform control Enabled high sensibility active). -
Page 47: Eco Mode
Setting bypass parameters when the USMPW-USMPX is in Eco mode (see Settings → Basic → Operating mode). Sensibility Select the sensibility of the bypass line quality control [Default → NORMAL]. Minimum threshold Set the minimum bypass voltage range threshold accepted for Eco mode operation; below this threshold, the USMPW-USMPX switches to Online mode. -
Page 48: Battery
ATTERY Setting the internal battery parameters of the USMPW-USMPX. The service level password is required to configure these parameters. -
Page 49: Nominal
OMINAL UPS without battery If the USMPW-USMPX is normally used without batteries installed (for example as a frequency converter of stabiliser), this option must be enabled [Default → Option DISABLED] If the option is enabled, the USMPW-USMPX switches off in the event of mains power failure. Battery number Number of batteries present within the USMPW-USMPX system. -
Page 50: Charging Algorithm
HARGING ALGORITHM It is possible to select the battery charging mode [DEFAULT → Two level]. For information on the charging algorithm refer to the product technical specification. One level The batteries are charged at a set voltage level which cannot be changed (displayed in the field “Recharging voltage”) (in this mode the “Recharging voltage”... -
Page 51: Battery Test
ATTERY Displays the execution mode of the battery test. The settings displayed can only be modified from the MCU or CONNECTIVITY PANEL. -
Page 52: Scheduling Time Test
CHEDULING TIME TEST Automatic battery test If the function is enabled, the USMPW-USMPX automatically carries out the battery tests [Default → Function ENABLED]. It is possible to set the frequency with which the UPS runs the test (time between tests and the next) choosing from 3 options: execution of the test every n hours (“Time”... -
Page 53: External I-O
XTERNAL Configuration of the programmable outputs present on the MultiCOM 382, MultiCOM 384, or MultiCOM 392 accessories. The MultiCOM 392 accessory is to be used as an alternative to the MultiCOM 384 accessory. The MultiCOM 382 accessory is no longer manufactured but is compatible. The service level password is required to configure these parameters. -
Page 54: I/Ocard Model
CARD MODEL Select the accessory card installed. NPUT CONTACT for MultiCOM 382 for MultiCOM 384 for MultiCOM 392... -
Page 55: Output Contact
Input mode For each input select the action to be associated with the contact in use. No operation No associated operation Energy saving Energy saving mode active System on System on CB off Battery charger off System stand-by System off Bypass disabled Bypass line disabled Battery test... - Page 56 Output mode For each output select the event to be associated with the contact in use. Battery low End of charge pre-alarm Redundancy low Warning of redundancy low Battery working Redundancy lost Battery operating mode Alarm of redundancy lost Load on bypass Load powered by bypass Battery test active Battery test in progress...
- Page 57 Logic For each output, select the operating logic of the relay. Normal OFF The contact closes when the associated event occurs Normal ON The contact opens when the associated event occurs Delay Set the delay (in seconds and from 0 to 255) between the occurrence of the event and the switching of the relative contact.
-
Page 58: Multi Com 382 ( No Longer Manufactured )
COM 382 ( ULTI NO LONGER MANUFACTURED Configuration of MultiCOM 382 card for the USMPW-USMPX Open jumper JP1 for the correct operation when used within the USMPW-USMPX system. This is closed by default from the factory. Refer to the dedicated manual for further details. COM 384 ULTI Configuration of MultiCOM 384 card for the USMPW-USMPX... -
Page 59: Multi Com 392
COM 392 ULTI Configuration of MultiCOM 392 card for the USMPW-USMPX Close jumper JP1 for the correct operation when used within the USMPW-USMPX system. This is closed by default from the factory. Refer to the dedicated manual for further details. - Page 60 MAN_advanced configuration_AVARA Multi Power USMPX 15_25kW_EN_2020_05_03_0MNMPWK25RUENCC .docx 0MNMPWK25RUENCC...
Need help?
Do you have a question about the AVARA Multi Power Series and is the answer not in the manual?
Questions and answers