
Related Manuals for Bertazzoni F30PROX


Summary of Contents for Bertazzoni F30PROX
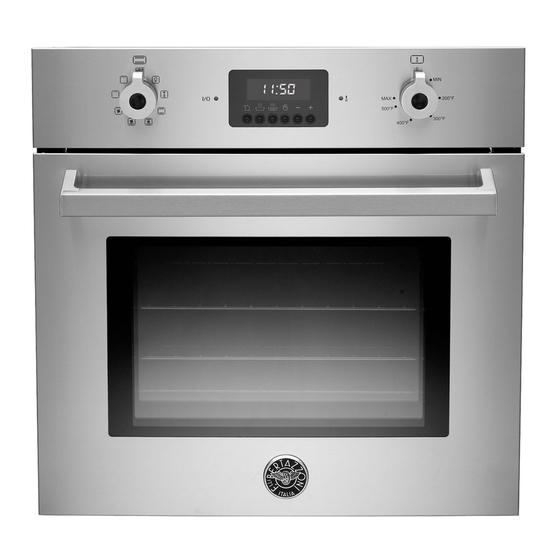
- Page 1 INSTALLATION, USE & CARE MANUAL 30” BUILT‐IN OVEN F30CONXE (F7..PQC1XE.UA) F30CONXT (F7..PKC1XE.UA) F30PROX (F7..PAZ1XE.UA) F30PROXE (F7..PAU1XE.UA) F30PROXT (F7..PHU1XE.UA) 310461...
- Page 2 FROM THE DESK OF THE PRESIDENT Dear new owner of a Bertazzoni product, I want to thank you for choosing one of our beautiful products. We know that you have many brands and products to choose from and we are thrilled that you have decided to take one of our products into your home.
-
Page 3: Table Of Contents
TABLE OF CONTENTS APPLIANCE INFORMATION ______________________________________________ 4 WARRANTY AND SERVICE _______________________________________________ 5 IMPORTANT SAFETY INSTRUCTIONS ______________________________________ 6 PRODUCT SPECIFICATION _______________________________________________ 9 INSTALLATION INSTRUCTIONS __________________________________________ 11 CARING FOR THE ENVIRONMENT ________________________________________ 11 WIRING DIAGRAM _____________________________________________________ 12 CUT-OUT DIMENSIONS _________________________________________________ 14 INSTALLING THE OVEN ________________________________________________ 15 GETTING STARTED ____________________________________________________ 16 USING THE LCD DISPLAY _______________________________________________ 18... -
Page 4: Appliance Information
MODEL _____________________________________________________ DATE INSTALLED _____________________________________________________ DEALER _____________________________________________________ _____________________________________________________ INSTALLER _____________________________________________________ _____________________________________________________ SERVICER _____________________________________________________ _____________________________________________________ APPLIANCE INFORMATION... -
Page 5: Warranty And Service
WARRANTY AND SERVICE All Bertazzoni products are covered by a 2 years parts and labor warranty. Service on all Bertazzoni products shall be carried out by factory-trained professionals only. For warranty service please contact Customer Service at the numbers indicated below. -
Page 6: Important Safety Instructions
IMPORTANT SAFETY INSTRUCTIONS Read these instructions before installing or using the oven for the first time. Save these instructions and review them periodically. Keep the instructions in a safe place and transfer them to any future user. General This appliance complies with current safety requirements. The appliance is intended for domestic use only: cooking, baking, roasting, broiling, defrosting and heating of food. - Page 7 Do not sit or step on the oven door. Do not place heavy items on the open oven door. Only use the food probe supplied with the oven. Contact Bertazzoni Service if you need to purchase a new probe. To prevent damage, remove the food probe from the oven when it is not being used.
- Page 8 consistency of the food, and recipe. Germs present in the food are killed off only at a sufficiently high temperature (> 158F / 70C) and after a sufficiently long time (10 minutes or longer). Select a longer cooking time if you are unsure whether the food is thoroughly heated.
-
Page 9: Product Specification
PRODUCT SPECIFICATION PROFESSIONAL SERIES OVENS (PRO MODELS) Electrical requirements 120/240V - 5500W (24 A max) or 120/208V – 4400W (21 A max). Upper heating element Lower heating element Convection heating elements 3400W 2100W 2 x 1650W... - Page 10 PRODUCT SPECIFICATION DESIGN SERIES OVENS (CON MODELS) Electrical requirements 120/240V - 5500W (24 A max) or 120/208V – 4400W (21 A max). Upper heating element Lower heating element Convection heating elements 3400W 2100W 2 x 1650W...
-
Page 11: Installation Instructions
INSTALLER: PLEASE LEAVE THESE INSTRUCTIONS WITH THE OWNER. Electrical connection Power supply 120/240Vac: 5500 Watt or 24 A max. 120/208Vac: 4400 Watt or 21 A max. Black wire: connect to L1 (hot) Red wire: connect to L2 (hot) White wire: connect to N (neutral) Green wire: connect to GND (ground) A dedicated line and junction box should be used to connect the oven to a CARING FOR THE ENVIRONMENT... -
Page 12: Wiring Diagram
WIRING DIAGRAM Models: F 30PRO X - F30 PR OXE - F 30 PRO XT... - Page 13 WIRING DIAGRAM Models: F30CONXE - F30CONXT...
-
Page 14: Cut-Out Dimensions
IMPORTANT Kitchen cabinets shall be made of materials capable of withstanding temperatures at least 117°F (65°C) above room temperature in order to avoid possible damage to the cabinets during oven usage. The oven must be installed into cabinetry and be supported from underneath. -
Page 15: Installing The Oven
STEP 1 Fix the supplied skid plates to the cabinet floor. STEP 2 Prepare the door for removal. Flip up the locking clamps on each door hinge. Slowly shut the door until the protruding clamps stop the movement. Pull oven door upwards and remove. -
Page 16: Getting Started
1 Control Panel (KNOBS only presents on PRO models) 2 Cooling exhaust 3 Self-clean cycle door lock 4 Lights 5 Food probe port (XT (models only) 6 Convection fans 7 Seven level shelf supports 8 Data plate 9 Oven door COOLING FANS Two cooling fans are concealed in the upper portion of the oven. - Page 17 When inserting a rack, always check that the safety notches are at the back. To remove racks, raise them upwards and pull out. TELESCOPIC RACKS The oven is also equipped with full-extension telescopic racks that extend on ball bearing glides. The telescopic racks must be securely fastened to the side runners. Additional racks can be purchased as accessory (part # 901267).
-
Page 18: Using The Lcd Display
PROFESSIONAL SERIES OVENS (PRO MODELS) A Touch control areas START The LCD display can be operated 1 minute after the power supply is connected. To activate the display: DESIGN SERIES OVENS (CON MODELS) Tap for 2 seconds any of the touch control areas (A). The following icons will appear: Timer PROFESSIONAL SERIES OVENS (PRO MODELS) - Page 19 ICONS LEGEND Timer Light Settings menu Start Scroll left/right and up/down Confirm selection Remove selection or leave menu Stop cooking Set cooking time, delay start/end time, food probe Modify cooking mode Modify cooking temperature...
- Page 20 SETTINGS Activate SETTINGS menu with Select field with Set the desired values with Leave menu Notes ECO mode: this setting reduces energy consumption by: Audio Level Metric /Imperial SHOW ROOM mode: this option is for showroom demonstration. In showroom mode the heating elements are not activated. Never use this at home. TIMER Activate TIMER with Set desired time (max 10 hours) with...
-
Page 21: Before Using The Oven
BEFORE USING THE OVEN Before using the oven for preparing food: Remove the protective film from the oven door and control panel Remove all accessories from the oven Remove all stickers from the baking tray, from the roasting pan or from the interior cavity of the oven ... -
Page 22: Basic Operation - Design Series Models
BASIC OPERATION - DESIGN SERIES MODELS START Activate the oven by touching any control area for 2 seconds. Start programming with Select COOKING MODES Set desired COOKING TEMPERATURE The oven will start PRE-HEATING in a few second showing the progress in the display. -
Page 23: Basic Operation - Professional Series Models
BASIC OPERATION – PROFESSIONAL SERIES MODELS START Activate the oven by turning the COOKING MODE knob (right) Select COOKING MODE by turning the right knob Select COOKING TEMPERATURE by turning the temperature left knob The oven will start PRE-HEATING in a few second showing the progress in the display. -
Page 24: Time Management Menu - Timer, Delay/End Cooking, Food Probe
TIME MANAGEMENT MENU – TIMER, DELAY/END COOKING, FOOD PROBE START After programming the oven for cooking, touch management menu. SET TIMER This function is simply a minute minder: the timer can be used independently from cooking and it will not turn off the oven at the end of the set time. For the oven to shut off automatically, select END OF COOKING (see below). - Page 25 Activate DELAY START Set desired time before oven will turn on Leave menu The display will show the countdown. The oven will turn on at the end of a count down. The end of the countdown will be confirmed with a repeating tone. Note DELAY START can be combined with the END OF COOKING.
- Page 26 Connect the probe jack to the port located in the upper left side of the oven cavity. Place the food in the oven and confirm The display will show the set temperature and the actual temperature measured by the probe. The oven will turn off when the desired food temperature is reached. The display will show END OF COOKING –...
-
Page 27: Cooking Modes Guide
MODE DETAILS BAKE Bake and broil elements ON Convection OFF Temperature 100F - 500F Use lower 2 shelf levels. CONVECTION BAKE Bake element ON at full power Broil element ON at moderate power Convection fan ON Temperature 100F- 500F Use several levels at the same time. NOTE: As a general rule, the temperature of a recipe not designed for baking in a convection oven should be lowered by 20F (15C) -
Page 28: Broil / Convection Broil
The broil element operates on 4 different power levels. The element is heated for the first 3 minutes at maximum power and then the power is reduced according to different desired effects. Level 1 produce a mild browning of the food surface Level 4 produce an intense irradiated heat that cause a fast browning of food. -
Page 29: Tips For Best Results - Baking
FOOD Cookies 12”x15” Cookie Sheet Layer Cakes Sheet Cakes Bunt Cakes Brownies, Bar Cookies Biscuits 12"x15" Cookie Sheet Quick Bread Muffins 12 cup Muffin Pan Fruit Pies Fruit Cobblers Yeast Bread Dinner Rolls Cinnamon Rolls Yeast Cake 12"x15" Cookie Sheet TIPS FOR BEST RESULTS - WARMING Biscuits and Muffins (covered) Casserole (covered) -
Page 30: Tips For Best Results - Dehydrate
TIPS FOR BEST RESULTS - DEHYDRATE FOOD PREPARATION Cut in ¼” slices and dip Apples in 1/4 cup lemon juice + 2 cups water solution Cut in ¼” slices and dip Bananas in 1/4 cup lemon juice + 2 cups water solution Wash and towel dry. -
Page 31: Assistant Function
Developed with the help of Italian professional chef consultant Roberto Carcangiu, Bertazzoni’s exclusive ASSISTANT function is a revolutionary system for upgrading oven cooking in the home. The ASSISTANT is pre-programmed with finely calibrated sets of cooking modes, temperatures and times sequences for each type of food. - Page 32 Start programming with Select ASSISTANT Select MANAGE Select TYPE OF FOOD with Selected food categories will guide you through the selection of additional parameters (e.g. for meat: weight, type of cut, food probe temperature). Follow the directions on the display, select the appropriate parameters and confirm. The oven will begin pre-heating and signal the end of the pre-heating cycle with a tone.
- Page 33 room temperature. If using frozen food for a dish, defrost it before starting a sequence. Note : In low temp roasting mode, food is baked at a very low temperature then requiring long cooking time. Baking time can last up to 5/6 hours, according to food dimensions.
- Page 34 SAVE The ASSISTANT stores your latest cooking sequence for future use. Select ASSISTANT with or with right knob and confirm Select SAVE with and confirm The display will show the last cooking sequence performed, indicating the set of cooking modes, temperatures and times used for the cycle. Confirm Select FOOD CATEGORY and confirm Enter a name for this cooking sequence - scroll through the keyboard with...
- Page 35 RETRIEVE To retrieve a previously stored personal sequence follow these simple steps. Select ASSISTANT Select RETRIEVE Select FOOD CATEGORY and confirm Select a stored sequence and confirm You will have the following options: - START: will immediately start the cooking sequence. - MODIFY: allows to modify food category and name associated to a personal cooking sequence - DELETE: delete the selected cooking sequence.
-
Page 36: Sabbath Mode
This special program is designed for religious observances. START Activate the oven by touching any control area for 2 seconds. Start programming with Select WARMING with Select S.M. with The oven will turn on and pre-heat until the temperature of 200F is reached. Then, the temperature will be held constant until the oven is switched off. -
Page 37: Self-Cleaning Cycle
DESCRIPTION In the self-cleaning cycle, the oven cavity is heated to very high temperatures to burn off any residue on the oven interior. After the cleaning cycle, any burnt off residue is transformed to ash and can be easily wiped out with a damp sponge. Spilled fruit juices may permanently discolour surfaces. -
Page 38: Cleaning The Oven
FRONT Clean spills from the front of the appliance immediately. Spills may cause discoloration of the glass and steel surfaces. Clean the front of the appliance with a clean sponge or cloth, liquid dish soap and warm water. Alternatively, use a clean, damp microfiber cloth and then dry with a soft cloth. -
Page 39: Replacing The Oven Lights
REPLACING THE OVEN LIGHTS WARNING! Disconnect power before servicing unit. To replace the oven light bulb, remove the protection cap. It is not necessary to remove the rack supports. NOTE: Touching the bulb with fingers may cause the bulb to burn out. Always use protective gloves or use a cloth to remove the bulb. -
Page 40: Troubleshooting Guide
OVEN PROBLEM Oven does not function Self-clean cycle does not activate Door is not shut tight and door latch cannot lock Door does not open Oven light does not work Oven door is locked and will not release after cooling Oven is not heating Oven light is not working properly Replace or reinsert the light bulb if loose or defective. - Page 41 BERTAZZONI SpA Via Palazzina 8 42016 Guastalla RE ITALY WWW.BERTAZZONI-ITALIA.COM...
- Page 42 403534 OVEN DOOR HANDLE 1406 403535 OVEN HANDLE 1406 403519 OVEN HANDLE 1407 406469 OVEN DOOR GLASS 1407 406463 OVEN DOOR GLASS 1409 411128 GLASS OVEN GASKET SPARE PARTS LIST F30CONXE F30CONXT F30PROX F30PROXE F30PROXT DESCRIPTION 800584 800584 800584 800584 800586 800586 800585 800585 800587 800587 800586 800586 800588 800588 800587 800587...
- Page 43 1411 411127 GASKET FOR OVEN FRONT 1414 602050 THERMOSWITCH 1415 602051 THERMOREGULATOR 1421 406462 INTERNAL OVEN GLASS 1427 406461 GLASS CONTROL PANEL 1428 406470 CONTROL PANEL GLASS 1508 410809 STAINLESS STEEL OVEN DOOR 1508 410765 STAINLESS STEEL OVEN DOOR 1601 410812 CONTROL PANEL FRAME 1602 211117 CONTROL PANEL 1605 402446 INSULATING FOR LAMP 1614 202737 BACK PANEL 1615 202761 CONTROL SUPPORT 1615 202722 CONTROL SUPPORT 1639...
- Page 44 ...
- Page 45 ...
- Page 46 ...
Need help?
Do you have a question about the F30PROX and is the answer not in the manual?
Questions and answers