Table of Contents
Advertisement
Available languages
Available languages
Quick Links
IMPORTANT INSTRUCTIONS -
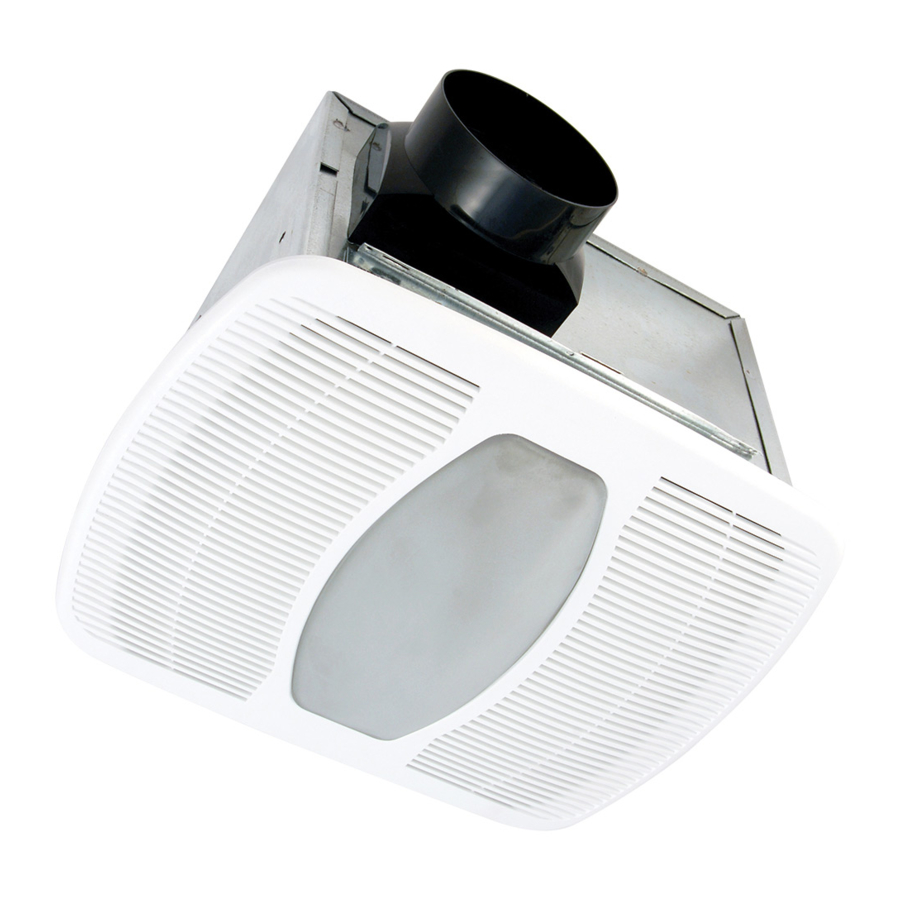
Models: AKF100D4,
LEDAK100D, LED100DH
READ AND SAVE THESE INSTRUCTIONS
READ CAREFULLY BEFORE ATTEMPTING TO ASSEMBLE, INSTALL, OPERATE OR MAINTAIN
THE PRODUCT DESCRIBED. PROTECT YOURSELF AND OTHERS BY OBSERVING ALL SAFETY
INFORMATION. FAILURE TO COMPLY WITH INSTRUCTIONS COULD RESULT IN PERSONAL
When using electrical appliances, basic precautions should
always be followed to reduce the risk of fire, electric shock and
WARNING:
ELECTRIC SHOCK AND INJURY TO PERSON,
OBSERVE THE FOLLOWING:
a) Use this unit only in the manner intended by the manufacturer. If you have
questions, contact the manufacturer.
b) Before servicing or cleaning the unit, switch power off at service
panel and lock the service disconnecting means to prevent power
from being switched on accidentally. When the service disconnecting
means cannot be locked, securely fasten a prominent warning
device, such as a tag, to the service panel.
WARNING:
ELECTRIC SHOCK AND INJURY TO PERSON,
OBSERVE THE FOLLOWING:
a) Installation work and electrical wiring must be done by qualified
person(s) in accordance with all applicable codes and standards,
including fire-related construction.
b) Sufficient air is needed for proper combustion and exhausting of
gases through the flue (chimney) of fuel burning equipment to prevent
back drafting. Follow the heating equipment manufacturer's guideline
and safety standards such as those published by the National Fire
Protection Association (NFPA) and the American Society for Heating,
Refrigeration, and Air Conditioning Engineers (ASHRAE), and the local
code authorities.
c) When cutting or drilling into wall or ceiling, do not damage electrical
wiring and other hidden utilities.
CAUTION:
DO NOT USE TO EXHAUST HAZARDOUS OR EXPLOSIVE
MATERIALS AND VAPORS.
A210952014 Rev. L 8-17
OPERATING MANUAL
INJURY AND/OR PROPERTY DAMAGE!
RETAIN INSTRUCTIONS FOR FUTURE REFERENCE.
GENERAL SAFETY INFORMATION
injury to person, including the following:
TO REDUCE THE RISK OF FIRE,
TO REDUCE THE RISK OF FIRE,
FOR GENERAL VENTILATING USE ONLY.
SAVE THESE INSTRUCTIONS
d) Ducted fans must always be vented to the outdoors.
e) This unit must be grounded.
f) To avoid motor bearing damage and noisy and/or unbalanced impellers,
keep drywall spray, construction dust, etc. off power unit.
WARNING:
OPERATION DO NOT POWER FAN UNTIL ALL CONSTRUCTION HAS
BEEN COMPLETED. THE FAN WILL DRAW IN AIRBORNE DUST THAT COULD
IMPAIR OPERATION AND REDUCE THE LIFE OF THE MOTOR. USAGE OF
FAN DURING CONSTRUCTION PROCESS WILL VOID ALL WARRANTIES.
g) Read all instructions before installing or using exhaust fan.
h) If this unit is to be installed over a tub or shower, it must be marked
as appropriate for the application and be connected to a GFCI (Ground
Fault Circuit Interrupter) – protected branch circuit.
WARNING:
WARNING:
OUTSIDE OF THE BUILDING HAS A STRONG EFFECT
ON THE AIR FLOW, NOISE AND ENERGY USE OF THE FAN. USE
THE SHORTEST, STRAIGHTEST DUCT ROUTING POSSIBLE FOR
BEST PERFORMANCE, AND AVOID INSTALLING THE FAN WITH
SMALLER DUCTS THAN RECOMMENDED. INSULATION AROUND
THE DUCTS CAN REDUCE ENERGY LOSS AND INHIBIT MOLD
GROWTH. FANS INSTALLED WITH EXISTING DUCTS MAY NOT
ACHIEVE THEIR RATED AIRFLOW.
www.airkinglimited.com
Exhaust Fan with Light
IF FAN IS INTENDED FOR CONTINUOUS
WARNING:
TO REDUCE THE RISK OF FIRE,
ELECTRIC SHOCK, DO NOT USE THIS FAN WITH
ANY SOLID-STATE SPEED CONTROL DEVICE.
DO NOT USE IN KITCHENS.
THE DUCTING FROM THIS FAN TO THE
1 of 12
Advertisement
Table of Contents

Subscribe to Our Youtube Channel
Related Manuals for AirKing AKF100D4


Summary of Contents for AirKing AKF100D4
- Page 1 IMPORTANT INSTRUCTIONS - OPERATING MANUAL Models: AKF100D4, Exhaust Fan with Light LEDAK100D, LED100DH READ AND SAVE THESE INSTRUCTIONS READ CAREFULLY BEFORE ATTEMPTING TO ASSEMBLE, INSTALL, OPERATE OR MAINTAIN THE PRODUCT DESCRIBED. PROTECT YOURSELF AND OTHERS BY OBSERVING ALL SAFETY INFORMATION. FAILURE TO COMPLY WITH INSTRUCTIONS COULD RESULT IN PERSONAL INJURY AND/OR PROPERTY DAMAGE! RETAIN INSTRUCTIONS FOR FUTURE REFERENCE.
- Page 2 SECTION 4 INSTALLATION INSTRUCTIONS Ducting CAUTION: MAKE SURE POWER IS SWITCHED OFF AT NOTE: 4" OR LARGER RIGID DUCT IS RECOMMENDED FOR BEST PERFORMANCE. SERVICE PANEL BEFORE STARTING INSTALLATION. CAUTION: ALL DUCTING MUST COMPLY WITH LOCAL AND SECTION 1 NATIONAL BUILDING CODES. Preparing the Exhaust Fan NOTE: The ducting from this fan to the outside of the building has a strong effect on the air Unpack fan from the carton and confirm that all pieces are present.
- Page 3 Intermittent Ventilation: For two speed fans wired for intermittent ventilation with a standard duplex toggle switch (such as Leviton 5224-2W not included). Connect the Screw White wires of the fan to the White (Neutral) wire from the power source. Connect the ground wire from the fan to the ground wire from the power source.
-
Page 4: Night Light
SECTION 7 Night Light Setting the Humidistat Socket This fan may be equipped with a humidity sensor that automatically turns the fan on when humidity is above set point and off when humidity is at or below set point. If the fan is operating too long or not enough, first check to see the humidity sensor set point. -
Page 5: Troubleshooting Guide
Troubleshooting Guide Trouble Probable Cause Suggested Remedy 1. Fan does not operate when the switch is on. A fuse may be blown or a circuit tripped. Replace fuse or reset circuit breaker. Connector plug from motor is not plugged in. 1b. Turn off power to unit. -
Page 6: Replacement Parts Diagram
REPLACEMENT PARTS DIAGRAM Replacement Qty. Description Part # Mounting Rails 5S1299002 Mounting Channel 5S1202122 Collar Assembly 5S1299111 Wire Cover Assembly - LEDAK100D, AKF100D4 5S1202626 Wire Cover Assembly - LED100DH 5S1250122 Blower Assembly 5S2202401 Light Assembly 5S1202799 Outlet Gasket 5S1202043 Grill Assembly... -
Page 7: Instructions Générales De Sécurité
INSTRUCTIONS IMPORTANTES – MANUEL D’OPÉRATION Ventilateur combiner, comprend Modèles: AKF100D4, lumière et ventilation LEDAK100D, LED100DH LIRE ET CONSERVER CES INSTRUCTIONS LIRE SOIGNEUSEMENT AVANT DE TENTER D’ASSEMBLER, INSTALLER, OPÉRER OU DE RÉPARER LE PRODUIT DÉCRIT. PROTÉGEZ VOUS-MÊME ET LES AUTRES EN OBSERVANT TOUTE L’INFORMATION DE SÉCURITÉ. -
Page 8: Instructions D'installation
SECTION 4 INSTRUCTIONS D’INSTALLATION Conduits ATTENTION : VOUS ASSURER QUE L’ALIMENTATION NOTE: UN CONDUIT PLUS RIGIDE DE 4 PO OU PLUS EST RECOMMANDE POUR UNE EST COUPÉE AU PANNEAU DE SERVICE AVANT DE COMMENCER MEILLEURE PERFORMANCE. L’INSTALLATION. ATTENTION : TOUS LES CONDUITS DOIVENT ÊTRE CONFORMES SECTION 1 AUX CODES DU BÂTIMENT LOCAUX ET NATIONAUX. - Page 9 Ventilation intermittente : Pour les ventilateurs à deux vitesses, raccordés pour une ventilation intermittente avec un interrupteur à bascule duplex standard (comme Leviton 5224 -2W non inclus). Connectez les fils blancs du ventilateur au fil blanc (neutre) de la source d’alimentation. Connectez le fil de terre du ventilateur au fil de terre de la source d’alimentation.
- Page 10 SECTION 7 Lumière de Nuit Réglage de l’humidostat Ce ventilateur peut être équipé d’un capteur d’humidité qui allume automatiquement le Socle ventilateur, lorsque l’humidité est supérieure au point de consigne lorsque l’humidité est inférieure ou égale au point de consigne. Si le ventilateur fonctionne trop longtemps ou pas assez, vérifiez d’abord le point de consigne du capteur d’humidité.
-
Page 11: Guide De Dépannage
Guide de dépannage Trouble Cause Possible Solution Suggérée 1. Le ventilateur ne fonctionne pas lorsque 1a. Un fusible peut être grillé ou un disjoncteur Remplacer le fusible ou réinitialiser le disjoncteur. l’interrupteur est à la position en marche. peut être décle.nché. 1b. - Page 12 Qté. Description remplacement Traverses de Montage 5S1299002 Canal de Montage 5S1202122 Assemblée de collier 5S1299111 Assemblée du compartiment du fil - LEDAK100D, AKF100D4 5S1202626 Assemblée du compartiment du fil - LED100DH 5S1250122 Assemblée de la Soufflante 5S2202401 Assemblement de lumière 5S1202799 Joint - Extérieur...
-
Page 13: General Safety Information
IMPORTANT INSTRUCTIONS - OPERATING MANUAL Models: LEDAK50, LEDAK80, LEDAK100, Exhaust Fan with Light LEDAK80H, LEDAK100H READ AND SAVE THESE INSTRUCTIONS READ CAREFULLY BEFORE ATTEMPTING TO ASSEMBLE, INSTALL, OPERATE OR MAINTAIN THE PRODUCT DESCRIBED. PROTECT YOURSELF AND OTHERS BY OBSERVING ALL SAFETY INFORMATION. -
Page 14: Installation Instructions
SECTION 4 INSTALLATION INSTRUCTIONS Ducting CAUTION: MAKE SURE POWER IS SWITCHED OFF AT NOTE: 4" OR LARGER RIGID DUCT IS RECOMMENDED FOR BEST PERFORMANCE. SERVICE PANEL BEFORE STARTING INSTALLATION. CAUTION: ALL DUCTING MUST COMPLY WITH LOCAL AND NATIONAL SECTION 1 BUILDING CODES. - Page 15 terminal of each toggle switch. Connect the Yellow wire from the fan to one of the toggle switches (this is the main light control). Connect the Purple wire from the fan to the other toggle switch (this is the night light control). Use approved methods for all connections. Screw 3c.
- Page 16 SECTION 8 Install the reflector onto the grill by placing the slots on the side of the reflector over the lens clips near the center of the grill. While squeezing the middle of the reflector, slide it so Use and Care that the plastic notches rest under the lens clips and the reflector feels secure (Figure 13).
- Page 17 Troubleshooting Guide Trouble Probable Cause Suggested Remedy 1. Fan does not operate when the switch is on. A fuse may be blown or a circuit tripped. Replace fuse or reset circuit breaker. Connector plug from motor is not plugged in. 1b. Turn off power to unit.
- Page 18 REPLACEMENT PARTS DIAGRAM Replacement Qty. Description Part # Mounting Rails 5S1299002 Mounting Channel 5S1202122 Collar Assembly 5S1299111 Wire Cover Assembly - LEDAK50 5S1202621 Wire Cover Assembly - LEDAK80 5S1202625 Wire Cover Assembly - LEDAK100 5S1202622 Wire Cover Assembly - LEDAK80H 5S1202623 Wire Cover Assembly - LEDAK100H 5S1202624...
- Page 19 INSTRUCTIONS IMPORTANTES – MANUEL D’OPÉRATION Modèles: LEDAK50, LEDAK80, LEDAK100, Ventilateur combiner, comprend LEDAK80H, LEDAK100H lumière et ventilation LIRE ET CONSERVER CES INSTRUCTIONS LIRE SOIGNEUSEMENT AVANT DE TENTER D’ASSEMBLER, INSTALLER, OPÉRER OU DE RÉPARER LE PRODUIT DÉCRIT. PROTÉGEZ VOUS-MÊME ET LES AUTRES EN OBSERVANT TOUTE L’INFORMATION DE SÉCURITÉ.
- Page 20 SECTION 4 INSTRUCTIONS D’INSTALLATION Conduits ATTENTION : VOUS ASSURER QUE L’ALIMENTATION REMARQUE : UN CONDUIT PLUS RIGIDE DE 4 PO OU PLUS EST RECOMMANDE POUR UNE EST COUPÉE AU PANNEAU DE SERVICE AVANT DE COMMENCER MEILLEURE PERFORMANCE. L’INSTALLATION. ATTENTION : SECTION 1 TOUS LES CONDUITS DOIVENT ÊTRE CONFORMES AUX CODES DU BÂTIMENT LOCAUX ET NATIONAUX.
- Page 21 1a. Compartiment de Câblage Extérieur : enlever la vis du couvercle du compartiment à chaque boîte pour effectuer les connexions. Dans la boîte de commutation, connectez câblage et mettre ce couvercle dans un endroit fiable (Figure 6). le fil noir de la maison à la borne commune du commutateur. Connectez le fil noir du ventilateur à...
- Page 22 SECTION 7 Installez la lampe dans la douille en alignant les broches de la base de la lampe à la prise de la douille de lampe. Tournez le corps de la lampe dans le sens horaire jusqu’à ce que Réglage de l’humidostat la lampe s’enclenche et est fermement en place dans la douille.
- Page 23 Guide de dépannage Trouble Cause Possible Solution Suggérée 1. Le ventilateur ne fonctionne pas lorsque 1a. Un fusible peut être grillé ou un disjoncteur Remplacer le fusible ou réinitialiser le disjoncteur. l’interrupteur est à la position en marche. peut être décle.nché. 1b.
- Page 24 DIAGRAMME DES PIÈCES DE REMPLACEMENT # de pièce de Qté. Description remplacement Traverses de Montage 5S1299002 Canal de Montage 5S1202122 Assemblée de collier 5S1299111 Assemblée du compartiment du fil - LEDAK50 5S1202621 Assemblée du compartiment du fil - LEDAK80 5S1202625 Assemblée du compartiment du fil - LEDAK100 5S1202622 Assemblée du compartiment du fil - LEDAK80H...
Need help?
Do you have a question about the AKF100D4 and is the answer not in the manual?
Questions and answers