Advertisement
Quick Links
Advertisement

Related Manuals for FlexQube eQart


Summary of Contents for FlexQube eQart
- Page 1 ® U NB O XI N G & QUICK START...
-
Page 2: Loosen The Screws
UNBOXING. WATCH THE UNBOXING VIDEO SCAN CODE Loosen the screws Use a Torx T25 and a screwdriver to remove the screws. Open the box and place the ramp Remove the straps... - Page 3 When you hear a ‘click’ the drive is connected. It also indicates that the brakes are released. Pull the eQart out from the box Because the eQart is heavy, it is recommended to use two people. Remove the maintenance drive After you have removed the...
- Page 4 IN THE SHIPMENT. You Should Have eQart ® Red and blue tape Charger RFID tags...
- Page 5 User manual Maintenance drive Cockpit with LTE/4G SIM Arduino cable Battery cable Laser scanner cable...
- Page 6 START THE EQART. The ON/OFF switch is placed in front of the battery module. eQart Switch - ON eQart Switch - OFF Remove eQart Switch Make sure no emergency stop buttons are pushed in before proceeding.
- Page 7 MAIN MENU. eQart Cockpit Main There are five main functions in the eQart Cockpit, which all are located under the Main Menu. 3. Map & Routes 1. Cockpit 4. Mission Planner 2. Navigation 5. Settings...
- Page 8 COCKPIT. eQart Cockpit Manual Drive View This will Highlight Blue when the eQart has Located the Line Direction Fwd. or Rev. Press the arrow to switch direction. Direction Right or Left eQart Rotation...
- Page 9 Status Cart Battery Tablet Battery Find Cart Cart Location Go to Mission Go to Navigation Speed Control Start / Stop Line Follow...
- Page 10 = 1 meter It is also essential that the lines are connected and that it creates a continuous path for the eQart. Simple or Circular Path There are two types of paths, simple and circular path. A circular path means there is one closed loop in the path.
- Page 11 If the layout is a circular path (includes a loop), then the mapping needs to start when the eQart is placed within the loop. If the layout is a simple path, then the eQart should start just before one of the end line stations with the driving direction facing the map. The eQart should detect the line, however, not so far in that it detects the RFID-tag.
-
Page 12: Specifications
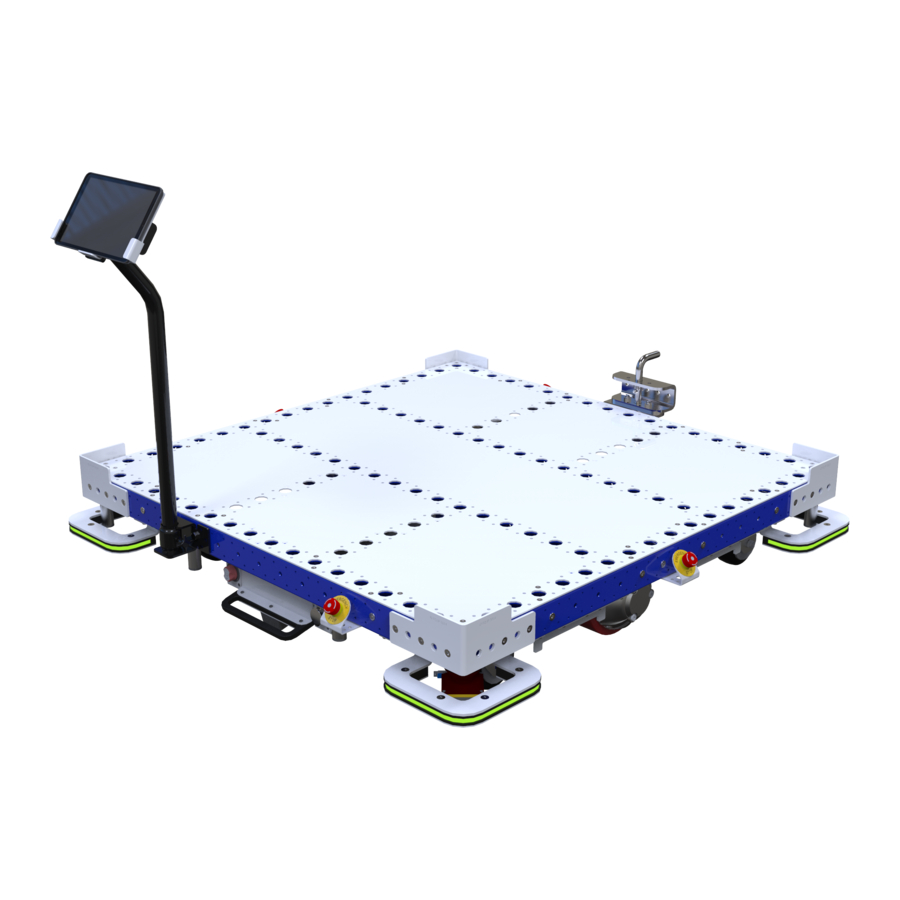
SIZE RANGE • Min. 910 mm x 840 mm • Max. 2520 mm x 2520 mm The eQart can be configured to any size between the smallest and largest size in increments of 70 mm. SPEEDS • Manual drive 0.7 m/s •... - Page 13 The eQart is based on six smart modules enabling a high degree of scalability and flexibility in design.
- Page 14 ®...
- Page 16 ® L EA RN IN G SCAN CODE C O N TA C T eqart@flexqube.com...
Need help?
Do you have a question about the eQart and is the answer not in the manual?
Questions and answers