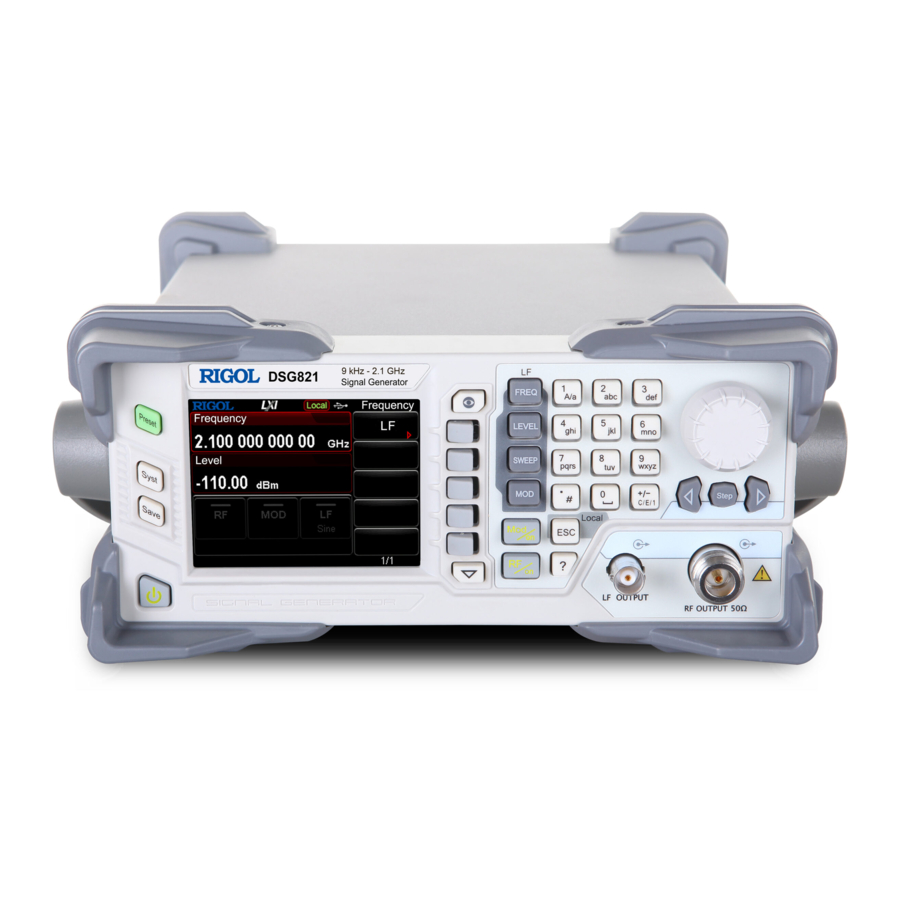
Rigol DSG800 Series Service Manual
Rf signal generator
Hide thumbs
Also See for DSG800 Series:
- User manual (109 pages) ,
- Performance verification manual (40 pages) ,
- Quick manual (72 pages)

Subscribe to Our Youtube Channel
Related Manuals for Rigol DSG800 Series


Summary of Contents for Rigol DSG800 Series
- Page 1 RIGOL Service Guide DSG800 Series RF Signal Generator Sept. 2018 RIGOL (SUZHOU) TECHNOLOGIES, INC.
- Page 3 Notices RIGOL products are covered by P.R.C. and foreign patents, issued and pending. RIGOL reserves the right to modify or change parts of or all the specifications and pricing policies at the company’s sole decision. Information in this publication replaces all previously released materials.
-
Page 4: Safety Requirement
Do not touch exposed junctions and components when the unit is powered on. Do Not Operate With Suspected Failures. If you suspect damage occurs to the instrument, have it inspected by RIGOL authorized personnel before further operations. Any maintenance, adjustment or replacement especially to circuits or accessories must be performed by RIGOL authorized personnel. - Page 5 Use the Battery Properly. Do not expose the battery (if available) to high temperature or fire. Keep it out of the reach of children. Improper change of a battery (lithium battery) may cause an explosion. Use the RIGOL specified battery only.
-
Page 6: Safety Notices And Symbols
RIGOL Safety Notices and Symbols Safety Notices in this Manual: WARNING Indicates a potentially hazardous situation or practice which, if not avoided, will result in serious injury or death. CAUTION Indicates a potentially hazardous situation or practice which, if not avoided, could result in damage to the product or loss of important data. -
Page 7: Allgemeine Sicherheits Informationen
Wenn Sie am Gerät einen Defekt vermuten, sorgen Sie dafür, bevor Sie das Gerät wieder betreiben, dass eine Untersuchung durch RIGOL autorisiertem Personal durchgeführt wird. Jedwede Wartung, Einstellarbeiten oder Austausch von Teilen am Gerät, sowie am Zubehör dürfen nur von RIGOL autorisiertem Personal durchgeführt werden. - Page 8 Die richtige Verwendung desAkku. Wenneine Batterieverwendet wird, vermeiden Sie hohe Temperaturen bzw. Feuer ausgesetzt werden. Bewahren Sie es außerhalbder Reichweitevon Kindern auf. UnsachgemäßeÄnderung derBatterie (Anmerkung: Lithium-Batterie) kann zu einer Explosion führen. VerwendenSie nur von RIGOL angegebenenAkkus. Sicherer Transport. Transportieren Sie das Gerät sorgfältig (Verpackung!), um Schäden an Bedienelementen, Anschlüssen und anderen Teilen zu vermeiden.
-
Page 9: Sicherheits Begriffe Und Symbole
RIGOL Sicherheits Begriffe und Symbole Begriffe in diesem Guide: WARNING Die Kennzeichnung WARNING beschreibt Gefahrenquellen die leibliche Schäden oder den Tod von Personen zur Folge haben können. CAUTION Die Kennzeichnung Caution (Vorsicht) beschreibt Gefahrenquellen die Schäden am Gerät hervorrufen können. -
Page 10: Document Overview
LF denotes that you first press FREQ on the front panel and then press LF. Manuals of this Product The manuals of this product include Quick Guide, User’s Guide, Programming Guide, Data Sheet, Service Guide, etc. The latest versions of the manuals can be downloaded from www.rigol.com. VIII DSG800 Service Guide... -
Page 11: Table Of Contents
RIGOL Contents Contents Guaranty and Declaration ....................I Safety Requirement ......................II General Safety Summary ....................II Safety Notices and Symbols ....................IV Allgemeine Sicherheits Informationen .................. V Sicherheits Begriffe und Symbole ..................VII Document Overview ....................VIII Chapter 1 Disassembly and Assembly................ -
Page 13: Chapter 1 Disassembly And Assembly
RIGOL Chapter 1 Disassembly and Assembly Chapter 1 Disassembly and Assembly Notices to Disassembly and Assembly Notices: Do not disassemble the instrument unless for working requirement. Only authorized personnel are allowed to disassemble the instrument. Cut off the power supply before disassembling the instrument. -
Page 14: Exploded View Drawing Of The Instrument
This manual mainly introduces the disassembly and assembly methods of DSG800 series RF signal generator. The exploded view drawing for DSG800 (with the IQ and OCXO modules) is as shown in Figure 1-1. - Page 15 RIGOL Chapter 1 Disassembly and Assembly Table 1-1 Replacement Parts List Part No. Qty. Name/Description 2010002859 Front Panel 1020003311 Side Keypad 2010003560 2010003245 Side Keypad Board 2010001542 Knob 1020003319 Screen Bezel Mounting Frame 1020003310 Main Keypad 2010003244 Main Keypad Board...
-
Page 16: Disassemble The Handle
RIGOL Chapter 1 Disassembly and Assembly Disassemble the Handle Handle Figure 1-2 Disassemble the Handle Part Description: ① 1 handle. Disassembly Step: Rotate the handle upright and pull out from the sides of the instrument to remove the handle. Note: Before assembling the handle, check whether the metal enclosure is correctly installed. -
Page 17: Disassemble Rear Support Legs
RIGOL Chapter 1 Disassembly and Assembly Disassemble Rear Support Legs ① ① ① ① Figure 1-3 Disassemble Rear Support Legs Part Description: ① 4 screws (M4*14 torx pan head screw, used for securing rear support legs). Disassembly Steps: Use the T20 screwdriver to remove 4 screws (①) that secure rear support legs. -
Page 18: Disassemble The Metal Enclosure
RIGOL Chapter 1 Disassembly and Assembly Disassemble the Metal Enclosure Metal Enclosure ① ① Binding Seam Figure 1-4 Disassemble the Metal Enclosure Part Description: ① 2 screws (M3*6 torx flat countersunk head screw, used for fastening the metal enclosure to the metal chassis). -
Page 19: Disassemble Bnc-Mcx Feedthroughs
RIGOL Chapter 1 Disassembly and Assembly Disassemble BNC-MCX Feedthroughs BNC Nuts BNC Washers BNC-MCX Feedthroughs Figure 1-5 Disassemble BNC-MCX Feedthroughs Part Description: ① 4 BNC nuts for fastening BNC-MCX feedthroughs. ② 4 BNC washers for fastening BNC-MCX feedthroughs. Disassembly Steps: Use the BNC socket wrench to remove 4 BNC nuts (①) and 4 BNC washers (②) that fasten... -
Page 20: Disassemble The Power Module
RIGOL Chapter 1 Disassembly and Assembly Disassemble the Power Module ② ① ① ③ ② Figure 1-6 Disassemble the Power Module Part Description: ① 2 screws (M3*10 torx pan head screw, used for fastening the power cord connector). ② 2 screws (M3*10 torx pan head screw, used for fastening the power module). -
Page 21: To Disassemble The Iq Module
RIGOL Chapter 1 Disassembly and Assembly To Disassemble the IQ Module ① ① ① ① ② ① BNC Nuts ② BNC Washers Figure 1-7 To Disassemble the IQ Module Part Explanations: ① 5 screws (M3*25 torx pan head screw assembly) fixing the IQ module. -
Page 22: Disassemble Front Protective Covers
RIGOL Chapter 1 Disassembly and Assembly Disassemble Front Protective Covers ① ① ① ① ① ① ① ① Figure 1-8 Disassemble Front Protective Covers Part Description: ① 8 screws (M4*10 torx pan head screw, used for fastening front protective covers). -
Page 23: Disassemble The Front Panel Assembly
RIGOL Chapter 1 Disassembly and Assembly Disassemble the Front Panel Assembly RF Board Connector ① ① ① ① Figure 1-9 Disassemble the Front Panel Assembly Part Description: ① 4 screws (M4*6 torx pan head screw, used for fastening the front panel assembly). -
Page 24: Disassemble The Control Board
RIGOL Chapter 1 Disassembly and Assembly Disassemble the Control Board Control Board ② Shielding Cover ② ① ① ② ① ① Figure 1-10 Disassemble the Control Board Part Description: ① 4 screws (M3*6 torx pan head combination screw, used for fastening the shielding cover). -
Page 25: Disassemble The Front Panel Cover, Keypads And The Knob
RIGOL Chapter 1 Disassembly and Assembly Disassemble the Front Panel Cover, Keypads and the Knob ① ① ① ① ① Keypads Knob Front Panel Cover ② Figure 1-11 Disassemble the Front Panel Cover, Keypads and the Knob Part Description: ① 5 screws (M3*6 torx pan head combination screw, used for fastening the front panel assembly). -
Page 26: Disassemble The Lcd
RIGOL Chapter 1 Disassembly and Assembly Disassemble the LCD Screen Bezel Mounting Frame ① ① ① Figure 1-12 Disassemble the LCD Part Description: ① 4 screws (M3*6 torx flat countersunk head screw, used for fastening the LCD assembly). Some of the screws are not marked out in the figure above and please disassemble them all. -
Page 27: Disassemble The Keypad Boards
RIGOL Chapter 1 Disassembly and Assembly Disassemble the Keypad Boards ② ② ① ① ① ① Figure 1-13 Disassemble the Keypad Boards Part Description: ① 4 screws (M3*6 torx flat countersunk head screw, used for fastening the main keypad board). -
Page 28: Disassemble The Ocxo Module
RIGOL Chapter 1 Disassembly and Assembly Disassemble the OCXO Module ① ① OCXO Plate OCXO Module Figure 1-14 Disassemble the OCXO Module Part Description: ① 2 screws (M3*6 torx pan head combination screw, used for fastening the OCXO plate). Disassembly Steps: Use the T10 screwdriver to remove 2 screws (①) that fasten the OCXO plate. -
Page 29: Disassemble The Rf Module
RIGOL Chapter 1 Disassembly and Assembly Disassemble the RF Module ② ② ① ① BNC Connectors ① ① ① Figure 1-15 Disassemble the RF Module Part Description: ① 5 screws (M3*25 torx pan head combination screw, used for fastening the RF module). -
Page 30: Disassemble The Fan
RIGOL Chapter 1 Disassembly and Assembly Disassemble the Fan ① ① ① ① Figure 1-16 Disassemble the Fan Part Description: ① 4 screws (PTF5*10 torx flat countersunk head self-tapping screw, used for fastening the fan). Disassembly Steps: Use the T10 screwdriver to remove 4 screws (①) that fasten the fan. -
Page 31: Assembly Procedures
RIGOL Chapter 1 Disassembly and Assembly Assembly Procedures The assembly procedures are simply the reversal of the disassembly procedures. Check whether the cables are correctly connected and whether all the screws are installed after completing each assembly step. DSG800 Service Guide... -
Page 33: Chapter 2 Troubleshooting&Maintenance
The commonly encountered failures of DSG800 and their solutions are listed below. When you encounter those problems, please observe the following instructions to resolve them. If the problem still persists, please contact RIGOL and provide your instrument information to us (press Syst Information System Info to obtain information about your instrument). - Page 34 (2) Ensure that you use a USB flash storage device. This instrument does not support hardware USB storage device. (3) Restart the instrument and insert the USB storage device to check whether it can work normally. (4) If the USB storage device still cannot be used normally, please contact RIGOL. DSG800 Service Guide...
- Page 35 (3) If the above failures occur, the connecting wire of the keypad board might be loose or the keypad board is damaged. Please do not disassemble the instrument and contact RIGOL. 8. The instrument does not pass the performance specifications test.
-
Page 36: Maintenance
RIGOL guarantees free replacement or repair for the defective product. To get repair service, please contact with your nearest RIGOL sales or service office. There is no other warranty, expressed or implied, except such as is expressly set forth herein or other applicable warranty card. -
Page 37: Care And Cleaning
RIGOL Chapter 2 Troubleshooting&Maintenance Care and Cleaning Care Do not store or leave the instrument where it may be exposed to direct sunlight for long periods of time. Cleaning Clean the instrument regularly according to its operating conditions. Disconnect the instrument from all power sources. -
Page 39: Chapter 3 Appendix
RIGOL Chapter 3 Appendix Chapter 3 Appendix Appendix A: Error Codes and Explanations Command Errors Content -100 Command error Indicates a syntax error, which means no more detailed error information could be detected. This code indicates that only Command Error defined in IEEE 488.2,11.5.1.1.4 has been found. - Page 40 RIGOL Chapter 3 Appendix -113 Incorrect number of parameters Indicates that the number of parameters received does not correspond to the number of parameters expected. This is typically due to an inconsistency with the number of the instrument in the selected group (refer to INSTrument:DEFine:GROup).
-
Page 41: Execution Errors
RIGOL Chapter 3 Appendix a block data element. This error is generated when no more specific information is available. -131 Invalid block data Indicates that a block data element was expected, but was invalid for some reason (refer to IEEE 488.2, 7.7.6.2). For example, an END message was received before the length satisfies the requirement. - Page 42 RIGOL Chapter 3 Appendix 488.2, 11.5.1.1.5.). -146 Too much data Indicates that a legal block, expression or string program data element was found but cannot be executed because it contained more data than the device could handle due to the memory limit of the device, related device requirements or the processing ability of the device.
-
Page 43: Device-Specific Errors
Indicates a failure in the self-test. For more information, please refer to the self-test results. -168 Calibration failed Indicates a failure in the calibration. Please report the error to RIGOL sales personnel or technical support. -169 Query queue overflow Indicates an error occurred that did not get put in the error queue because the queue was full. - Page 44 RIGOL Chapter 3 Appendix Failed to exit the USB storage device Rename failed Failed to create a new folder The filename or directory name is incorrect Indicates that you entered the illegal string. Failed to update Indicates that the update operation failed because the image file format was incorrect or the image file was damaged.
-
Page 45: Query Errors
RIGOL Chapter 3 Appendix Query Errors Content -172 Query error Indicates a query error that cannot be specifically identified. This code indicates that only Query Errors defined in IEEE 488.2, 11.5.1.1.7 and 6.3 occurred. -173 Query INTERRUPTED error Indicates that an INTERRUPTED query error occurred due to some reason (refer to IEEE 488.2, 6.3.2.3). -
Page 46: Appendix B: Software Update
Appendix B: Software Update Software Update Preparations Prepare a DSG800 series RF signal generator that requires software update. Prepare a USB storage device that contains the latest version of the update file. The name of the update file is DSG800_UpdateFile.sys.
Need help?
Do you have a question about the DSG800 Series and is the answer not in the manual?
Questions and answers