
Related Manuals for Dialogic D/41JCT-LS


Summary of Contents for Dialogic D/41JCT-LS
- Page 1 Dialogic PCI and Euro PCI Linecards Installation and Replacement S p a r e P a r t s D o c u m e n t...
- Page 2 D i a l o g i c P C I L i n e c a r d s Edition Note ® This is the first edition of the Dialogic PCI and Euro PCI Linecards Installation and Replacement Spare Parts Document. Information in this document applies to OneBox systems with version 5.0 and later.
-
Page 3: Table Of Contents
Electrostatic Discharge (ESD) Warning ................. 1 Gathering Tools and Equipment..................... 1 Dialogic D/41JCT-LS and D/41JCT-LS Euro PCI Linecard Technical Specifications ... 2 Cabling D/41JCT-LS Linecards to the Telephone System ............3 Dialogic D/42JCT-U and D/82JCT-U PCI Linecard Technical Specifications ......5 D/42JCT-U Linecard ...................... - Page 4 D i a l o g i c P C I L i n e c a r d s Installing Dialogic Software ....................22 Configuring Dialogic PCI Linecards in Dialogic Configuration Manager - DCM ....23 Appendix A—Manually Adding a Linecard to the Configured Devices List ......25 Addendum B—Configuring the D/42JCT or D/82JCT for Your Station Set Emulation ..26...
-
Page 5: Preface
Web—http://www.dialogic.com NOTE For a list that provides information for registering Dialogic linecards in many countries, contact Dialogic or retrieve a copy of their Global Product Approvals list from their website. The following Aastra documents are available for your reference: ... -
Page 6: Online Books
D i a l o g i c P C I L i n e c a r d s Online Books Included on the OneBox Telephony Server DVD is a catalog of technical documentation. Refer to the appropriate technical documentation for additional application and installation information. Aastra produces technical documentation in Adobe Acrobat PDF format and requires the Adobe;... -
Page 7: Overview
Specific information pertaining to each type of linecard is contained within a separate section of this document for each linecard type. General information about the Dialogic PCI linecard such as installing the card in the system and installing Dialogic software is located in the section specific to the required task. -
Page 8: Dialogic D/41Jct-Ls And D/41Jct-Ls Euro Pci Linecard Technical Specifications
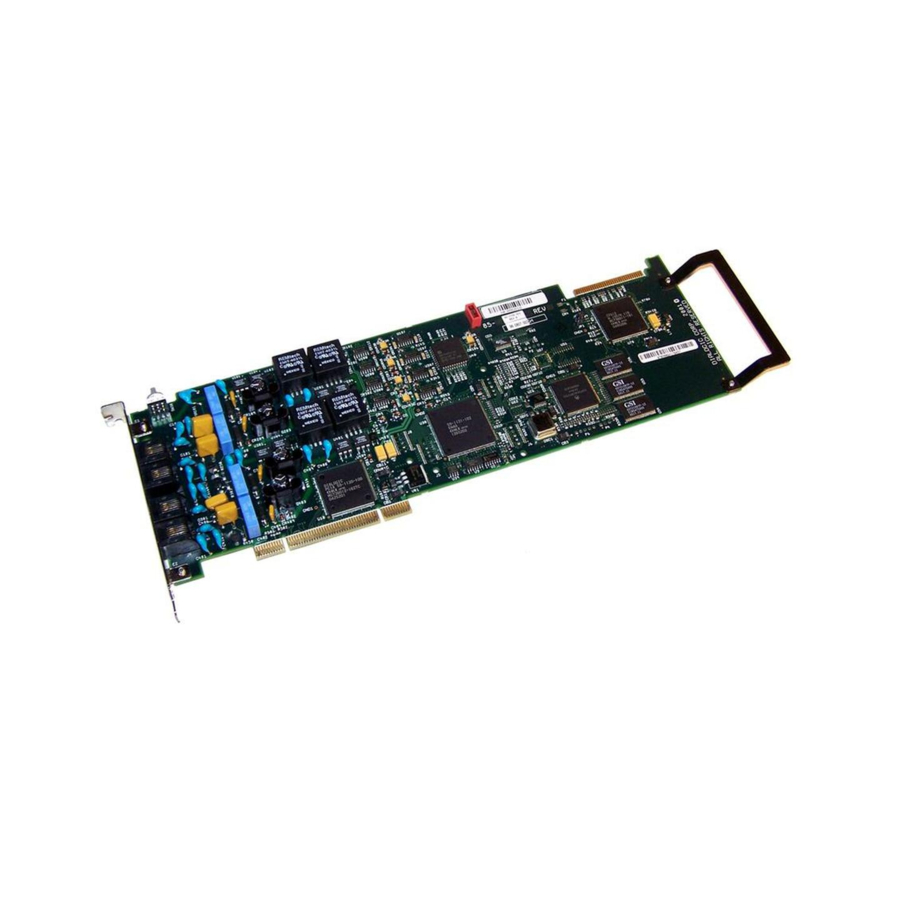
D i a l o g i c P C I L i n e c a r d s Dialogic D/41JCT-LS and D/41JCT-LS Euro PCI Linecard Technical Specifications Table 1 lists the technical specifications for the Dialogic D/41JCT-LS and D/41JCT-LS Euro linecards approved for use with OneBox. Figure 1 shows the general layout of these linecards. NOTE Your local telephone company may require some of these specifications. -
Page 9: Cabling D/41Jct-Ls Linecards To The Telephone System
For example, a D/41JCT-LS linecard to which you assigned the linecard ID 1 is assigned line numbers 1–4; a D/41JCT-LS linecard to which you assigned the linecard ID 2 is assigned line numbers 5-8 (Figure 2). Refer to the topic, ―Assigning the Linecard... - Page 10 D i a l o g i c P C I L i n e c a r d s To cable D/41JCT-LS linecards… Plug the linecords from the telephone system into the RJ-11 connectors on the D/41JCT-LS. If the provided telephone line interface is not an RJ-11 connector, plug the linecords into the appropriate linecord adapter, and then plug the RJ-11 linecord(s) of the adapter into the RJ-11 connector of the D/41JCT-LS.
-
Page 11: Dialogic D/42Jct-U And D/82Jct-U Pci Linecard Technical Specifications
The D/42JCT-U linecard is essentially a lower-cost, half-capacity version of the D/82JCT-UNIV linecard. Table 2 lists the technical specifications for the Dialogic D/42JCT-U PCI linecard approved for OneBox. Figure 4 shows the general layout of these linecards. Table 2: D/42JCT-U linecard Technical Specifications... -
Page 12: D/82Jct-U Linecard
D i a l o g i c P C I L i n e c a r d s D/82JCT-U Linecard Dialogic provides versions of the D/82 linecard to support both 3.3-volt and 5-volt PCI buses. The 5-volt version is referred to as the D/82JCT-U. Because the 3.3-volt version is also compatible with 5-volt buses, Dialogic refers to it as the D/82JCT-U-PCI-UNIV linecard. -
Page 13: Understanding D/42 And D/82 Linecard Identification
Cabling D/42JCT-U and D/82JCT-U PCI Linecards to the Telephone System Each D/42 or D/82 linecard connects to the telephone system through a Dialogic D/82-U PBX interface cable assembly as shown in Figure 6. A cable assembly ships with each D/42 or D/82 linecard. - Page 14 D i a l o g i c P C I L i n e c a r d s Table 4: Dialogic D/42 and D/82 wire connections Pair Color 4-wire 2-wire Usage White/Blue T (Port 1) D/42 and D/82 linecards...
-
Page 15: Dialogic D/120Jct-Ls And D/120Jct-Ls Euro Pci Linecard Technical Specifications
D i a l o g i c P C I L i n e c a r d s Dialogic D/120JCT-LS and D/120JCT-LS Euro PCI Linecard Technical Specifications Table 5 lists the technical specifications for the Dialogic D/120JCT-LS and D/120JCT-LS Euro PCI linecards approved for use with OneBox. Figure 7 shows the general layout of these linecards. -
Page 16: Cabling D/120Jct-Ls Pci Linecards To The Telephone System
D i a l o g i c P C I L i n e c a r d s Cabling D/120JCT-LS PCI Linecards to the Telephone System Once the D/120JCT-LS linecards are installed in the platform, you can cable the platform to the telephone system. - Page 17 D i a l o g i c P C I L i n e c a r d s To cable D/120JCT-LS linecards… Plug the linecords from the telephone system into the RJ-14 connectors on the D/120JCT-LS (Figure 5). If the provided telephone line interface is not an RJ-14 connector, plug the linecords into the appropriate linecord adapter, then plug the RJ-14 linecord(s) of the adapter into the RJ-14 connector of the D/120JCT-LS.
-
Page 18: Dialogic D/240Jct-T1 Pci Linecard Technical Specifications
Dialogic D/240JCT-T1 PCI Linecard Technical Specifications Each Dialogic D/240JCT-T1 linecard provides voice channel support for one T1 link or span. Installations that use ―robbed-bit‖ signaling, such as most OneBox applications, the 1.544- megabit-per-second bit stream carried by each T1 span typically contains twenty-four 64-kilobit- per-second voice channels, plus some additional signaling bits. -
Page 19: Cabling D/240Jct-T1 Pci Linecards To The Telephone System
D i a l o g i c P C I L i n e c a r d s Table 6: D/240JCT-T1 Technical Specifications Feature Specification Number of Ports 1-24 (channel order); the correlation between channelization and (Channelization) OneBox ports is determined by the linecard identification number Dialing DTMF FCC registration number... - Page 20 D i a l o g i c P C I L i n e c a r d s numbers 1–24; a D/240JCT-T1 linecard to which you assigned the linecard ID 2 is assigned line numbers 25-48. Refer to the topic, ―Assigning the Linecard Identification Number‖...
-
Page 21: Dialogic D/480Jct-T1 Pci Linecard Technical Specifications
Dialogic D/480JCT-T1 PCI Linecard Technical Specifications Each Dialogic D/480JCT-T1 linecard provides voice channel support for two T1 links or spans. Installations that use ―robbed-bit‖ signaling, such as most OneBox applications, provide a 1.544- megabit-per-second bit stream carried by each T1 span. Typically, each T1 span contains twenty-four 64-KB (kilobit-per-second) voice channels, plus some additional bits for signaling. - Page 22 D i a l o g i c P C I L i n e c a r d s Table 7: D/480JCT-T1 Technical Specifications Feature Specification Number of Ports 1-48 (channel order); the correlation between channelization and (Channelization) OneBox ports is determined by the linecard identification number Dialing DTMF FCC registration number...
-
Page 23: Cabling D/480Jct-T1 Pci Linecards To The Telephone System
D i a l o g i c P C I L i n e c a r d s Cabling D/480JCT-T1 PCI Linecards to the Telephone System OneBox assigns port numbers in ascending order based on the linecard identification number. For example, a D/480JCT-T1 linecard to which you assigned the linecard ID 1 is assigned line numbers 1–48;... -
Page 24: Preparing Dialogic Pci Linecards For Installation
D i a l o g i c P C I L i n e c a r d s Preparing Dialogic PCI Linecards for Installation You must configure some or all of the following components of the Dialogic PCI linecard before installing it in the OneBox platform: ... -
Page 25: Configuring The Default Line State (D/41 And D/120 Only)
Aastra recommends that you set the default line state to offhook. To change the default hook- switch line state of the linecard to offhook, flip the line state switch (SW4 on the D/41JCT-LS or SW1 on the D/120JCT-LS) to the ON position as shown in Figure 15. -
Page 26: Installing Dialogic Pci Linecards In The Platform
Installing Dialogic PCI Linecards in the Platform The following procedures detail how to install a Dialogic linecard into your platform. For more information, refer to the documentation that came with your platform. 1. Verify that the linecard identification number, the H.100 bus, and the default line state are configured correctly for each linecard. -
Page 27: Installing The H.100 Bus Cable
CTbus, SCbus, MVIP, and others. Each Dialogic PCI linecard is equipped with an H.100 bus connector to which an H.100 bus cable attaches. Because the OneBox software is designed to work without terminated resource buses, it is not necessary to add a terminator pack of any sort to either end of the H.100 bus... -
Page 28: Installing Dialogic Software
The Dialogic software is installed as a hardware support component of the OneBox Server software found on the Telephony Server DVD. The Dialogic software is typically installed at the time of the initial Call Server software installation. However, if it was not been previously installed, you must install it by re-installing the OneBox Server software. -
Page 29: Configuring Dialogic Pci Linecards In Dialogic Configuration Manager - Dcm
Configuring Dialogic PCI Linecards in Dialogic Configuration Manager - DCM The Dialogic Configuration Manager (DCM) is a utility that allows you to configure the parameters used by the Dialogic system software to control the Dialogic linecards installed in the platform. Each time you start the DCM, it automatically detects any installed linecards. The DCM matches the linecards it detects with the corresponding configuration data. - Page 30 11. Repeat steps 3-10 for each Dialogic voice-resource card installed in the platform. 12. Click the green Start icon on the toolbar to start the Dialogic Service. The Dialogic Service starts. 13. Once the service has started the Red Stop icon displays on the toolbar and the System Status on the bottom of the dialog box displays, Running.
-
Page 31: Appendix A-Manually Adding A Linecard To The Configured Devices List
2. If the Computer Name dialog box appears, select Local, and then click Connect to continue. 3. If the Dialogic service is running, click the red Stop icon on the toolbar. 4. From the menu bar, select System, and then select Auto detect devices. -
Page 32: Addendum B-Configuring The D/42Jct Or D/82Jct For Your Station Set Emulation
Nortel_Norstar. You must change this parameter to the appropriate PBX type you are integrating with OneBox. To program the Dialogic Configuration Manager… 1. On the Start menu at the OneBox platform, select Programs | Dialogic System Release | Configuration Manager-DCM. 2. Stop the Dialogic service if it is running.
Need help?
Do you have a question about the D/41JCT-LS and is the answer not in the manual?
Questions and answers