Advertisement
Quick Links
Advertisement

Related Manuals for Ouring 3D TALK DS200


Summary of Contents for Ouring 3D TALK DS200
- Page 1 Jiangsu Ouring 3D Technology co.,Ltd User Guide of 3D TALK DS200 Version:V3.0...
-
Page 2: Table Of Contents
Jiangsu Ouring 3D Technology co.,Ltd Catalogue 1. Product Description....................3 2. Product View………....................5 3.Printer Preparation……………………….…………………………………………………………….…….…12 4. Software introduction…………………………………………………………………………………………19 5.Printing Process………………………………………………………………………….…………………….….45 6. Resin vat release film replacement instruction……………………….…………………………..48 7.Printer use instruction………………………………………………………………………………………….49 8.Warranty………………………………………………………………………………….………………………….52... -
Page 3: Product Description
General 3DTALK-DS200 series printer is a high-tech digital 3D resin printer developed and produced by Jiangsu Ouring 3D Technology Co., Ltd. (referred to as Ouring). Users of 3DTALK-DS200 are advised to read the product manual carefully before start. Ouring reserves all rights. This manual is subject to upgrade without prior notice. - Page 4 Jiangsu Ouring 3D Technology co.,Ltd Note: Wear appropriate protective printer to avoid contact with resin. For example: goggles, masks, protective gloves. Note: Do not pour waste resin into the bottle and sink to avoid contaminating the intact resin in the bottle and clogging the sewer, please place the waste resin in a plastic bag and discard it in the sun after cured.
-
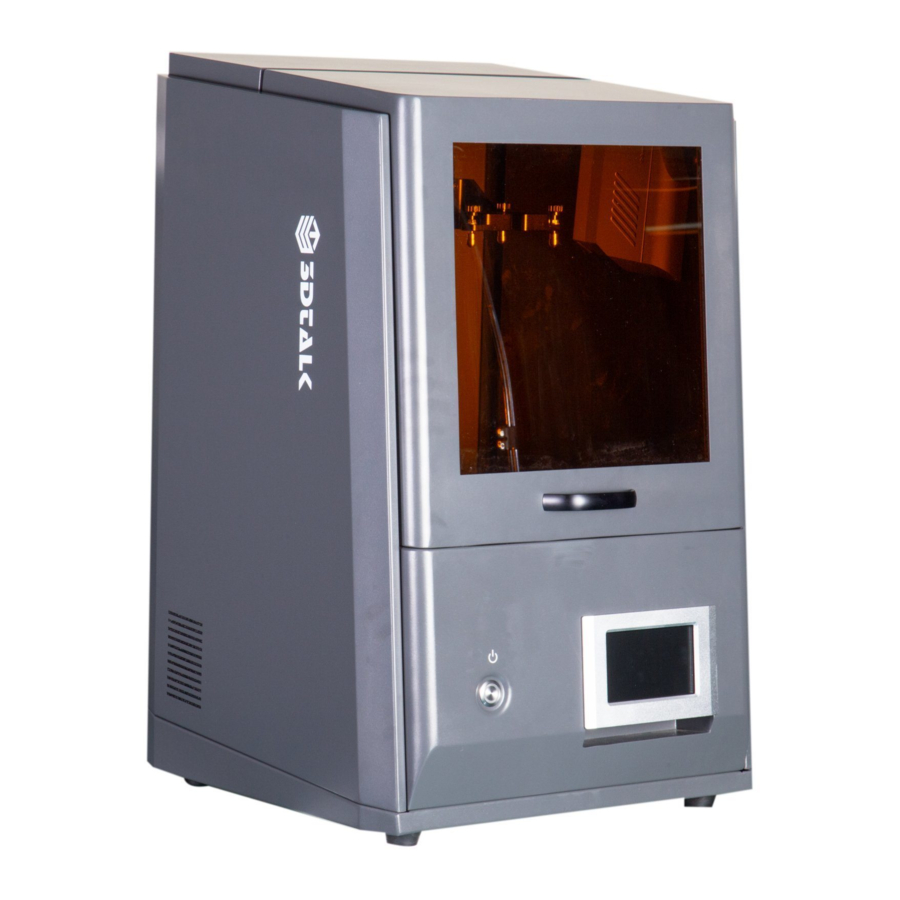
Page 5: Product View
Jiangsu Ouring 3D Technology co.,Ltd 2.Product View Open Handle Touch screen Screen button USB connector Building plate Resin vat... - Page 6 Jiangsu Ouring 3D Technology co.,Ltd Power socket Spare Parts Flat shovel X 1 Open end wrench Hex wrench (2、 2.5、 3mm) (6-7mm) Protective gloves X 2 set Protective glasses X 1 USB Drive X 1 Resin vat X 2 Cleaning Vat X 1...
- Page 7 Jiangsu Ouring 3D Technology co.,Ltd Pliers X1 Note: The photos of accessories listed here should be based on the real accessories. Performance Parameter 3D Technology Printer Size (L * W * H) = 525 * 460 * 725mm Working Tem 18℃...
- Page 8 Jiangsu Ouring 3D Technology co.,Ltd Resin Professional Dental model resin, Dental Ortho Resin, Dental Guide resin Transfer USB drive, wifi Power input AC110/240V 50/60Hz 400W Environmental Requirements Avoid placing the resin in the following environment: high temperature environment, local heat source, oxidizing environment, freezing environment, direct sunlight, ultraviolet radiation, inert gas coverage, dust environment.
- Page 9 Jiangsu Ouring 3D Technology co.,Ltd [Local file] is stored in the model print file of the printer. All files printed by the printer will be stored in this location. [Udisk file] After the USB disk is inserted into the printer, the print model file will ...
- Page 10 Jiangsu Ouring 3D Technology co.,Ltd printer resin vat, this function can be used to cure the resin at the bottom of the vat, solidify the impurities and remove the cured resin. [Operation Control] Controls the Z-axis of the printing build plate to move up &...
- Page 11 Jiangsu Ouring 3D Technology co.,Ltd About Interface Display the model, hardware version, software version, and IP address of the device Dental Resin Introduction Resin Mode Color Character Dental Application High precision, smooth Prosthodontic Dental Model Resin Beige surface, no irritating odor High temperature resistance 150 °...
-
Page 12: Printer Preparation
Jiangsu Ouring 3D Technology co.,Ltd 3.Printer Preparation Printer installation 1.Take out the fixed strip and protective cotton of the printer from the packing box and place the printer on the horizontal tabletop. 2.Open the printer compartment door and take out all the protection devices and random accessories from the printer 3. - Page 13 Jiangsu Ouring 3D Technology co.,Ltd Build Plate Leveling Note: When the model fails to print before the first printing and during the use of printer, please perform the build plate leveling operation. If the printing work is normal, you do not need to do this. When leveling the build plate, please make sure that there are no materials, no impurities, and no objects in the vat to prevent the falling printing build plate crushing the release film and other parts.
- Page 14 Jiangsu Ouring 3D Technology co.,Ltd 2. Manually rotate the four units hand screw on the Z-axis bracket counterclockwise to the highest position (See below picture) If the hand screw cannot be rotated counterclockwise, please hold the printing build plate, loosen the locking handle and then try to rotate.
- Page 15 Jiangsu Ouring 3D Technology co.,Ltd 4.Click the [Reset] button, when the printing build plate stops moving upwards, click the [Bottom] button, the printing build plate can freely descend into the vat. (See the picture below) 5.When the printing build plate is lowered into the vat, loosen the locking handle to...
- Page 16 Jiangsu Ouring 3D Technology co.,Ltd 6. Align the four positioning pins on the Z-axis bracket with the four positioning holes on the printing build plate. (See below pictures) 7. Rotate the four units hand screw down to ensure that the printing build plate is completely attached to the bottom surface of the vat without sloshing (see the picture below).
- Page 17 Jiangsu Ouring 3D Technology co.,Ltd 8. Use hand to turn the locking handle clockwise to tighten it (see the picture below) 9. Use a tool wrench to rotate the four locking screws clockwise to tighten (see the picture below)
- Page 18 Jiangsu Ouring 3D Technology co.,Ltd 10. Click once the arrow ▲ above the [Reset] button, and then click the [Reset] button to raise the build plate to the top of the printer, and finish the leveling. Filling resin material 1. Shake the material inside the bottle before pouring it into the resin vat,to keep the density of resin uniform 2.
-
Page 19: Software Introduction
Jiangsu Ouring 3D Technology co.,Ltd 4. Keep the printer door closed, if there is any resin material in the vat. Warning: When there is resin material in the vat, it is forbidden to open the cabin door frequently to prevent daylight curing. - Page 20 Jiangsu Ouring 3D Technology co.,Ltd Sliced software homepage Software installation process 1. Choose [Next] button...
- Page 21 Jiangsu Ouring 3D Technology co.,Ltd 2. choose the software storage path → [Everyone] → [Next]...
- Page 22 Jiangsu Ouring 3D Technology co.,Ltd 3. Click [Next] button...
- Page 23 Jiangsu Ouring 3D Technology co.,Ltd 4. Click [Close] button Set Software language After installation, the initial version of software is English version. You can set the software language through the following path. 1. Click [File] → [Configuration]...
- Page 24 Jiangsu Ouring 3D Technology co.,Ltd 2. Click the text box on behind of [Interface language] to switch the software language version. After the language switching is finished, click [Save]. 3. Click [OK] to restart the software.
- Page 25 Jiangsu Ouring 3D Technology co.,Ltd Software slicing process Import model Select [Open File] / [Import File] in the [File] option and import the model file that needs to be sliced. Note: Only the following model file formats can be recognized by the software:...
- Page 26 Jiangsu Ouring 3D Technology co.,Ltd Model editing Model perspective Model display layer by layer Move the model to the center position Select the model and click Model movement Method 1: Select and click the model, make it in a directional movement...
- Page 27 Jiangsu Ouring 3D Technology co.,Ltd Method 2: After the model is selected, hold the arrow in the X, Y, and Z directions to move. Model rotation Method 1: Select the model and click , rotate it in the appointed direction.
- Page 28 Jiangsu Ouring 3D Technology co.,Ltd Method 2: After the model is selected, hold the arc in the X, Y, and Z directions and rotate. Keep model surface on bottom Click and then click the side that needs to be bottomed.
- Page 29 Jiangsu Ouring 3D Technology co.,Ltd Combination/dissolution model When multiple models need to add support, it is slow to add one by one. You can combine multiple models into one model file, so that we could add support to multiple models at the same time.
- Page 30 Jiangsu Ouring 3D Technology co.,Ltd Hollow mesh model comparison Model after hollow mesh Model before hollow mesh...
- Page 31 Jiangsu Ouring 3D Technology co.,Ltd Model add side row holes 1. Select the [Support Mode] button for the model; 2.Select to add side row hole to the model 3. Side row hole setting Select the side row holes to be set under the mode of support editing, and set the parameters in the parameter area on the right of the software Click the [Apply to Selection] button to take effect.
- Page 32 Jiangsu Ouring 3D Technology co.,Ltd Add model base 1. Select the [Support Mode] button of the model Select , the model generate the base automatically...
- Page 33 Jiangsu Ouring 3D Technology co.,Ltd 3. Pedestal setting Click the pedestal in edit status, and set the parameters in the parameter area on the right of the software. After setting, click [apply to selection] button. Support use...
- Page 34 Jiangsu Ouring 3D Technology co.,Ltd Support mode: it can edit supporting on the model Finish support mode: After finish editing, click [Finish Support Mode] to close editing. Support profile Click Generate Supports button , the current model will generate support according to the parameters of Support Configuration File.
- Page 35 Jiangsu Ouring 3D Technology co.,Ltd Default density 100% -it can be reset according to the actual situation of the model. Tip diameter The contact area between the support and the model. Default v v a v alue 0.5 -can be modified according to the actual situation of the model. model...
- Page 36 Jiangsu Ouring 3D Technology co.,Ltd The pole widening factor defaults to 2.0 The position above 0 Click √to enable this function, Edit the spacing of the model anomaly when supporting Internal support is starting click √ to enable this function , This...
- Page 37 Jiangsu Ouring 3D Technology co.,Ltd Support editing function Generate support Click to generate support effect diagram, preview support effect Edit points Editing support production point, Click the original generation point to delete, click the blank of the model generation point to add,...
- Page 38 Jiangsu Ouring 3D Technology co.,Ltd Support base parameter editing Support the base of the selected model in the edit state. After the base turns yellow, you can edit parameters on the right side of the software. When you're done, click...
- Page 39 Jiangsu Ouring 3D Technology co.,Ltd Set up the print profile The configuration file sets the path...
- Page 40 Jiangsu Ouring 3D Technology co.,Ltd The figuration file sets the content...
- Page 41 Jiangsu Ouring 3D Technology co.,Ltd...
- Page 42 Jiangsu Ouring 3D Technology co.,Ltd Generate new profile: modify profile name and profile Settings and click [Save] Modify configuration file Configuration File Name remains unchanged. Modify Configuration File Settings and click [Save]. Name of parameter Repair model Orthodontic Guide model...
- Page 43 Jiangsu Ouring 3D Technology co.,Ltd Z-axis distance (mm) Z-axis lifting distance (mm/min) Z-axis slowest speed (mm/min) Z-axis download speed (mm/min) Delay time before 1000 1000 1000 solidifying Delay time after solidifying Delay time when reaching top Resume exposure 4800 4500...
- Page 44 Jiangsu Ouring 3D Technology co.,Ltd Printer:DS200 series Material and print profile: select the print profile that matches the current resin material Print job folder name: print file name (editable) Start slicing: click this button when you confirm that all parameters in the General Slicing page no longer change.
-
Page 45: Printing Process
Jiangsu Ouring 3D Technology co.,Ltd 5.Introduction to the printing process Model printing process 1. Insert the USB flash drive with slice files into the printer 2. Click the [File] button on the main interface of the device, enter the "print file"... - Page 46 Jiangsu Ouring 3D Technology co.,Ltd 5. Remove the printings build plate from the printer, and close the warehouse door after taking it out 6. Use a shovel knife to remove the model from the printing build plate and place it in a wash with sufficient alcohol (90-95%). The vat is ready for cleaning. Wipe the printing build plate and assemble it in the original position of the printer through locking handle,hand tighten and fix, model post-processing.
- Page 47 Jiangsu Ouring 3D Technology co.,Ltd the material inside being cured. 1. After putting the printing build plate in place, the post-processing operation of the model is started 2. Leave trees on the surface of the model placed in the cleaning vat with alcohol (90-95%) and soft bristle brush.
-
Page 48: Resin Vat Release Film Replacement Instruction
Jiangsu Ouring 3D Technology co.,Ltd impurities, please use the vat cleaning function. The solid impurities in the resin vat must be cleaned up before printing the secondary model. Note: Do not use metal spatula when cleaning or inspecting solid impurities in the... -
Page 49: Printer Use Instruction
Jiangsu Ouring 3D Technology co.,Ltd 2. Remove the screws at the bottom of the vat with a screwdriver, take out the lower die frame and release film, and remove the residue in the die frame clean up 3. Lay the new release film and press die frame on the bottom of the vat and use the... - Page 50 Jiangsu Ouring 3D Technology co.,Ltd use. Before using 1. To ensure the normal power supply before the printer starts to use, please confirm whether the connected power output is stable. Source instability can damage printer. 2. The printer is placed on a horizontal plane.
- Page 51 Jiangsu Ouring 3D Technology co.,Ltd the feed vat. If there is cured resin, please clean it. If it's not solidified, after removing the material vat and printing build plate, use the "light path control" function of the printer to check whether the display screen is normally output.
-
Page 52: Warranty
Jiangsu Ouring 3D Technology co.,Ltd non-corrosive room, and try not to place it in the open air. Avoid direct sunlight, avoid drastic changes in the surrounding environment, If the storage time is too long, please check the printer regularly. Without protective measures, don't squeeze the printer by goods. - Page 53 Jiangsu Ouring 3D Technology co.,Ltd fault of the aircraft belongs to normal use, with the purchase certificate, can enjoy the warranty service. 2. 3DTALK-DS200 printers purchased through formal channels authorized by our company will enjoy free maintenance, repair for one year from the purchase date 3.
- Page 54 Jiangsu Ouring 3D Technology co.,Ltd...
Need help?
Do you have a question about the 3D TALK DS200 and is the answer not in the manual?
Questions and answers