Table of Contents
Advertisement
ENG
USE AND MAINTENANCE MANUAL
Conversion kit standard machine with weighing device
KIT PESA
Translation of the original instructions
3710308386.1
Code:
0317
Edition:
__________ SERIAL NUMBER __________
ATTENTION
Read and understand these instructions before using the machine.
Keep this handbook for further consultation.
ROBOPAC S.p.A.
Advertisement
Table of Contents

Related Manuals for AETNAGROUP ROBOPAC ROTOPLAT


Summary of Contents for AETNAGROUP ROBOPAC ROTOPLAT
- Page 1 USE AND MAINTENANCE MANUAL Conversion kit standard machine with weighing device KIT PESA Translation of the original instructions 3710308386.1 Code: 0317 Edition: __________ SERIAL NUMBER __________ ATTENTION Read and understand these instructions before using the machine. Keep this handbook for further consultation. ROBOPAC S.p.A.
-
Page 2: Table Of Contents
KIT PESA Summary GENERAL INFORMATION 1.1. PURPOSE OF THE MANUAL 1.2. MANUFACTURER AND MACHINE IDENTIFICATION 1.3. TERMS AND DEFINITIONS 1.4. MODES OF REQUESTING FOR ASSISTANCE 1.5. ATTACHED DOCUMENTATION 1.6. HOW TO READ THE DIRECTIONS FOR USE SAFETY INFORMATION 2.1. GENERAL SAFETY PRECAUTIONS 2.2. -
Page 3: General Information
KIT PESA 1. GENERAL INFORMATION 1.1. PURPOSE OF THE MANUAL ‒ The manual is an integral part of the machine and is aimed to provide the operator the instructions for use in order to prevent and reduce the risks that arise from man-machine interface. The information have been written by the manufacturer into Italian (the original language) in full compliance with the professional writing principles and the regulations in force. -
Page 4: Terms And Definitions
KIT PESA Machine model. Machine’s serial number. Year of manufacture. Power supply voltage. Power supply frequency. Power supply phases. Electrical power consumption. Total installed power. Air consumption. Max. air supply pressure. Machine weight. Manufacturer’s name. 1.3. TERMS AND DEFINITIONS Some recurring terms found within the manual are described in order to provide a more complete image of their meanings. -
Page 5: Modes Of Requesting For Assistance
VIA FABRIZIO DA MONTEBELLO, 81 47892 GUALDICCIOLO, REPUBBLICA S. MARINO (RSM) Phone 0549 (international ++378) 910511 Fax 0549/908549 - 905946 http://www.aetnagroup.com 1.5. ATTACHED DOCUMENTATION The machine is provided with the documentation listed below, in the absence of a different trade agreement. ―... -
Page 6: Safety Information
KIT PESA 2. SAFETY INFORMATION 2.1. GENERAL SAFETY PRECAUTIONS ― Carefully read the “Directions for use”, paying particular attention to the “Residual risks”. ― Pay attention to the safety warnings. ― Use the machine only for the use for which it is designed. ―... -
Page 7: Safety Warnings For Use And Operation
KIT PESA 2.3. SAFETY WARNINGS FOR USE AND OPERATION ― The operator must be trained and possess the proper knowledge required to carry out the specific tasks and must meet the conditions required for the safe use of the machine. ―... -
Page 8: Employer Obligations
KIT PESA 2.4.2.EMPLOYER OBLIGATIONS ― The operator must possess the required training and meet the suitable conditions for carrying out the activities in safety conditions. ― The employer must inform the operator on the INCORRECT USES predictable and on the persistent Residual risks. -
Page 9: Information And Safety Signals
KIT PESA 2.7. INFORMATION AND SAFETY SIGNALS The figure indicates the position of the safety and information signs affixed to the machine. For each sign is specified the relative description. Information sign: it indentified the power cut-off switch. Prohibition sign: do not climb onto the ramp with the forklift. -
Page 10: Technical Information
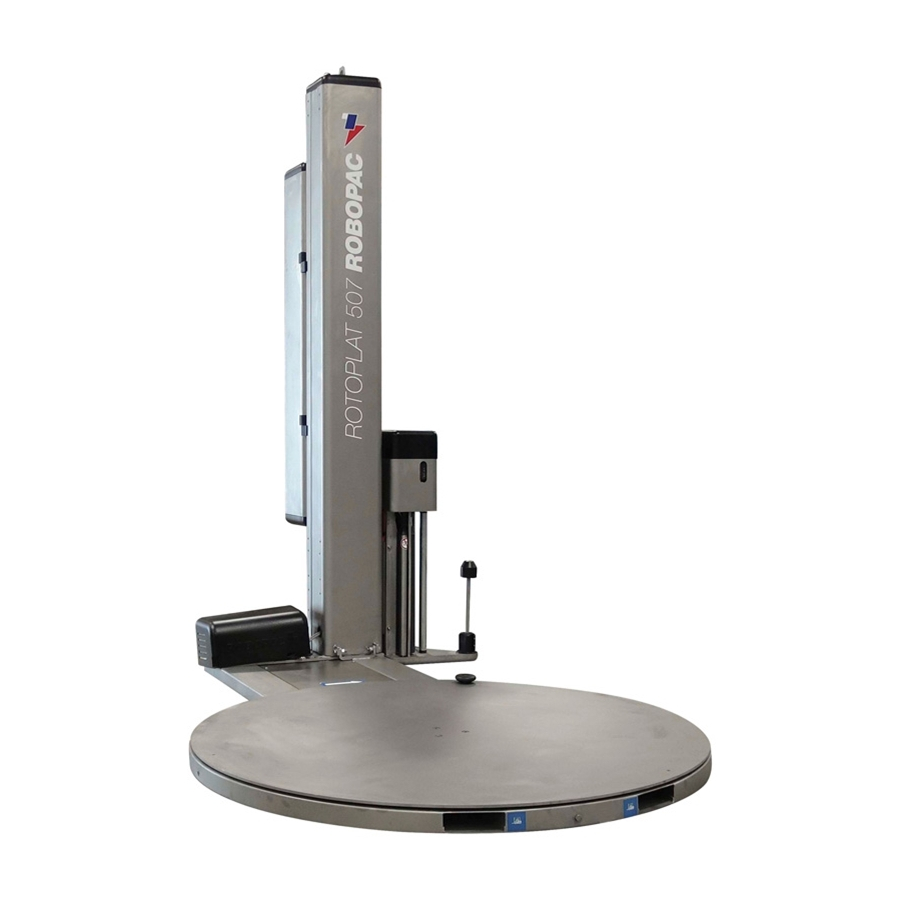
KIT PESA 3. TECHNICAL INFORMATION 3.1. MACHINE GENERAL DESCRIPTION ― The machine is arranged to perform the weighing of each single pallet. ― The weighing device is electronic and it is provided with a display to view the weight, not valid for tax purposes. -
Page 11: Technical Specifications
KIT PESA ‒ Platform loading/unloadingramp (B): to facilitate these operationsusing forklift devices (pallet jack). ‒ Template for embedding: profiled structure for embedding the base in the ground. 3.3. TECHNICAL SPECIFICATIONS The figure and table specify the dimensional characteristics and technicaldata of the machine. 3.3.1.MACHINE DIMENSIONS Version ø1500... -
Page 12: Noise Level
KIT PESA 3.4. NOISE LEVEL The weighing device operates in combination with a wrapping machine. For the noise level, refer to the values shown in the wrapping machine use instructions, to which the weighing device is associated. 3.5. INSTALLATION ENVIRONMENT CHARACTERISTICS Careful consideration must be given to the place where the machine is to be installed, in order to ensure that it may be easily operated, without creating any unnecessary risks for personnel. -
Page 13: Information On Handling And Installation Operations
KIT PESA 4. INFORMATION ON HANDLING AND INSTALLATION OPERATIONS 4.1. RECOMMENDATIONS FOR HANDLING AND LOADING ― Before performing any operation, the authorised operator must make sure that he/she understood the "Instructions for use". ― Carefully read the "Instructions for use" specified in the manual and those applied directly to the machine and/or the package. -
Page 14: Loading And Transportation
KIT PESA Cardboard box packaging 4.3. LOADING AND TRANSPORTATION Transport, also according to the destination, can be performed by different vehicles. The diagram represents the most popular solutions. Important Transport the machine suitable means of adequate capacity. Make sure the machine and its components are properly fastened to the transport mean. -
Page 15: Installation Of Dismounted Parts
KIT PESA 4.4. INSTALLATION OF DISMOUNTED PARTS If a weighing kit is requested after the purchase of a machine model ROTOPLAT/ECOPLAT, proceed as follows. Place the weighing kit in an area, arranged for assembly. Lift the machine by inserting the forks in the appropriate openings on the base. -
Page 16: Fastening Of The Load Ramp
KIT PESA 4.5. FASTENING OF THE LOAD RAMP ‒ Upon completion of the assembly operations of the units, of the level, squareness, parallelism and orthogonality checks, it is necessary to proceed with the fastening of the load ramp on the floor. Important Do not absolutely fasten the machine to the floor and do not lean the load ramp... -
Page 17: Electrical Connection
KIT PESA 4.8. ELECTRICAL CONNECTION Proceed as follows for electrical connections. Check that the mains voltage (V) and frequency (Hz) correspond to those of the machine (see identification plate and wiring diagram). Turn the mains switch to 0 (OFF). Connect the power cord to the outlet (A), as illustrated, according to the network mains. -
Page 18: About The Use
KIT PESA 5. ABOUT THE USE 5.1. RECOMMENDATIONS FOR OPERATION AND USE ― Before performing any operation, the operator must make sure that he/she understood the "Instructions for use". ― When using the machine for the first time, the operator must read the manual and identify the controls and simulate some operations, especially the start-up and shutdown. -
Page 19: Maintenance Information
KIT PESA 6. MAINTENANCE INFORMATION 6.1. MAINTENANCE INSTRUCTIONS ― A good maintenance will allow for a longer working life and constant compliance with the safety requirements. ― Before performing any operation, the authorised operator must make sure that he/she understood the "Instructions for use". ―... -
Page 20: Enclosed Documentation
KIT PESA ENCLOSED DOCUMENTATION 7.1. WARRANTY CONDITIONS ROBOPAC S.p.A. pledges, within the limits described herein, to replace or repair, at no charge, the parts that become defective during the 12 (twelve) months following the date indicated on the company’s shipping documents. -
Page 21: User Interface Operation Manual N.b.c
KIT PESA 7.2. USER INTERFACE OPERATION MANUAL N.B.C. Shown below are the directions for use provided directly by the manufacturer of the commercial device, standard or optional, installed on the machine. The language of such documentation may not correspond to that in which the machine’s directions for use are written. - Page 22 22/41...
- Page 23 Mode Zero Each key has two ways of being pressed: 1.2.1. EGULAR MODE THE KEY IS REGULARLY PRESSED The most direct functions for use are managed like this. 1.2.2. IMED MODE THE KEY IS PRESSED FOR SECONDS Second-level functions are managed like this (settings and selections). Set (pn) =Selection of stored tares (pt) SET quick setting Zero (pn) = Auto-tare (pt) auto-tare cancellation...
- Page 24 an auto-tare has been performed and the net weight is displayed. indicates that weight is stable. indicates (if hold is selected) that the hold function is active. indicates (if peak is selected) that the peak function is active. First field in multirange operation or activation of the 1st relay Second field in multirange operation or activation of the 2nd relay Third field in multirange operation or activation of the 3rd relay Indicates the activation of one or several relays in multirange operation or ac-...
- Page 25 press the Zero key (pn) immediately after the Mode key (pn) C00000 is displayed to set access codes. Press the Mode (pn) key to return to weigh- C00000 C00000 C00000 C00000 ing as C00000 is displayed. Cnnnnn Cnnnnn Cnnnnn Cnnnnn set the indicated code number using the arrows and press , you can open the pre- selected sub-program if the code is exact (if it is wrong, press C and re-write it).
- Page 26 It performs the temporary manual zeroing of weight (auto-tare) press the Z (PN) key. the word TARA (tare) is displayed for 3 seconds and the weight is zeroed (effect also tArA tArA tArA tArA obtained through input 1) It cancels the auto-tare by restoring the gross weight. Press and hold the Z (PT) key to cancel weight zeroing (effect also obtained through input 2).
- Page 27 Caution: when the instrument is calibrated, you can read and file a series of parameters that allows restoring the same calibration in another instrument, thus, avoiding the need to empty the scale or load calibration weights. See RESTORING THE ADJUSTMENT on section 8:2. Use the PASSWORD setting method (section 2.3).
- Page 28 13.1.3. Z ERO CALIBRATION Serves to cancel the fixed tare on load cells (scale plate, hopper and several accesso- ries). only the fixed tare must be present on the scale. Press the key to carry out the zero calibration. displays , which is equivalent to net weight 0.
- Page 29 This option allows reading the signal read by the instrument through the load cells. PASSWORD code 02001.(section 2.3) M n.nn M n.nn M n.nn M n.nn when the code is accepted, the milliVolts read by the converter are shown. the signal of cells must be between max. 0.00 mV and 10.00 mV (or -10.00 mV in the case of bipolar).
- Page 30 The serial output is hardware set at the laboratory for RS232 and RS422. Press the Mode (pt) key MOdE MOdE MOdE MOdE ModE ModE ModE ModE displays for 2 seconds; otherwise, exits. Press the F2 (pn) key within these 2 seconds for setting the RS422 serial port or the F3(pn) key for the RS232 serial port bAud bAud...
- Page 31 PEAC PEAC PEAC PEAC if enabled, PEAC, transmission of the peak value, is displayed HOLd HOLd HOLd HOLd HOLd HOLd HOLd HOLd if enabled, ,transmission of the weight locked is shown on the dis- play selects the parameter and continues. Use the selection method (section 2.2).
- Page 32 radio radio radio radio R a d i o p r o t o c o l 2 1 . 3 . 1 . 5 . If RADIO is selected, transmission will occur in Manchester coding, with STX as start of string and ETX as end of string. C C C C U U U U StOM StOM StOM...
- Page 33 = 10 characters of tax sequence Number (if enabled) FFFFFFFFFF LLLLLL = 6 gross-weight characters (a comma adds a character) TTTTTT = 6 tare characters (a comma adds a character) NNNNNN = 6 characters for net weight (a comma adds a character) = 2 characters for unit of measurement = (CHR$(13)) line terminator 21.3.5.
- Page 34 21.3.6. W EIGHT IS RECEIVED FROM SERIAL PESO SR PESO SR PESO SR PESO SR is displayed, that is, the instrument receives weight from another SD in- PESO SR PESO SR PESO SR PESO SR strument, rather than from a load cell goes to the next selection with the enter key, the datum is accepted and the operation is finished.
- Page 35 ERROR SD response string to WRITE commands (CHR$(21)) ETX [No. c] R e a d w e i g h t 2 1 . 3 . 7 . 1 . STX [No. c] [RP] CHK ETX STX [No. c] [P] [pppppp] CHK ETX W e i g h t r e a d i n g w i t h s t a b l e w e i g h t ( R e a d W ) 2 1 .
- Page 36 C a n c e l w e i g h t a u t o - t a r e 2 1 . 3 . 7 . 6 . STX [No.c] [RA] CHK ETX STX [No. c] (CHR$(6)) ETX(OK) STX [No.
- Page 37 21.3.8. MODBUS PROTOCOL This type of protocol allows connecting the instrument to equipment with MODBUS standard; the instrument includes the MODBUS RTU- type protocol. The communication string is as follows: ADDRESS(8bit) + FUNCTION(8bit) + DATA(Nx8bit) + CRC(16bit) The functions used by the instrument are as follows: FUNCTION 0x03: Reading of the register FUNCTION 0x10: Writing of the register Address (Hex)
- Page 38 Power supply 230 Vac 50/60 Hz (optionally 115 Vac) (version 24 Vdc) Max absorption 10 VA Insulation Class II Installation category Cat. II -10°C ÷ +50°C (max. humidity 85% without condensation) Operating temperature -20°C ÷ +60°C Storage temperature Weight display (SE) Numeric display with 6 red LED digits in 7 segments (h: 14 mm) 8 3 mm LED indicators (SE) 6-key membrane keyboard (SE)
- Page 39 Mod. SD M3 IN/ANALOG J2 Seriale R1 R2 R3 R4 M2 IN/OUT M1 Alim. 1 2 3 4 5 6 7 8 9 10 11 12 J1 Load Cell M1 Power supply L Line + Vdc N Line – Gnd M2 Input/output J1 LOAD CELLS (9-pole male) Set 1 relay Out...
- Page 40 SE 01 DICHIARAZIONE DI CONFORMITA’ Questa apparecchiatura risponde ai requisiti di Compatibilità Elettromagnetica previsti dalle seguenti Direttive: • 90/384/CEE del 20 Giugno 1990 • 2004/108/CE del 15 Dicembre 2004 perché progettata e costruita secondo le Norme: • EN 50082-1 (Electromagnetic compatibility - Generic immunity standard - Part 1: Residential, commercial and light industry).
- Page 41 INFORMAZIONI AGLI UTENTI Ai sensi dell’art. 13 del Decreto Legislativo 25 Luglio 2005, n.151 “Attuazione delle direttive 202/95/CE, 2002/96/CE e 2003/108/CE, relative alla riduz ione dell’uso di sostanze pericolose nelle apparecchiature elettriche ed elettroniche, nonché allo smaltimento dei rifiuti”. Il simbolo del cassonetto barrato sopra riportato sull’apparecchiatura o sulla sua confezione o sul manuale istruzioni, indica che il prodotto alla fine della propria vita utile deve essere raccolto in modo differenziato e separatamente dagli altri rifiuti come sancito dal D.
Need help?
Do you have a question about the ROBOPAC ROTOPLAT and is the answer not in the manual?
Questions and answers