Table of Contents
Advertisement
Quick Links
ReTurn7600
SystemRoMedic
TM
Functional inspection
Visual inspection
Check the condition and function of the product regularly. Check to ensure that material is free from damage. If there are
signs of wear, the product must be inspected and serviced.
Always read the manual
Always read the manuals for all assistive devices used during a transfer.
Keep the manual where it is accessible to users of the product.
Do not leave the patient unattended during a transfer situation.
The product should be inspected yearly, and otherwise as required, by a qualified technician. Service must be performed
by a qualified technician.
Manual no: 720-En Ver. 1 150617
Service manual - English
Art. no.
7600
SWL: 205kg/450 lbs
Advertisement
Chapters
Table of Contents

Subscribe to Our Youtube Channel
Related Manuals for SystemRoMedic ReTurn7600


Summary of Contents for SystemRoMedic ReTurn7600
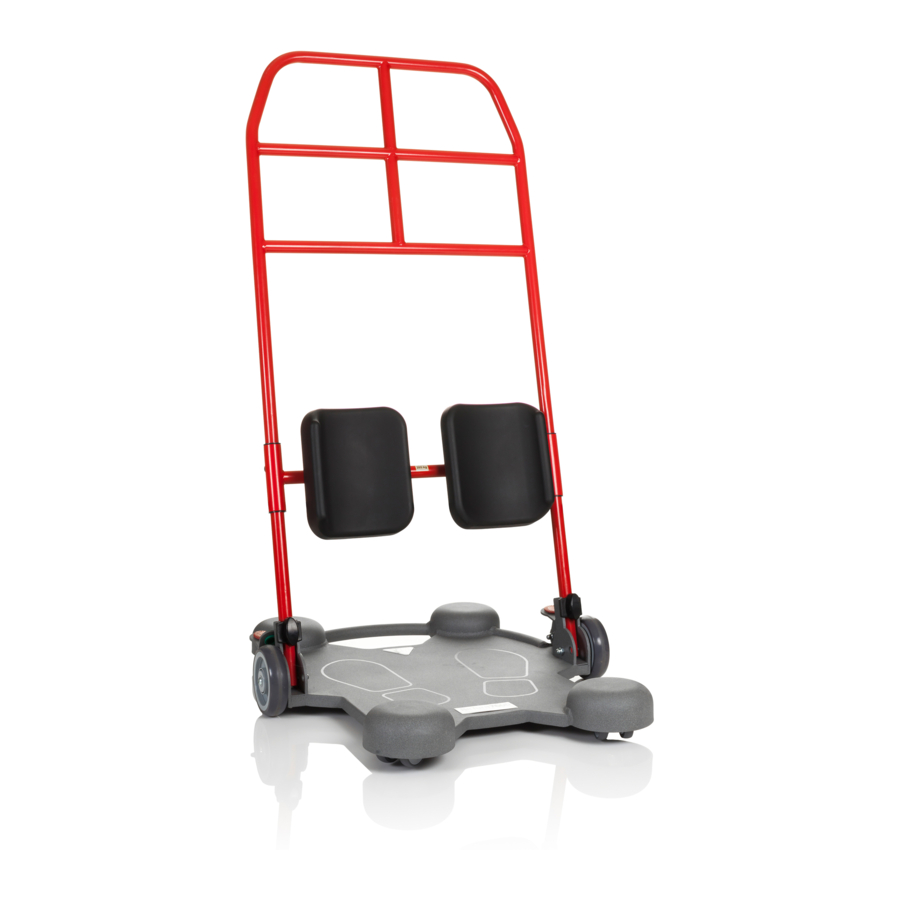
- Page 1 ReTurn7600 Service manual - English SystemRoMedic Art. no. 7600 SWL: 205kg/450 lbs Functional inspection Visual inspection Check the condition and function of the product regularly. Check to ensure that material is free from damage. If there are signs of wear, the product must be inspected and serviced.
-
Page 2: Table Of Contents
Rising ladder and leg support with component list ........Chassie with component list ..............Spare parts ................... Spare part list ..................Replacing spare parts ................Periodic inspection ..............10-14 Detail descriptions for Periodic inspection ..........10 Periodic inspection, instruction ............11-14 Care of the product .................15 Technical specifications ................15 SystemRoMedic... -
Page 3: Assembly
Before the product is used, check to ensure that the screws are securely tightened. The product must be inspected regularly by an authorized technician. The product must be inspected thoroughly at least once each year, or more regularly if it is used very frequently. Inspection and service must be performed by an authorized technician. SystemRoMedic... -
Page 4: Exploded View
SHEET 1 OF 1 Components Ladder: Number Name Rasing ladder Leg support: Number Name Size Holder for leg support Locking pin Bushing Ø28/Ø25,5x32 mm svart POM Mounting fixture for leg support Screw K6S ISO 7380 M6x16 Label SWL Leg support SystemRoMedic... -
Page 5: Chassie With Component List
Nut MHM Din 1587 M8 fzb Washer Ø16/Ø8x1,5 mm Washer Ø20/Ø10x9 mm svart POM Screw MVBF Din 603 M8x30 fzb Screw K6S ISO 7380 M6x20 Nut DIN985 M6 fzb Brake shoe antislip Brake pad green Brake pad red Instruction label Label ReTurn7600 SystemRoMedic... -
Page 6: Spare Parts
2 x Washer black 2 x Washer white M8 2 x Screw M6x20 2 x Washer white M6 ´ 2 x Nut Din 985 M6fzb 2 x Green plastic button 2 x Red plastic button 2 x Friction 3M tape SystemRoMedic... -
Page 7: Spare Part List
Article no. Product Unit Components Images 7334 Carriage bolt / washers 1 set 2 x Carriage bolt M8x35 2 x Teflon coated washer 4 x Steel washer 2 x Locking acorn nut DIN 986 2 x Washer black 7334 SystemRoMedic... -
Page 8: Replacing Spare Parts
Lower-leg support Unscrew the lower-leg support from its mount. Remove the lower-leg support and mount, and then install and secure the new ones. The lower-leg support is secured with 4 screws, which are included in the spare parts kit. SystemRoMedic... - Page 9 For assembly instructions, see page 12 under the Periodic Inspection section. Brake kit For assembly instructions, see page 13 under the Periodic Inspection section. Carriage bolt / washers For assembly instructions, see page 12 under the Periodic Inspection section. SystemRoMedic...
-
Page 10: Periodic Inspection
2. Wing handles Page 8 3. Base plate Page 8 4. Brakes (on fixed wheels) Page 9 5. Fixed castors 125mm and axles (2 pcs.) Page 9 6. Castors 75mm (4 pcs.) Page 10 7. Leg support Page 10 SystemRoMedic... -
Page 11: Periodic Inspection, Instruction
The gap between the front and rear wheels should be between 2-3 mm. Park the ReTurn on a level surface and place a 2 mm washer under one of the castor wheels. The gap can be adjusted with the help of spacers on the castors. SystemRoMedic... -
Page 12: Brakes (On Fixed Wheels)
Tighten the locking nut, together with the accompanying steel washer, sufficiently to allow the right degree of tension on the pedal when the brake is applied and released. Order of assembly for parts (marked area) SystemRoMedic... -
Page 13: Castors 75Mm (4 Pcs.)
6. Tighten the locking nut, together with the accompanying steel washer, sufficiently to allow the right degree of tension on the pedal when the brake is applied and released. Order of assembly for parts Brake pedal Brake shoe SystemRoMedic... -
Page 14: Leg Support
(4 pcs.) rotate and swivel easily. If necessary, remove dirt and hair from wheels. Castor Castor swirvel Castor swirvel Leg support Check both parallel and horizontal adjustment. Friction can be adjusted by loosening or tightening the bolts at the rear of the support. SystemRoMedic... -
Page 15: Care Of The Product
• Do not use solvents. • To disinfect, use 70% alcohol. Technical specifications • Art.nr 7600 Complete ReTurn • 7601 Ladder to 7600 SWL, Max weight: 200 kg/440 lbs (static load) Total weight: 26 kg/57 lbs Patented SystemRoMedic... - Page 16 SystemRoMedic™ is a complete solution that provides for the majority of patient transfer or manual handling requirements. From the simplest to the most complex scenarios, from the lightest to the heaviest. The concept encompasses assistive devices for four different categories of transfers: •...
Need help?
Do you have a question about the ReTurn7600 and is the answer not in the manual?
Questions and answers