
Subscribe to Our Youtube Channel
Related Manuals for Occhio Mito largo


Summary of Contents for Occhio Mito largo
- Page 1 Mito largo Montageanleitung / Bedienungsanleitung Mounting instructions / Operating instructions...
-
Page 3: Table Of Contents
Step 2 Steuerung Control via » touchless control « + » air « via » touchless control « + » air « mit der Occhio air App using the Occhio air app mit dem Occhio air controller using the Occhio air controller (optional) -
Page 4: Sicherheitshinweise
Sicherheitshinweise Lesen Sie die Montage-/ Gebrauchs anweisung sorgfältig durch, bevor Sie die Leuchte Dieses Zeichen macht Sie auf installieren. Beachten Sie die Situationen aufmerksam, bei Sicherheitshinweise in dieser denen Sie direkt in das Licht der Anleitung genau und bewahren LED blicken könnten. Dies kann Sie die Anleitung auf. - Page 5 Safety precautions Read through the mounting/ use instructions carefully before installing the luminaire. Follow This symbol draws your attention to the safety precautions in these situations in which you could look instructions closely and keep the directly into the light of the LED. instructions in a safe place.
-
Page 6: Produktbeschreibung
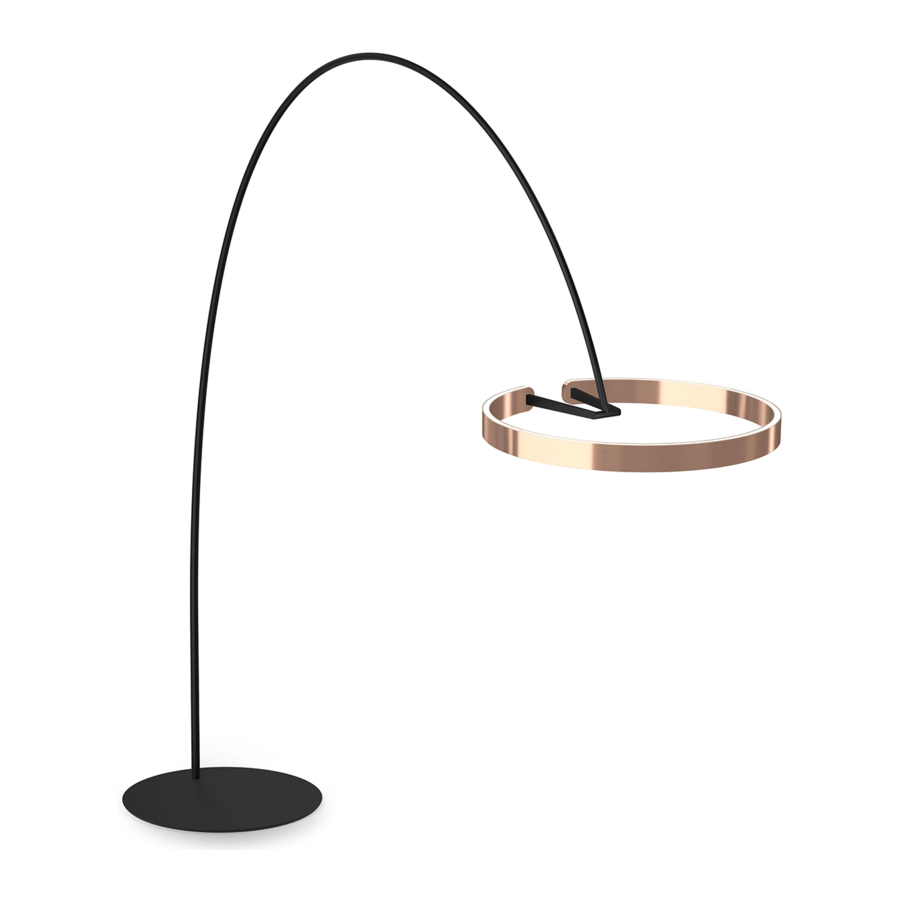
über Netzteil (Konverter) an 230 V AC / 50 Hz Netzspannung, head für Wartungszwecke abnehmbar. Leistung 60 W, Steuerung via » touchless control « (Gestensteue- rung am head, deaktivierbar) oder mit Occhio air. Weitere Versionen: Mito raggio (Bogenleuchte) * Produktionstoleranz ± 50 mm... - Page 7 (converter), removable head for maintenance purposes. Luminous power 60 W, control via » touchless control « (gesture control on the head, can be deactivated) or with Occhio air Other versions: Mito raggio (arc luminaire) * production tolerance ± 50 mm...
-
Page 9: Montage
Montage Mounting... - Page 10 Montage / Mounting...
- Page 11 body head Netzteil / power supply base...
- Page 12 Montage / Mounting Reihenfolge der Pakete beachten! Pay attention to the order of the packages!
- Page 14 Montage / Mounting Verpackung der base wie Open base packaging abgebildet öffnen. as shown. Schutzcover der base nicht Do not remove the protective entfernen! cover!
- Page 15 1 base anheben 1 lift the base 2 Einleger entnehmen 2 remove inlays 3 Einleger wie abgebildet 3 prepare inlays aufstellen as shown...
- Page 16 Montage / Mounting Einleger in die Aussparungen Insert the inlays in the einsetzen. recesses.
- Page 17 Die untere Lasche der Turn down the lower flap of Ver packung umklappen. the packaging. Erst jetzt kann die base auf Only now can the base be den Stützen abgelegt werden! placed on the supports!
-
Page 18: Schritt
Montage / Mounting Die Standardeinstellung The default setting (height) (Höhe) ist medium, wie die is medium, to change the Einstellung verändert werden setting show the following kann zeigen die folgenden steps. Schritte. medium high 1,3 m 1,45 m 1,6 m... - Page 19 Schrauben lösen, Höhen Loosen screws, turn height einstellung drehen und adjustment and fix again. wieder befestigen.
- Page 20 Montage / Mounting Den body wie abgebildet mit dem Kabel zuerst durch die Öffnung führen. First guide the body through the opening with the cable as shown.
- Page 21 Kabel durch die Zugent Guide the cable through lastung führen. the strain relief. Verdrehsicherung und Mount torsion protection Mutter befestigen. and nut.
- Page 22 Montage / Mounting Mit Steckschlüssel und Schrauben zieher fixieren (nur handfest anziehen). Tighten with socket wrench and screwdriver (hand tighten only).
- Page 23 Leuchte am unteren Teil des Lift the luminaire on the body anheben, Verpackung lower part of the body and entfernen. remove the packaging.
- Page 24 Montage / Mounting...
- Page 25 Leuchtenstecker auf der Insert the luminaire plug Unterseite des Stecker on the bottom of the power netzteils einsetzen. supply unit.
- Page 26 Montage / Mounting Kabel, bis die gewünschte Länge erreicht ist, aufwickeln. Wrap the cable until the Wrap the cable until the desired length is reached. desired length is reached.
- Page 27 Schutzcover von body, base und Netzteil entfernen. Remove protective cover from body, base and power supply.
- Page 28 Montage / Mounting upper body auf lower body stecken. Put the upper body to the lower body.
- Page 29 upper body auf lower body stecken. Put the upper body to the lower body. Stecker in die Buchse stecken. Plug the connector into the socket.
- Page 30 Montage / Mounting upper body wie abgebildet ausrichten. Align upper body as shown.
- Page 31 Den head aufstecken (evtl. leicht eindrehen) und fixieren. Sicherstellen, dass der head wirklich fixiert ist! Put on (poss. smoothly turn in) and fix the head. Make sure the head is really fixed!
- Page 32 Montage / Mounting Falls notwendig kann der head über die Feinjustierung ausgerichtet werden. If necessary, the head can be aligned via the fine adjustment.
- Page 33 Die Gabel des head ist kein Gelenk sondern nur zur Feinjustierung vorgesehen! The fork of the head is not a joint, it is only intended for fine adjustment!
- Page 34 Montage / Mounting Die Leuchte ist nun fertig montiert. The luminaire is now completely assembled.
-
Page 37: Steuerung
Steuerung Funktionen / Steuerungs- möglichkeiten der Leuchte. Control Functions / control options of the luminaire. -
Page 38: Via " Touchless Control " + " Air
Steuerung via » touchless control « + » air « Control via » touchless control « + » air « on / off bewegen / move your hand dimmen / halten / keep your hand still up / down fading lange halten / keep your hand still for a time maximale Helligkeit auf eine Seite ziehen /... - Page 39 Steuerung via Occhio air, weitere Informationen ab Seite 41. Steuerung via Occhio air, weitere Informationen ab Seite 41. Control via Occhio air, for further information see page 41. Control via Occhio air, for further information see page 41. Die Funktion » touchless control « kann via Occhio air deaktiviert werden, weitere Informationen auf Seite 48.
- Page 41 Steuerung mit der Occhio air Control using the Occhio air...
-
Page 42: Mit Der Occhio Air App
Steuerung mit der Occhio air App (optional) Control using the Occhio air app (optional) Quick guide 3 neue Geräte gefunden / Die Occhio air Produkte lassen sich Zurück / Grupp Found 3 new devices Back Group mit der Occhio air App einrichten und steuern. - Page 43 Steuerungsgesten den / Gruppe / Bearbeiten / my network Group Edit Control gestures QR-C Scan on / off antippen on / off Mito soffitto Mito sospeso dimmen wischen swipe npaired up / down wischen faden * swipe Sento npaired color tune ** halten hold …...
- Page 44 Steuerung mit der Occhio air App (optional) Control using the Occhio air app (optional) Nutzung auf mehreren Nutzung auf 1. Netzwerknamen Gruppe / Bearbeiten / Abbrec my network mehreren Geräten vergeben Group Edit Cance Geräten Use on several 1. Assign name...
- Page 45 2. Netzwerk Einstellungen / beiten / Abbrechen / Sichern / Gruppe / Bearbeiten / Abbrechen my network freigeben Settings Cancel Save Group Edit Cancel Besucher / 2. Share network Freigabe / Name my network Sharing Passwort / Leuchten in der Nähe anzeigen / Password Display luminaires near me Mito soffitto...
- Page 46 Steuerung mit der Occhio air App (optional) Control using the Occhio air app (optional) Netzwerk freigeben 2. Netzwerk Einstellungen / Bearbeiten / Abbrechen / Sichern / Gruppe / Bearbeiten / Abbre my network freigeben Settings Edit Cancel Save Group Edit Cance und schützen...
- Page 47 Passwort für Besucher Passwort / Visitors password Password E-Mail des Netzwerk- Administrator / Administrator Administrators (zur Wiederherstellung des E-Mail / john.doe @ occhio.de e-mail Netzwerks) e-mail of the network Passwort / administrator (for the Password restoration of the network) Netzwerkkonfiguration Passwort für Administrator...
- Page 48 Steuerung mit der Occhio air App (optional) Control using the Occhio air app (optional) Sensoren deaktivieren Gruppe / Bearbeiten / my network Group Edit Deactivate sensors Name Optional können die Sensoren Symb am head deaktiviert werden. Herst Mito soffitto Mito sospeso...
- Page 49 Geräte in der Nähe / ten / Zurück / Zurück / Mito largo Devices near me Back Back Name Mito largo Bluetooth-Geräte / devices Zum Auswählen drücken / Mito largo Symbol / Icon Tap to set Occhio @Netzwerk / network...
- Page 50 Steuerung mit der Occhio air App (optional) Control using the Occhio air app (optional) Leuchte entkoppeln Decouple luminaire Ist die Leuchte in einem alten Netzwerk eingebunden, kann sie ausgeschaltet durch die Entnahme des Occhio air Moduls entkoppelt und in ein neues Netzwerk eingebunden werden.
- Page 51 Anschließend auf Gerät click decouple device and entkoppeln klicken und den start the process Vorgang starten 3 Remove the Occhio air mo- 3 Occhio air Modul wie dule as shown and replace abgebildet entnehmen und it immediately gleich wieder einsetzen Geräte in der Nähe /...
- Page 53 Steuerung mit dem Occhio air controller (optional) Control using the Occhio air controller (optional)
- Page 54 Steuerung mit dem Occhio air controller (optional) Control using the Occhio air controller (optional) Occhio air controller Occhio air controller Intuitiv bedienbare Fernbedienung Intuitive remote control with four mit vier programmierbaren Tasten programmable buttons (setup via (Einrichtung via Occhio air App).
- Page 55 schalten / switch dimmen / – – – IIII IIII einzelne Leuchten, Gruppen, einzelne Leuchten, Gruppen, oder Szenen schalten oder Szenen dimmen – – – IIII IIII switch individual luminaires, dims individual luminaires, groups or scenes groups or scenes 2700 K 4000 K 2700 K 4000 K...
- Page 57 Anhang Appendix...
-
Page 58: Pflegehinweise
Leuchte nur in abgekühltem Zustand reinigen! Zur Reinigung der Leuchte ein trockenes Mikro- fasertuch verwenden. Detaillierte Pflegehinweise sind unter www.occhio.de/de/company/faq zu finden. Always allow the luminaire to cool down before cleaning! To clean the luminaire, use a dry microfibre cloth. Detailed care instructions are available at www.occhio.de/en/company/faq. -
Page 59: Info & Kontakt
Info & Kontakt Information & contact Weitere Fragen beantwortet gerne Ihr Occhio Fachhändler Your Occhio specialist retailer will gladly answer any other questions www.occhio.de info @ occhio.de... - Page 60 Zulässige Betriebsbedingung max. 30°C nur im Innenbereich betreiben Prüfzeichen 0,2 m Technische Daten Leuchtmittel Leuchtmittel Occhio »color tune« LED Ausführung LED-board Lebensdauer > 50.000 Std. Energieeffizienzklasse – EEK Entsorgung Bei örtlicher Entsorgungsstelle entsorgen. Mito largo ist recyclebar; RoHS-konform. Nicht in den Hausmüll geben!
-
Page 61: Control
Occhio »color tune« LED Version LED-board Lifetime > 50.000 h Energy efficiency class – EEC A + Disposal Dispose of at a local disposal site. Mito largo is recyclable and RoHS compliant. Do not dispose of with the household waste! - Page 64 MA- 9 6704 Mi t o l a rgo MA-96704 Mito largo 010404295696704010 010404295696704010...
Need help?
Do you have a question about the Mito largo and is the answer not in the manual?
Questions and answers