Table of Contents
Advertisement
Available languages
Available languages
Quick Links
Advertisement
Chapters
Table of Contents

Related Manuals for Occhio terra HV


Summary of Contents for Occhio terra HV
- Page 1 HV Montageanleitung mounting instructions body head...
- Page 3 HV Montageanleitung S. 2 mounting instructions p. 21...
- Page 4 Sicherheitshinweise Die Montage von Elektrokomponenten darf nur von qualifiziertem Fachpersonal durchgeführt werden! Vor den Arbeiten an der Leuchte diese 0.2m unbedingt vom Netz trennen! Den Sicherheitsabstand zu brennbaren Objekten einhalten! Vor dem Wechsel des Reflektorkopfes und des Leuchtmittels, Leuchte ausschal- ten und abkühlen lassen.
-
Page 5: Table Of Contents
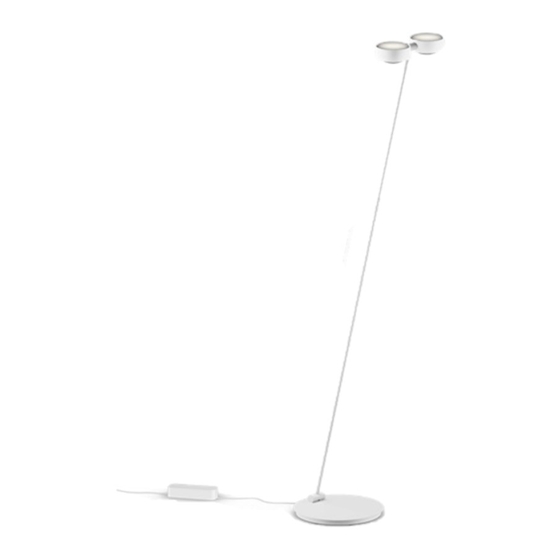
Produktbeschreibung Occhio terra HV ist eine Hochvolt- Halogen-Leuchte der Schutzklasse 1. Sie verfügt über zwei HV-Lichtquellen, die durch den Fußschalter getrennt gedimmt werden können. Inhalt Produktbeschreibung Aufbau Montage Ausrichten der Leuchte 10 Leuchtmittel einsetzen 12 An- und Auschalten 14 Reflektorköpfe aufsetzen/wechseln... -
Page 7: Aufbau
Aufbau Reflektorköpfe Leuchtenkörper Leuchtenfuß Controller (Doppeltastdimmer) -
Page 8: Montage
Montage Achtung! Vor der Montage alle stromführenden Leitungen vom Stromnetz trennen! Die magnethaftende Deckplatte mit der Zentrierhilfe auf die Grundplatte legen. Die Deckplatte auf der Grundplatte so drehen, dass der Ausschnitt für die Intarsie symmetrisch über den Montage- bohrungen liegt. Die Intarsie in die Aussparung einlegen. - Page 9 Montage Montage bei starrem Fuß Für die Leuchtenmontage den Leuch- tenfuß so auf den Tisch legen, dass die Bohrungen für die Montage von unten zugänglich bleiben. Montage bei drehbarem Fuß Für die Leuchtenmontage den Leuch- tenfuß so auf den Tisch legen, dass die Bohrungen für die Montage von unten zugänglich bleiben.
-
Page 10: Ausrichten Der Leuchte
Ausrichten der Leuchte Der Leuchtenarm lässt sich aus senk- rechter Position etwa 15° nach vorne schwenken. Der Anschlag ist begrenzt. Die Beweglichkeit kann mit dem beilie- 15 ° genden Inbusschlüssel an der Gelenk- schraube eingestellt werden. -
Page 12: Leuchtmittel Einsetzen
Leuchtmittel einsetzen Achtung! Vor der Montage alle stromführenden Leitungen vom Stromnetz trennen! Reflektorköpfe abkühlen lassen! Auf die richtige Größe des Leuchtmittels achten: B15d, mittel, 78-86 mm. kurz mittel lang Maximalleistungsangaben auf Leuchten- körper und Reflektorkopf beachten! Die niedrigste Leistungsangabe zählt! B15d mittel Originalgröße... - Page 13 Leuchtmittel einsetzen Hochvolthalogen Leuchtmittel in die B15d Fassung setzen. Glaskolben des Leuchtmittels nur mit weichem Tuch, nicht mit der bloßen Hand anfassen. Fingerabdrücke auf dem Leuchtmittel vor dem Einschalten der Leuchte mit einem weichen Tuch abwischen.
-
Page 14: An- Und Auschalten
An- und Auschalten Die Occhio terra HV Leuchte ist mit einem Occhio controller zur Steuerung beider HV-Leuchtmittel ausgestattet. Mit dem Fußschalter des Controllers kön- nen beide Leuchtmittel getrennt an- und ausgeschaltet sowie gedimmt werden. Kurzes Betätigen der Tastwippe schaltet das jeweilige Leuchtmittel ein oder aus. -
Page 16: Reflektorköpfe Aufsetzen/Wechseln
Reflektorköpfe aufsetzen/wechseln Die Montage des Reflektorkopfes wird in der getrennt beiliegenden Anleitung zum entsprechenden Reflektorkopf beschrieben. -
Page 17: Leuchtmittel Wechseln
Leuchtmittel wechseln Das Wechseln des Leuchtmittels wird in der getrennt beiliegenden Anleitung zum entsprechenden Reflektorkopf beschrieben. -
Page 18: Pflege
Pflege Zur Reinigung der Metall- als auch der Glasteile der Leuchte empfehlen wir die Verwendung eines Glasreinigers. Leuchte nur im abgekühlten Zustand reinigen! -
Page 19: Info & Kontakt
Info & Kontakt Weitere Fragen beantwortet gerne Ihr Occhio Fachhändler www.occhio.com info@occhio.com... -
Page 20: Technische Daten
Technische Daten Artikelbezeichnung Occhio terra HV max. 2 x 150 W Hochvolt-Halogen B 15 d max. 150 W Occhio controller HV (Doppeltastdimmer) Höhe 180 cm Fuß drehbar (optional) Technische und gestalterische Änderun- gen vorbehalten. - Page 21 HV Oberfläche Fuß Leuchtenkörper Art.-Nr. (Cover wechselbar) terra HV schwarz matt chrom matt 8R 79 00 MS F chrom matt chrom matt 8R 79 00 MM F chrom chrom 8R 79 00 CC F bianco chrom 8R 79 00 CB F...
-
Page 23: Terra Hv
HV mounting instructions... - Page 24 Safety precautions The assembly and installation of electrical components must be carried out only by qualified personnel. Before working on the lamp, always 0.2m disconnect it from the mains. Maintain the minimum safety distance from flammable materials. Before changing the reflector head and the bulb, switch off the lamp and allow it to cool down.
-
Page 25: Product Description
Product description Occhio terra HV is a high-voltage halogen lamp, protection class 1. It has two HV light sources which can be independently dimmed using the footswitch. Contents 23 Product description 25 Configuration 26 Fitting 28 Adjusting the lamp 30 Inserting the bulb... -
Page 27: Configuration
Configuration Reflector heads Lamp body Light base Controller (double touch dimmer) -
Page 28: Fitting
Fitting Caution Before fitting, disconnect all current- carrying lines from the mains supply. Lay the magnetic cover plate on the base plate using the centring aid. Turn the cover plate on the base plate until the cut-out for the inlay is positioned symmetrically over the mounting holes. - Page 29 Fitting Assembly with fixed base To assemble the lamp, place the lamp base on the table in a position where the assembly holes remain accessible from underneath. Assembly with swivel base To assemble the lamp, place the lamp base on the table in a position where the assembly holes remain accessible from underneath.
-
Page 30: Adjusting The Lamp
Adjusting the lamp The lamp stem can be pivoted forwards approximately 15° from the vertical. The stop position is fixed. The ease of movement can be adjusted 15 ° by the screw in the joint using the en- closed Allen key. -
Page 32: Inserting The Bulb
Inserting the bulb Caution Before fitting, disconnect all current- carrying lines from the mains supply. Allow reflector heads to cool. Make sure that the correct bulb size is used: B15d, medium, 78-86 mm. short medium long Check the maximum power specifications on the lamp body and reflector head. - Page 33 Inserting the bulb Fit the high-voltage halogen bulb into the B15d socket. Always use a soft cloth when handling the bulb glass. Never touch it with bare hands. Use a soft cloth to wipe off any finger prints left on the bulb before switching the lamp on.
-
Page 34: Switching On And Off
Switching on and off The Occhio terra HV lamp is equipped with an Occhio controller for controlling both HV bulbs. Both bulbs can be switched on and off independently, as well as dimmed, using the controller footswitch. A short actuation of the rocker button switches the respective bulb on or off. -
Page 36: Fitting/Replacing The Reflector Heads
Fitting/replacing the reflector heads Reflector head assembly is described separately in the enclosed instructions for the respective reflector head. -
Page 37: Replacing The Bulb
Replacing the bulb How to replace the bulb is described separately in the enclosed instructions for the respective reflector head. -
Page 38: Care
Care We recommend using a glass cleaner to clean both the metal and glass parts of the lamp. Always allow the lamp to cool down before cleaning. -
Page 39: Information & Contact
Information & contact Your Occhio specialist retailer will gladly answer any other questions www.occhio.com info@occhio.com... -
Page 40: Technical Data
Height 180 cm Swivel base (optional) Subject to technical and design modifica- tions without notice The Occhio terra CDM lamp can be used in combination with all Occhio reflector heads from the Puro, Sento and Divo ranges. Our Occhio specialist retail partners and... -
Page 41: Terra Hv
HV Base surface Lamp body Product (changeable cover) number terra HV black matt chrome matt 8R 79 00 MS F chrome matt chrome matt 8R 79 00 MM F chrome chrome 8R 79 00 CC F bianco chrome 8R 79 00 CB F... - Page 44 Occhio GmbH Wiener Platz 7 D 81667 München Fon +49-89-44 77 86 30 Fax +49-89-44 77 86 39 info@occhio.com www.occhio.com 4 0 4 2 9 5 6 9 6 5 1 3 8...
Need help?
Do you have a question about the terra HV and is the answer not in the manual?
Questions and answers