Table of Contents
Advertisement
Quick Links
Advertisement
Table of Contents

Related Manuals for Gymstick IC 3.0


Summary of Contents for Gymstick IC 3.0
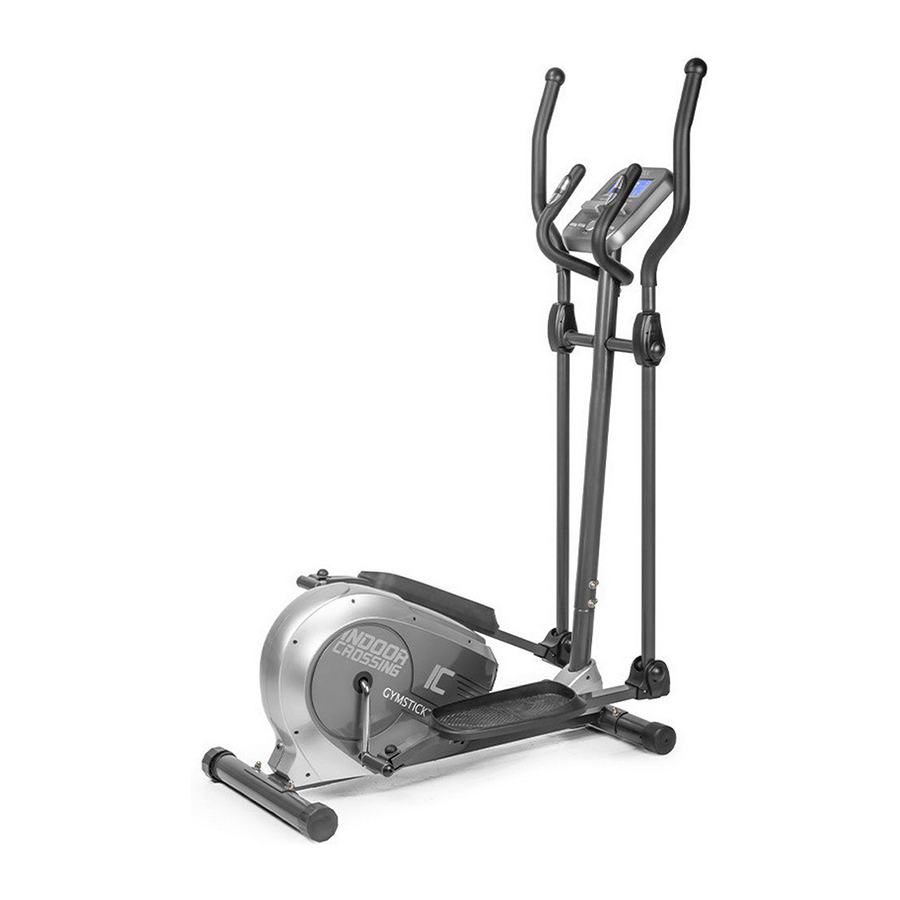
- Page 1 IC 3.0 CROSSTRAINER USER MANUAL IMPORTANT: Read all instructions carefully before using this product. Retain this owner’s manual for future reference. The specifications of this product may vary from this photo, subject to change without notice.
-
Page 2: Table Of Contents
TABLE OF CONTENTS SAFETY INSTRUCTIONS ------------------------------------------------------------- 2 PARTS LIST ------------------------------------------------------------------------------- 3 HARDWARE PACKING LIST --------------------------------------------------------- 5 TOOLS -------------------------------------------------------------------------------------- 6 OVERVIEW DRAWING ----------------------------------------------------------------- 7 ASSEMBLY INSTRUCTIONS --------------------------------------------------------- 8 COMPUTER OPERATING INSTRUCTIONS ------------------------------------- 12 MAINTENANCE -------------------------------------------------------------------------- 22 WARM UP AND COOL DOWN ROUTINE ----------------------------------------- 23 IMPLIED WARRANTY ------------------------------------------------------------------ 26... -
Page 3: Safety Instructions
SAFETY INSTRUCTIONS Basic precautions should always be followed, including the following safety instructions when using this equipment: Read all instructions before using this equipment. Read all the instructions in this manual and do warm up exercises before using this equipment. Before exercise, in order to avoid injuring the muscle, warm-up exercise of every position of the body is necessary. -
Page 4: Parts List
PARTS LIST Description Qty No. Description 001 Main Frame 1 032 Bolt M10x18 002 Front Post 1 033 Spring Washer Ø10 003 Left Handrail Arm 1 034 Big Washer Ø8xØ20x2.0 004 Left Handrail Arm 1 035 D Washer Ø28x5 005 Left Foot Bar 1 036 Powder Metal Bushing Ø33xØ29xØ16x3 006 Right Foot Bar... - Page 5 PARTS LIST Description Qty No. Description 063 Cap Nut M8 4 081 Right Handrail Arm Cover-B 064 Cover Cap 2 082 Screw ST4.2x20 065 Screw ST4.2x25 6 083 Bolt M8X20 066 Left Chain Cover 1 084 Motor Cable L=500MM 067 Right Chain Cover 1 085 Nut M6 068 Screw ST4.2X25 10 086 Spring Washer Ø6...
-
Page 6: Hardware Packing List
HARDWARE PACKING LIST... -
Page 7: Tools
TOOLS... -
Page 8: Overview Drawing
OVERVIEW DRAWING... -
Page 9: Assembly Instructions
ASSEMBLY INSTRUCTIONS 1. Front and Rear Stabilizers Installation Position the Front Stabilizer (14) in front of Main Frame (1) and align bolt holes. Attach the Front Stabilizer (14) onto the front curve of the Main Frame (1) with two M8x70 Bolts (61), two Ø8xØ25 Big Curve Washers (43), and two M8 Cap Nuts (63). - Page 10 3. Left/Right Handrail Arms, Left/Right Foot Bars, Left/Right Foot Pedals, and Foot Bar Covers-A/B Installation Remove two M10x18 Bolts (32), two Ø10 Spring Washers (33), two Ø10xØ20x2.0 Big Washers (95), and two Ø28x5 D shape Washers (35) from the left and right horizontal axes of the Front Post (2).
- Page 11 Repeat above step to attach the Right Foot Pedal (48) onto the Right Foot Bar (6) and Foot Bar Covers (45,46) onto the Right Foot Bar (6) 4. Left/Right Handrails Attach the Left/Right Handrails (16, 17) onto the Left/Right Handrail Arms (3, 4) with four M6x35 Bolts (31), four Ø6xØ12x1 Curve Washers (30), and four M6 Cap Nuts (29).
- Page 12 6. Handlebar and Computer Installation Remove four M5x12 Bolts (97) from the back of the Computer (96). Remove bolts with the Multi Hex Tool with Phillips Screwdriver provided. Remove two M8x15 Bolts (91) and two Ø8xØ16x1.5 Curve Washers (13) from the Front Post (2).
-
Page 13: Computer Operating Instructions
COMPUTER OPERATING INSTRUCTIONS A. Input Power Plug in the adaptor to the equipment then the computer will produce a beep sound and turn on the computer at the Manual mode. B. Program select and setting value 1. Use the UP or DOWN keys to select program mode and then press ENTER to confirm your exercise mode. - Page 14 5. CALORIES: Your computer will estimate the cumulative calories burned at any given time during your workout. 6. PULSE: Your computer displays your pulse rate in beats per minute during your workout. 7. AGE: Your computer is age-programmable from 10 to 99 years. If you do not set an age, this function will always default to age 35.
- Page 15 c. During setting the Clock, press this key can accept the setting hour and setting minute. 5. BODY FAT key: Press the key to input your HEIGHT, WEKGHT, GENDER and AGE then to measure your body fat ratio, 6. PULSE RECOVERY key: Press the key to activate heart rate recovery function. PROGRAM INTRODUCTION AND OPERATION: Manual Program: Manual P1 is a manual program.
- Page 16 your exercise TIME. Press ENTER key to confirm your desired TIME. 4. The DISTANCE will flash and you can press UP or DOWN keys to setting your target DISTANCE. Press ENTER key to confirm your desired DISTANCE. 5. The CALORIES will flash and you can press UP or DOWN keys to setting your exercise CALORIES.
- Page 17 10. Press the START/STOP key to begin exercise. Heart Rate Control Program: 55% H.R.C., 65% H.R.C., 75% H.R.C., 85% H.R.C., Target H.R.C. Program 18 to Program 22 is the Heart Rate Control Programs and Program 22 is the Target Heart Rate Control program. Program 18 is the 55% Max H.R.C.
- Page 18 Body Fat Program: Body Fat Program 23 is a special program design to calculate users’ body fat ratio and to offer a specific loading profile for users. There are 3 body types divided according to the FAT% calculated. Type1: BODY FAT% > 27 Type2: 27 ≧...
- Page 19 OPERATIONS GUIDE: 1. Sleep Mode: The computer will enter the sleep mode when there is no signal input and no keys be pressed after 4 minutes. You can press any key to wake up the computer. 2. BMI (Body Mass Index): BMI is a measure of body fat based on height and weight that applies to both adult men and women.
- Page 20 LCD Workout Graphics PRESET PROGRAM PROFILES: PROGRAM 1 PROGRAM 2 PROGRAM 3 MANUAL STEPS HILL PROGRAM 4 PROGRAM 5 PROGRAM 6 ROLLING VALLEY FAT BURN PROGRAM 7 PROGRAM 8 PROGRAM 9 RAMP MOUNTAIN INTERVALS PROGRAM 10 PROGRAM 11 PROGRAM 12 RANDOM PLATEAU FARTLEK...
- Page 21 USER SETTING PROGRAM PROGRAM 14 USER 1 PROGRAM 15 USER 2 PROGRAM 16 USER 3 PROGRAM 17 USER 4 HEART RATE PROGRAM PROFILES: PROGRAM 18 55% H.R.C. PROGRAM 19 65% H.R.C.
- Page 22 PROGRAM 20 75% H.R.C. PROGRAM 21 85% H.R.C. PROGRAM 22 TARGET H.R.C. BODY FAT TEST PROGRAMS: PROGRAM 23 BODY FAT (STOP MODE) BODY FAT (START MODE) One of the Following Six Profiles Will Display Automatically after Measuring Your BODY FAT: Workout Time: 40 minutes Workout Time: 40 minutes Workout time: 20 minutes...
-
Page 23: Maintenance
MAINTENANCE Cleaning The elliptical trainer can be cleaned with a soft cloth and mild detergent. Do not use abrasives or solvents on plastic parts. Please wipe your perspiration off the elliptical trainer after each use. Be careful not get excessive moisture on the computer display panel as this might cause an electrical hazard or electronics to fail. -
Page 24: Warm Up And Cool Down Routine
WARM UP AND COOL DOWN ROUTINE A good exercise program consists of a warm-up, aerobic exercise, and a cool down. Do the entire program at least two to three times a week, resting for a day between workouts. After several months you can increase your workouts to four or five times per week. AEROBIC EXERCISE is any sustained activity that sends oxygen to your muscles via your heart and lungs. - Page 25 SIDE STRETCHES Open your arms to the side and lift them until they are over your head. Reach your right arm as far toward the ceiling as you can for one count. Repeat this action with your left arm. QUADRICEPS STRETCH With one hand against a wall for balance, reach behind you and pull your right foot up.
- Page 26 TOE TOUCHES Slowly bend forward from your waist, letting your back and shoulders relax as you stretch toward your toes. Reach as far as you can and hold for 15 counts. HAMSTRING STRETCHES Extend your right leg. Rest the sole of your left foot against your right inner thigh.
-
Page 27: Implied Warranty
• Non-compliance of the operating instructions Wear parts and expendable parts are also not covered. The device is only intended for home use. The warranty does not apply to commercial use of any kind. Manufactured by: Gymstick International Oy Ratavartijankatu 11 15170 Lahti, FINLAND...
Need help?
Do you have a question about the IC 3.0 and is the answer not in the manual?
Questions and answers