Table of Contents
Advertisement
Advertisement
Table of Contents

Subscribe to Our Youtube Channel
Related Manuals for Covert Scouting Cameras WC30-V


Summary of Contents for Covert Scouting Cameras WC30-V
- Page 1 WC30‐V Covert Scouting Camera Instruction Manual ...
-
Page 2: Table Of Contents
Table of Contents Quick Start Guide ................................... 3 What You Will Need to Set Up Your Camera ........................ 4 Installing the Batteries ............................... 4 Installing the SD Card ................................. 4 Camera Button Control Diagram ............................ 4 Button and Switch Functions .............................. 5 Understanding Main Screen Information .......................... 5 SET UP SCREENS.................................. 6 Set Clock.................................... 6 Mode .................................... 6 Image Size ................................... 6 Capture Number ................................. 6 Image Format .................................. 6 Video Size.................................... 6 Video Length .................................. 6 Camera Name .................................. 6 Trigger Switch .................................. 6 Interval .................................... 6 Work Period .................................. 7 Time Lapse .................................. 7 Night Image .................................. 7 Sensor Level .................................. 7 Password ..................................... 7 Overwrite ... - Page 3 Congratulations on your purchase of the WC30‐A/WC30‐V Covert Scouting Camera! We truly value your business and will continue to provide you top quality customer service should you ever need help with any of our products. Check out our other products on ourwebsite at: www.covertscoutingcameras.com We hope you enjoy hassle free performance from this quality product for years to come. Technical Support Customer Service www.feradyne.com/contact Toll Free: (270) 743‐1515 COVERT SCOUTING CAMERAS 1451 Bowling Green Rd. Russellville, KY 42276 Downloading the Mobile App Search “Covert Wireless” in your Google Play Store or Apple App Store. Accessing the Web Portal: Open your web browser to: www.covert‐wireless.com Accessing the Billing Site: Open your web browser to: https://secure.covert‐wireless.com 2 ...
-
Page 4: Quick Start Guide
Quick Start Guide 1. Install a minimum of 6AA batteries, up to a 32GB SD card, and your provided SIM card. 2. Turn the camera to SETUP 3. Click the Menu (M) button, and go to the last page of the menu that shows a QR code 4. Scan the QR code with your smart phone camera 5. This will take you to https://secure.covert‐wireless.com a. Either Log In to your account, or create an account b. Once logged in, you will see your camera information populated in the proper fields 6. Select which plan you would like to add the camera to. Please see the included Quick Start Guide for more information. To manually enter camera information 1. Open you web browser to https://secure.covert‐wireless.com 2. Select the type of plan you would like to add 3. Enter the IMEI for your Covert WC30 found on the inside of the front case of the camera on a white label and on the outer package. 4. Enter the ICCID found on your provided SIM card. 5. Follow the prompts to select your rate plan, enter your personal/billing information and complete your purchase. ... -
Page 5: What You Will Need To Set Up Your Camera
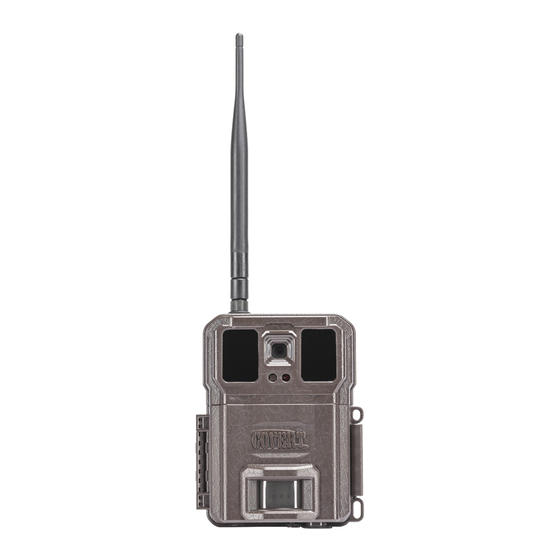
What You Will Need to Set Up Your Camera Installing the Batteries Your WC30 can function short term on 6AA batteries. To function on 6 batteries, one full side of the battery case must have all 6 batteries installed, either the front or back of the case. Improved battery life on 8AA, but we suggest you use 12AA batteries to get the most out of your camera’s battery life. To remove the battery tray, open the front case of the camera and press the button in the bottom right corner, and the battery case will pop out the bottom of the camera. Install batteries by sliding the top battery into the sleeve, then depressing the spring with the other battery and snapping down in place. Pay attention to the (+) of (‐) molded into each sleeve to determine if you insert the positive or negative end into the sleeve first. The negative battery terminal (the flat end) always contacts the spring. Installing the SD Card Now that you have activated your plan, you will need to install an SD card in the right side of the camera. We recommend a Covert SD card. Other SD cards may work, but also use an encryption that may not be compatible with your camera. See below for card orientation. Push the card in until it clicks and release. To remove, repeat that process, the card will pop out enough to remove. You can use any SD card up to 32 GB. Camera Button Control Diagram SIM Card Slot Viewing Screen SD Card Battery Tray Eject 4 ... -
Page 6: Button And Switch Functions
Button and Switch Functions On/Off Three Position Switch OFF Position – The unit will remain OFF as long as the switch is in this position. SETUP Position – When in the setup position, you will be able to view the home screen, view images stored on the SD card, and change the camera settings. You will need to have the switch in this position to setup your camera for use. If you leave the unit idle for too long in this position, the screen will go blank, switch the unit off and back to setup to re‐access the main screen. ON Position – When the switch is in this position, the camera will be ON and functioning in the settings that you have chosen. Button Functions Arrow Keys – You will use these keys to navigate the menu screen, as well as take test images. o Test Image – To take a test image, simply press either the left or right arrow. o Test Video – To access the video screen press either the up or down arrow. Once there, press either the left or right arrow to start the test video, and the press them again to end it. OK Button –You will use this button to select your settings and view images/videos stored on your SD card. o To View – When at the main screen, click OK, and you will be taken to the images and videos stored on your SD card. o To Delete – When you are viewing an image/video that you would like to delete, click OK, and follow the prompts. Menu (M) Button – Press the menu (M) button to access the settings for your camera. To go back to the main screen, press (M) again. Understanding Main Screen Information Megapixel Cellular Service Setting Camera/Video SD Card Storage Mode ... -
Page 7: Set Up Screens
SET UP SCREENS Set Clock On this screen you will set up date and time for your unit. Select set, then change the date and time using the arrow keys.Once you have the current date and time set, click OK, and it will take you back to the menu screen. Mode On this screen you will find three camera modes, Photo, Video, Dual. Select your desired mode using the arrow keys. When your desired camera mode is highlighted, click OK, and the mode will be set. In Photo mode – the camera will only take images. In Video mode – the camera will only take video. In Dual mode – the camera will take both images and videos. Screens you will see in each mode In Photo Mode: Image Size, Capture Number, Camera Name, Interval, Work Period, Time Scan, Night Image, Sensor Level, Password, Image Recycle, Wireless, Transmit Frequency, Language, Format, and Default. In Video Mode: Video Size, Video Length, Camera Name, Interval, Work Period, Time Scan, Sensor Level, Password, Image Recycle, Video Sound, Wireless, Transmit Frequency, Language, Format, and Default. In Dual Mode: All Screens in their listed order. Image Size Here you will be able to select your desired megapixel rating. You have three options for megapixel rating 5, 16, and 30. Use the arrow keys to select your desired setting and press OK. Capture Number On this screen you are able to select the number of burst photos you would like to be taken each time the camera is triggered. You can select 1‐9 photos per trigger. Use the arrow keys to scroll through the list, and when your desired burst setting is selected, click OK. Image Format Two options here 4:3 and 16:9 – this is just the image aspect ratio – how large the image is. We recommend 16:9. Video Size Options here are 360, 720p, 1080p. Your camera will transmit either 360 or 720p HD video. If 1080p is selected, your camera will record HD videos and store them on the SD card Video Length You can set between :05‐:60 videos. Your camera will transmit :05 video clips. Camera Name You can set up to a 10‐character name for your camera. Trigger Switch When turned on, the camera sensor will function as normal. When turned off, the camera will not trigger when something moves in front of it. This allows you to remotely turn off the sensor if you have a leaf or branch triggering your camera. Interval ... -
Page 8: Work Period
Work Period Allows you to set multiple work periods (A/B) for your camera. When off the camera will function all the time. When ON, the camera will only function during the designated time periods. Time Lapse Set the work period and interval of your time scan. Set your work period to when you want your camera to function. Set your interval to how often you would like your camera to take an image. Interval options are: 1 min.‐ 59 min., 1 hour – 6 hours. Night Image On the night image screen, you will have three options to choose from Short Range, Fast, and Long Range. Short Range: The camera will dim the brightness of the LED’s when a picture is taken so the reflection off of the subject is not overly bright. Long Range: The camera will increase the brightness of the LED’s when a picture is taken so you can clearly see the subject of the image from a distance. Fast Mode: This mode will optimize the camera for when the subject of the image is moving at a quick pace. When in the mode, the camera will adjust the shutter speed to minimize motion blur. Sensor Level Adjust the sensitivity of your PIR sensor. Four options: Low, Normal, High, Auto. Low: The camera will only trigger from major movements Normal: The camera will trigger at a normal rate. High: The camera will take pictures whenever movement is detected. Auto: The camera will dynamically change the sensitivity based on the temperature around the unit. In cold temperatures, the unit will increase the sensitivity to optimize captures. In warm temperatures, the camera will decrease sensitivity to decrease the number of false triggers. As the temperature around the camera changes, warms up throughout the day, your sensitivity will change as well. Auto is our recommended setting. Password The password screen allows you to set a pin code to be able to change the settings of your camera. To set the password, select ON, then change the four‐digit PIN to a unique password that you will use to open the camera. Once the password is set, each time you go to the camera, you will be prompted to enter the PIN before opening the menu. If you forget your password, please contact Covert Scouting Cameras at support@dlccovert.com, call 270‐743‐1515 or use our online chat option to request an RA #. We require warranty registration to verify your camera. This must be completed within 10 days after your purchase. Proof of purchase will be required. 7 ... -
Page 9: Overwrite
Overwrite When overwrite is ON, the camera will delete the oldest pictures on the SD card when the SD card has reached its maximum storage capacity. Images that are recycled from the SD card that have already been transmitted to the app, will not be deleted from the app. If there are images you would like to keep that are sitting on your SD card, you will need to pull the SD card, and download them to your computer before they are recycled. Once an image is recycled from the SD card, they cannot be recovered. Wireless When you reach this screen, select ON to allow the camera to transmit images wirelessly. In the Covert Wireless App, you will also be able to turn off the transmission of images. This is useful if you have a branch or weeds that are continually triggering an image capture. Turn off the wireless transmission until you can go cut or trim what is causing your camera to take and send images. This is to help prevent the area around your camera from chewing up battery life or wasting your images. Send Mode Here you will find the ability to set when you would like your photos to be transmitted to the Covert Wireless App. When immediately is selected, when a photo is taken it will immediately be sent to the app. If daily or weekly is selected, your images from that day or week will all be transmitted at the same time to the app. Your daily or weekly transmission will be during the systems daily check in to the camera, usually around 2 AM central time. Format Formatting your SD card clears everything off the card. (It will delete any pictures that are stored on the card!) We recommend formatting your SD card every time before using your camera. Even if you have a new SD card, you should always format the card before you use it in the camera. Default This will return the camera to its factory default settings. Tricks and Tips on Field Setup For best results, mount the camera approximately three (3) feet off the ground facing straight forward, as level as possible. Be sure to adjust for uneven terrain. To enhance the flash, we recommend positioning the camera in an area with a backdrop to reflect the maximum amount of light. For instance, place the camera 20‐30’ from a field edge facing the woods. For inside of timber, positioning the camera facing a thicket approximately 20‐30’ away. Clear brush away from the front of the camera to avoid false triggers. Face the camera down a game trail, rather than directly at it, to cover more of the animal’s path. Try to set the camera up facing North or South to avoid overexposure from the sun in the morning or the ... -
Page 10: Covert Scouting Cameras Warranty
Covert Scouting Cameras Warranty Covert Scouting Cameras warranties this product for a period of two (2) years from the date of purchase. This warranty only covers manufacturer’s defects and does not cover damage caused by misuse or abuse of the product. This warranty includes two (2) years repair or replacement service on the product from date of purchase. If you have problems with this product, please do not contact the store you purchased it from. Contact Covert Scouting Cameras Customer Service toll free at (207) 743‐1515 or visitwww.feradyne.com/contact ** Proof of purchase required for replacement ** Covert Warranty Policy and Procedure To receive repair or replacement by Covert Scouting Cameras two‐year warranty, we ask you to do the following: All returns must have a Return Authorization (RA#) prior to sending in the camera. 1. E‐mail or call our customer service department. a. www.feradyne.com/contact b. (270)743‐1515 Please explain to the technician what issues you are having with your camera. 2. If you are asked to return your camera to Covert Scouting Cameras, you will be responsible for the cost of shipping to Covert Scouting Cameras. In return, Covert will provide fast and exceptional service, as well as incur the cost of shipping back to you. (Only within the Continental United States.) 3. Please include the following information when sending in your camera. a. RA# on the outside of the package b. Return address c. Telephone and e‐mail address d. Brief description of the problem e. Copy of proof of purchase 4. Please make sure all the accessories are removed (SD cards, batteries, solar panels, SIM cards, straps, ETC.) before shipping. All accessories received by Covert Scouting Cameras will NOT be returned. 5. This warranty only covers manufacturer’s defects and does not cover damage caused by misuse or abuse of the product. Covert International Warranty Policy and Procedure 1. - Page 11 d. An item that has been modified or integrated with other products when the effect of such modification or integration increases the time or difficulty of servicing the product or degrades performance or reliability. e. To perform user maintenance or cleaning or to repair damage, malfunction. Damage, malfunction, or degradation of performance resulting from use of the product in an environment not meeting the operation specifications set forth in the user manual. g. Damage, malfunction, or degradation of performance resulting from failure to properly prepare and transport the product as prescribed in published product materials. h. Any failure to register the product warranty within 10 days of purchase. To replace items that have been refilled, are used up, abused, misused, or tampered with in any way. To install replacement items that are not considered customer replaceable. k. To support software not supplied by Covert. To provide software or firmware updates or upgrades. Any service identified in the above list and provided by Covert at the customer’s request shall be invoiced to the customer, at Covert’s then current rates for parts, labor, and shipping. THE ABOVE WARRANTIES ARE GIVEN BY COVERT WITH RESPECT TO THIS PRODUCT AND ITS RELATED ITEMS IN LIEU OF ANY OTHER WARRANTIES, EXPRESS OR IMPLIED. COVERT AND ITS VENDORS DISCLAIM ANY IMPLIED WARRANTIES OF MERCHANTABILITY OR FITNESS FOR A PARTICULAR PURPOSE OR ANY SIMILAR STANDARD IMPOSED BY APPLICABLE LEGISLATION. COVERT’S RESPONSIBILITY TO REPAIR OR REPLACE, FOR DEFECTIVE PRODUCTS AND RELATED ITEMS IS SOLE AND EXCLUSIVE REMEDY PROVIDED TO THE CUSTOMER FOR BREACH OF THESE WARRANTIES. Some states, provinces, and countries do not allow the exclusion or limitation of incidental or consequential damages or exclusions or limitation on the duration of implied warranties or conditions, so the above limitations or exclusions may not apply to you. This warranty gives you specific legal rights, and you may have other rights that vary by state, province or country. TO THE EXTENT ALLOWED BY LOCAL LAW, EXCEPT FOR THE OBLIGATIONS SPECIFICALLY SET FORTH IN THIS WARRANTY STATEMENT, IN NO EVENT SHALL COVERT AND ITS VENDORS BE LIABLE FOR ANY INDIRECT, SPECIAL, INCIDENTAL, OR CONSEQUENTAIL DAMAGES (INCLUDING LOSS OF PROFITS) WHETHER BASED ON CONTRACT, TORT, OR ANY OTHER LEGAL THEORY AND IRRESPECTIVE OF WHETHER COVERT OR THE VENDOR HAS ADVANCE NOTICE OF THE POSSIBILITY OF SUCH DAMAGES. ...
- Page 12 Caution: This device complies with Part 15 of the FCC rules and Industry Canada license‐exempt RSS standard(s). Operation is subject to the following two conditions: (1) this device may not cause harmful interference, and (2) this device must accept any interference received, including interference that may cause undesired operation. The manufacturer is not responsible for any radio or TV interference caused by unauthorized modifications ...
Need help?
Do you have a question about the WC30-V and is the answer not in the manual?
Questions and answers