Table of Contents
Advertisement
Quick Links
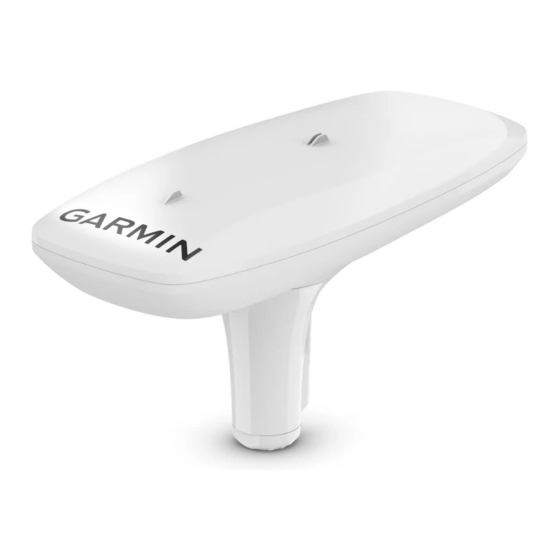
MSC 10 MARINE SATELLITE COMPASS
Important Safety Information
To avoid possible personal injury, always wear safety goggles, ear protection, and a dust mask when drilling,
cutting, or sanding.
When drilling or cutting, always check what is on the opposite side of the surface to avoid damaging the vessel.
For the best performance and to avoid damage to your boat, read all installation instructions before
proceeding. Install the device according to these instructions. Use the appropriate fasteners, tools, and mounts
listed, which are available at most marine dealers.
The MSC 10 satellite compass provides heading information to your existing NMEA 2000
does not have a NMEA 2000 network, you must install one. For more information, go to
/nmea_2000.
Tools Needed
• Drill
3
• 19 mm (
/
in.) drill bit for a pole-mount cable-hole
4
3
• 5 mm (
/
in.) drill bit for surface-mount screw holes
16
• 25 mm (1 in. ) hole saw for a surface-mount cable-hole
• #2 Phillips screwdriver
3
• 35 mm (1
/
in.) wrench
8
• Marine sealant
• Torque wrench
9
• 7 mm (
/
) socket for torque wrench
32
• Additional NMEA 2000 network components as needed
April 2021
INSTALLATION INSTRUCTIONS
CAUTION
NOTICE
GUID-C15E42C9-BE5D-467E-80CA-4DB7F6A31142 v2
network. If your boat
®
garmin.com/manuals
Advertisement
Table of Contents

Summary of Contents for Garmin MSC 10
- Page 1 Install the device according to these instructions. Use the appropriate fasteners, tools, and mounts listed, which are available at most marine dealers. The MSC 10 satellite compass provides heading information to your existing NMEA 2000 network. If your boat ®...
- Page 2 NOTE: The compass may lose heading information when operating below a bridge, under a slip, or near tall structures. To retain heading information in these situations, the MSC 10 can be configured to use an internal magnetic compass as a backup to the GPS compass (recommended). To enable this backup, you can calibrate...
- Page 3 If you plan to use the internal magnetic compass as a backup (recommended), consider these guidelines when selecting the mounting location: • The compass should not be mounted near known ferrous metal objects such as a toolbox or another compass. •...
- Page 4 Surface Mounting the Compass Before you mount the compass, you must review the mounting location considerations and select a mounting location. NOTE: The supplied M4 x .07 x 45 threaded rods can be used on mounting thicknesses of 5 to 30 mm ( in.) (recommended).
- Page 5 Mounting the Compass with the Cable Routed Outside the Pole 1 If necessary, position the stainless steel pole in the selected location. 2 Route the cable through the pole-mount adapter, and place the cable in the vertical slot along the base of the pole-mount adapter.
- Page 6 Mounting the Compass with the Cable Routed Through the Pole 1 If necessary, attach the stainless steel pole to the boat: 1.1 Position the pole in the selected location, and mark the approximate center of the pole. 1.2 Drill a hole using a 19 mm ( in.) drill bit for the cable to pass through.
- Page 7 (Performing Menu-Based Calibration, page • If there is not a Garmin chartplotter connected to the NMEA 2000 network, or if you are connected to a third- party display device, you must use the basic calibration procedure...
- Page 8 Performing Menu-Based Calibration 1 Select Settings > Communications > NMEA 2000 Setup > Device List. 2 Select the MSC 10 from the device list. 3 Select Review > Compass Cal. > Begin. 4 Follow the on-screen instructions until the compass calibration is complete.
- Page 9 Performing Basic Calibration If you connect the compass to a NMEA 2000 network without a compatible Garmin chartplotter or with a third- party display device, you must perform basic calibration instead of menu-based calibration. Before you can perform basic calibration, you must be able to view heading data from the NMEA 2000 network on a connected device.
-
Page 10: Compass Settings
1 Clean the outer casing of the device using a cloth dampened with a mild detergent solution. 2 Wipe the device dry. Appendix Software Update You must update the Garmin chartplotter software when you install this device. For instructions on updating the software, see your chartplotter owner's manual at support.garmin.com. -
Page 11: Specifications
180 mA @ 12 Vdc NMEA 2000 LEN @ 9 Vdc Typical NMEA 2000 draw Max. NMEA 2000 draw 2.5W The device withstands incidental exposure to water of up to 1 m for up to 30 min. For more information, go to www.garmin.com/waterrating. -
Page 12: Declaration Of Conformity
ISO address claimed 126208 Request group function Declaration of Conformity Hereby, Garmin declares that this product is in compliance with the Directive 2014/53/EU. The full text of the EU declaration of conformity is available at the following internet address: http://www.garmin.com /compliance. -
Page 13: Limited Warranty
© 2021 Garmin Ltd. or its subsidiaries Garmin and the Garmin logo are trademarks of Garmin Ltd. or its subsidiaries, registered in the USA and other countries. These trademarks may not be used without the ® express permission of Garmin. - Page 14 © 2021 Garmin Ltd. or its subsidiaries support.garmin.com...


Need help?
Do you have a question about the MSC 10 and is the answer not in the manual?
Questions and answers