Advertisement
Advertisement
Table of Contents

Related Manuals for Swann SWWHD-INTSOL


Summary of Contents for Swann SWWHD-INTSOL
- Page 1 ENGLISH Solar Panel For Swann Smart Security Camera INSTRUCTION MANUAL...
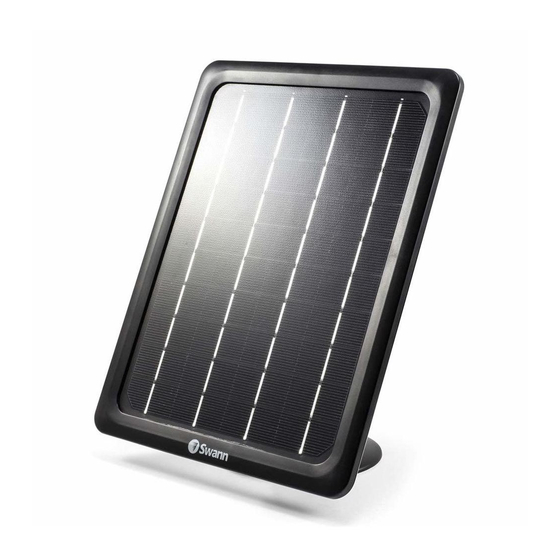
- Page 2 Easily adjust the solar panel angle to maximize sunlight exposure Solar port Locking nut Secures the swivel head mount assembly USB charging cable For connecting the solar panel to Replacement your Swann Smart Security camera camera port cover With USB connector cutout...
- Page 3 Before you begin • The solar panel requires full, direct sunlight to charge your camera. Grey skies, rainy days, and other inclement weather conditions may hinder the ability of the solar panel to generate power. • For best results, the solar panel should be tilted towards the sun. The optimum angle varies throughout the year, depending on the seasons and your location.
- Page 4 Installing the Solar Panel Attach the mounting bracket to a solid surface with the supplied screws. Make sure to allow enough charging cable to reach your camera from the mounting location of the solar panel. If mounting to a wooden surface, screw the mounting bracket directly to the surface. If mounting to a masonry surface (bricks, concrete, or stucco), drill three holes using a 8mm(1/8”) drill bit and insert the supplied wall plugs into holes.
- Page 5 Installing the Solar Panel Attach the solar panel to the mounting bracket. Align the solar panel with the threaded screw on the swivel head mount, and then screw in the solar panel until it is secured tightly.
- Page 6 Installing the Solar Panel The solar panel produces power only when it is exposed to sunlight. To generate the most power and achieve best charging performance, tilt the solar panel towards the sun, away from cover and shade. PEAK HOURS Performance is directly related to the ~10AM-3PM amount and strength of sunlight received...
- Page 7 Installing the Solar Panel Connect the solar panel to your camera. First, pull out the port cover on your camera and replace with the supplied port cover which has a USB connector cutout (a spare port cover is included). Ensure the port cover is sealed properly;...
- Page 8 Need Help? Visit us at support.swann.com for more information. You can register your product for dedicated customer support, download guides, ask questions & share ideas in our support community, and more. Product Registration Product Guides Customer Support Support Community This marking indicates that this product should not be disposed with other household wastes throughout the EU.
Need help?
Do you have a question about the SWWHD-INTSOL and is the answer not in the manual?
Questions and answers