Table of Contents
Advertisement
Advertisement
Table of Contents

Subscribe to Our Youtube Channel
Related Manuals for Baumatic MEGAWDSS


Summary of Contents for Baumatic MEGAWDSS
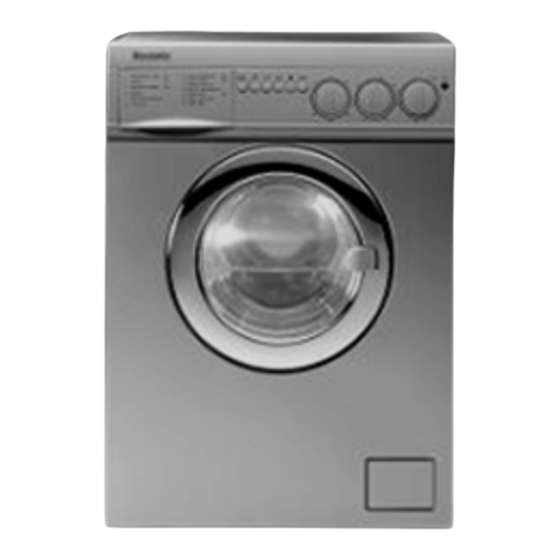
- Page 1 MEGAWDSS 60 cm Stainless steel washer dryer...
-
Page 2: Washer-Dryer
Washing Machine for the first time. It also contains valuable Troubleshooting tips so that you can solve faults without having to call for a service engineer. Instruction Manual for your Baumatic MEGAWDSS 60cm Stainless Steel... -
Page 3: Table Of Contents
CONTENTS Specifications ……….…………….……………………..………………. 3 Important Safety Information……….…..………..…..…………………..4 Your Washing Machine’s Control Panel & Features ..……..……...5-7 Cautions and Advice ………….…………..……...…………………..…8-9 Using your MEGAWD washer dryer……….….……..……………...….10 Before Loading your Washing Machine ………….…………..….……11 Tips for Loading Laundry / Guide to Washing Labels ..………..…..12 Filling your Washing Machine’s Dispenser Drawer with Detergent …………………………………..……………13-14 Tips on Washing your Clothes / Running your Washing Machine... -
Page 4: Specifications
3 washing programmes Wash load : 5 kg Maximum spin speed : 1200 rpm A – Glass door B – Filter C – Adjustable feet D – Top cover E – Drum F – Control Panel 2) Half load 3) Spin Speed select (500 or 1200 rpm) 4) Rinse Hold 5) Extra Rinse 6) On / Off... -
Page 5: Important Safety Information
IMPORTANT SAFETY INFORMATION WARNING: THIS IS IMPORTANT SAFETY INFORMATION. PLEASE READ THIS BEFORE USING YOUR WASHING MACHINE. DO NOT USE AN EXTENSION CORD OR PLUG INTO A MULTIPLE SOCKET. DO NOT INSERT A PLUG WITH A DAMAGED CORD OR THAT IS BROKEN INTO THE SOCKET. -
Page 6: Your Washing Machine's Control Panel & Features
Your MEGAWDSS’s Control Panel Key to above figure: A – Table of Programmes (see page 16-17 for details on use) B - Buttons (see page 6-7 for details on use) G – Thermostat knob D – Drying timer knob P – Programmer knob... -
Page 7: On/Off Button
* NOTE: SEE PAGE 18 FOR DETAILS ON THE PROGRAMMER KNOB ON / OFF BUTTON Press this to start/stop the machine. RINSE HOLD Press this to allow your washer dryer to stop automatically at the end of the last rinse cycle without draining water. - Page 8 EXTRA RINSE BUTTON Your MEGAWD has been designed to reduce water consumption to a minimum. 3 rinse cycles are normally sufficient. For very soft water zones or those who are allergic to detergent residues, pressing this button will carry out an extra rinse. 500 / 1200 RPM Push the button to vary the speed of the spin-dryer from...
-
Page 9: Cautions And Advice
Cautions and advice about using your washer dryer In order to get maximum satisfaction and performance from your washer dryer, please ensure you follow the instructions given below: Select the clothes load correctly and choose the appropriate programme. Before opening the door, check that there is no water in the machine and the pilot light is off. - Page 10 After each wash, leave the door ajar to prevent the rubber seal from becoming misshapen or mouldy. When the clothes to be washed are heavily soiled or splattered with mud, it is advisable to run a programme with pre-wash. Unless doing half load washing, always put the...
-
Page 11: The First Time
Using your MEGAWDSS CAUTION: (*VERY IMPORTANT*) – You must ensure that the transportation bolts have been removed before you attempt to use your Washer Dryer, OTHERWISE you will damage or destroy your appliance. See page 32 for instructions. Only once you are sure this has been done (with the... -
Page 12: Before Loading Your Washing Machine
Before Loading your Washing Machine NOTE: Before putting the clothes into the machine: o Separate the clothes into 3 lots (cotton, synthetics and wool). Within each group, separate the coloureds from the whites. *NOTE – see next page for tips. Once the clothes have been separated, you can put them into the drum of the washing machine, separately and according to colour and group,... -
Page 13: Tips For Loading Laundry / Guide To Washing Labels
Tips for loading your laundry: Never wash your white coloured clothes together. Since your coloured clothes may shed dye on the first wash, wash them separately. HOW TO READ THE SYMBOLS ON YOUR CLOTHES LABELS Be careful that no metal plastic or metal pieces are in hooks of curtains... -
Page 14: Filling Your Washing Machine's Dispenser Drawer With Detergent
Filling your Washing Machine’s Dispenser Drawer with Detergent The dispenser drawer consists of three compartments: Pre-wash / Bio-wash Compartment This compartment should be used only when programmes involving pre-wash or bio- wash have been selected. The amount of power used will depend on the fabric type to be washed. - Page 15 HOW MUCH DETERGENT SHOULD I USE? NOTE: You will need more detergent for washing cycles containing dirtier clothes. For very dirty clothes, select a programme with pre- washing, fill compartment 1 with ¼ of the amount of the detergent you are putting in compartment 2.
-
Page 16: Tips On Washing Your Clothes / Running Your Washing Machine
Tips on washing your clothes. Dirtiness Sort the clothes according to dirtiness. Give special treatment to those which are very dirty or have got difficult stains. Treat very dirty areas like collars and cuffs before washing. Wash clothes that are only slightly dirty in short programmes. -
Page 17: Washing Programmes
Washing Programmes NOTE: You select the washing programme using the programme knob and any of the option buttons. Please see the following tables to understand which programme is suitable for your wash load. -
Page 19: Starting A Washing Programme
Starting a Washing Programme The Programmer Knob 2. Then, set the washing temperature that you’d like to use using the temperature knob (shown on page 7). Ensure that you have pressed any options buttons to fine tune your washing preference. See pages 6-7 for a description of these options functions. -
Page 20: Interrupting A Programme
Once you have selected the programme (using the knob shown on previous page) & the temperatures you need for your wash, etc., press this button to start your washing cycle. Note: • The button will be depressed on the console. •... -
Page 21: At The End Of A Wash Programme
At the end of a Wash Programme Provided the programme completes without interruptions, you can open the loading door 2 minutes after it has completed. Take out your clothes. If you have just washed a full load, take out half of the laundry from the drum. YOUR DRYER The drying section of the washer-dryer operates like any other by blowing heated air onto... -
Page 22: Using Your Dryer
TO USE THE DRYER: CAUTION: Before using the dryer, please read the following notes. Do not attempt to dry items treated with solvents or petroleum based products. Such substances are volatile and may cause an explosion. Before using the dryer, remove any plastic detergent containers. - Page 23 Set the programmer knob to the STOP point (just before ‘7’ on the dial) for a drying cycle using high heat. For a heat drying cycle, set the knob to the STOP point between ‘11’ and ‘12’ on the dial. NOTE YOUR MACHINE WILL NOT PERFORM A DRYING CYCLE IF THE WOOL...
-
Page 24: Continuous Wash-Dry Cycle
CONTINUOUS WASH-DRY CYCLE This feature of your appliance allows a drying cycle to follow on from a washing cycle without your having to go anywhere near your washer-dryer! NOTE: You will need to set your washer-dryer to perform this function if you do not want it to wash and stop and then have to dry separately. -
Page 25: Cleaning Inlet Valve Filter
MAINTENANCE AND CLEANING: Please note: Disconnect the power supply before attempting maintenance or cleaning your washing machine. Cleaning the outlet filter If you are using the drying feature on your appliance, you will need to clean its filter out after every 3-4 washes. If you have been drying clothes that will leave a lot of fluff or lint, you will then need to clean this filter out after each such cycle. - Page 26 DETERGENT DRAWER Detergents may form sediment in your detergent drawer or in the housing of the detergent drawer over time… • To clean the sediment, pull out the detergent drawer from time to time and wash it out. To pull out the detergent drawer your drawer has the word ‘PUSH’...
-
Page 27: Cleaning The Drum
Cleaning the Cabinet Clean the exterior surface of your machine with lukewarm water and a cleaning substance that will not harm or scratch the cabinet. After rinsing with clean water, wipe it with a soft and dry cloth. PLEASE NOTE: If your washing machine is installed in a location where the ambient temperature can fall below 0 the following (once before you know your machine will be unused for a long time). -
Page 28: Notes On Stains And How To Remove Them From Your Clothes
NOTES ON STAINS AND HOW TO REMOVE THEM FROM YOUR CLOTHES... -
Page 30: Troubleshooting
TROUBLESHOOTING – dryer have a problem, checking the problem against this chart may keep you from needing to call for service! PROBLEM Your Machine doesn’t Work Your Machine isn’t taking in Water Your Machine is vibrating PROBABLE CAUSE It is unplugged Your fuse is defective. - Page 31 PROBLEM Your Washing Machine is vibrating Excessive foam in the Detergent Drawer Washing is still dirty PROBABLE CAUSE You haven’t put enough clothes in the drum You have put too many clothes in the drum Your machine is resting against a rigid object, You’ve put in too much detergent.
-
Page 32: What You Can Do
PROBLEM The Water drains from your Washing Machine as soon as it has filled. No water seen in the drum during the washing cycle. Detergent residue shows up on clothes Grey stains show up on the clothes The Spinning Cycle is not done or starts only after a delay The Loading Door will... -
Page 33: Installation Instructions
REMOVING THE TRANSPORTATION SCREWS: * PLEASE NOTE THAT FAILURE TO REMOVE THE TRANSPORTATION SCREWS WILL RESULT IN YOUR GUARANTEE BECOMING VOID! * THE TRANSPORTATION SCREWS, WHICH CAN BE FOUND AT THE REAR OF YOUR WASHER-DRYER, MUST BE TAKEN OFF BEFORE YOU CAN USE YOUR MACHINE. THEY ARE THERE ONLY TO STABILISE YOUR APPLIANCE DURING TRANSIT. - Page 34 INSTALLING YOUR MEGAWDSS Washer / Dryer Before installing, it is very important that you familiarise yourself with your Washing Machine’s dimensions. Please see the illustration below for details: Your Washer Dryer requires the space shown here: 595mm 530mm 850mm...
-
Page 35: Adjusting The Feet
*REMINDER: WARNING! (PLEASE NOTE) Baumatic Ltd are not responsible for any damages arising out of usage following failure to earth (ground) your appliance. CONNECTING TO THE WATER MAINS •... - Page 36 • To prevent leakage from the connection joints, a seal (for machines with cold water inlet only) or seals (for machines with hot & cold water inlets) are included in the hose packing. Fit these seals at the end of the water inlet hoses on the tap side.
-
Page 37: Environmental Note
Environmental note o The packaging materials that Baumatic uses are environmentally friendly and can be recycled. o Please discard all packaging material with due regard for the environment. -
Page 38: Conditions Of Guarantee
Baumatic appliance. * In addition, your appliance is covered by a 5 year parts warranty. Baumatic Ltd will provide free of charge the parts required to repair the appliance, only if they are fitted by a Baumatic engineer, for any defect that arises due to faulty materials or workmanship within a period of 5 years from the original purchase date. -
Page 39: Contact Details
Headquarters Baumatic Ltd. Baumatic Buildings, 6 Bennet Road, Reading, Berkshire RG2 0QX, United Kingdom Sales Telephone +44 118 933 6900 Sales Fax +44 118 931 0035 Service Telephone +44 118 933 6911 Service Fax +44 118 986 9124 Spares Telephone...
Need help?
Do you have a question about the MEGAWDSS and is the answer not in the manual?
Questions and answers