Advertisement
Quick Links
Advertisement

Subscribe to Our Youtube Channel
Related Manuals for Retrospec Beaumont REV


Summary of Contents for Retrospec Beaumont REV
- Page 1 Beaumont USER’S MANUAL • 36V/350W...
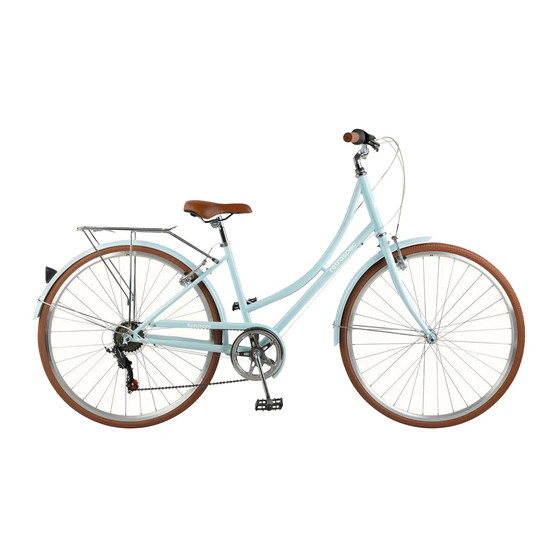
- Page 2 User’s Manual Electric Bike List of E-Bike Component Names Congratulations on your purchase of this Retrospec electric bike. It has been carefully designed and manufactured to the latest international quality standards. Please read this instruction manual carefully and thoroughly before riding. It contains important information on safety, and maintenance.
- Page 3 User’s Manual Electric Bike Section I - Mechanical Components Operation, Maintenance, & Safety 3. Safe Cycling and Safety Tips Contents: 3.1 Pre-Ride Check Points 1. Conditions for Riding This Electric bicycle Before you ride your pedal electric assistance bicycle always make sure it is in a safe 2.
- Page 4 User’s Manual Electric Bike 4. Routine Maintenance Check and Lubrication E-Fork L-The Electrical Parts L-The Electrical parts Dealer adjustment only You can refer to the manual for You can refer to the manual for WARNING! As with all mechanical components, your bicycle is subjected to electrical parts electrical parts wear and stress.
- Page 5 User’s Manual Electric Bike Step 2: Front Wheel & Front Fender Installation Step 3: Seat Assembly (Refer to Fig. 10) 2.1 Installing the Front Wheel 2.1 - Assembling the Saddle onto the Seatpost: 1. Remove the plastic dropout protector from the metal shipping axle. (Fig. 6) 1.
- Page 6 Step 4: Handlebar & Handlebar Stem Assembly (Refer to Figs. 12 & 13) Step 5: Installing Pedals (Refer to Fig. 14) The pedals are marked with either a “R”(Right) or “L” (Left) on the threaded end of the pedal axle. Threadless: Quill: Screw the pedal marked by”...
- Page 7 User’s Manual Electric Bike Step 6: Brake Adjustments Once the correct amount of travel has been reached, centre the brake Caliper on the The brakes on your bicycle should be correctly adjusted from the factory. However, as disc by adjusting screw C (Fig. 17). When the brake pads are centered on the disc the cables do seat and stretch.
- Page 8 User’s Manual Electric Bike Step 7: Derailleur Gears Maintenance and Adjustment The gears/derailleur(s) on your bicycle should be correctly adjusted from the factory. Small Front Sprocket Large Front Sprocket However, as cables do seat and stretch. It is important to check the function of your (Front Derailleur) Chain Guard shifting after your first ride.
- Page 9 3. Battery Installation & Usage. 12. Main Technical Specification Sheet Retrospec Beaumont Rev 36V/350W & 48V/500W E-bikes have the battery positioned within the rear carrier (the battery pack is directly connected to the controller box in 1. Important Safety Precautions the front of the carrier (Fig.
- Page 10 User’s Manual Electric Bike 4.2 Handlebar-mounted Battery Power Display Panel: NOTE: Battery Lock (Fig. 3) Turn on the power. Four LED lights indicating the power levels will be displayed from low (bottom) to high (top) power levels. When all 4 LED Power Level lights are lit, this indicates a full, 100% battery charge.
- Page 11 • • If the bike is ridden infrequently, or stored long term, it must be Retrospec e-bikes have the Controller (the e-bike “brain”), positioned at the bottom Fig. 6 fully charged every 2-3 months. and inside the battery pack holder/housing. The Controller is a critical component for your e-bike system.
- Page 12 User’s Manual Electric Bike 10. Maintaining the Throttle Lever Take care to protect the throttle from impact or damage. If your bikes falls or you are in a crash, make sure to check the throttle function before riding. Periodically check that the throttle cable is securely plugged-in to the throttle body. If not, check and plug it in again.
- Page 13 User’s Manual Electric Bike 12. Main Technical Specification Sheet Please find model name of your bike below: Model Remark (for reference) BEAUMONT REV 36V/350W Here is some of the general technical data for this electric bike: Maximum Speed with Electric Assistance: 25km/h ±10% Distance per Full Charge: 36V: 40~50k (total loading ≤75kgs...
Need help?
Do you have a question about the Beaumont REV and is the answer not in the manual?
Questions and answers