Advertisement
Quick Links
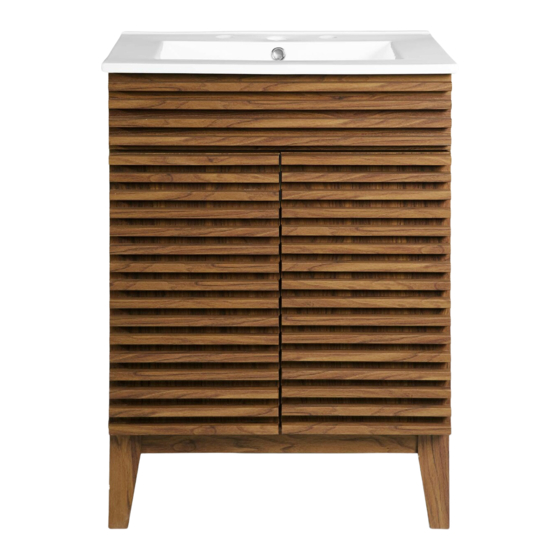
EEI-3860
Cabinet
Thank you for purchasing the MODWAY
Before you start, here are some helpful advice:
1.We suggest you spend a short time reading through this leaflet and then follow the simple step-by-step
instructions.
2.Owing to the size and weight of the
padded area, in the room that it is intended for. Approximate assembly time: 60 minutes.
3.Please do not use any tools other than those provided or recommended in these instructions.
4.Please do not throw away any of the packaging or instructions until you have checked all the components and
hardware and the furniture are fully assembled.
5.Assemble all components loosely until advised to tighten. Depending on use, it may be necessary to tighten the
components from time to time, so please save the tools that have been provided.
6.Please keep all pieces out of reach of children.
Hardware :
A)
B)
Cambolt/Metal
Ø 6 x 35 mm
Ø 15 mm
x18
F)
G)
Hinge/Metal
86 x 52 x 11 mm
x 4
K)
L)
Bracket/Metal
x 4
67 x 67 mm
Customer Service 908-368-1025︱
CABINET!
Cabinet,
we recommend that it is assembled by two adults, on a carpeted or
C)
Camlock Big/Metal
x20
Ø 8 x 30 mm
H)
Cambolt/Metal
Ø 6 x 32 mm
M 7 x 50 mm
x 2
M)
Foam Pad/Spons
25 x 25 x 2 mm
x 4
Screwdriver (Not Include)
www.modway.com
D)
Dowel Big/Wood
Screw/Metal
x 26
4.5 x 12.5 mm
I)
Screw/Metal
Key/Metal
x 6
L 4
x 1
E)
Shelf Support/Metal
x 40
x 4
J)
Buffer/Rubber
Ø 8 mm
x 2
x 1
Page 1 of 10
Advertisement

Related Manuals for modway EEI-3860


Summary of Contents for modway EEI-3860
- Page 1 EEI-3860 Cabinet CABINET! Thank you for purchasing the MODWAY Before you start, here are some helpful advice: 1.We suggest you spend a short time reading through this leaflet and then follow the simple step-by-step instructions. 2.Owing to the size and weight of the...
- Page 2 EEI-3860 Cabinet Components: Adjustable Shelf Panel x1 Right Side Panel Bottom Panel Left Side Panel Middle Back Rail Top Back Rail Shelf Back Panel Front Panel Left Wooden Door Middle Front Rail Front&Back Leg Apron x2 Leg Apron Side Rail x2 Right Wooden Door Customer Service 908-368-1025︱...
- Page 3 EEI-3860 Cabinet STEP 1: Consist of 2 components. 1.1- Lay flat both of the Components #9, Properly insert and slowly screw in the Cambolt (A) to the lower portion of the pre-drilled holes at both ends of the Leg Apron.
- Page 4 EEI-3860 Cabinet STEP 3: Pre-insert Dowel (C), Cambolt (G), & Screw (D) Carefully insert all hardwares as mentioned in the list to the respective components as shown. Hardware required. Screwdriver not included STEP 4: Pre-insert Dowel (C), Cambolt (A), & Screw (D) Carefully insert all hardwares as mentioned in the list to the respective components as shown.
- Page 5 EEI-3860 Cabinet STEP 5: Securing Middle Back Rail (8), Top Back Rail (7), & Middle Front Rail (11) to the Left Side Panel (2) Carefully insert the Camlock (B) to secure all Rails to the Left Side Panel (2). Hardware required. Screwdriver not included STEP 6: Securing Middle Back Rail (8), Top Back Rail (7), &...
- Page 6 EEI-3860 Cabinet STEP 7: Securing the Bottom Panel (1) 7.1- Due to unstable structure, carefully place the assembly from STEP 6 with flat edges (without dowel edges) facing down onto flat surface. 7.2- Carefully align the Bottom Panel (1) pre-drilled holes to the pre-assembled Dowel on both of the Side Panels (Left &...
- Page 7 EEI-3860 Cabinet STEP 9: Securing the Leg Apron completed in (Step2) to the main cabinet structure. Carefully place the Leg Apron assembly to the cabinet structure and tighten the Camlock (B) to secure both structures. Hardware required. Screwdriver not included...
- Page 8 EEI-3860 Cabinet STEP 11: Securing the Corner Bracket (K) 11.1- Place the Corner Bracket (K ) at the protruded Screw (D) on both Side Panel (2&3 ) and Top Back Rail (7). Continue to place it on another 3 corners.
- Page 9 EEI-3860 Cabinet STEP 13: Securing the door hinges (F) 13.1- Lay both door on flat surface. 13.2- Place the Hinge (F) on each of the pre-cut cup. ( 2 cups on each door). 13.3- Secure each Hinge (F) with 2 nos of Screws(D).
- Page 10 EEI-3860 Cabinet STEP 15: Securing the Vanity Cabinet (Professional Installer Required) DETAIL HOLE FOR WALL FIXING NOTE : Hammer, fisher and screw not included 15.1- Using spirit / water levelling tool, adjust the Cabinet level by adjusting the leg leveler.
Need help?
Do you have a question about the EEI-3860 and is the answer not in the manual?
Questions and answers