
Related Manuals for Optimus MI Series

Summary of Contents for Optimus MI Series
- Page 1 SISTEMA INALÁMBRICO WIRELESS SYSTEM SERIE MI MI SERIES Manual de instalación y funcionamiento v1.2 Installation and operating instructions v1.2...
-
Page 2: Table Of Contents
Serie MI Sistema inalámbrico INDICE INSTRUCCIONES DE SEGURIDAD ................2 CARACTERÍSTICAS ..................... 2 RECEPTOR DIVERSITY DE UN CANAL MI-RD1CU16 UHF PLL ....... 3 RECEPTOR DIVERSITY DE DOS CANALES MI-RD2CU16 UHF PLL ......5 ... -
Page 3: Instrucciones De Seguridad
Serie MI Sistema inalámbrico 1. INSTRUCCIONES DE SEGURIDAD Antes de conectar la alimentación, compruebe que la alimentación requerida por el equipo es la misma que la alimentación suministrada por su red eléctrica. No deje el equipo en lugares húmedos o de alta temperatura. ... -
Page 4: Receptor Diversity De Un Canal Mi-Rd1Cu16 Uhf Pll
Serie MI Sistema inalámbrico 3. RECEPTOR DIVERSITY DE UN CANAL MI-RD1CU16 UHF PLL 1- POWER: I significa “ON” y O significa “OFF”. SET: Se utiliza para configurar los parámetros. Mantenga el botón presionado durante 2 segundos para entrar en el modo de configuración. Pulse “SET” varias veces para buscar el parámetro que necesite configurar. - Page 5 Serie MI Sistema inalámbrico 20- Jack de 6,3 mm: Salida de audio no balanceada. 21- XLR macho: Salida de audio balanceada. 22- Conector de alimentación CC: Alimentación de 12~15 Vcc / 300 mA. Fuera del modo de configuración, la pantalla LCD muestra lo siguiente: 23- AF: Intensidad de la señal de audio AF.
-
Page 6: Receptor Diversity De Dos Canales Mi-Rd2Cu16 Uhf Pll
Serie MI Sistema inalámbrico 4. RECEPTOR DIVERSITY DE DOS CANALES MI-RD2CU16 UHF PLL 1- POWER: I significa “ON” y O significa “OFF”. SET: Se utiliza para configurar los parámetros. Pulse durante 2 segundos para entrar en el modo de configuración. Pulse “SET” varias veces para buscar el parámetro que necesite configurar. - Page 7 Serie MI Sistema inalámbrico 34- Conector XLR macho (RX1): Salida de audio balanceada RX1. 35- Conector XLR macho (RX2): Salida de audio balanceada RX2. 36- Mixing: permite mezclar las señales de audio no balanceadas RX1 y RX2 en RX1 (Jack). 37- Jack de 6.3 mm (RX1): Salida de audio no balanceada RX1 o MIX.
-
Page 8: Microfono De Mano Mi-Mmu16 Uhf Pll
Serie MI Sistema inalámbrico 5. MICROFONO DE MANO MI-MMU16 UHF PLL 54- Power: Pulse para encender el equipo. Con el equipo encendido, pulse y mantenga durante 2 segundos para apagarlo. 55- Mute: Mientras el micrófono esté encendido, suba el interruptor para hablar y bájelo para silenciar. -
Page 9: Transmisor De Petaca Mi-Tpu16 Uhf Pll
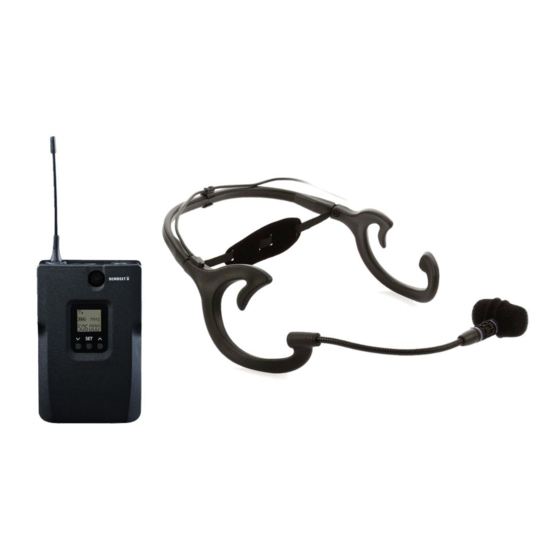
Serie MI Sistema inalámbrico 6. TRANSMISOR DE PETACA MI-TPU16 UHF PLL 70- Mute/Power: Pulse una vez para encender la unidad. Mientras la unidad esté encendida pulse una vez para silenciar y nuevamente para hablar. Pulse 2 segundos para apagar la unidad. -
Page 10: Accessorios (Incluidos En Mi-Rd1Cu16 Y Mi-R2Cu16)
Serie MI Sistema inalámbrico 7. ACCESSORIOS (incluidos en MI-RD1CU16 y MI-R2CU16) 80- Adaptador de corriente Vca / Vcc Entrada Vca: 100~240 V / 50~60 Hz Salida Vcc: 12 V / 0,5 A 81- Cable de salida AF (Jack/Jack de Ø 6,3 mm). 8. -
Page 11: Microfono De Aeròbic Cm-804I
Serie MI Sistema inalámbrico 10. MICROFONO DE AERÒBIC CM-804i 90- Jirafa. 91- Cinta de ajuste. 92- Patilla ajustable. 93- Ajuste de cable. 94- Pinza. 95- Paravientos. 11. CARGADOR DE BATERÍAS MI-CH2 1- Zócalo de conexión para MI-TPU16. 2- Zócalo de conexión para MI-MMU16. 3- Indicadores LED: ... -
Page 12: Conexión
Serie MI Sistema inalámbrico 12. CONEXIÓN Como conectar el receptor: 1- Conectar la salida de audio del receptor al mezclador o amplificador. MI-RD1CU16: Tanto la salida XLR como la salida desbalanceada Jack de 6,3 mm pueden usarse para conectar la salida AF a un mezclador o amplificador. ... -
Page 13: Instalación (Mi-Tpu16 Y Mi-Mmu16)
Serie MI Sistema inalámbrico 13. INSTALACIÓN (MI-TPU16 Y MI-MMU16) MI-MMU16: En el micrófono de mano el botón Mute también activa el encendido. Eso es la causa por la que la unidad se enciende tan pronto como se reemplazan las pilas. Por lo tanto, si no desea encender el equipo después de cambiar las pilas, mantenga el interruptor de Mute hacia abajo. -
Page 14: Instrucciones De Uso
Serie MI Sistema inalámbrico 14. INSTRUCCIONES DE USO 14.1 COMO USAR EL MI-RD1CU16 AJUSTE DE PARÁMETROS Pulse y mantenga “SET” para entrar en el modo ajuste. Pulse ▲/▼ para seleccionar RX (receptor) o TX (transmisor). CUANDO RX ESTÁ SELECCIONADO: Pulse SET para moverse por los menús y ▲/▼ para cambiar los parámetros. Tras cualquier cambio el equipo volverá... - Page 15 Serie MI Sistema inalámbrico SCAN: Escaneo de canales Función desactivada. SC oFF Función activada. El Sistema escanea los canales para ver SC oN si están ocupados y, en caso afirmativo, los descarta para evitar interferencias. Nota: Esta función sólo funciona en modo Preset. La función está...
- Page 16 Serie MI Sistema inalámbrico GAIN: Sensibilidad de entrada GAIN: +15 dB GAIN: +12 dB GAIN: +9 dB GAIN: +6 dB GAIN: +3 dB Sensibilidad GAIN: 0 dB normal GAIN: -3 dB Muestra la sensibilidad del micrófono GAIN: -6 dB ajustada a 0 dB (valor por defecto).
-
Page 17: Como Usar El Mi-Rd2Cu16
Serie MI Sistema inalámbrico 14.2 COMO USAR EL MI-RD2CU16 AJUSTE DE PARAMETROS Pulse y mantenga “SET” para entrar en el modo ajuste. Pulse ▲/▼ para seleccionar RX (receptor) o TX (transmisor). CUANDO RX ESTÁ SELECCIONADO: Pulse SET para moverse por los menús y ▲/▼ para cambiar los parámetros. Tras cualquier cambio el equipo volverá... - Page 18 Serie MI Sistema inalámbrico SCAN: Escaneo de canales Función desactivada. SC oFF Función activada. El Sistema escanea los canales para ver SC on si están ocupados y, en caso afirmativo, los descarta para evitar interferencias. Nota: Esta función solo funciona en modo Preset. La función está...
- Page 19 Serie MI Sistema inalámbrico GAIN: Sensibilidad de entrada GAIN: +15 dB GAIN: +12 dB GAIN: +9 dB GAIN: +6 dB GAIN: +3 dB Sensibilidad GAIN: 0 dB normal GAIN: -3 dB Muestra la sensibilidad del micrófono ajustada a 0 dB (valor por defecto). GAIN: -6 dB GAIN: -9 dB GAIN: -12 dB...
-
Page 20: Emparejamiento Remoset U
Serie MI Sistema inalámbrico 14.3 EMPAREJAMIENTO REMOSET U Una vez configurados los parámetros, presione el botón "REMOSET U" y se enviarán al transmisor/micrófono a través del emisor ultrasónico. El indicador del receptor parpadeará rápidamente durante la transmisión de datos, mientras que en la pantalla del transmisor se mostrará... -
Page 21: Como Usar Mi-Mmu16 Y Mi-Tpu16
Serie MI Sistema inalámbrico 14.4 COMO USAR MI-MMU16 y MI-TPU16 AJUSTE DE PARÁMETROS Pulse y mantenga “SET” para entrar en el modo ajuste. Pulse SET para moverse por los menús y ▲/▼ para cambiar los parámetros. FREQ: Ajuste de frecuencia Seleccione la frecuencia con 1 MHz ▲/▼... - Page 22 Serie MI Sistema inalámbrico SENITIVITY (GAIN): Sensibilidad de entrada GAIN: +15 dB GAIN: +12 dB GAIN: +9 dB GAIN: +6 dB GAIN: +3 dB Sensibilidad GAIN: 0 dB GAIN: -3 dB Muestra que la sensibilidad está ajustada a 0 dB (valor por defecto). GAIN: -6 dB GAIN: -9 dB GAIN: -12 dB...
-
Page 23: Cómo Conseguir La Máxima Ganancia
Serie MI Sistema inalámbrico 14.5 CÓMO CONSEGUIR LA MÁXIMA GANANCIA Para conseguir la máxima ganancia debe configurar los parámetros del receptor según se indica: Modo RX: ATT (OFF) Modo TX: ATT (OFF), GAIN* (15), RC (rC-ALL) Volumen: 0 dB Una vez ajustados, sincronice los parámetros con el transmisor. Tenga en cuenta que con el micrófono de solapa CM-501 es difícil conseguir nivel de audio suficiente como para funcionar a nivel de línea, por lo tanto es recomendable conectarlo a una entrada de micrófono. -
Page 24: Especificaciones Técnicas
Serie MI Sistema inalámbrico 16. ESPECIFICACIONES TÉCNICAS 16.1 KITS Modelo. COMPONENTES MI-MAU16 MI-TPU16 + CM-804i MI-MDU16 MI-TPU16 + CX-504 MI-MSU16 MI-TPU16 + CM-501 16.2 RECEPTORES MI-RD2CU16 Modelo MI-RD1CU16 Modo de Oscilación Phase-locket loop (PLL) Rango de frecuencia 470 ~ 960 MHz Ajuste remoto Por ultrasonidos Diversity... -
Page 25: Transmisores
Serie MI Sistema inalámbrico 16.3 TRANSMISORES Modelo MI-MMU16 Modo de oscilación Phase-locket loop (PLL) Rango de frecuencia 470 ~ 960 MHz Ajuste remoto Por ultrasonidos Potencia RF 10 mW / 50 mW Estabilidad RF < ±10 kHz @ Fc Modulación de cambio de frecuencia ±... -
Page 26: Micrófono De Solapa
Serie MI Sistema inalámbrico 16.4 MICRÓFONO DE SOLAPA Modelo CM-501 Conector 4-pin mini XLR Respuesta en frecuencia 100 Hz ~ 15 kHz Patrón polar Cardiode Sensibilidad a 1 kHz -60 ±3 dB Impedancia 2k2 Ω MAX SPL para 1% THD 130 dB Dimensiones (mm) Ø10,1 (Ancho) x 26,4 (Alto) -
Page 27: Listado De Frecuencias
Serie MI Sistema inalámbrico 16.8 LISTADO DE FRECUENCIAS FRECUENCIAS (MHz)* Grupo 1 Grupo 2 Grupo 3 Grupo 4 Grupo 5 Grupo 6 Grupo 7 Grupo 8 823,150 863,100 823,475 823,175 823,300 823,350 823,975 823,425 824,200 863,475 824,600 824,275 824,800 823,825 824,475 824,400 825,675... -
Page 28: Certificado De Garantía
éstas hayan sido ejecutadas debidamente o no. 3. TRANSFERENCIA DE LA GARANTÍA OPTIMUS S.A. tampoco asumirá costes en el marco de la garantía por este tipo La garantía se concede únicamente para el comprador original (cliente principal) y de modificaciones. - Page 29 HEADSET MICROPHONE ................25 16.6 EART-HOOK MICROPHONE ................25 16.7 BATTERY CHARGER ..................25 16.8 FREQUENCY LIST ................... 26 GUARANTEE CERTIFICATE ..................27 Page 1 of 27 MI SERIES Version 1.2...
- Page 30 There are in total 80 channels to choose from. 2 MHz bandwidth. REMOSET U ultrasonic pairing for synchronized setting of all parameters. Channel scan. Adjustable receiving sensitivity. Digital volume control. Automatic microphone power off. Page 2 of 27 MI SERIES Version 1.2...
- Page 31 The effective range is 30º on both sides with the optimized distance at 30 19- Female BNC antenna port: the 50 Ω BNC antenna is connected here. It also provides a booster power of 12~15 V DC / 100 mA for an external antenna booster. Page 3 of 27 MI SERIES Version 1.2...
- Page 32 24- RF: RF signal strength. 25- A B: Antenna A/B. 26- Transmitter battery level. 27- Group / Channel. 28- VOL: Volume level. 29- Lock Button. 30- MUTE: Receiver mute. 31- ATT.ON: Output attenuation. 32- Frequency. Page 4 of 27 MI SERIES Version 1.2...
- Page 33 The effective range is 30º on both sides with the optimized distance at 30 33- Female BNC antenna port: the 50 Ω BNC antenna is connected here. It also provides a booster power of 12~15 V DC / 100 mA for an external antenna booster. Page 5 of 27 MI SERIES Version 1.2...
- Page 34 40- AF: AF audio signal strength. 41- RF: RF signal strength. 42- A B: Antenna A/B. 43- Transmitter battery level. 44- Group / Channel. 45- MUTE: Receiver mute. 46- ATT.ON: Output attenuation. 47- Frequency. Page 6 of 27 MI SERIES Version 1.2...
- Page 35 62- PUSH and hold the “LOCK” button for 2 seconds to lock the buttons. Push and hold again for 2 seconds to unlock. 63- Charging contact: If rechargeable batteries are used, this microphone can be recharged with an optional charger. Page 7 of 27 MI SERIES Version 1.2...
- Page 36 77- ▲/▼: these are used with “SET” to change the parameter settings. 78- Battery holder: It holds AA 1.5 V battery or rechargeable battery x 2. 79- Charging contact: if rechargeable batteries are used, this transmitter can be recharged with an optional charger. Page 8 of 27 MI SERIES Version 1.2...
- Page 37 81- AF output cable (with Ø 6.3 plug at both ends). 8. CM-501 LAVALIERE MICROPHONE 82- Clip. 83- 4 Pin Mini XLR. 84- Windscreen. 9. CX-504 HEADSET MICROPHONE 85- Gooseneck. 87- Headband. 89- Windscreen. Page 9 of 27 MI SERIES Version 1.2...
- Page 38 This device has two slots with two sockets in each one. Only one socket of each slot can be used at a time. Charging time is 5 hours (2000 mA rechargeable battery). Page 10 of 27 MI SERIES Version 1.2...
- Page 39 Set the parameters: Turn the power on and set the parameters of receiver according to the setting instructions. Caution! Secure the power cable on the fastening hook of anti-pulling clip in order to prevent it from falling. Page 11 of 27 MI SERIES Version 1.2...
- Page 40 4- According to the type of microphone, insert the 4-pin mini XLR in MIC IN to complete the installation (Fig. 4). 5- Push the Power button to turn the unit on (Fig. 5). 6- Set the transmitter parameters according to the instructions. Page 12 of 27 MI SERIES Version 1.2...
- Page 41 GROUP / CHANNEL: Group / Channel setting Select default group 1~8 G: Group Select default channel, 1~15 CH: Channel max. (Default 1-1) Select the group when “G” is flashing. Select the channel when “CH” is flashing. Page 13 of 27 MI SERIES Version 1.2...
- Page 42 20 dB attenuation at audio input (depending on whether At on the transmitter is provided with the corresponding function). (Default OFF) This function is activated with 20 dB of audio input attenuation Page 14 of 27 MI SERIES Version 1.2...
- Page 43 In non-setting mode, adjust the volume from 0 to -31 dB using the ▲/▼ buttons. The minimum volume is -31 dB. The maximum volume is 0 dB. The default volume setting is -10 dB. Page 15 of 27 MI SERIES Version 1.2...
- Page 44 GROUP / CHANNEL: Group / Channel setting Select default group 1~8 G: Group Select default channel, 1~15 CH: Channel max. (Default 1-1, 1-8) Select the group when “G” is flashing. Select the channel when “CH” is flashing. Page 16 of 27 MI SERIES Version 1.2...
- Page 45 ATT: Microphone audio input attenuation At oFF No attenuation at audio input. 20 dB attenuation at audio At on input. (Default OFF) This function is deactivated. Page 17 of 27 MI SERIES Version 1.2...
- Page 46 The transmitter’s battery level is also shown on the LCD display. If the battery level is ≤ 2 V, the frame around the battery level will flash and the backlight turns into red as a warning (for MI- RD1CU16 and MI-RD2CU16). Page 18 of 27 MI SERIES Version 1.2...
- Page 47 If the signal is not received for a certain period of time, the indicator will flash slowly to inform pairing failure (the slowly flashing indicator can be reset by pushing any button). Note: the optimum pairing distance is 30 cm, ±30º. Page 19 of 27 MI SERIES Version 1.2...
- Page 48 ATT: Microphone audio input attenuation (only MI-TPU16) Att oFF No attenuation at audio input. 20 dB attenuation at audio Att on input. (Default OFF) This shows the audio input attenuation at 20 dB. Page 20 of 27 MI SERIES Version 1.2...
- Page 49 10 minute countdown to turn off. 30 minute countdown to turn off. (The default setting is 10 minute) LOC: Key Lock (only MI-TPU16) Loc On Lock ON. Loc OFF Lock OFF. (Default OFF) Page 21 of 27 MI SERIES Version 1.2...
- Page 50 For the best power performance, it is recommended to change both batteries and use products of the same manufacturer when they have to be changed. Page 22 of 27 MI SERIES Version 1.2...
- Page 51 Power Source 100 ~ 240 Vac 12 Vdc 0.5 A Jack 6.35 mm / Jack 6.35 mm 1.5 m cable Included accessories 2 x Antena Frequency label Not included accessories RM-1RU (rack mounting brackets, 1 or 2 receivers) Page 23 of 27 MI SERIES Version 1.2...
- Page 52 AA alkaline battery or rechargeable battery x 2 Battery operating time 13~14 h (alkaline batteries) Charging Dimensions 62 mm (W) x 97 mm (H) x 20 mm (L) Weight 75 g (without batteries) Page 24 of 27 MI SERIES Version 1.2...
- Page 53 LED indicator Charging, flash green Fault, flash red Charging Time 5 hours Dimensions (mm) 165 (W) x 70.95 (H) x 99.6 (D) Weight 335 g Included accessories 4 x Rechargeable AA batteries Page 25 of 27 MI SERIES Version 1.2...
- Page 54 863.600 864.125 864.525 864.400 864.850 864.875 864.900 * Note: Please contact your national frequency authority to get information on the available legal frequencies for your area and legal use of the equipment. Page 26 of 27 MI SERIES Version 1.2...
- Page 55 In the event that the guarantee 1. OPTIMUS S.A. guarantees that its products are free from material and rights do not apply, OPTIMUS S.A. shall duly inform the client. If, within a manufacturing defects when they are first delivered to the purchaser.
Need help?
Do you have a question about the MI Series and is the answer not in the manual?
Questions and answers