Table of Contents
Advertisement
Quick Links
Advertisement
Table of Contents

Related Manuals for ARAG Bravo 3 Series


Summary of Contents for ARAG Bravo 3 Series
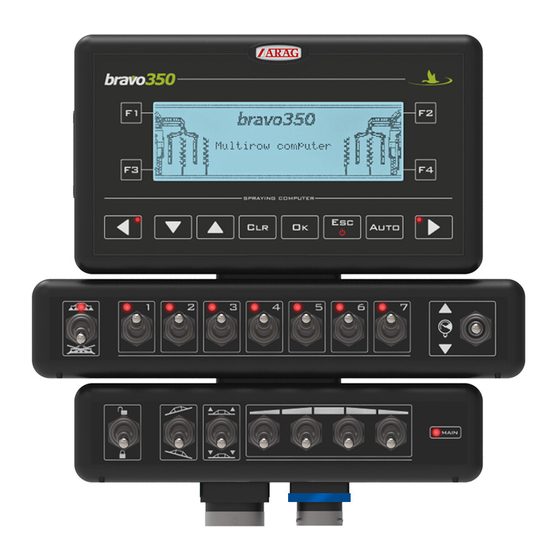
- Page 1 BRAVO 3XX SOFTWARE 60 VERSION ADDITION TO INSTRUCTION BOOKLET CODE D20033.GB...
- Page 2 This manual is an integral part of the device to which it refers and must always accompany it, even in case of sale or transfer. Keep it for future reference; ARAG reserves the right to modify the spe - cifications and instructions regarding the product at any time and without prior notice.
-
Page 3: Table Of Contents
Contents INTRODUCTION ....... . 4 New functions ........4 SETTING THE FUNCTIONS . -
Page 4: Introduction
English INTRODUCTION This introduction booklet explains the different functions of the 60 software compared to the 54 software. The main changes in the software affect operation when the BRAVO 3XX computer is set as a multi-row sprayer or orchard sprayer. New functions The main changes are: •... -
Page 5: Setting The Functions
English SETTING THE FUNCTIONS Setting the minimum and maximum nozzle pressure alarms 1) Keep pressed until you access menu 1.0 2) Press to select menu 4.0 (see following illustration) MENU 4.0 3) Press to select the nozzle whose pressure alarms require setting 4) Keep pressed until you access the menu for setting the alarms relative... -
Page 6: Incorrect Operating Pressure Signal
English 5) Press to access modification of the minimum pressure level, below which an alarm will be triggered (visual and acoustic) 6) Press to access modification of the maximum pressure level, above which an alarm will be triggered (visual and acoustic) 7) Press to return to menu 4.0... -
Page 7: Setting The Minimum Speed Of Adjustment
English Setting the minimum speed of adjustment 1) Keep all the buttons pressed together in order to access advanced user programming 2) Press to set code 76 3) Press to confirm the code MENU 191.0 1) Press to set the value for the minimum speed, below which automatic adjustment will be blocked... -
Page 8: Setting The Minimum Speed For The Automatic Closure Of The Main Valve
English Setting the minimum speed for the automatic closure of the main valve 1) Keep all the buttons pressed together in order to access advanced user programming 2) Press to set code 76 3) Press to confirm the code MENU 191.0 1) Press to set the value for the minimum speed (km/h or mph), below which... - Page 9 English 1) Press to select menu 192.1 MENU 192.1 1) Press to set the delay (in sec) for the closure of the main valve: after the speed has dropped below the minimum value set in menu 191.0, the computer will close the main valve after the delay, set previously, is over.
-
Page 10: Calibration Of 0 For The Pressure Transducer
English Calibration of 0 for the pressure transducer 1) Keep pressed until you access the calibration menu for the calibrated returns (see following illustration) 2) Press to access the 0 calibration menu for the pressure transducer (see following illustration) ATTENTION: If the computer has not been programmed to manage calibrated returns, the... -
Page 11: Resetting The Liquid Present In The Tank
English Resetting the liquid present in the tank 1) Keep pressed until you access the menu for filling the tank (see following illustration) 2) Press to access setting for the liquid present in the tank 3) Press both buttons together in order to reset the value for the remaining liquid shown by the computer... -
Page 12: Display Of The "Field 0" Counters
English Display of the "FIELD 0" counters 1) Keep pressed until you access the menu for selection of the field (see following illustration) 2) Press to select "FIELD 0" 3) Press to display the meter totals in succession: • Distance travelled •... -
Page 13: Pump Failure Signal
English Example 2: The display here aside indicates that a distance of 15 km or miles has been travelled Pump failure signal Should pump failure be detected, these symbols will be displayed and an acoustic alarm signal will be heard... -
Page 14: Multirow Sprayer Programme Functions
English MULTIROW SPRAYER PROGRAMME FUNCTIONS Main differences compared to the version for the spraying machine This software enables 5 different operating widths to be stored, in order to minimise the time required to carry out settings when treating plots of land with different widths between rows. This function has resulted in the modification or addition of new menus or procedures: •... -
Page 15: Programming Of The Flow Rate For The Sectors
English Programming of the flow rate for the sectors 1) Keep pressed until you access menu 1.0 2) Press the buttons to select menu 5.0 (see following illustration) MENU 5.0 1) Press to select which of the 5 configurations requires modification 2) Press to select the sector whose flow rate requires setting... -
Page 16: Selection Of The Flow Rate Of The Sectors
English Selection of the flow rate of the sectors 1) Keep pressed until you access menu 1.0 2) Press the buttons to select menu 5.0 (see following illustration) MENU 5.0 3) Press to select which of the 5 configurations is to be used 4) Press to confirm selection... -
Page 17: Setting The Operating Widths
English Setting the operating widths 1) Keep pressed until you access menu 1.0 2) Press the buttons to select menu 6.0 (see following illustration) MENU 6.0 1) Press to access selection of the configuration to be modified 2) Press to select the number of the configuration to be modified 3) Press to confirm the... -
Page 18: Selection Of The Operating Width
English Selection of the operating width 1) Keep pressed until you access the menu for the selection of dosing (l/ha) and the operating width (see following illustration) 2) Press to set the dosing amount (l/ha) to be applied 3) Press to modify the operating width During data modification: A) Press to modify the data... -
Page 19: Setting The Operating Programmes
English Setting the operating programmes 1) Keep pressed until you access the menu for the selection of the operating programme (see following illustration) 2) Press to select the operating programme for configuration 3) Press to set the dosing (l/ha) that is to be associated with the operating programme selected... -
Page 20: Selection Of The Operating Programmes
English Selection of the operating programmes 1) Keep pressed until you access the menu for the selection of the operating programme (see following illustration) 2) Press to select one of the 12 operating programmes (previously set) 3) Press to confirm selection of the operating programme... -
Page 21: Orchard Sprayer Programme Functions
English ORCHARD SPRAYER PROGRAMME FUNCTIONS Main differences compared to the version for the spraying machine This software has been specially developed for orchard sprayers and optimised for machines with mul- ti-split sprayer booms, where it is difficult to calculate dosage correctly when some sections are closed and others are not. -
Page 22: Programming The Flow Rate Of The Sprayer Booms
English Programming the flow rate of the sprayer booms 1) Keep pressed until you access menu 1.0 2) Press to select menu 5.0 (see following illustration) MENU 5.0 1) Press to select which of the 5 configurations requires modification 2) Press to select the sprayer boom whose flow rate requires setting 3) Press to set the flow rate... -
Page 23: Selection Of The Flow Rate Of The Sprayer Booms
English Selection of the flow rate of the sprayer booms 1) Keep pressed until you access menu 1.0 2) Press the buttons to select menu 5.0 (see following illustration) MENU 5.0 3) Press to select which of the 5 configurations is to be used 4) Press to confirm selection... -
Page 24: Selection/Modification Of Row Distance
English Selection/modification of row distance 1) Keep pressed until you access the menu for selection of treatment (l/ha) and sector configuration (see following illustration) 2) Press to set the amount for dosage (l/ha) 3) Press to select the row distance to be used/modified 4) Press to access the modification of the... -
Page 25: Configuration Of Operating Programmes
English Configuration of operating programmes 1) Keep pressed until you access the menu for selection of the operating programme (see following illustration) 2) Press to select the operating programme for configuration 3) Press to set the amount for dosing (l/ha) to be associated with the operating programme selected... -
Page 26: Selection Of Operating Programmes
English Selection of operating programmes 1) Keep pressed until you access the menu for selection of the operating programme (see following illustration) 2) Press to select one of the 12 operating programmes (set previously) 3) Press to confirm selection of the operating programme Signalling of ambiguous section opening Should the number of open... - Page 28 Only use original ARAG accessories and spare parts, to maintain safety conditions foreseen by the constructor. Always refer to the ARAG spare parts catalogue. Via Palladio, 5/A 42048 RUBIERA (Reggio Emilia) ITALY Tel. 0522.622011 Fax 0522.628944 Home page: http://www.aragnet.com E-Mail: info@aragnet.com...
Need help?
Do you have a question about the Bravo 3 Series and is the answer not in the manual?
Questions and answers