Sony CDX-GT65UIW Operating Instructions Manual
Fm/am compact disc player
Hide thumbs
Also See for CDX-GT65UIW:
- User manual ,
- Specifications (5 pages) ,
- Installation/connections (2 pages)
Table of Contents
Advertisement
Available languages
Available languages
FM/AM
Compact Disc Player
Owner's Record
The model and serial numbers are located on the bottom of the unit.
Record the serial number in the space provided below.
Refer to these numbers whenever you call upon your Sony dealer regarding this product.
Model No. CDX-GT65UIW Serial No.
To cancel the demonstration (DEMO) display, see page 6.
Pour annuler l'affichage de démonstration (DEMO), reportez-vous à la página 6.
CDX-GT65UIW
©2011 Sony Corporation
4-294-067-11(1)
Operating Instructions
Manual de instrucciones
US
ES
Advertisement
Chapters
Table of Contents

Related Manuals for Sony CDX-GT65UIW


Summary of Contents for Sony CDX-GT65UIW
- Page 1 The model and serial numbers are located on the bottom of the unit. Record the serial number in the space provided below. Refer to these numbers whenever you call upon your Sony dealer regarding this product. Model No. CDX-GT65UIW Serial No.
- Page 2 (sold separately). Please see your nearest authorized Sony dealer for details on the satellite radio tuner module. Please refer to the manuals included in the satellite radio tuner module. Sirius or XM Subscription required.
- Page 3 Microsoft, Windows, Windows Vista and Windows Media and logos are trademarks or registered trademarks of Microsoft Corporation in the United States and/or other countries. This product contains technology subject to certain intellectual property rights of Microsoft. Use or distribution of this technology outside of this product is prohibited without the appropriate license(s) from Microsoft.
-
Page 4: Table Of Contents
Table of Contents Getting Started Playable discs on this unit ....6 Resetting the unit ......6 Canceling the DEMO mode . - Page 5 Auxiliary audio equipment ... . . 25 Support site If you have any questions or for the latest support information on this product, please visit the web site below: http://esupport.sony.com http://www.sony.com/mobileAV Provides information on: • Models and manufacturers of compatible digital audio players •...
-
Page 6: Getting Started
Getting Started Playable discs on this unit This unit can play CD-DA (also containing CD TEXT) and CD-R/CD-RW (MP3/WMA/AAC files (page 26)). Type of discs Label on the disc CD-DA Resetting the unit Before operating the unit for the first time, or after replacing the car battery or changing the connections, you must reset the unit. -
Page 7: Detaching The Front Panel
Detaching the front panel You can detach the front panel of this unit to prevent theft. Caution alarm If you turn the ignition switch to the OFF position without detaching the front panel, the caution alarm will sound for a few seconds. The alarm will only sound if the built-in amplifier is used. -
Page 8: Location Of Controls And Basic Operations
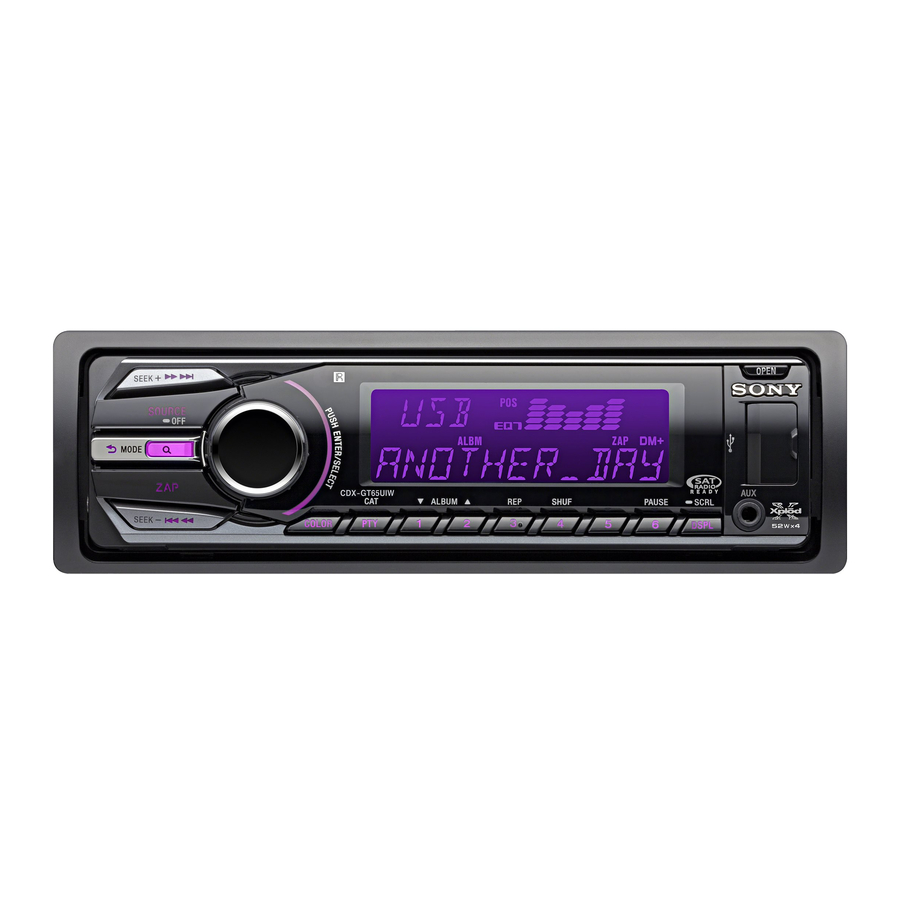
Location of controls and basic operations Main unit Front panel removed This section contains instructions on the location of controls and basic operations. For details, see the respective pages. A SEEK +/– buttons Radio: To tune in stations automatically (press); find a station manually (press and hold). -
Page 9: Number Buttons
E Receptor for the card remote commander F Display window G OPEN button page 7, 12 H USB connector page 13, 15, 16 To connect to the USB device. (BACK)/MODE button* Press to return to the previous display/select the radio band (FM/AM). Press and hold to enter/cancel the passenger control. -
Page 10: Rm-X151 Card Remote Commander
RM-X151 Card Remote Commander SOURCE – DSPL – Remove the insulation film before use (page 6). A OFF button To turn off the power; stop the source. B SOURCE button* To turn on the power; change the source (Radio/CD/USB/SensMe™* MODE C <... -
Page 11: Radio
Radio Storing and receiving stations Caution When tuning in stations while driving, use Best Tuning Memory (BTM) to prevent an accident. Storing automatically — BTM Press (SOURCE/OFF) repeatedly until “TUNER” appears. To change the band, press (MODE) repeatedly. You can select from FM1, FM2, FM3, AM1 or AM2. -
Page 12: Selecting Pty
Selecting PTY Press (PTY) during FM reception. The current program type name appears if the station is transmitting PTY data. Rotate the control dial until the desired program type appears, then press it. The unit starts to search for a station broadcasting the selected program type. -
Page 13: Usb Devices
USB devices For details on the compatibility of your USB device, visit the support site. Support site http://esupport.sony.com http://www.sony.com/mobileAV • MSC (Mass Storage Class) and MTP (Media Transfer Protocol) type USB devices compliant with the USB standard can be used. -
Page 14: Repeat And Shuffle Play
To return to normal play mode, select “ or “SHUF OFF. ” Enjoying music according to your mood — SensMe™ Sony’s unique “SensMe™ channels” features automatically group tracks by channel, and allow you to enjoy music intuitively. Before using the SensMe™... -
Page 15: Setup
Registering a USB device using “SensMe™ Setup” USB device registration is required to enable the SensMe™ function on the unit. If registration is not performed along with the installation procedure, follow the steps below. Start “SensMe™ Setup” on your computer. Connect a USB device to your computer. -
Page 16: Channel List
In these Operating Instructions, “iPod” is used as a general reference for the iPod functions on the iPod and iPhone, unless otherwise specified by the text or illustrations. Support site http://esupport.sony.com http://www.sony.com/mobileAV Playing back iPod Before connecting the iPod, turn down the volume of the unit. -
Page 17: And Artists
If an iPod is already connected, to start playback press (SOURCE/OFF) repeatedly until “USB” appears. (“IPOD” appears in the display when iPod is recognized.) * In the case of an iPod touch or iPhone being connected, or that the iPod was last played back using passenger control, the logo will not appear on the screen. -
Page 18: Operating An Ipod Directly - Passenger Control
Operating an iPod directly — Passenger control You can operate an iPod connected to the dock connector directly. During playback, press and hold (MODE). “MODE IPOD” appears and you will be able to operate the iPod directly. To change the display item Press (DSPL). -
Page 19: Searching By Alphabetical Order - Alphabet Search
To cancel Jump mode (BACK) or (SEEK) –. Press Note If no operation is performed for 7 seconds, the Jump mode is canceled. Searching by alphabetical order — Alphabet search When an iPod is connected to the unit, you can search for a desired item alphabetically. -
Page 20: Enjoying The Illumination Color Variation
Enjoying the illumination color variation Changing the color of display and buttons —Dynamic Color Illuminator Dynamic Color Illuminator allows you to change the color of the display and buttons on the main unit to match the car's interior. You can select from 12 preset colors, customized color and 5 preset patterns. -
Page 21: Advanced Color Setting
Advanced color setting SensMe™ Channels synchronization — SensMe™ Channels Color The color of the display and buttons on the main unit changes according to the SensMe™ channel. Press and hold the select button. The setup display appears. Rotate the control dial until “SENSME COLR”... -
Page 22: Sound Settings And Setup Menu
*2 When AUX source is activated (page 25). Enjoying sophisticated sound functions — Advanced Sound Engine Advanced Sound Engine, Sony’s new sound engine, creates an ideal in-car sound field with digital signal processing. Advanced Sound Engine contains the following features: EQ7, Listening Position, DM+ Advanced, Rear Bass Enhancer. -
Page 23: Customizing The Equalizer Curve - Eq7 Setting
Customizing the equalizer curve — EQ7 Setting “CUSTOM” of EQ7 allows you to make your own equalizer settings. Select a source, then press the select button. Rotate the control dial until “EQ7 SETTING” appears, then press it. Rotate the control dial until “BASE” appears, then press it. -
Page 24: Adjusting The Listening Position
Adjusting the listening position You can fine-tune the listening position setting. During reception/playback, press the select button. Rotate the control dial until “ADJUST POS” appears, then press it. Rotate the control dial to adjust the listening position, then press it. Adjustable range: “+3”... -
Page 25: Other Functions
SOUND SYNC Selects the color with sound synchronization: “ON,” “OFF.” WHITE MENU Sets the effect when the source is switched: “ON,” “OFF.” START WHITE Sets the start up color: “ON,” “OFF.” MOTION DSPL (Motion Display) – “SA”: to show moving patterns and spectrum analyzer. -
Page 26: Additional Information
Please note that the use of this accessory with iPod or iPhone may affect wireless performance. If you have any questions or problems concerning your unit that are not covered in this manual, consult your nearest Sony dealer. Folder (album) MP3/WMA/ AAC file... -
Page 27: Maintenance
If the fuse blows again after replacement, there may be an internal malfunction. In such a case, consult your nearest Sony dealer. Cleaning the connectors The unit may not function properly if the connectors between the unit and the front panel are not clean. In order to prevent this, detach the front panel (page 7) and clean the connectors with a cotton swab. -
Page 28: Removing The Unit
Removing the unit Remove the protection collar. 1 Detach the front panel (page 7). 2 Pinch both edges of the protection collar, then pull it out. Remove the unit. 1 Insert both release keys simultaneously until they click. 2 Pull the release keys to unseat the unit. 3 Slide the unit out of the mounting. -
Page 29: Troubleshooting
MB or more (For Windows Vista or later) • USB port Windows XP, Windows Vista, Windows 7 For details on compatible editions or Service Pack, visit the following support site: http://esupport.sony.com http://www.sony.com/mobileAV Monitor High color (16-bit) or more, 800 × 600 dots or more Other... - Page 30 The Auto Off function does not operate. The unit is turned on. The Auto Off function activates after turning off the unit. t Turn off the unit. Radio reception The stations cannot be received. The sound is hampered by noises. •...
-
Page 31: Error Displays/Messages
The character cannot be displayed with the unit. If these solutions do not help improve the situation, consult your nearest Sony dealer. If you take the unit to be repaired because of CD playback trouble, bring the disc that was used at the time the problem began. - Page 32 (se vende por separado). Si desea obtener más detalles sobre el módulo de sintonizador de radio por satélite, póngase en contacto con el distribuidor Sony autorizado más cercano. Consulte los manuales que se incluyen en el módulo de sintonizador de radio por satélite.
- Page 33 Microsoft, Windows, Windows Vista y Windows Media y los logotipos son marcas comerciales o marcas registradas de Microsoft Corporation en los Estados Unidos y/u otros países. Este producto contiene tecnología sujeta a ciertos derechos de propiedad intelectual de Microsoft. La utilización o distribución de esta tecnología fuera de este producto está...
- Page 34 Tabla de contenido Procedimientos iniciales Discos que se pueden reproducir en esta unidad ....... . 6 Restauración de la unidad .
-
Page 35: Sitio Web De Soporte Técnico En Línea
Sitio Web de soporte técnico en línea Para resolver cualquier duda u obtener la información más reciente sobre el soporte técnico de este producto, visite el siguiente sitio Web: http://esupport.sony.com http://www.sony.com/mobileAV Proporciona información acerca de: • Modelos y fabricantes de reproductores de audio digital compatibles •... -
Page 36: Procedimientos Iniciales
Procedimientos iniciales Discos que se pueden reproducir en esta unidad Esta unidad permite reproducir discos CD-DA (incluidos CD TEXT) y CD-R/CD-RW (archivos MP3/WMA/AAC (página 29)). Tipos de discos Etiqueta del disco CD-DA Restauración de la unidad Antes de utilizar la unidad por primera vez, o después de reemplazar la batería del automóvil o de cambiar las conexiones, debe restaurar la unidad. -
Page 37: Extracción Del Panel Frontal
Extracción del panel frontal Es posible extraer el panel frontal de la unidad para evitar que la roben. Alarma de precaución Si gira el interruptor de la llave de encendido hasta la posición OFF sin haber extraído el panel frontal, la alarma de precaución sonará durante unos segundos. -
Page 38: Ubicación De Los Controles Y Operaciones Básicas
Ubicación de los controles y operaciones básicas Unidad principal Panel frontal extraído Este apartado contiene instrucciones acerca de la ubicación de los controles y las operaciones básicas. Consulte las páginas indicadas para obtener información detallada. A Botones SEEK +/– Radio: Para sintonizar emisoras en forma automática (presionar);... - Page 39 D Selector de control/botón de selección páginas 23, 26 Para ajustar el volumen (girar); para seleccionar elementos de configuración (presionar y girar). E Receptor del control remoto de tarjeta F Visualizador G Botón OPEN páginas 7, 12 H Conector USB páginas 13, 16, 17 Para conectar al dispositivo USB.
-
Page 40: Control Remoto De Tarjeta Rm-X151
Control remoto de tarjeta RM-X151 SOURCE – DSPL – Retire la película de aislamiento antes de usar la unidad (página 6). A Botón OFF Para apagar la alimentación; para detener la fuente. B Botón SOURCE* MODE Para encender la unidad; para cambiar la fuente (Radio/CD/USB/SensMe™* C Botones <... -
Page 41: Radio
Radio Almacenamiento y recepción de emisoras Precaución Para sintonizar emisoras mientras maneja, utilice la función BTM (Memoria de la mejor sintonía) para evitar accidentes. Almacenamiento automático — BTM Presione (SOURCE/OFF) varias veces hasta que aparezca “TUNER”. Para cambiar de banda, presione (MODE) varias veces. -
Page 42: Selección De Pty
Notas • Dependiendo del país o región, puede que no estén disponibles todas las funciones RDS. • RDS no funcionará si la intensidad de la señal es muy débil o si la emisora que sintonizó no transmite datos RDS. Selección de PTY Presione (PTY) durante la recepción Si la estación está... -
Page 43: Reproducción Repetida Y Aleatoria
Para obtener más información acerca de la compatibilidad del dispositivo USB, visite el sitio web de soporte técnico. Sitio Web de soporte técnico en línea http://esupport.sony.com http://www.sony.com/mobileAV • Es posible utilizar dispositivos USB de almacenamiento masivo (MSC) y de protocolo de transferencia multimedia (MTP) que cumplan con el estándar USB. -
Page 44: Extracción Del Dispositivo Usb
Conecte el dispositivo USB al conector USB. Cuando utilice un cable, use el que se ha suministrado para la conexión con el dispositivo USB. Se inicia la reproducción. Si ya hay un dispositivo USB conectado, presione (SOURCE/OFF) varias veces hasta que aparezca “USB”... -
Page 45: Reproducción De Música En Función Del Estado De Ánimo - Sensme
Reproducción de música en función del estado de ánimo — SensMe™ La función “SensMe™ channels” exclusiva de Sony permite agrupar pistas por canal automáticamente y reproducir la música de manera intuitiva. Antes de utilizar la función SensMe™ A continuación encontrará el procedimiento básico necesario para utilizar la función... -
Page 46: Content Transfer
Registro de un dispositivo USB mediante “SensMe™ Setup” Es necesario registrar el dispositivo USB para habilitar la función SensMe™ en la unidad. Si no se lleva a cabo el registro durante el procedimiento de instalación, siga los pasos que se indican a continuación. Inicie “SensMe™... -
Page 47: Lista De Canales
Sitio Web de soporte técnico en línea http://esupport.sony.com http://www.sony.com/mobileAV Reproducción en un iPod Antes de conectar el iPod, baje el volumen de la unidad. -
Page 48: Elementos De La Pantalla
Sugerencia Para ello, le recomendamos que utilice el cable RC-100IP USB (no suministrado). Las pistas del iPod empiezan a reproducirse automáticamente a partir del punto en el que se detuvo la última reproducción. Si ya hay un iPod conectado, presione (SOURCE/OFF) varias veces hasta que aparezca “USB”... -
Page 49: Reproducción Repetida Y Aleatoria
Reproducción repetida y aleatoria Durante la reproducción, presione (3) (REP) o (4) (SHUF) varias veces hasta que aparezca el ajuste deseado. Seleccione Para reproducir TRACK pistas en forma repetida. ALBUM álbumes en forma repetida. PODCAST podcast en forma repetida. ARTIST artistas en forma repetida. -
Page 50: Búsqueda De Una Pista
Búsqueda de una pista Búsqueda de una pista por nombre — Quick-BrowZer™ Puede buscar una pista fácilmente en un CD o dispositivo USB por categoría. Presione (BROWSE). La unidad accede al modo Quick-BrowZer y aparece la lista de categorías de búsqueda. Gire el selector de control para seleccionar la categoría de búsqueda deseada y, a continuación, presiónelo... -
Page 51: Búsqueda De Una Pista Mediante La Escucha De Fragmentos De Pista - Zappin
Búsqueda de una pista mediante la escucha de fragmentos de pista — ZAPPIN™ Es posible buscar una pista que desee escuchar mediante la reproducción de pequeños fragmentos de pistas de un CD o dispositivo USB de forma secuencial. El modo ZAPPIN es adecuado para buscar pistas en el modo de reproducción aleatoria o de repetición aleatoria. -
Page 52: Ajuste De Color Avanzado
Modo de color DIMMER Apagado o Automático (apague la luz principal*) NIGHT Encendido o Automático (encienda la luz principal*) * Disponible únicamente si la antena monitorizada de iluminación está conectada. Si desea obtener más información sobre DIMMER, consulte la página 26. Mantenga presionado (COLOR). -
Page 53: Visualización De Colores Claros - Menú Blanco
Nota Es posible que no se sincronicen correctamente. Visualización de colores claros — Menú Blanco Es posible visualizar el menú de manera más clara (en blanco) sin preocuparse del ajuste del color. Mantenga presionado el botón de selección. Aparecerá la pantalla de ajustes. Gire el selector de control hasta que aparezca “WHITE MENU”... -
Page 54: Uso De Funciones De Sonido Sofisticadas - Sistema De Sonido Avanzado
— Sistema de sonido avanzado El Sistema de sonido avanzado, el nuevo motor de sonido de Sony, crea un campo de sonido ideal en el vehículo gracias a su procesamiento digital de señales. El Sistema de sonido avanzado incluye las siguientes funciones: EQ7, Posición de escucha, DM+ Avanzado, Potenciador de sonidos graves posteriores. -
Page 55: Optimización De Sonido Por Alineación De Tiempo - Posición De Escucha
Optimización de sonido por Alineación de tiempo — Posición de escucha La unidad puede demorar la salida de sonido de cada altavoz para cambiar la ubicación del sonido con el fin de adaptarse a su posición y simular un campo de sonido natural para ofrecerle la sensación de estar en el centro del vehículo, independientemente del asiento que ocupe. -
Page 56: Uso De Los Altavoces Posteriores Como Altavoz Potenciador De Graves - Potenciador De Sonidos Graves Posteriores
Uso de los altavoces posteriores como altavoz potenciador de graves — Potenciador de sonidos graves posteriores El Potenciador de sonidos graves posteriores mejora los sonidos graves, ya que aplica el ajuste del filtro de paso bajo (página 27) a los altavoces posteriores. - Page 57 COLOR (Color preajustado) Selecciona el color preajustado de la pantalla y de los botones de la unidad principal (página 21). CUSTOM COLR (Color personalizado) Selecciona un color preajustado como base para una personalización más precisa (página 21). SENSME COLR (Color de SensMe) Cambia el color en función de los canales SensMe: “ON”, “OFF”.
-
Page 58: Otras Funciones
Otras funciones Uso de equipo opcional Equipo de audio auxiliar Si conecta un dispositivo de audio portátil opcional a la toma de entrada AUX (minitoma estéreo) de la unidad y simplemente selecciona la fuente, podrá escuchar por los altavoces del automóvil. -
Page 59: Orden De Reproducción De Los Archivos Mp3/Wma/Aac
Si desea realizar alguna consulta o solucionar algún problema relativo a la unidad que no se trate en este manual, póngase en contacto con el distribuidor Sony más cercano. -
Page 60: Mantenimiento
En tal caso, consulte con el distribuidor Sony más cercano. Limpieza de los conectores Es posible que la unidad no funcione correctamente si los conectores entre ésta y el panel frontal están sucios. -
Page 61: Especificaciones
(para Windows Vista o posterior) • Puerto USB Sistema operativo Windows XP, Windows Vista, Windows 7 Para obtener más información sobre las ediciones compartibles o el Service Pack, visite el siguiente sitio web de servicio técnico: http://esupport.sony.com http://www.sony.com/mobileAV continúa en la página siguiente t... -
Page 62: Solución De Problemas
Si no se resuelve el problema, visite el siguiente sitio web de soporte técnico. Sitio Web de soporte técnico en línea http://esupport.sony.com http://www.sony.com/mobileAV Generales La unidad no recibe alimentación. • Revise la conexión o el fusible. - Page 63 Las indicaciones desaparecen de la pantalla o no aparecen en ella. • El atenuador está ajustado en “DIMMER-ON” (página 26). • La pantalla se apaga si mantiene presionado (SOURCE/OFF). t Presione (SOURCE/OFF) en la unidad hasta que se ilumine la pantalla. •...
-
Page 64: Mensajes/Indicaciones De Error
Reproducción USB No es posible reproducir elementos a través de un concentrador USB. Esta unidad no puede reconocer dispositivos USB a través de un concentrador USB. No se pueden reproducir elementos. Un dispositivo USB no funciona. t Vuelva a conectarlo. El dispositivo USB tarda en reproducirse. - Page 65 ” No se puede mostrar el carácter con la unidad. Si estas soluciones no ayudan a mejorar la situación, póngase en contacto con el distribuidor Sony más cercano. Si entrega la unidad para su reparación a causa de problemas en la reproducción de CD, lleve el disco que se utilizó...
- Page 68 If you have any questions/problems regarding this product, try the following: Read Troubleshooting in these Operating Instructions. Reset the unit. Note: Stored data may be erased. Please contact (U.S.A. only); Call http://www.sony.net/ Sony Corporation Printed in Thailand 1-800-222-7669 http://www.SONY.com...
Need help?
Do you have a question about the CDX-GT65UIW and is the answer not in the manual?
Questions and answers